Page 1215 of 2543

OIL AND FILTER REPLACEMENT
CAUTION:
wProlonged and repeated contact with mineral oil will re-
sult in the removal of natural fats from the skin, leading
to dryness, irritation and dermatitis. In addition, used en-
gine oil contains potentially harmful contaminants which
may cause skin cancer.
wExercise caution in order to minimize the length and fre-
quency of contact of your skin to used oil. Wear protec-
tive clothing and gloves. Wash your skin thoroughly with
soap and water, or use waterless hand cleaner, to remove
any used engine oil. Do not use gasoline, thinners, or sol-
vents.
wIn order to preserve the environment, used oil and used
oil filters must be disposed of only at designated dispos-
al sites.
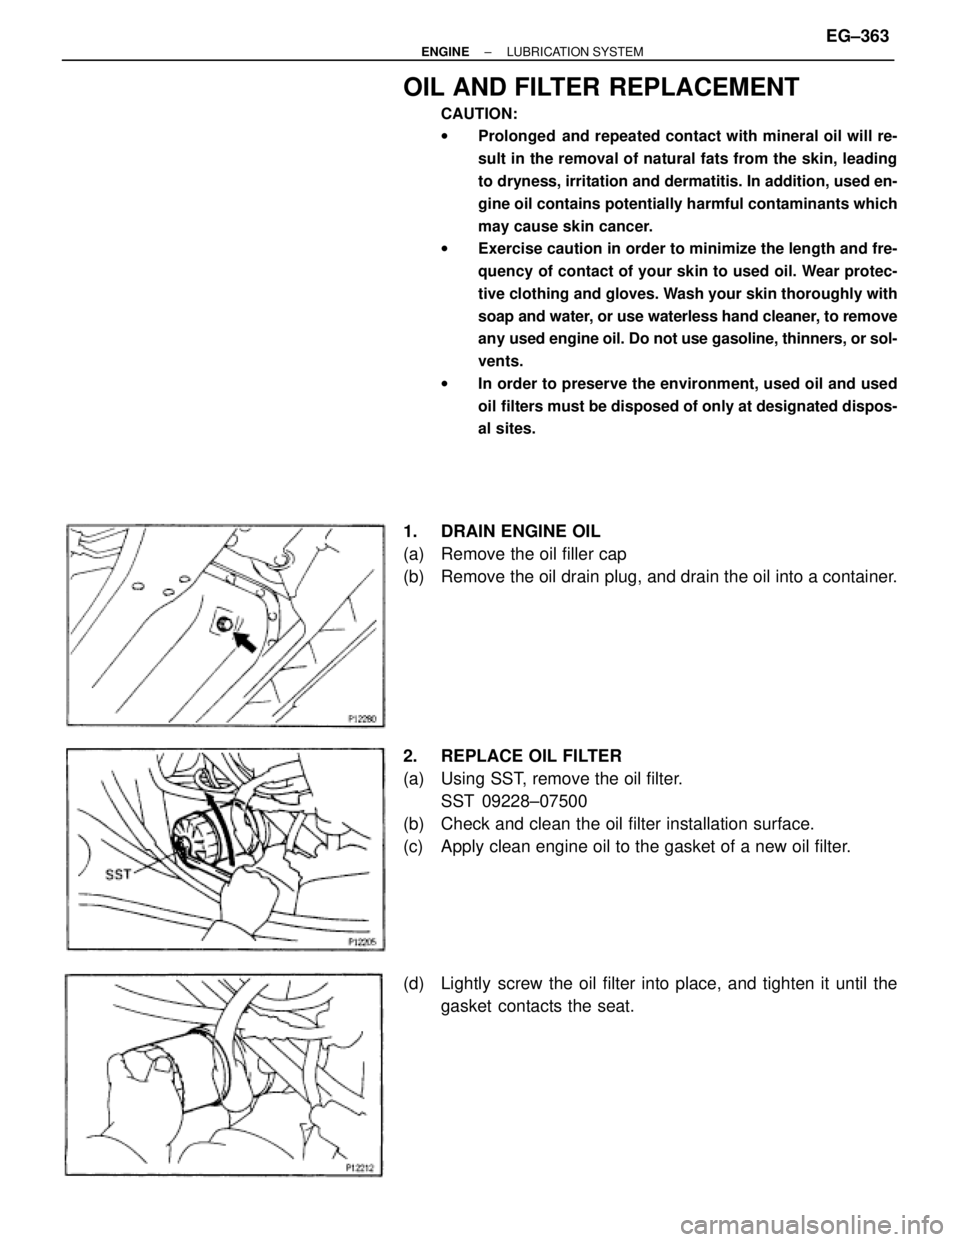
1. DRAIN ENGINE OIL
(a) Remove the oil filler cap
(b) Remove the oil drain plug, and drain the oil into a container.
2. REPLACE OIL FILTER
(a) Using SST, remove the oil filter.
SST 09228±07500
(b) Check and clean the oil filter installation surface.
(c) Apply clean engine oil to the gasket of a new oil filter.
(d) Lightly screw the oil filter into place, and tighten it until the
gasket contacts the seat.
± ENGINELUBRICATION SYSTEMEG±363
Page 1240 of 2543

Recommended spark plug:
2JZ±GE
ND
PK16R11
HGK
BKR5EP11
2JZ±GTE
ND
PK20R11
NGK
BKR6EP11
NOTICE: If adjusting the gap of a new spark plug, bend
only the base of the ground electrode. Do not touch the
tip.
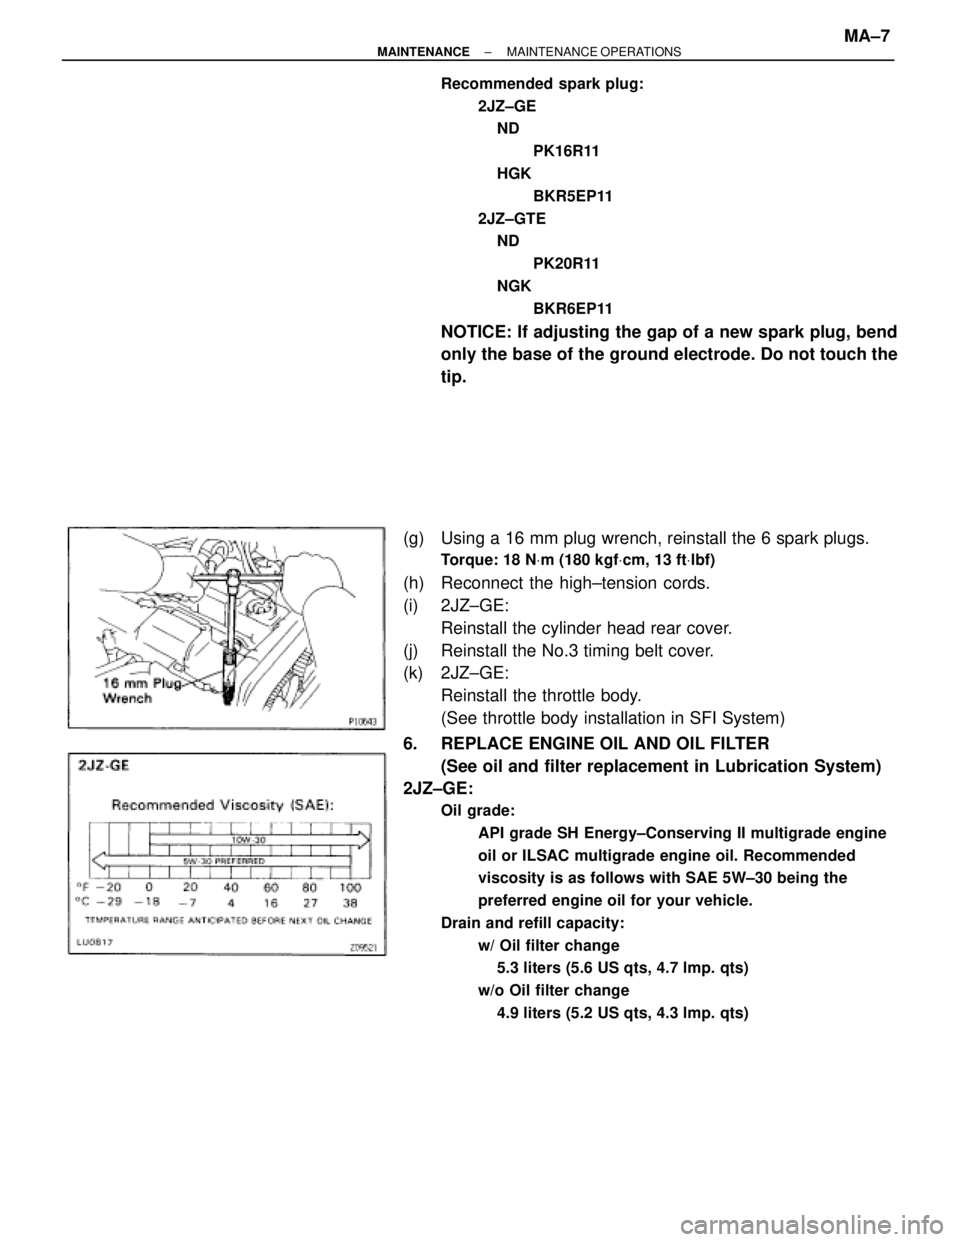
(g) Using a 16 mm plug wrench, reinstall the 6 spark plugs.
Torque: 18 NVm (180 kgfVcm, 13 ftVlbf)
(h) Reconnect the high±tension cords.
(i) 2JZ±GE:
Reinstall the cylinder head rear cover.
(j) Reinstall the No.3 timing belt cover.
(k) 2JZ±GE:
Reinstall the throttle body.
(See throttle body installation in SFI System)
6. REPLACE ENGINE OIL AND OIL FILTER
(See oil and filter replacement in Lubrication System)
2JZ±GE:
Oil grade:
API grade SH Energy±Conserving II multigrade engine
oil or ILSAC multigrade engine oil. Recommended
viscosity is as follows with SAE 5W±30 being the
preferred engine oil for your vehicle.
Drain and refill capacity:
w/ Oil filter change
5.3 liters (5.6 US qts, 4.7 lmp. qts)
w/o Oil filter change
4.9 liters (5.2 US qts, 4.3 lmp. qts)
± MAINTENANCEMAINTENANCE OPERATIONSMA±7
Page 1241 of 2543

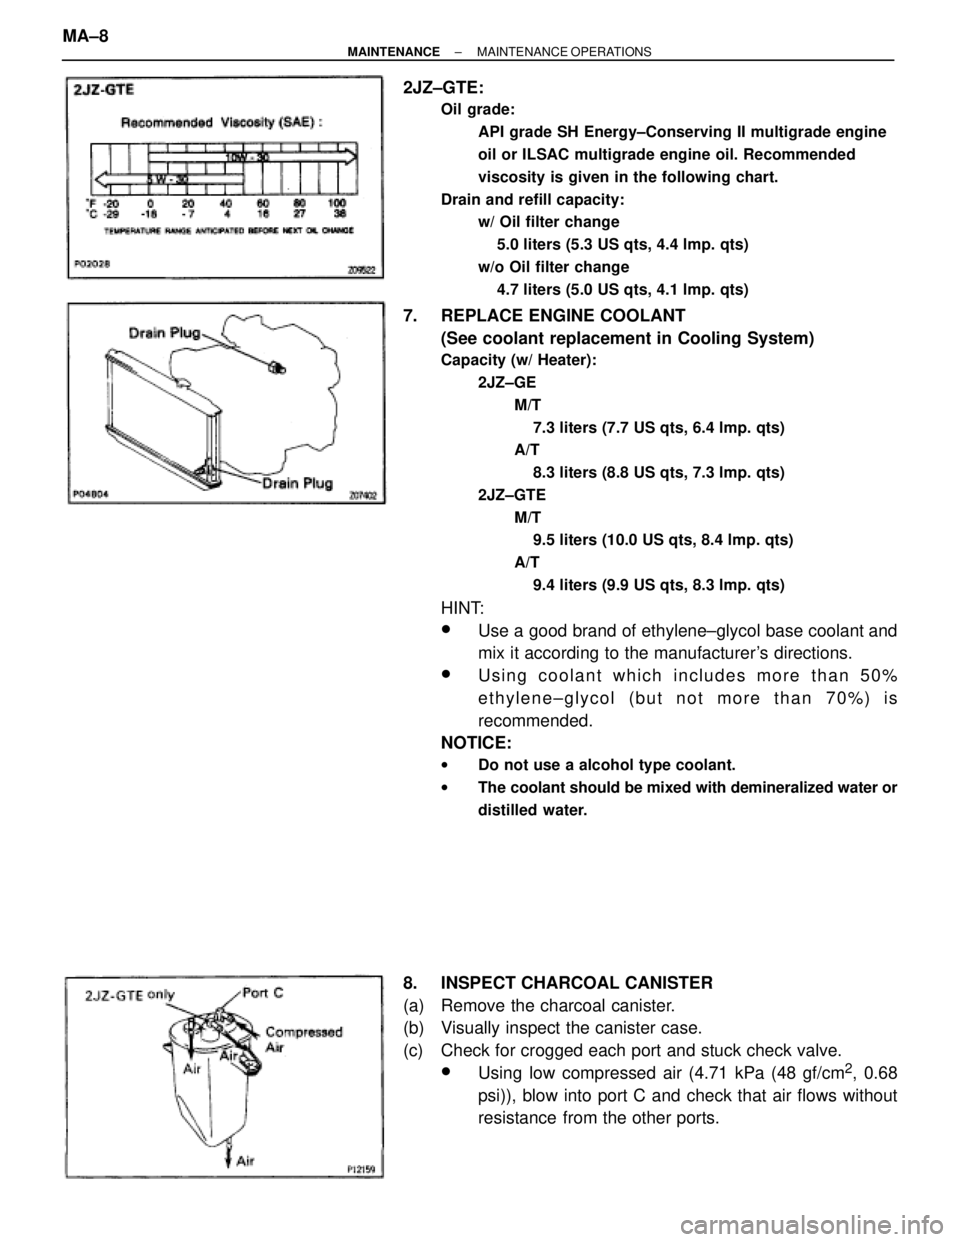
2JZ±GTE:
Oil grade:
API grade SH Energy±Conserving II multigrade engine
oil or ILSAC multigrade engine oil. Recommended
viscosity is given in the following chart.
Drain and refill capacity:
w/ Oil filter change
5.0 liters (5.3 US qts, 4.4 lmp. qts)
w/o Oil filter change
4.7 liters (5.0 US qts, 4.1 lmp. qts)
7. REPLACE ENGINE COOLANT
(See coolant replacement in Cooling System)
Capacity (w/ Heater):
2JZ±GE
M/T
7.3 liters (7.7 US qts, 6.4 lmp. qts)
A/T
8.3 liters (8.8 US qts, 7.3 lmp. qts)
2JZ±GTE
M/T
9.5 liters (10.0 US qts, 8.4 lmp. qts)
A/T
9.4 liters (9.9 US qts, 8.3 lmp. qts)
HINT:
wUse a good brand of ethylene±glycol base coolant and
mix it according to the manufacturer's directions.
wUsing coolant which includes more than 50%
ethylene±glycol (but not more than 70%) is
recommended.
NOTICE:
wDo not use a alcohol type coolant.
wThe coolant should be mixed with demineralized water or
distilled water.
8. INSPECT CHARCOAL CANISTER
(a) Remove the charcoal canister.
(b) Visually inspect the canister case.
(c) Check for crogged each port and stuck check valve.
wUsing low compressed air (4.71 kPa (48 gf/cm2, 0.68
psi)), blow into port C and check that air flows without
resistance from the other ports. MA±8
± MAINTENANCEMAINTENANCE OPERATIONS
Page 1412 of 2543
PREPARATION FOR DISASSEMBLY
1. M/T:
REMOVE FLYWHEEL
2. A/T:
REMOVE DRIVE PLATE
3. INSTALL ENGINE TO ENGINE STAND FOR
DISASSEMBLY
4. REMOVE GENERATOR
5. REMOVE TIMING BELT AND PULLEYS
(See timing belt removal)
6. REMOVE CYLINDER HEAD
(See cylinder head removal)
7. REMOVE OIL FILTER
(See oil and filter replacement in Lubrication System)
8. 2JZ±GTE:
REMOVE OIL COOLER
(See oil cooler removal in Lubrication System)
9. REMOVE NO.2 WATER BYPASS PIPE
(a) 2JZ±GE:
Remove the bolt, 2 nuts, water bypass pipe and gasket.
(b) 2JZ±GTE:
Remove the 2 bolts, 2 nuts, water bypass pipe and gasket.
10. REMOVE OIL FILTER BRACKET
Remove the union bolt, gasket, oil filter bracket and O ±ring.
11. REMOVE LH ENGINE MOUNTING BRACKET AND
INSULATOR ASSEMBLY
12. REMOVE FUEL PIPE SUPPORT EG±98
± ENGINEENGINE MECHANICAL
Page 1436 of 2543

8. INSTALL FUEL PIPE SUPPORT
Torque: 14 NVm (145 kgfVcm, 10 ftVlbf)
9. INSTALL LH ENGINE MOUNTING BRACKET AND
INSULATOR ASSEMBLY
HINT: LH mounting bracket is marked ºA u INº.
Torque: 58 NVm (590 kgfVcm, 43 ftVlbf)
10. INSTALL OIL FILTER BRACKET
(a) Check and clean the oil filter bracket installation.
(b) Place a new O±ring in position on the oil filter bracket.
(c) Apply clean engine oil to the O±ring.
(d) Install a new gasket to the union bolt.
(e) Install the oil filter braket with the union bolt.
Torque: 88 NVm (900 kgfVcm, 65 ftVlbf)
11. INSTALL NO.2 WATER BYPASS PIPE
(a) Install a new gasket to the water pump.
(b) 2JZ±GE:
Install the water bypass pipe with the bolt and 2 nuts.
Torque: 21 NVm (210 kgfVcm, 15 ftVlbf)
(c) 2JZ±GTE:
Install the water bypass pipe with the 2 bolts and 2 nuts.
Torque: 21 NVm (210 kgfVcm, 15 ftVlbf)
12. 2JZ±GTE:
INSTALL OIL COOLER
(See oil cooler installation in Lubrication System)
13. INSTALL OIL FILTER
(See oil and filter replacement in Lubrication System)
14. INSTALL CYLINDER HEAD
(See cylinder head installation)
15. INSTALL TIMING PULLEYS AND BELT
(See timing belt installation)
16. INSTALL GENERATOR
(See generator installation in Charging System)
17. REMOVE ENGINE STAND FROM ENGINE
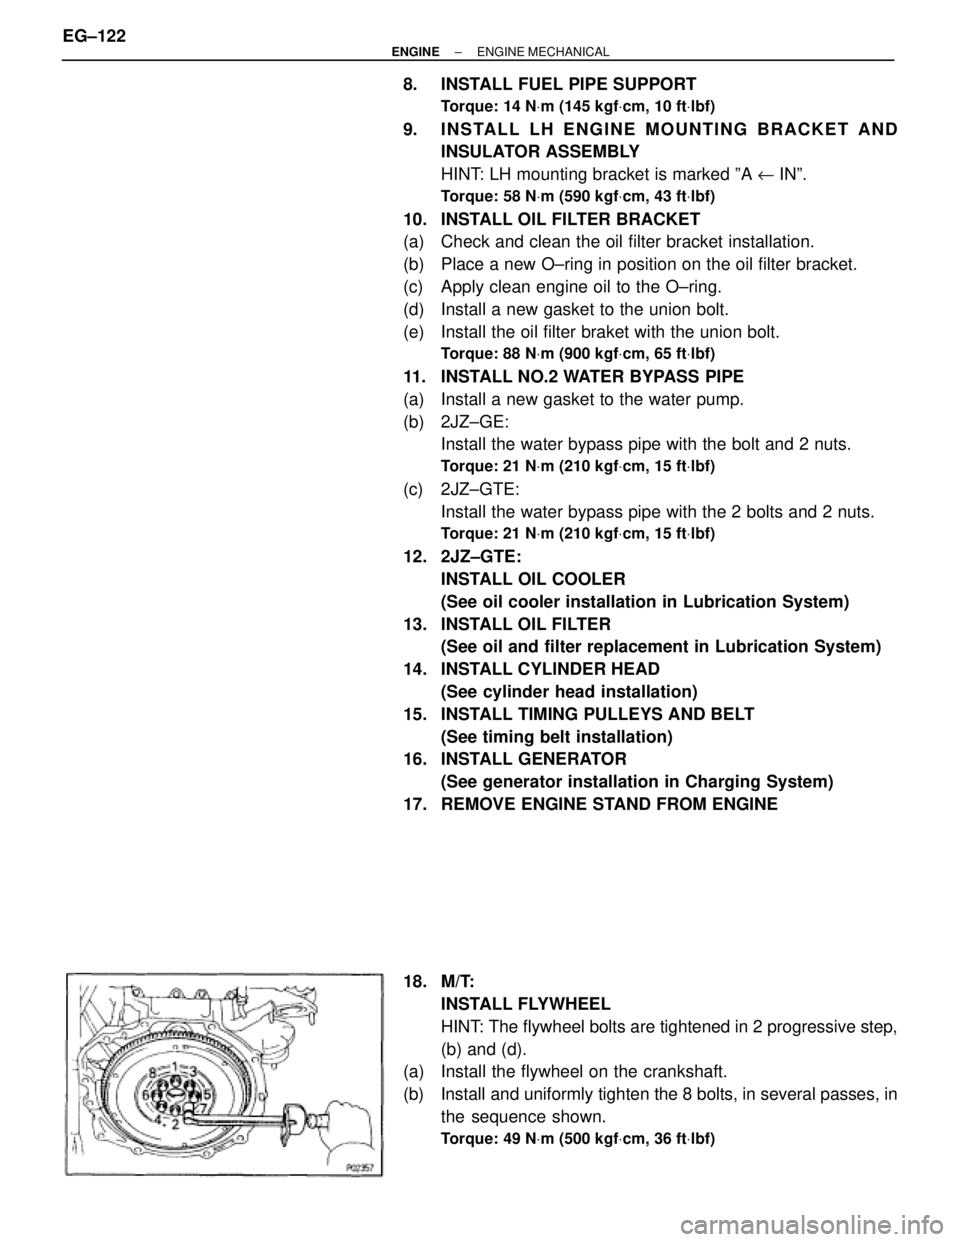
18. M/T:
INSTALL FLYWHEEL
HINT: The flywheel bolts are tightened in 2 progressive step,
(b) and (d).
(a) Install the flywheel on the crankshaft.
(b) Install and uniformly tighten the 8 bolts, in several passes, in
the sequence shown.
Torque: 49 NVm (500 kgfVcm, 36 ftVlbf)
EG±122± ENGINEENGINE MECHANICAL