Page 259 of 2248
3. Transmission
A: REMOVAL
1. Open front hood fully, and support it with stay.
2. Disconnect battery ground terminal.
3. Remove air intake duct.
4. Disconnect connectors and cables.
5. Remove starter.
6. Remove pitching stopper.
AT model
7. Separate torque converter from drive plate.
8. Remove ATF level gauge.
9. Remove transmission connector bracket.
10. Set special tools.
11. Remove bolt which holds right upper side of transmission to
engine.
12. Remove exhaust system.
�Front exhaust pipe
�Center exhaust pipe
�Rear exhaust pipe [AWD]
AT model
13. Drain ATF to remove ATF drain plug.
14. Disconnect ATF cooler hose from pipe on transmission side,
and remove ATF level gauge guide.
AWD model
15. Remove propeller shaft.
�A
�
�
�
�
�
�
�
�
�
�
�
�
25
2-11SERVICE PROCEDURE
3. Transmission
Page 260 of 2248
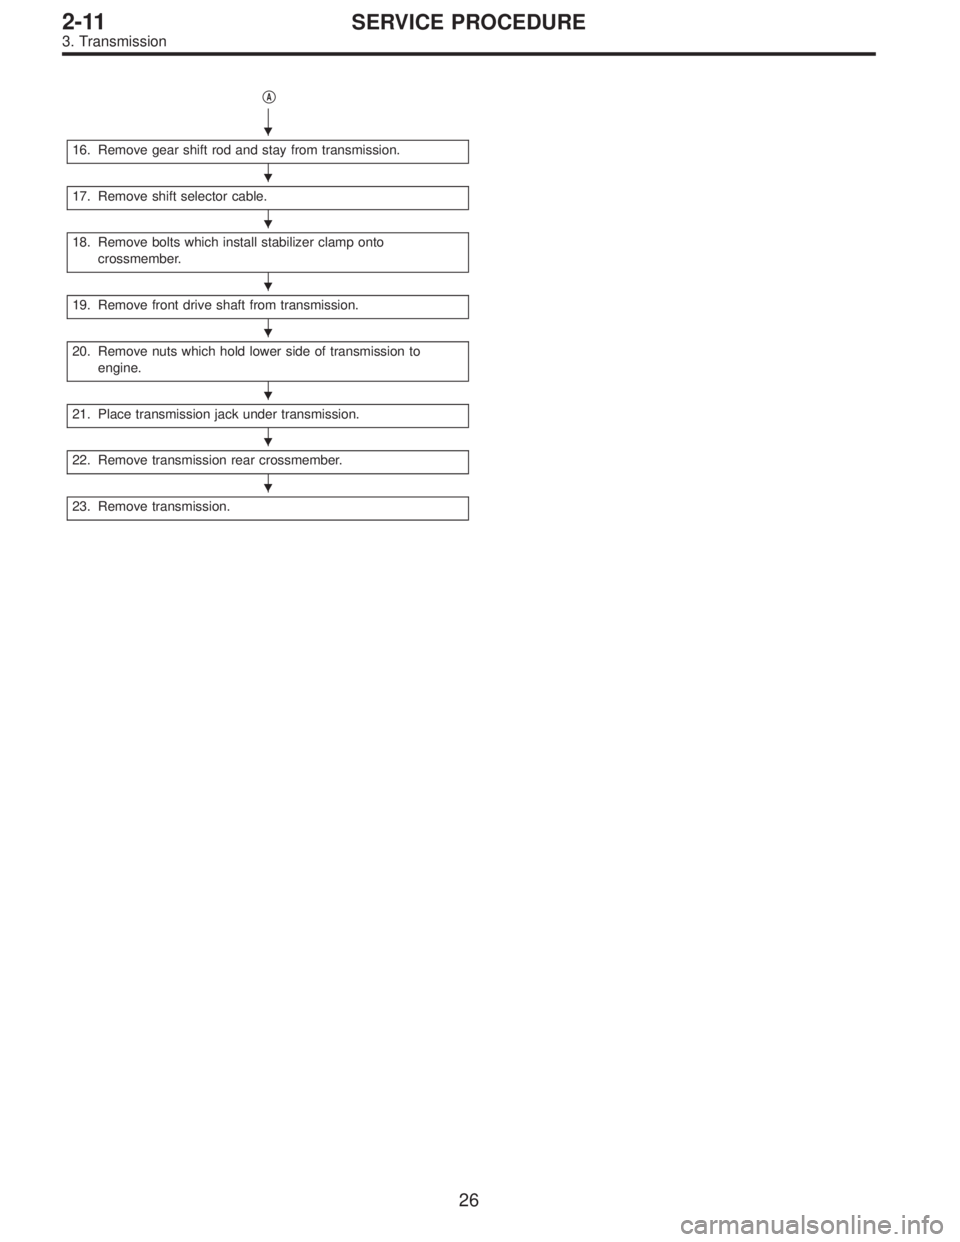
�A
16. Remove gear shift rod and stay from transmission.
17. Remove shift selector cable.
18. Remove bolts which install stabilizer clamp onto
crossmember.
19. Remove front drive shaft from transmission.
20. Remove nuts which hold lower side of transmission to
engine.
21. Place transmission jack under transmission.
22. Remove transmission rear crossmember.
23. Remove transmission.
�
�
�
�
�
�
�
�
26
2-11SERVICE PROCEDURE
3. Transmission
Page 262 of 2248
G2M0545
(2) Disconnect the following cables.
�Clutch release spring (MT model)
�Clutch cable (MT model)
G2M0309
5) Remove starter.
(1) Disconnect connectors and terminal from starter.
(2) Remove bolt which installs upper side of starter.
(3) Remove nut which installs lower side of starter, and
remove starter from transmission.
G2M0295
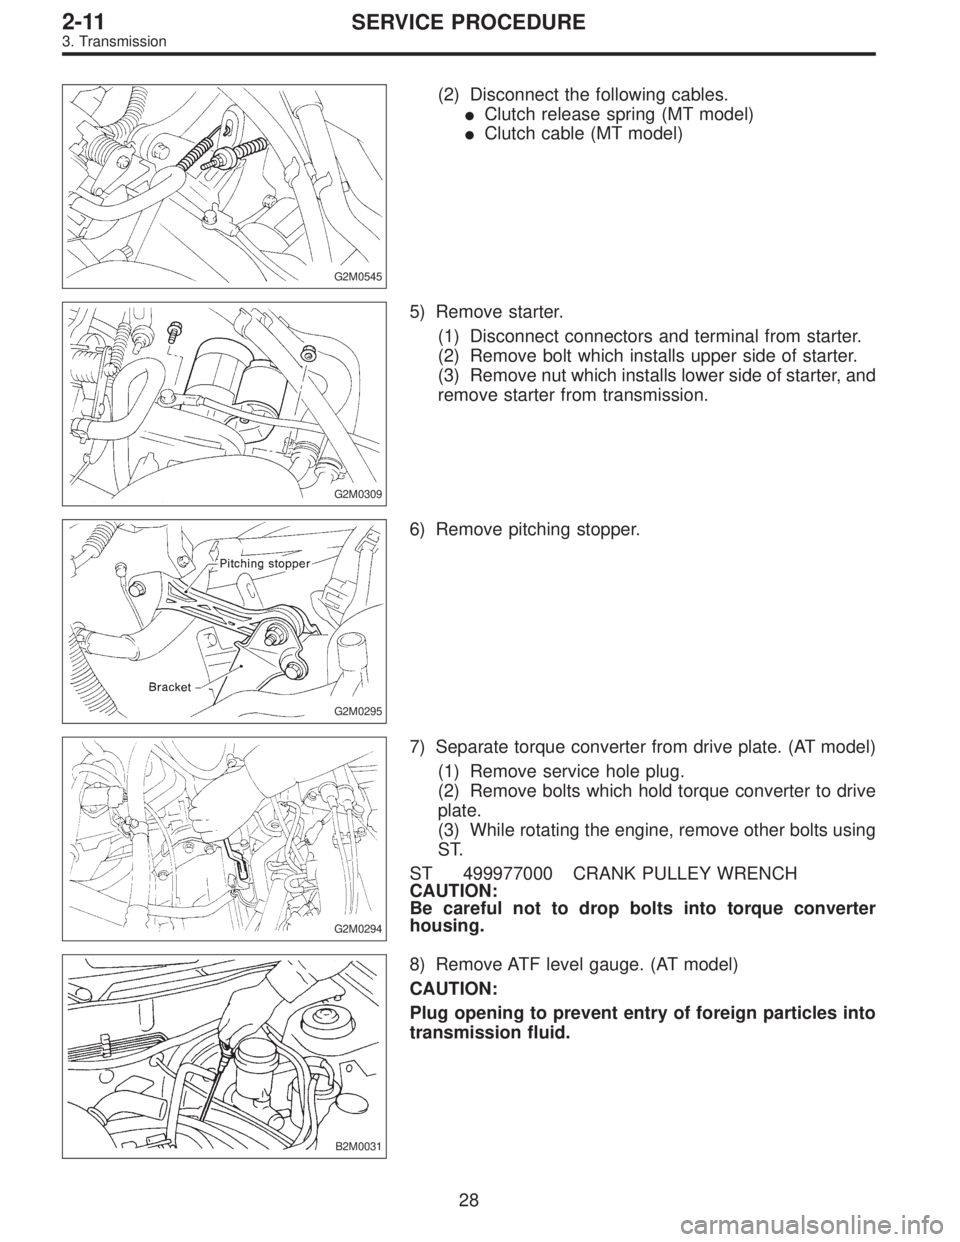
6) Remove pitching stopper.
G2M0294
7) Separate torque converter from drive plate. (AT model)
(1) Remove service hole plug.
(2) Remove bolts which hold torque converter to drive
plate.
(3) While rotating the engine, remove other bolts using
ST.
ST 499977000 CRANK PULLEY WRENCH
CAUTION:
Be careful not to drop bolts into torque converter
housing.
B2M0031
8) Remove ATF level gauge. (AT model)
CAUTION:
Plug opening to prevent entry of foreign particles into
transmission fluid.
28
2-11SERVICE PROCEDURE
3. Transmission
Page 263 of 2248
G2M0312
9) Remove transmission connector holder bracket.
G2M0313
10) Set ST.
ST 41099AA020 ENGINE SUPPORT ASSY
NOTE:
Also is available Part No. 927670000.
G2M0299
11) Remove bolt which holds right upper side of transmis-
sion to engine.
G2M0290
12) Remove exhaust system.
(1) Lift-up the vehicle.
(2) Remove nuts which install front exhaust pipe onto
engine.
B2M0335
(3) Disconnect connector from rear oxygen sensor.
29
2-11SERVICE PROCEDURE
3. Transmission
Page 267 of 2248
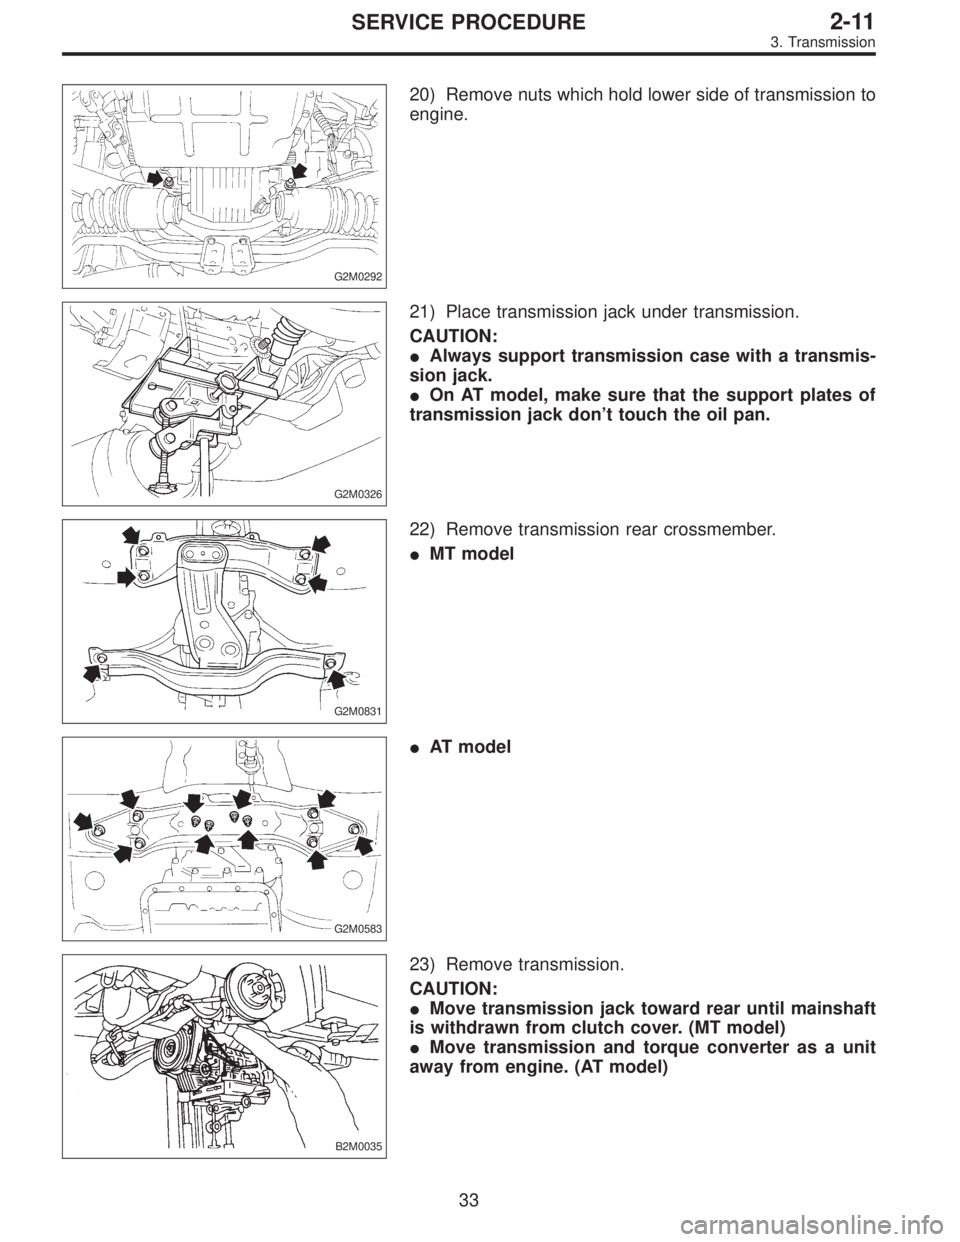
G2M0292
20) Remove nuts which hold lower side of transmission to
engine.
G2M0326
21) Place transmission jack under transmission.
CAUTION:
�Always support transmission case with a transmis-
sion jack.
�On AT model, make sure that the support plates of
transmission jack don’t touch the oil pan.
G2M0831
22) Remove transmission rear crossmember.
�MT model
G2M0583
�AT model
B2M0035
23) Remove transmission.
CAUTION:
�Move transmission jack toward rear until mainshaft
is withdrawn from clutch cover. (MT model)
�Move transmission and torque converter as a unit
away from engine. (AT model)
33
2-11SERVICE PROCEDURE
3. Transmission
Page 268 of 2248
B: INSTALLATION
1. Install transmission to engine.
2. Install transmission rear crossmember.
3. Take off transmission jack.
4. Tighten nuts which hold lower side of transmission to engine.
5. Tighten bolt which holds right upper side of transmission to
engine.
AT model
6. Install torque converter to drive plate.
7. Remove special tools.
8. Install pitching stopper.
9. Install front drive shafts into transmission.
10. Install stabilizer clamps onto front crossmember.
11. Install gear shift rod and stay.
�B
�
�
�
�
�
�
�
�
�
�
34
2-11SERVICE PROCEDURE
3. Transmission
Page 270 of 2248
B2M0035
1) Install transmission onto engine.
(1) Gradually raise transmission with transmission
jack.
(2) Engage them at splines.
CAUTION:
Be careful not to strike mainshaft against clutch cover.
(MT model)
G2M0832
2) Install transmission rear crossmember.
�MT model
Tightening torque:
T1: 69±15 N⋅m (7.0±1.5 kg-m, 51±11 ft-lb)
T2: 137±20 N⋅m (14±2 kg-m, 101±14 ft-lb)
G2M0332
�AT model
Tightening torque:
T1: 18±5 N⋅m (1.8±0.5 kg-m, 13.0±3.6 ft-lb)
T2: 69±15 N⋅m (7.0±1.5 kg-m, 51±11 ft-lb)
G2M0292
3) Take off transmission jack.
4) Tighten nuts which hold lower side of transmission to
engine.
Tightening torque:
50±4 N⋅m (5.1±0.4 kg-m, 36.9±2.9 ft-lb)
G2M0299
5) Tighten bolt which holds right upper side of transmis-
sion to engine.
Tightening torque:
50±4 N⋅m (5.1±0.4 kg-m, 36.9±2.9 ft-lb)
36
2-11SERVICE PROCEDURE
3. Transmission
Page 271 of 2248
G2M0294
6) Install torque converter to drive plate. (AT model)
(1) Tighten bolts which hold torque converter to drive
plate.
(2) Tighten other bolts while rotating the engine by
using ST.
ST 499977000 CRANK PULLEY WRENCH
CAUTION:
Be careful not to drop bolts into torque converter
housing.
Tightening torque:
25±2 N⋅m (2.5±0.2 kg-m, 18.1±1.4 ft-lb)
(3) Clog plug onto service hole.
B2M0017
(4) Install V-belt cover.
G2M0313
7) Remove special tools.
G2M0302
8) Install pitching stopper.
Tightening torque:
T1: 49±5 N⋅m (5.0±0.5 kg-m, 36.2±3.6 ft-lb)
T2: 57±10 N⋅m (5.8±1.0 kg-m, 42±7 ft-lb)
37
2-11SERVICE PROCEDURE
3. Transmission

 Remove transmission connector holder bracket.
G2M0313
10) Set ST.
ST 41099AA020 ENGINE SUPPORT ASSY
NOTE:
Also is available Part No. 927670000.
G2M0299
11) Remove bolt which holds right upp")

 Install transmission onto engine.
(1) Gradually raise transmission with transmission
jack.
(2) Engage them at splines.
CAUTION:
Be careful not to strike mainshaft against clutch cover.
(MT")
 Install torque converter to drive plate. (AT model)
(1) Tighten bolts which hold torque converter to drive
plate.
(2) Tighten other bolts while rotating the engine by
using ST.
ST 499977000")