Page 65 of 156

Downloaded from www.Manualslib.com manuals search engine 2
CONTROLS AND EQUIPMENT
r Notes on Automatic mode
• The interior temperature can be freely
s e lected w ith buttons 16 and 17 and is S ored alw ays until another temperature is selected , -he interior temperature can be set be
-we an + 18°C (64°F) and + 29°C (86°F) In th iS range it is automatically regulated,
f tempe ratures below 18°C are selected
LO" appears in the display , With tempera
-res abo ve 29 °C (86 ° Fl. "HI " is displayed ,
., these two end positions the system
N or ks continuous ly at ma ximum cooling or
n eating output. The temperatu re is not
r egulated
•
In certain operating con ditions it may be fo und that the syste m temporarily carries
o ut functions which are not quite as ex
5-pe cted, This includes, for examp le, that for
a few seconds after sta rting from cold, air is directed mainly into the fo ot wel l. This is ntentional so that damp air in the sys tem
d oes not cause the windo ws to mist up ,
Deviating from Automatic mode
In nearly all cases the Automatic mode
offers the best conditions for the comfort of
the vehicle occupants all the year round,
I n isolated cases however it might
be necessary to deviate from some functions
of Automatic mode by pressing certain but
tons, The Climatronic still works fu lly auto
matically
• With buttons 9 and 10 the blo w er speed
and thus the air vo lume can be increased or
r educed, Th is is sho wn by a change in the
number of lin es in display field 1
• With
bu tton 11 the de-humidifying and defrosting effect for the windsc reen can be
increased if, for example persons w ith
damp clothing
are picked-up shortly after
moving off,
• W ith button
12 air recircu lation can be
se lected to pre vent for examp le dust or
st rong smells
from entering the vehicle in
terio
r. At ambient temperatures below 5cC the sy ste m auto mat icall y sw itches off, This can lead to the window misting u p as t he air is no longer de-humidified.
Note
Smoking should be avoided when air recirculation is selected as t h e smoke drawn in from the vehicle interior deposits on the
evaporator of the air conditioner, This leads
to permanent odours when the air condition
is in operation These can only be efiminated b
y e xchanging the evaporator, which is
time-consuming
and expensive.
• With buttons
13 and 14 the air flow can
be to the upper part of the body or into the
footwe ll,
The air distribution buttons 11, 13 and 14
can be used in combination ,
• With button
18 (OFF) the complete sys
tem is sw itched off, This button should only
be pre ssed in isol ated cases eg when
the re is a fault in the system .
Wh en th e sp ecial functions are no longer re
quired the Automatic mode should be
s w itch ed on again without delay by pres
sin g the AUTO button,
63
Page 66 of 156

Downloaded from www.Manualslib.com manuals search engine CONTROLS AND EQUIPMENT
Operating instructions
• Ensure that the sensor betvveen the
windscreen defrost outlets in the centre of
the instrument panel and the air grille next
to the radio is not covered.
• If, after switching on the ignition,
all sym
bols in the display area flash for about 15
seconds, there is a fault in the system -con
tact a Volkswagen dealer.
Notes for both air conditioning
systems
• To ensure that the heating, ventilation
and air conditioner can work properly, the air
inlet in front of the windscreen should be
kept free of ice, snow and leaves.
• The heat output depends
on the coolant
temperature -the full heat output is there
fore available when the engine IS warm.
• The stale air escapes through openings
in the luggage compartment side panels.
Therefore when loading the luggage com
partment ensure that the openings are not
covered .
• When the ambient temperature
is high
and the air very humid, condensed water can drip off the evaporator and form a
puddle under the vehicle. This is quite nor
mal and does not indicate a leak.
Notes for the normal air condi
tioner
• All controls except the rotar y switch A and buttons 0 and E can be set to any inter
mediate position.
•
To prevent the windows from misting up
the blower should be running slowly when driving at low speeds.
Using air conditioners economi
cally
In cooling operation the air conditioner com
pressor places demands on the engine and
therefo re influences the fuel consumption.
To keep the period switched on as short as possible, the following points should be
noted:
• If the
in side temperature is very high
after the car has been parked in the sun, it is recommended to open doors or windows briefly to enable the hot air to escape
• The air conditioner should not be
switched on during a Journey if the
windows or sliding/tilting roof* are open.
• If the desired interior temperature
can be attained w ithout switching on the air
cond itioner the fresh air operation should
be selected (does not apply to Climatronicl.
Operating faults
• Should the air cond i:ioner not work at
any time, either .
- the ambient temperatu re IS below about +5 °C,
-or the fuse has blown.
Check fuse and if necessary r
enew it - see
page 119. If the troub le is n ot due to a defec
tive fuse, SWitch the system off and have It
checked.
- the air conditioner
has svvitched off due
to coolant temperature being too high -see
page 45.
• If the cooling output drops off, switch
the AlC
off and have the system checked.
64
Page 67 of 156

Downloaded from www.Manualslib.com manuals search engine CONTROLS AND EQUIPMENT
Sliding/tilting roof*
lh ignition sWit ched on, the glass roof
cl' be opened and closed with the switch.
T o
open
'de switch to rear.
o close
- de sw itc h to front.
To lift at rear
Ih ro of closed, press up rear of switch.
o
lower
lJe swi tc h to fro nt.
Notes
• When opening the glass roof the screen to prevent sun rays shining in w ill also open
automatical ly. I f req u ired it can be closed by hand whe n th e roof is closed .
• The glass roof can also be closedon ve
hicle s with central locking or electric win
dows if w he n loc king the vehicle with a key in the driv er' s door (with central locking al so in passeng er's door) the key is held in the
locking position.
Attention
Be careful when closing the roof!
Careless or uncontrolled closing
of the roof could cause injuries.
Therefore, when leaving the ve
hicle always take the ignition key
with you.
Emergency operation
If the system should develop a fault the roof
can also be c losed by hand .
• Pu
ll cover dow n at rear (arrow 1) and
take out to rear (arrow 2).
65
Page 68 of 156
Downloaded from www.Manualslib.com manuals search engine CONTROLS AND EQUIPMENT
Sun visors
• Turn crank opening protective cap to the
right.
•
Take crank out of retainer, insert in the
opening and close sliding roof.
• Replace crank
in the retainer and turn
protective cap over the crank opening.
•
Insert cover lugs in the roof trim. Then
using a sc rewdriver (out of the vehicle tools)
s
lide headlining trim over the cover retain
ing strip . Slide cover to rear slight ly.
Sun visors
The sun visors can be pulled out of the
centre mountings and swung towards the
doors.
Also there
is a make-up mirror fitted in the
rear of the passenger sun visor.
66
Page 69 of 156
Downloaded from www.Manualslib.com manuals search engine CONTROLS AND EQUIPMENT
Interior lights
nterior lig h t A
Switch pr essed on leh -Light on all the "TIe SWitc h in centre position -Light off/door
:O'1t acts ]) Sw itch pressed on right -Door contacts/ 9"t out 1) ter io r lights with time delayed switch off"' E'TIain on for about 10 seconds after doors co e closed.
On veh ic le s with electric sliding roof
Reading light front * B
• Switch press ed on left -Light off/light
per manently on 1 )
• Switch in centre position -Light off 1)
• SWitch pressed on right -Light perma
n e ntly on
Glove box light*
The ligh t in the glove box in the instrument
pane l o nly com es on when the ignition is on and the lid I S open.
L uggage compartment light*
The light comes on when tailgate is opened
(ev en w hen li g hti ng and ignition is switched off) It is there for e essential to ensure that
the tailgate is always closed INhen vehicle is parked.
67
Page 70 of 156

Downloaded from www.Manualslib.com manuals search engine CONTROLS AND EQUIPMENT
Cigarette lighter
The cigarette lighter is switched on by
pushing in the element. When the heating
element glows, the lighter springs out auto
matically -pull it out immediately and use it.
The
cigarette lighter socket can be
used for other electrical accessories with a
capacity of up to 120 watts. However, when the engine is not running this will discharge
the battery. For further information see
chapter Accessories on page
111 .
•
Attention • Be careful when using the cigarette lighter! Careless or uncontrolled use of the cigarette lighter can cause burns. The cigarette lighter and the socket also work when the ignition is switched off and the key removed. For this reason children should never be left in the vehicle on their own.
Ashtray
Front
To empty: Open ashtray, press but
ton
on ashtray and pull
ashtray out.
To replace Push ashtray into the
guides.
Attention Never use the ashtrays as paper containers. Danger of fire!
Rear
To empty
To replace: O
pen ashtra y and pull it
out ver ticall y u
pwards
P re ss ashtray
down ve rti cally and close flap.
Attention Never use the ashtrays as pape r containers. Danger of fire!
68
Page 71 of 156
Downloaded from www.Manualslib.com manuals search engine CONTROLS AND EQUIPMENT
Shelves and boxes
Glove box
-0 open lockable glove box* lift handle .
Attention For safety reasons all stowage box lids should always be closed w hen vehicle is moving.
On the estate there is further stowage
space behind flaps on the left and right-hand
sides of the luggage compartment. Pull handle in the direction shown to open these
boxes -see right-hand illustration .
Note
The stowage locations of the first aid kit and the warning triangle in both the saloon and
the estate are described on page 112.
69
Page 72 of 156

Downloaded from www.Manualslib.com manuals search engine CONTROLS AND EQUIPMENT
Roof rack I roof railing
When loads are to be carried on the roof, the
following should be noted:
• As the
rain channels are moulded into
the roof for streamlining reasons, the nor
mal type of roof rack cannot be used . To avoid ri sks we advise that on ly the cross
bars provided by the factory are used .
• These cross bars
are the basis for a com
plete roof load carrying system For safety
reasons when carrying luggage , bicycles,
surf boards, skis and boats , the appropriate
special adapters are required .
All the components of this syste m are avail
able from
Volkswagen dealers.
• Any damage which may occur to the vehicle as a result of using other roof load carrying systems or by incorrect fitting will not be covered by the warranty.
• The roof load ca rrying system must be
secured exactly as described in the instruc
tions supplied. When fitting the carrier feet
on the roof ensure that the feet are posi
tioned exactly between the marks stamped
on t
he plastic roof mou ldings -see illustra
tion.
•
On the estate with roof railing, the
base carriers can be attached to the ra ilings
at any position desired. The distance be
t w een the carriers should however be matched to the articles to be transported .
Also, on v e h icles with a sliding/ti lting roof*
the front ca rrier should not be attached in the region of the rear edge of the of the tilt
ing roof. •
Distribute the load eve
nly. Each cross
bar may carry 40 kg if loaded uniformly over
the full length . The permissibl e roo f load (in
cluding the rack) of 75 kg and the permiss
i ble gross vehicle weig ht m ust not be ex
ceeded -see page 143.
• When carrying heavy or lar ge objects on the roof, bear in mind tha t the veh icle handl
ing changes due to the displa cement of the
centre of gravity and the inc reased area e
xposed to the wind. Driving style and speed
m ust be adapted to allo w for thiS .
•
Ensu re that the ope ned tailgate does not
knock agai nst the roof load .
70
 1
1 2
2 3
3 4
4 5
5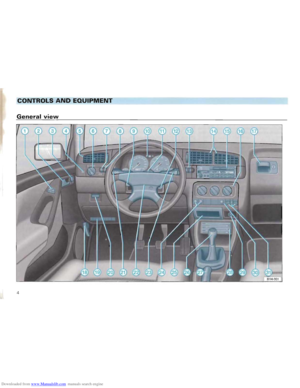 6
6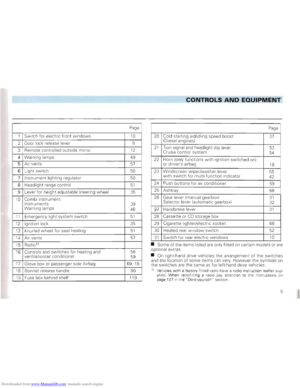 7
7 8
8 9
9 10
10 11
11 12
12 13
13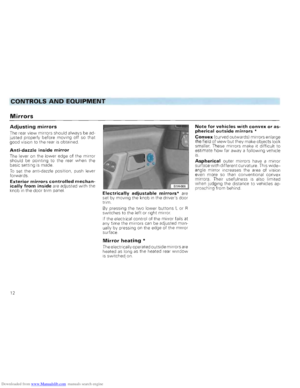 14
14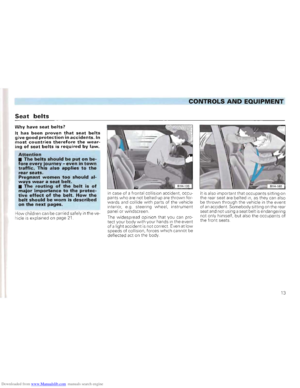 15
15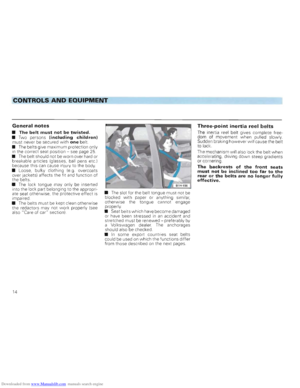 16
16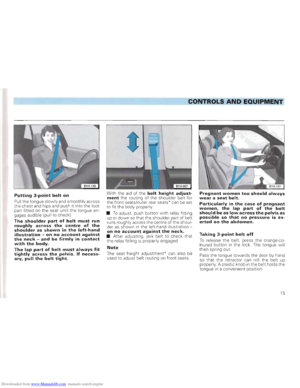 17
17 18
18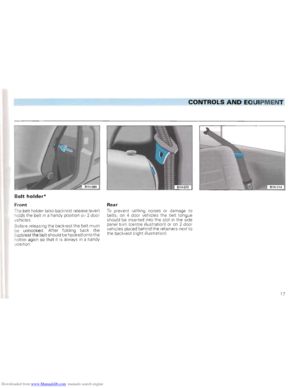 19
19 20
20 21
21 22
22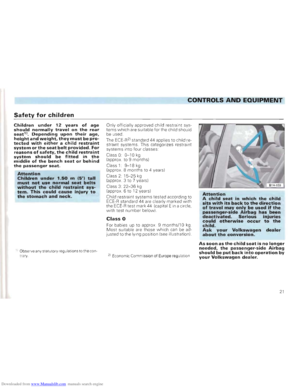 23
23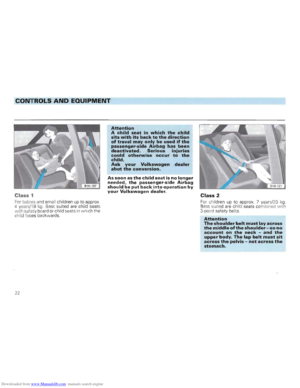 24
24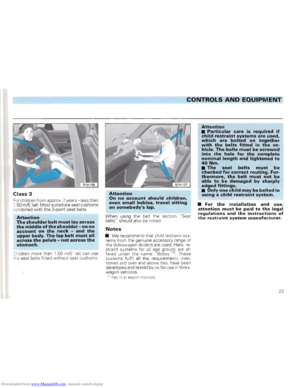 25
25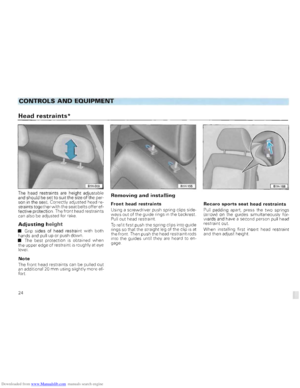 26
26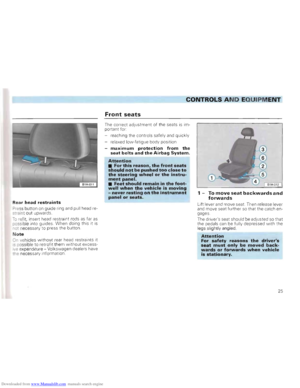 27
27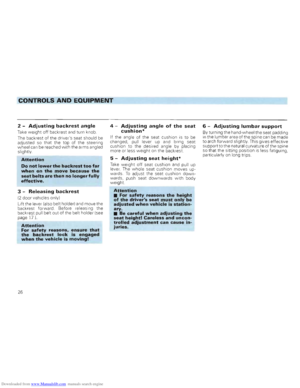 28
28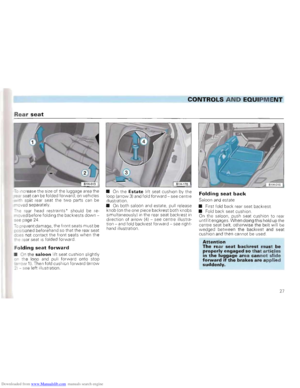 29
29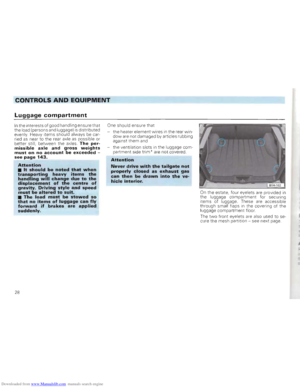 30
30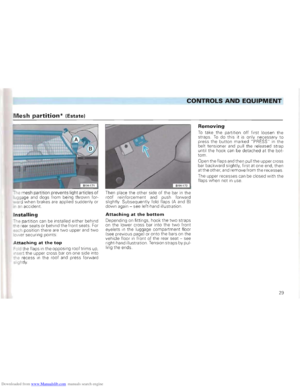 31
31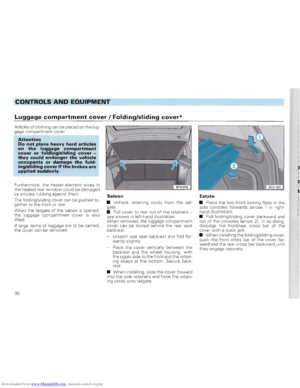 32
32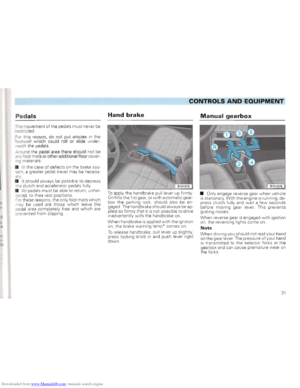 33
33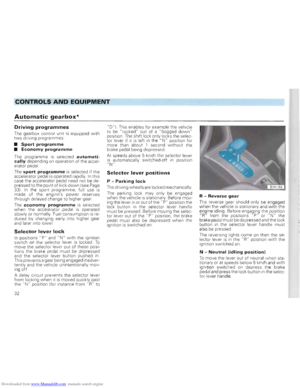 34
34 35
35 36
36 37
37 38
38 39
39 40
40 41
41 42
42 43
43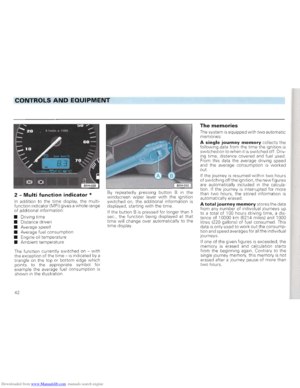 44
44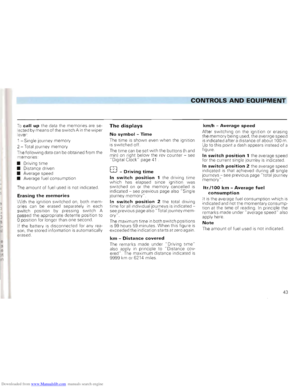 45
45 46
46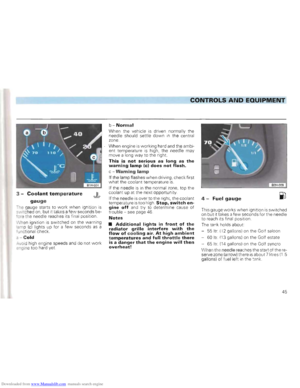 47
47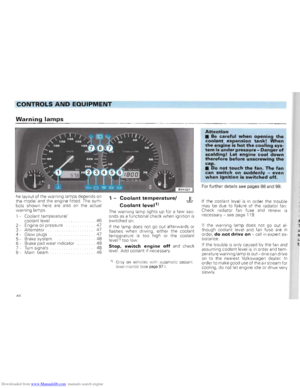 48
48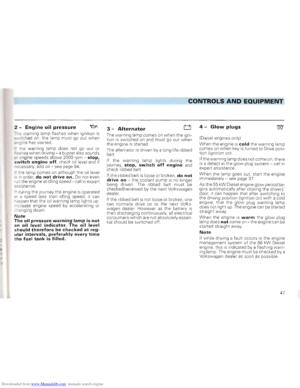 49
49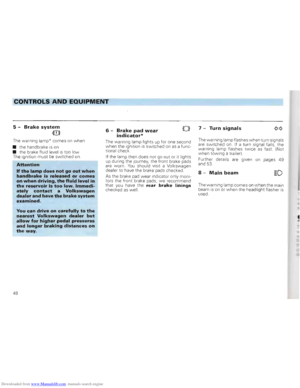 50
50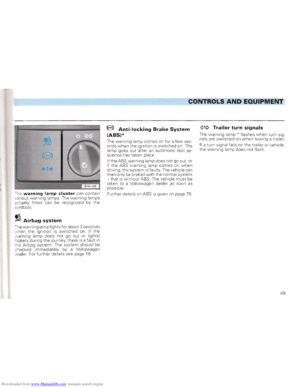 51
51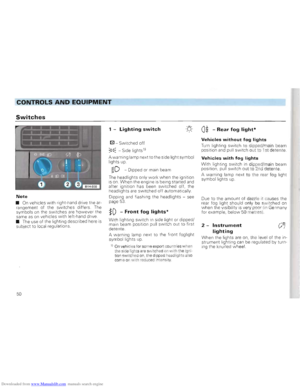 52
52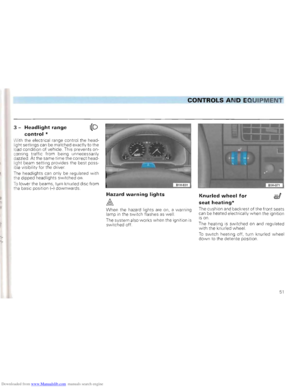 53
53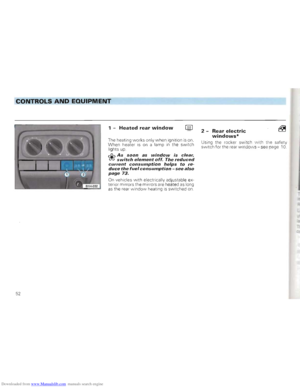 54
54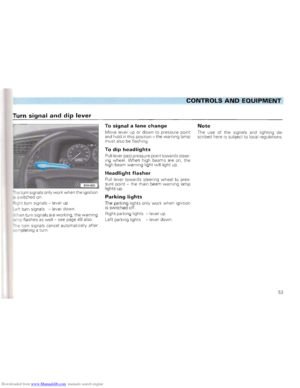 55
55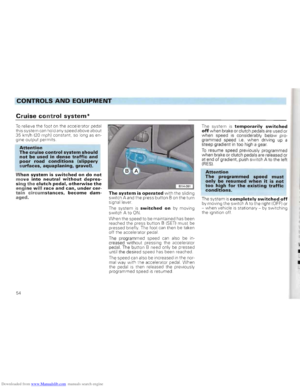 56
56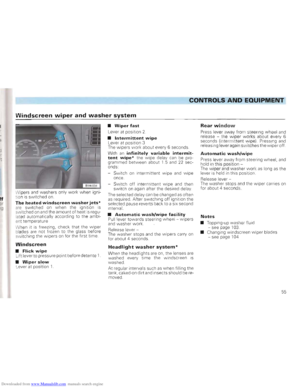 57
57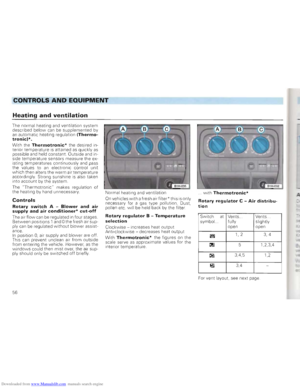 58
58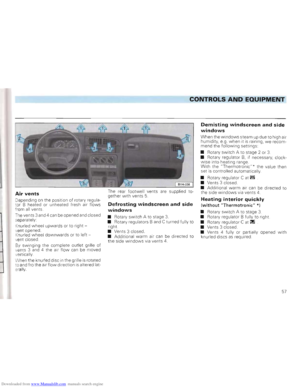 59
59 60
60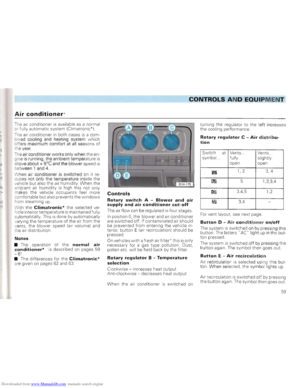 61
61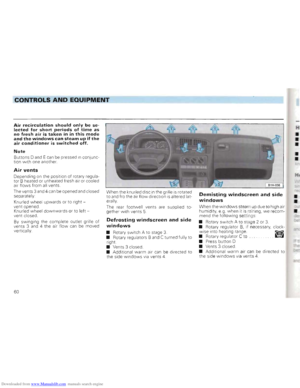 62
62 63
63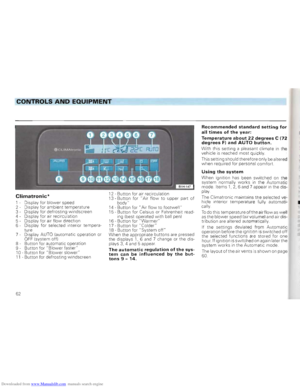 64
64 65
65 66
66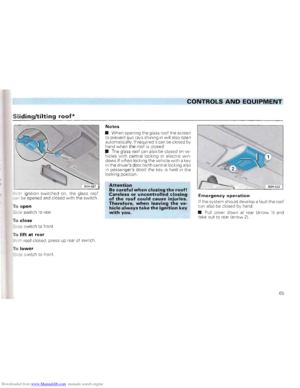 67
67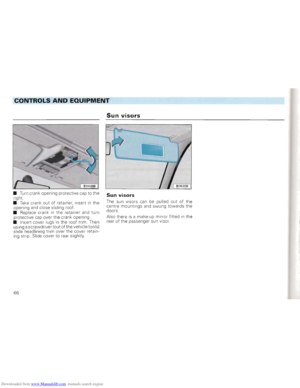 68
68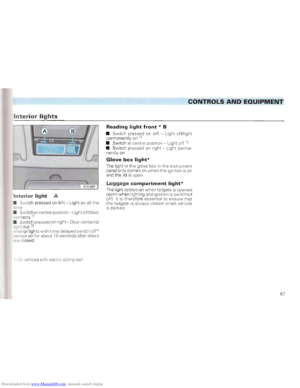 69
69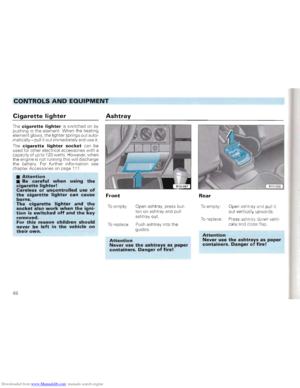 70
70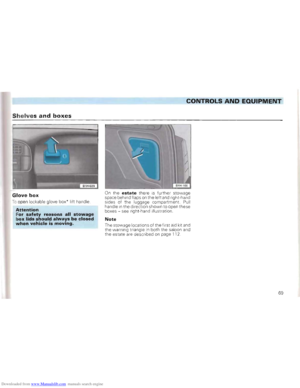 71
71 72
72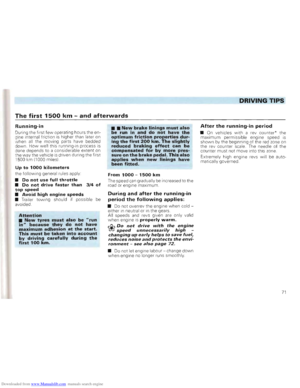 73
73 74
74 75
75 76
76 77
77 78
78 79
79 80
80 81
81 82
82 83
83 84
84 85
85 86
86 87
87 88
88 89
89 90
90 91
91 92
92 93
93 94
94 95
95 96
96 97
97 98
98 99
99 100
100 101
101 102
102 103
103 104
104 105
105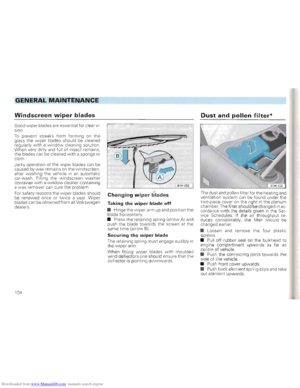 106
106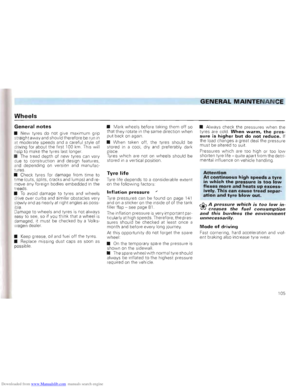 107
107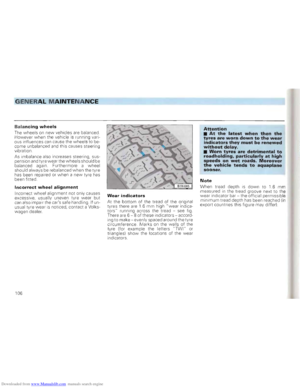 108
108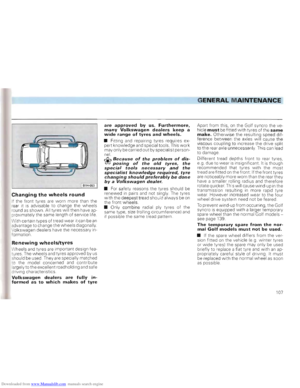 109
109 110
110 111
111 112
112 113
113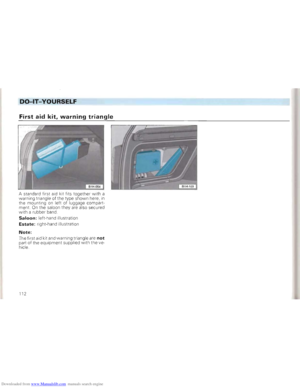 114
114 115
115 116
116 117
117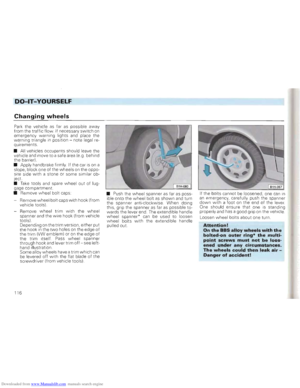 118
118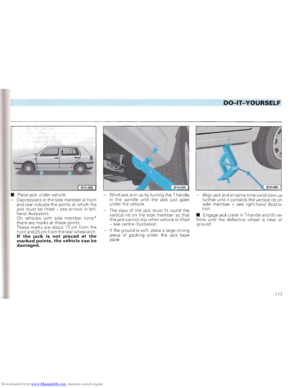 119
119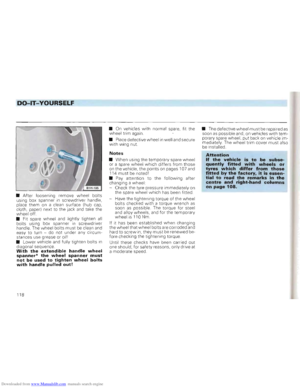 120
120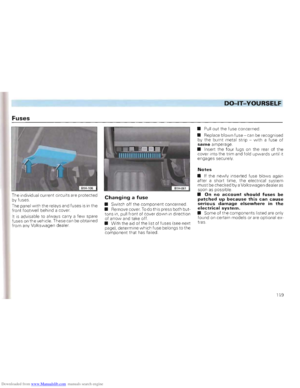 121
121 122
122 123
123 124
124 125
125 126
126 127
127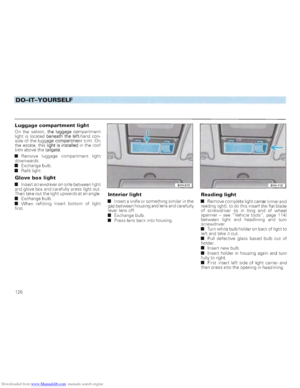 128
128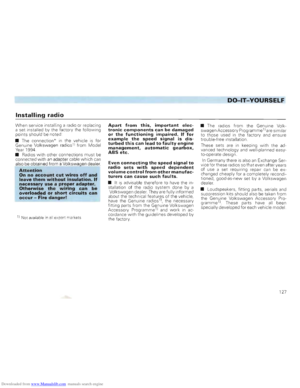 129
129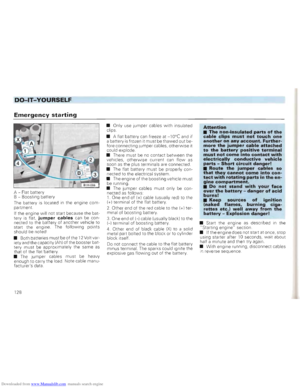 130
130 131
131 132
132 133
133 134
134 135
135 136
136 137
137 138
138 139
139 140
140 141
141 142
142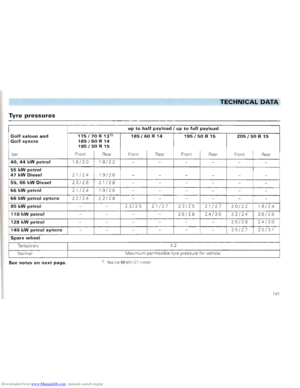 143
143 144
144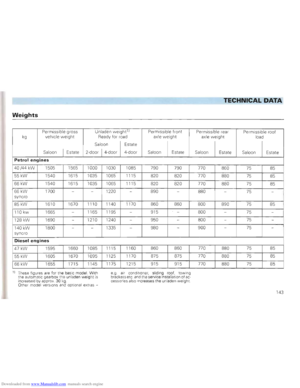 145
145 146
146 147
147 148
148 149
149 150
150 151
151 152
152 153
153 154
154 155
155

