1993 VOLKSWAGEN GOLF roof
[x] Cancel search: roofPage 5 of 156
Downloaded from www.Manualslib.com manuals search engine CONTROLS AND EQUIPMENT
Dashboard and Controls ..... 4
. ey s, Cen tral locking . . .... 6, 7
::"tl-thef t warning system .... 8
Joors .......................... .... 9
oot lid .... ........... . . . . . 10
::Iectric windows .. . .. 10
• ~Irrors . . ..... . ... 12
Seal belts 13
"" rbag System . . . . . 18
Safe ty for children .. ... 21
ead restraints . . . . . .. 24
= ro nt seats . . . . . . . . . . . .. 25
Rear seat . . . 27
L u ggage compartment ... . ... . ...... 28
M esh partition (Estate) ...... 29
L u ggage compartment cover /
F olding/sliding cover
... 30
Pedals, Hand brake .. 31
Manual gearbox .... ... .... 31
Automati c gearbox . . . .. .......... 32
H eig ht-adjustable steering wheel ..... 35
I gnition lock. . . . . .. 35
Starting/stopp ing engine 36, 38
\lIstrumellts .. .... 39
Warning lamps ....... 46
Switches . . . . . . . . . . . . . . 50
Turn signal and dip lever ............. 53
Cruise control system ........... 54
Wi ndscreen wipe r and washer system 55
Heating an d ventilation .. . ...... 56
Air cond itioner ......' 59
Sliding/ti ltin g roof. . . . . . . . . . . . ... 65
Sun visors / Interior lights 66,67
Cigarette lighter, Ash tray ..... 68
Shelves and boxes . . . . . . . . . . . ... 69
Roof rack / Roof ra ilings ... 70
DRIVING TIPS
The firs t 1500 km -and after wards .... 71
Driving economically and ecologically .. 72
Brakes. . . . . . . . . . . . . . . . 75
Tra iler tow ing . .. ..... . .... ... ...... 77
Driving a four- wheel drive vehicle .. 79
GENERAL MAINTENANCE
Filling the tan k, Fuel. 81, 82
Care of vehicle ........ .. . . 85
Bonnet . . ... 90
Engine compartment .. ...... .... .... 91
Engine oil ..... .......... ........... 92
Automatic transmission fluid (ATF)* ... 96
Power-assisted steering .. 96
Cooling system . . . . . . . . . . .. . 97
B rake fluid ...... 99
Battery . . . . .. 100
Spark plugs. V-belts . . . . . . . . . 102
Washer system
... . .. 103
Windscreen w iper blades . . . 104
Dust a
nd pollen filter * . 104
Wheel s . 105
D riving abroad ..... ............... 110
Accessories, modifications and
renewa l ot parts .............. III
Mobile telephones and tw o-way rad ios 111
DO -lT-YOURSELF
First -aid kit, Warn ing triangle ........ 112
Storage of vehicle tools, spare wheel
a n d ball coupling trailer bracket ...... 113
Vehicle tools, Spare wheel 114
CONTENTS
Changing w heels . 116
F uses . ........ .. .. . . . ... . .... 119
Changing bulbs. . .... .. . 121
Installing radio . . . . .. 127
E mergency starting .. .. 128
Tow starting / to wing . . .. 129
L ift ing vehicle ......... 131
SPECIAL INFORMATION
Body ..... .... . .......... 132
Environmental compatibility ... 133
TECHNICAL DATA
Engine data . .. , .... .... . 134
P er forman ce .. ... ... ... . .. 136
Fuel consump tion .. 137
Wh eels
. . 139
T yre pressures
.. .. ... .. . . .. ... 1 4 1
Weights ... 143
Trailer weights .. 144
Dimensions. ...... .. ... 145
Capacities " ..... 146
Vehicle identification data ... 147
ALPHABETICAL INDEX
Alph abetical index ... 148
3
Page 9 of 156
Downloaded from www.Manualslib.com manuals search engine Central locking system*
When one of the front doors is locked or un
lock ed w ith the key, all the other doors, the
tank flap and -depending on the position of
h e tailgate lock cylinder -the tailgate as w el l, are locked or unlocked by the central locking system
T he centra l locking system
is equipped with
a safe mechanism: Once the vehicle has been locked fr om the outside, the door lock Ing knobs on the inside are also blocked
a ft er approx. 12 seconds. This makes
b reaking in d ifficult.
W hen
unlocking, all the locking knobs
m ove upwards .
I f the key is held at the open position on
ve
h icles with electr ic win dows, all windows
wi ll open.
W hen
locking all door locking knobs must
m ove downwards. If this does not happen,
o p
en the door concer ned again and lock by pre ssing the locking knob down .
On ve hicles equipped w ith electric w inows/ele ctri c s liding roof, w indows/ele ctri c
s liding roof w hich hav e been left open can be automatically closed when the doors are
l o cked . T o do this one only need s to hold the
e y
in the lock ing position, until all windows and the sliding roof are completely closed.
The doors can also be locked by pushing down the locking knobs. However, the
s fe system IS not activated when th is is done. When the driver's door is locked all the other doors are locked as well. The
driv er
's door canno t be locked by pres
s ing the locking knob down as long as the
door is open. This is to prevent you from
locking yourself out.
Notes
• If you lock the car using the ignition key and with the driver' s door open, get into the
car and shut the door, all doors are locked.
They cannot be opened from the inside or
from the outs ide. As soon as the ignition is swit ched on, the door s are unlocked .
• If the ce ntral loc king shou ld fail , all locks
apart from the tank flap can be operated
manually.
Releasing tank flap manually, see Page 82.
Attention • When the vehicle is locked from outside, no-one should remain in the vehicle -especially not children -because the doors can no longer be opened from the inside. This applies particularly where the vehicle has electric windows, because then the windows cannot be opened either see page 10. • If the locking knob in the driver's door is pushed down, all the other doors are automatically locked as well. • Locking the doors can prevent them from bursting open in an extraordinary accident situation. Locked doors also prevent persons entering the vehicle forcibly e.g. at traffic lights. However, in an emergency, they make it more difficult for outside help to open the doors.
7
Page 10 of 156
Downloaded from www.Manualslib.com manuals search engine CONTROLS AND EQUIPMENT
Anti-theft warning
system*
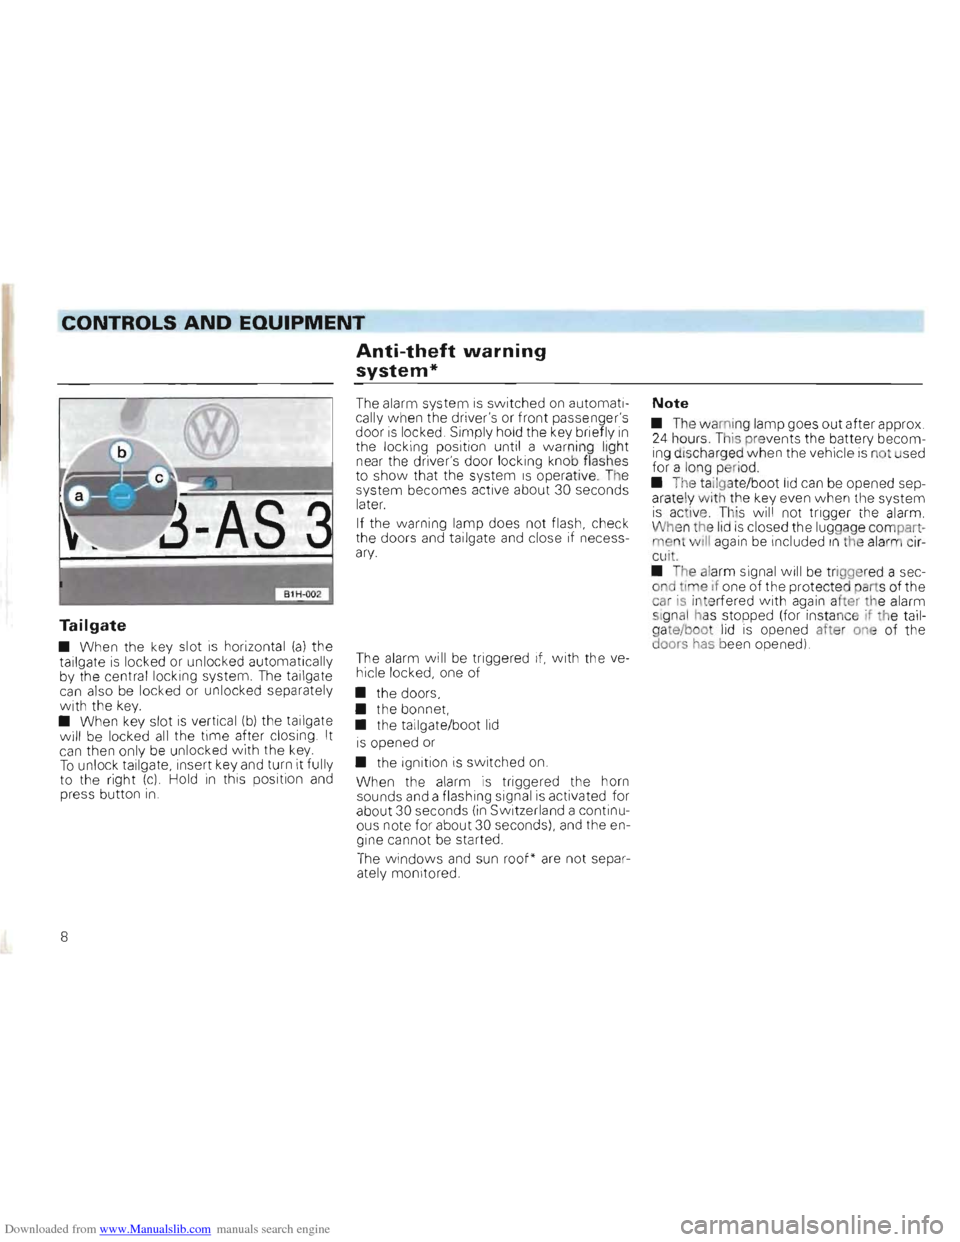
Tailgate
• When the key slot is horizont al (a) the
tailgate is locked or unloc ked automatically
by the central locking system. The tallgate can also be locked or unloc ked separately with the key. • When key slot is vertical (b) the tailgate
will be locke d all the time after closing . It can the n only be unlocked with the key. To unlock tailgate , insert key and turn It fully
to the right (c) Hold in this position and press button in .
The alarm system is switched on automatically when the driver's or front passenger's door is locked. Simply hold the key briefly in the locking position until a warni ng light
near the driver's door locking knob flashes
t o show that the system IS operative. The
system becomes active about 30 seconds
lat
er.
If the warning lamp does not flash, check
the doors and tailgate and close if necessary.
The alarm will be triggered if, with the ve
hicle locked, one of
• the doors,
• the bonnet,
• the tailgate/boot
lid
is opened or
• the ignition is switched
on.
When the alarm is triggered the horn
sounds and a flashi ng signal is activated for
about 30 seconds (in Switz erland a continu
ous note for about 30 seconds), and the en
gine cannot be started .
The windows and sun roof* are not separ
ately monitored .
Note
• The wa mi ng lamp goes out after approx . 24 hours. T hiS pre ven ts the battery becom
ing disc harged when the vehicle is not used for a long peri od
• The
tailgate/boo t lid can be opened sep
arate ly wi th the key even w hen the system is active . This wi ll not trigger the alarm .
Whe n the lid is closed the luggag e compartment wili again be included In the alarm circu it.
•
The alarm signal will be triggered a sec
ond time if one of the protecte d part s of the
car
is inte rfered w ith again aher th e alarm
si gnal has stopped (for insta nce if the tailgate/boo t lid is opened after one of the
doors has been opened)
8
Page 11 of 156
Downloaded from www.Manualslib.com manuals search engine CONTROLS AND EQUIPMENT
Doors
From outside the front doors can be
ocked or unl ocked with the key.
h
en unlocking, the locking knobs move .Jp.
I the key is held in the opening position in .119 d riv er's door (with central locking front passenge r door also), on vehicles with elec
-'le wi ndows all windows will b e opened .
:Jh
en locking, the locking kn o bs move dow n.
-o n vehicles with central locking or electric
Nln dows the key is held in th e loc king posi
- o n in the driver's door (with cen tral lock ing 'ront passe nger door also), windows an d
:ne electric sliding roof which have been left
o pe n w ill be closed.
The fron t passenger's door and the rear
d oors can be locked from outside without Jsing the key J ust press locking knob down and close door.
-he dri ver's door cannot be locked when :Jpe n by pre ssing the locking knob down and closing door . This pre vents you from
eaving the key in the car and forgetting it.
From inside all the door s can be locked by
press ing down the locking knobs.
As long as the knobs are pr esse d down the
doors cannot be opened from inside or outside.
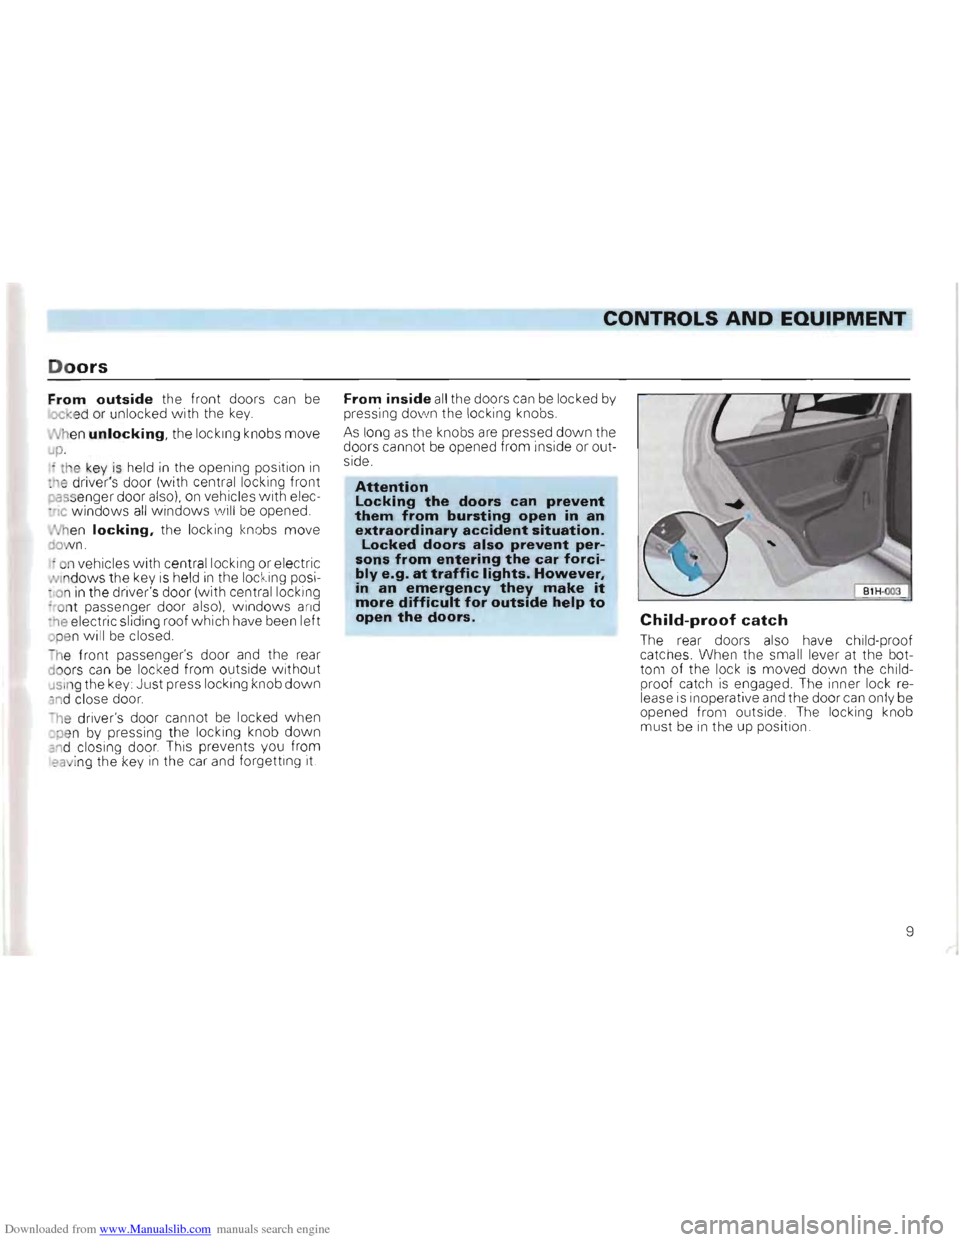
Attention Locking the doors can prevent them from bursting open in an extraordinary accident situation. Locked doors also prevent persons from entering the car forcibly e .g. at traffic lights. However, in an emergency they make it more d ifficult for outside help to open the doors. Child-proof catch
The rear doors also have child-pr oof catc hes . When the small lever at the bot
to m of the lock is moved down the chi ld
proof cat c h i s engaged. The inner lock release is inoperative and the door can only be opened from outside. The locking knob
m ust be in the up po sition .
9
Page 31 of 156
Downloaded from www.Manualslib.com manuals search engine CONTROLS AND EQUIPMENT
esh partition* (Estate)
e m esh partit ion prevents light articles of '99age and dogs from being thrown forard when brakes are applied suddenly or ~ an accident.
Installing
-"e part ition can be installed either behind "9 rear seat s or behind the front seats. For "'a::h position there are two upper and two ~ ve r securing points:
Attaching at the top
~:)Id the flaps in the opposing roof trims up, 5ert the upper cross bar on one side into
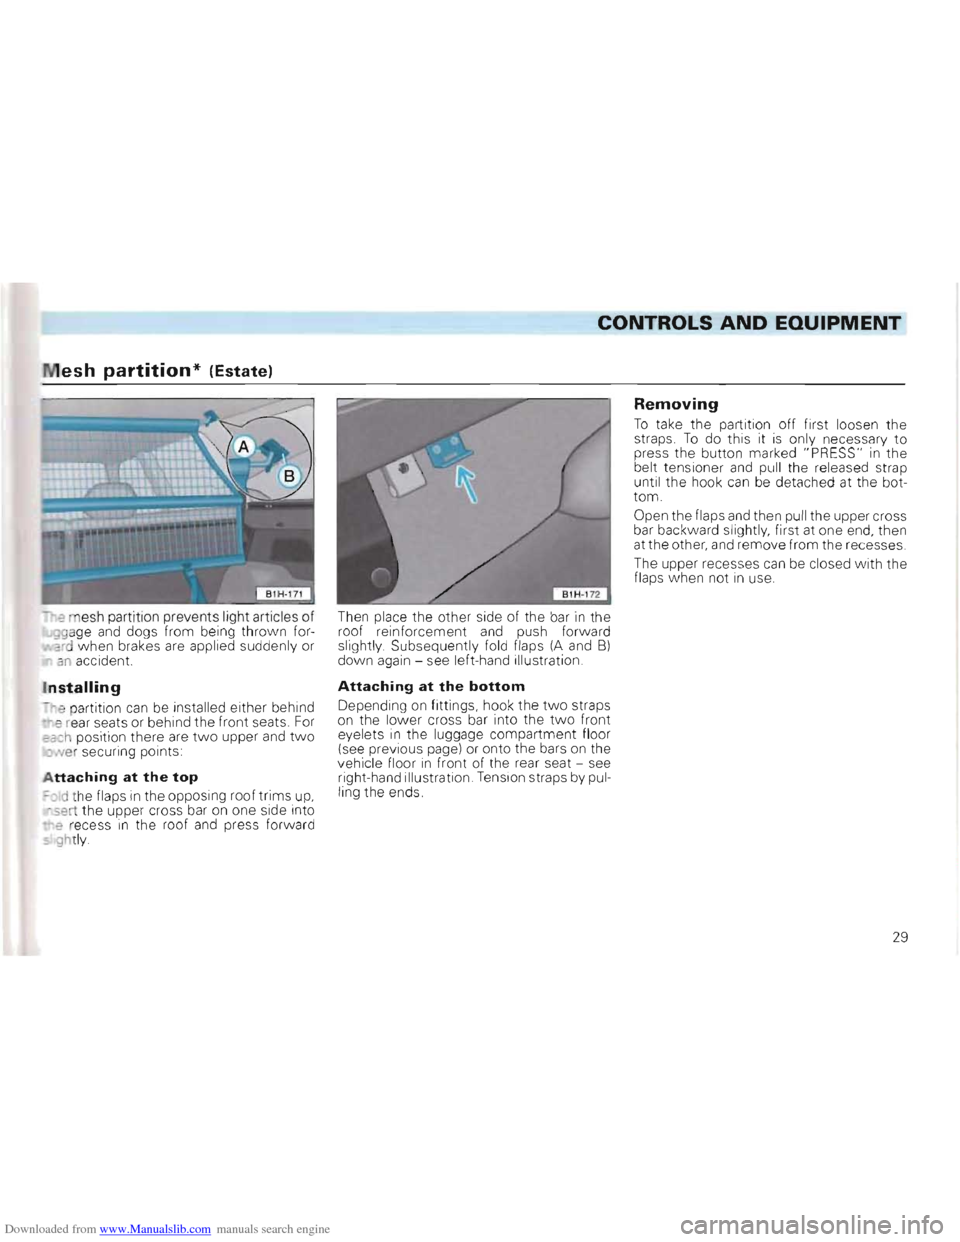
• e recess in the roof and press forward 5' ghtly. Then
place the other side of the bar
in the
r o of reinforcement and push forward slightly Subsequently fold flaps (A and 8)
down again -see left-hand illustration.
Attaching at the bottom
Depending on fittings, hook the tw o straps
on the lower cross bar into the tw o front
e yelets
in the luggage compartment floor
( see previous page) or onto the bars on the
vehicle floor in front of the rear seat -see
right-hand illustration . Ten sion straps by pul
ling the ends .
Removing
To take the partition off first loosen the straps . To do this it is only necessary to
press the button marked "PRESS" in the
belt tensioner and pull the released strap
until the hook can be detached at the bot
tom.
Open the flaps
and then pull the upper cross
bar bac kward slightly, first at one end, then
at the other, and remo ve from the recesses .
The upper recesses
can be closed with the
flaps when not in use.
29
Page 63 of 156
Downloaded from www.Manualslib.com manuals search engine __C_ONTROLS AND EQUIPMENT
Heating interior quickly
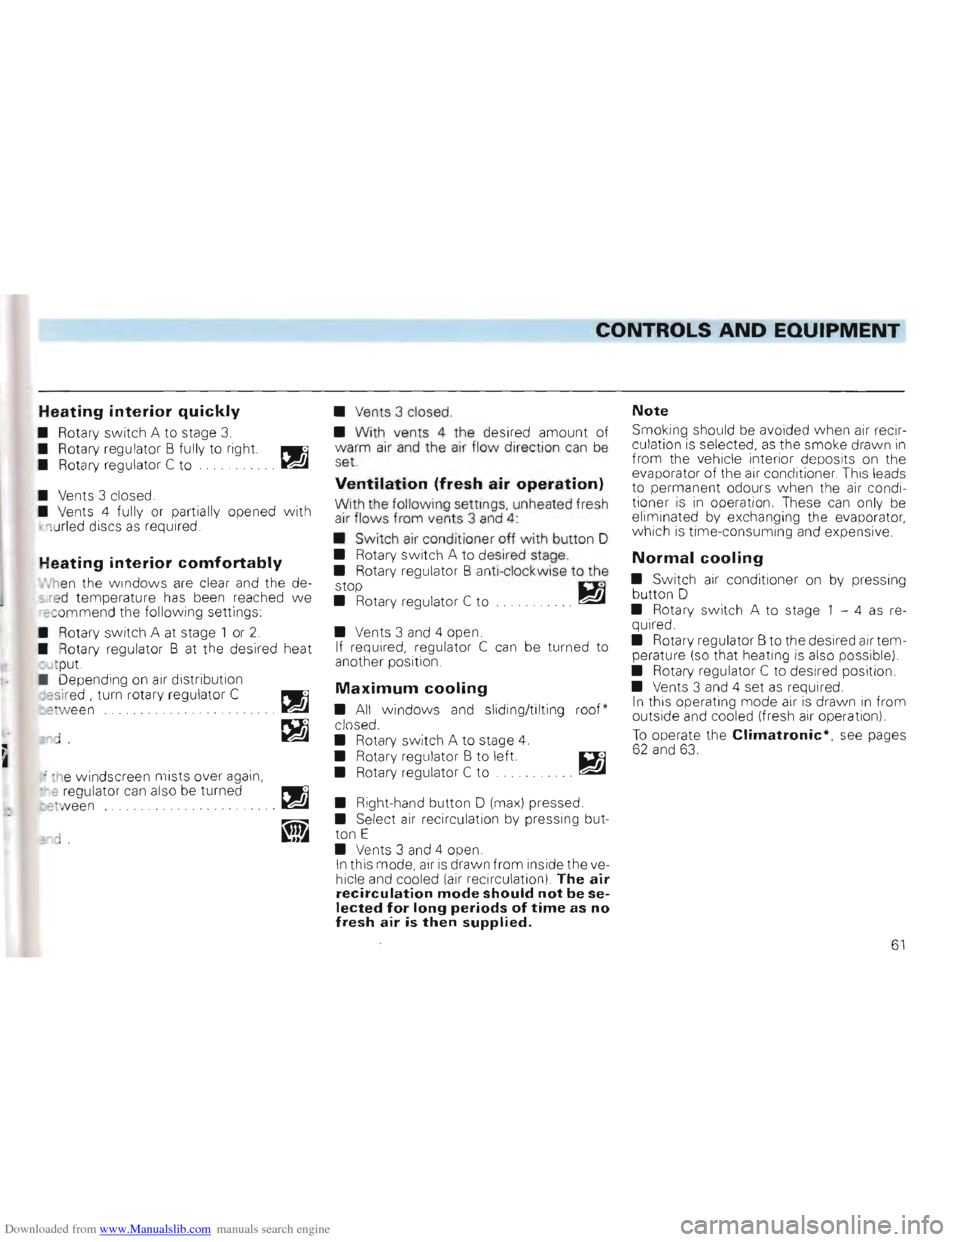
• Rotary switch A to stage 3.
• Rotary regulator B fully to right. PWll
• Rotary regulator C
to .. ~
• Vents 3 closed .
• Vents 4 fully or partially opened w ith
1 u rled discs
as required
Heating interior comfortably
hen the w indows are clear and the de
s red tempera ture has been reached we rec ommend the following settings
Rotary
switch A at stage 1 or 2.
• Rotary regulator B at the desired heat
Jt put.
Depending on air distribution
esir ed , turn rotary regulator C
re ween .. .. ~
'ld ~
, the windscreen mists over again,
e regulator can also be turned
etw een
•
Vents 3 closed.
•
With vents 4 the desired amount of
warm air and the air flow direction can be
set.
Ventilation (fresh air operation)
With the following settings, unheated fresh
air flows from vents 3 and 4:
• Switch air conditioner off with button D
• Rotary switch A to desired stage.
• Rotary regulator B anti-clockwise to the
stop D.1
• Rotary regulator C to . .. ~
• Vents 3 and 4 open.
If required, regulator C can be turned to
another position.
Maximum cooling
• All windows and sliding/tilting roof*
closed.
• Rotary s
witch A to stage 4.
• Rotary regulator B to left.
• Rotary regulator C to
• Right-hand button 0 (max) pressed.
• Select air recirculation by pressing but
ton E
• Vents 3 and 4 open.
In this mod e, air is drawn from inside the ve
hicle and cooled (air recircu lation) The air
recirculation mode should not be selected for long periods of time as no fresh air is then supplied.
Note
Smoking should be avoided w hen air recir
culation is selected , as the smoke drawn in from the vehicle interior deposits on the
evaporator of the air conditioner. This leads
to permanent odours when the air condi
tioner is i n operation. These can only be
eliminated by exchanging the evaporator,
which is time-consuming and expensive.
Normal cooling
• Switch air condit ioner on by pressing
button 0
• Rotary
switch A to stage 1 -4 as re
quired.
• Rotary regula
tor B to the desired air temperature (so that heating is also possible)
• Rotary regulator C to desired position
• Vents 3 and 4 set
as required.
I n this operating mode air is drawn in from
outside and cooled (fresh air operation)
To operate the Climatronic*, see pages 62 and 63.
61
Page 66 of 156
Downloaded from www.Manualslib.com manuals search engine CONTROLS AND EQUIPMENT
Operating instructions
• Ensure that the sensor betvveen the
windscreen defrost outlets in the centre of
the instrument panel and the air grille next
to the radio is not covered.
• If, after switching on the ignition,
all sym
bols in the display area flash for about 15
seconds, there is a fault in the system -con
tact a Volkswagen dealer.
Notes for both air conditioning
systems
• To ensure that the heating, ventilation
and air conditioner can work properly, the air
inlet in front of the windscreen should be
kept free of ice, snow and leaves.
• The heat output depends
on the coolant
temperature -the full heat output is there
fore available when the engine IS warm.
• The stale air escapes through openings
in the luggage compartment side panels.
Therefore when loading the luggage com
partment ensure that the openings are not
covered .
• When the ambient temperature
is high
and the air very humid, condensed water can drip off the evaporator and form a
puddle under the vehicle. This is quite nor
mal and does not indicate a leak.
Notes for the normal air condi
tioner
• All controls except the rotar y switch A and buttons 0 and E can be set to any inter
mediate position.
•
To prevent the windows from misting up
the blower should be running slowly when driving at low speeds.
Using air conditioners economi
cally
In cooling operation the air conditioner com
pressor places demands on the engine and
therefo re influences the fuel consumption.
To keep the period switched on as short as possible, the following points should be
noted:
• If the
in side temperature is very high
after the car has been parked in the sun, it is recommended to open doors or windows briefly to enable the hot air to escape
• The air conditioner should not be
switched on during a Journey if the
windows or sliding/tilting roof* are open.
• If the desired interior temperature
can be attained w ithout switching on the air
cond itioner the fresh air operation should
be selected (does not apply to Climatronicl.
Operating faults
• Should the air cond i:ioner not work at
any time, either .
- the ambient temperatu re IS below about +5 °C,
-or the fuse has blown.
Check fuse and if necessary r
enew it - see
page 119. If the troub le is n ot due to a defec
tive fuse, SWitch the system off and have It
checked.
- the air conditioner
has svvitched off due
to coolant temperature being too high -see
page 45.
• If the cooling output drops off, switch
the AlC
off and have the system checked.
64
Page 67 of 156
Downloaded from www.Manualslib.com manuals search engine CONTROLS AND EQUIPMENT
Sliding/tilting roof*
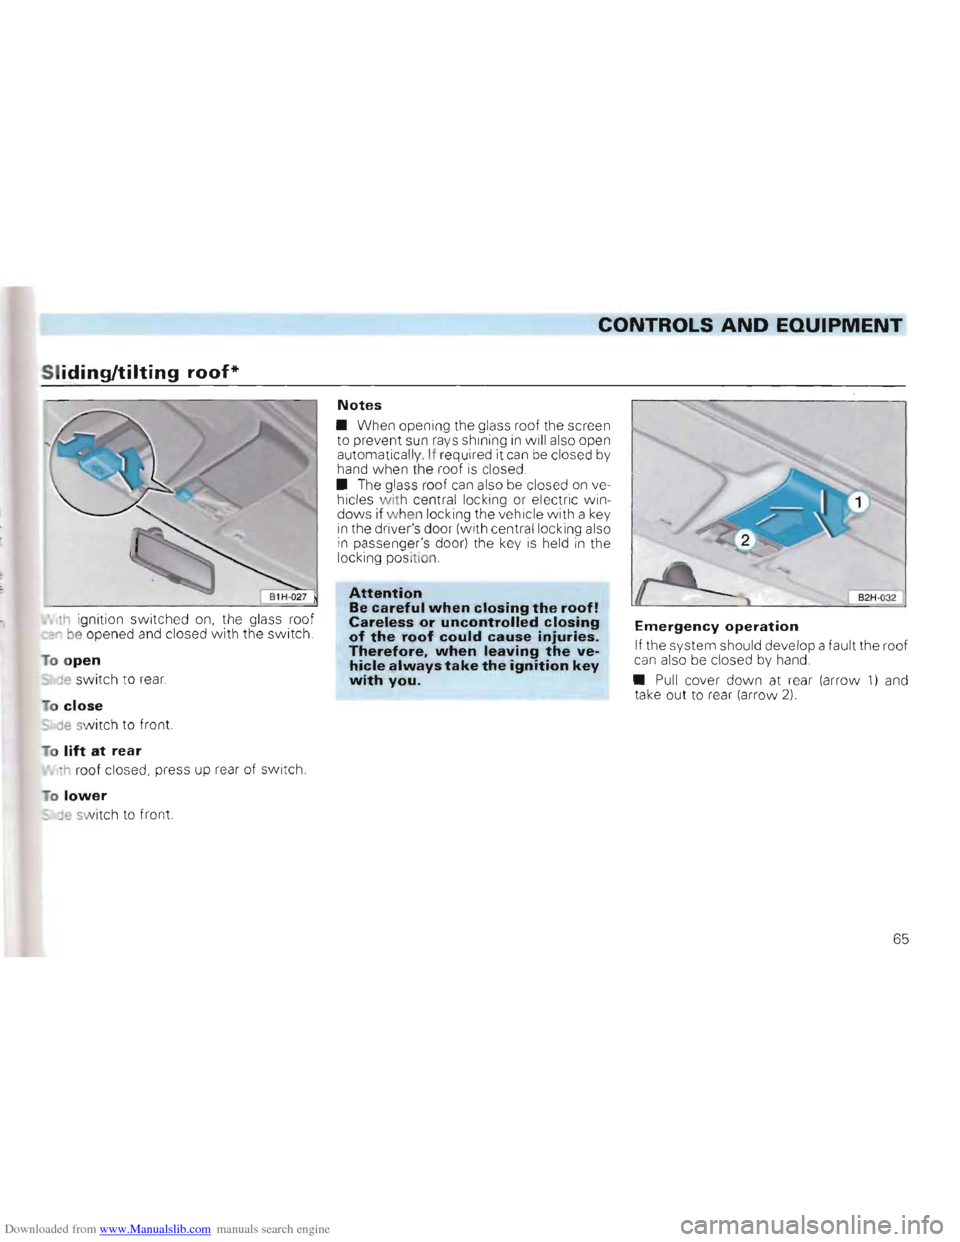
lh ignition sWit ched on, the glass roof
cl' be opened and closed with the switch.
T o
open
'de switch to rear.
o close
- de sw itc h to front.
To lift at rear
Ih ro of closed, press up rear of switch.
o
lower
lJe swi tc h to fro nt.
Notes
• When opening the glass roof the screen to prevent sun rays shining in w ill also open
automatical ly. I f req u ired it can be closed by hand whe n th e roof is closed .
• The glass roof can also be closedon ve
hicle s with central locking or electric win
dows if w he n loc king the vehicle with a key in the driv er' s door (with central locking al so in passeng er's door) the key is held in the
locking position.
Attention
Be careful when closing the roof!
Careless or uncontrolled closing
of the roof could cause injuries.
Therefore, when leaving the ve
hicle always take the ignition key
with you.
Emergency operation
If the system should develop a fault the roof
can also be c losed by hand .
• Pu
ll cover dow n at rear (arrow 1) and
take out to rear (arrow 2).
65