1993 FORD MONDEO rear view mirror
[x] Cancel search: rear view mirrorPage 7 of 279
0•7
This is a guide to getting your vehicle through the MOT test.
Obviously it will not be possible to examine the vehicle to the same
standard as the professional MOT tester. However, working through
the following checks will enable you to identify any problem areas
before submitting the vehicle for the test.
Where a testable component is in borderline condition, the tester
has discretion in deciding whether to pass or fail it. The basis of such
discretion is whether the tester would be happy for a close relative or
friend to use the vehicle with the component in that condition. If the
vehicle presented is clean and evidently well cared for, the tester may
be more inclined to pass a borderline component than if the vehicle is
scruffy and apparently neglected.
It has only been possible to summarise the test requirements here,
based on the regulations in force at the time of printing. Test standards
are becoming increasingly stringent, although there are some
exemptions for older vehicles. For full details obtain a copy of the Haynes
publication Pass the MOT! (available from stockists of Haynes manuals).
An assistant will be needed to help carry out some of these checks.
The checks have been sub-divided into four categories, as follows:
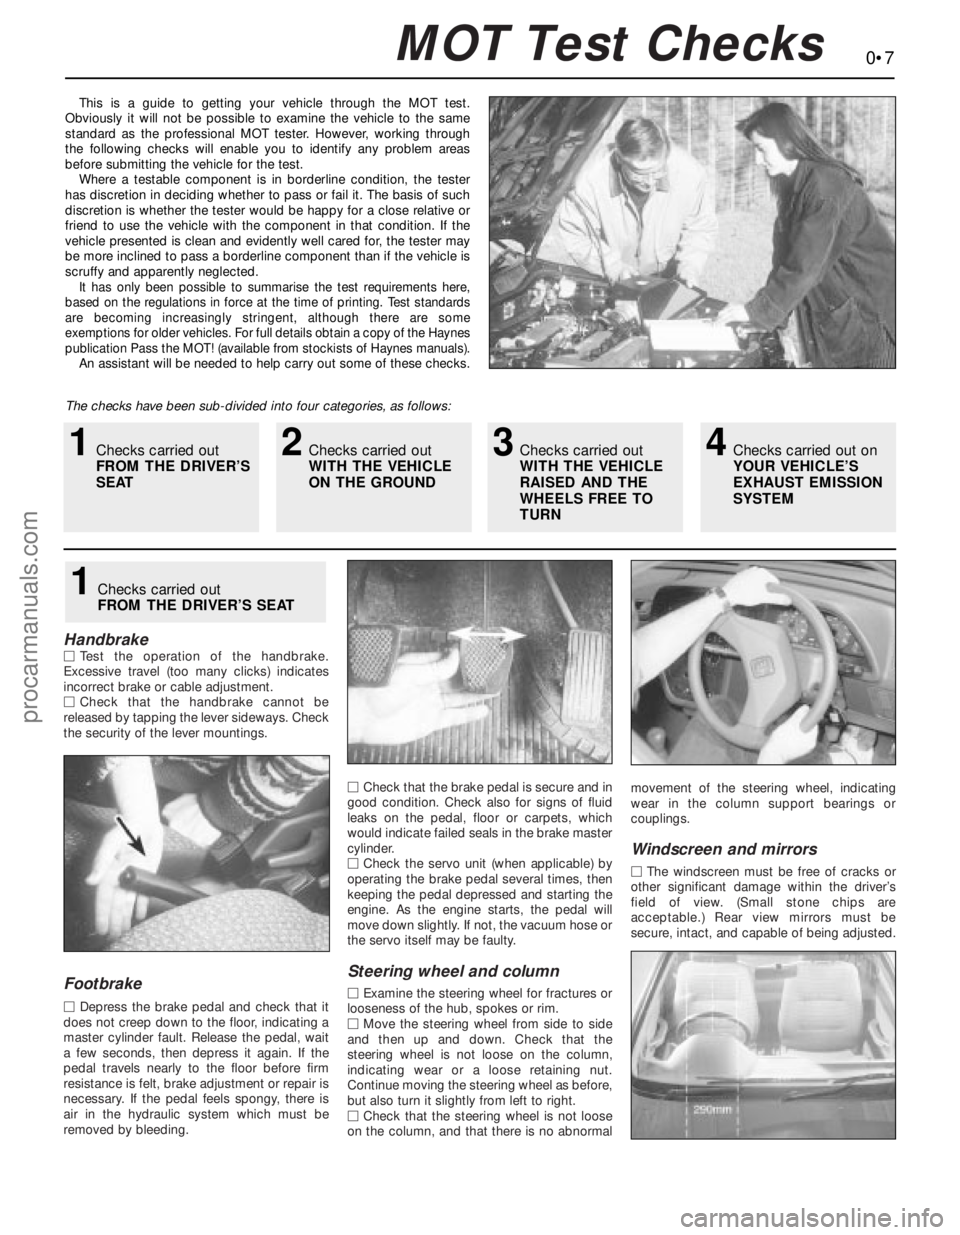
HandbrakeMTest the operation of the handbrake.
Excessive travel (too many clicks) indicates
incorrect brake or cable adjustment.
MCheck that the handbrake cannot be
released by tapping the lever sideways. Check
the security of the lever mountings.
Footbrake
MDepress the brake pedal and check that it
does not creep down to the floor, indicating a
master cylinder fault. Release the pedal, wait
a few seconds, then depress it again. If the
pedal travels nearly to the floor before firm
resistance is felt, brake adjustment or repair is
necessary. If the pedal feels spongy, there is
air in the hydraulic system which must be
removed by bleeding.MCheck that the brake pedal is secure and in
good condition. Check also for signs of fluid
leaks on the pedal, floor or carpets, which
would indicate failed seals in the brake master
cylinder.
MCheck the servo unit (when applicable) by
operating the brake pedal several times, then
keeping the pedal depressed and starting the
engine. As the engine starts, the pedal will
move down slightly. If not, the vacuum hose or
the servo itself may be faulty.
Steering wheel and column
MExamine the steering wheel for fractures or
looseness of the hub, spokes or rim.
MMove the steering wheel from side to side
and then up and down. Check that the
steering wheel is not loose on the column,
indicating wear or a loose retaining nut.
Continue moving the steering wheel as before,
but also turn it slightly from left to right.
MCheck that the steering wheel is not loose
on the column, and that there is no abnormalmovement of the steering wheel, indicating
wear in the column support bearings or
couplings.
Windscreen and mirrors
MThe windscreen must be free of cracks or
other significant damage within the driver’s
field of view. (Small stone chips are
acceptable.) Rear view mirrors must be
secure, intact, and capable of being adjusted.
1Checks carried out
FROM THE DRIVER’S SEAT
MOT Test Checks
1Checks carried out
FROM THE DRIVER’S
SEAT2Checks carried out
WITH THE VEHICLE
ON THE GROUND3Checks carried out
WITH THE VEHICLE
RAISED AND THE
WHEELS FREE TO
TURN4Checks carried out on
YOUR VEHICLE’S
EXHAUST EMISSION
SYSTEM
procarmanuals.com
Page 186 of 279
6Carefully prise off the weatherstrip from the
outside of the door.
7Support the glass, then unscrew the bolts
from the support bracket.
8Lift the glass from the door while tilting it at
the rear, and withdraw it from the outside.
Front (electric)
9Disconnect the battery negative (earth) lead
(Chapter 5, Section 1).
10Remove the door inner trim panel (Sec-
tion 11).
11Remove the door exterior mirror (Section 16).
12Temporarily reconnect the battery and the
window operating switch. Lower the window
until the support bracket and bolts are visible
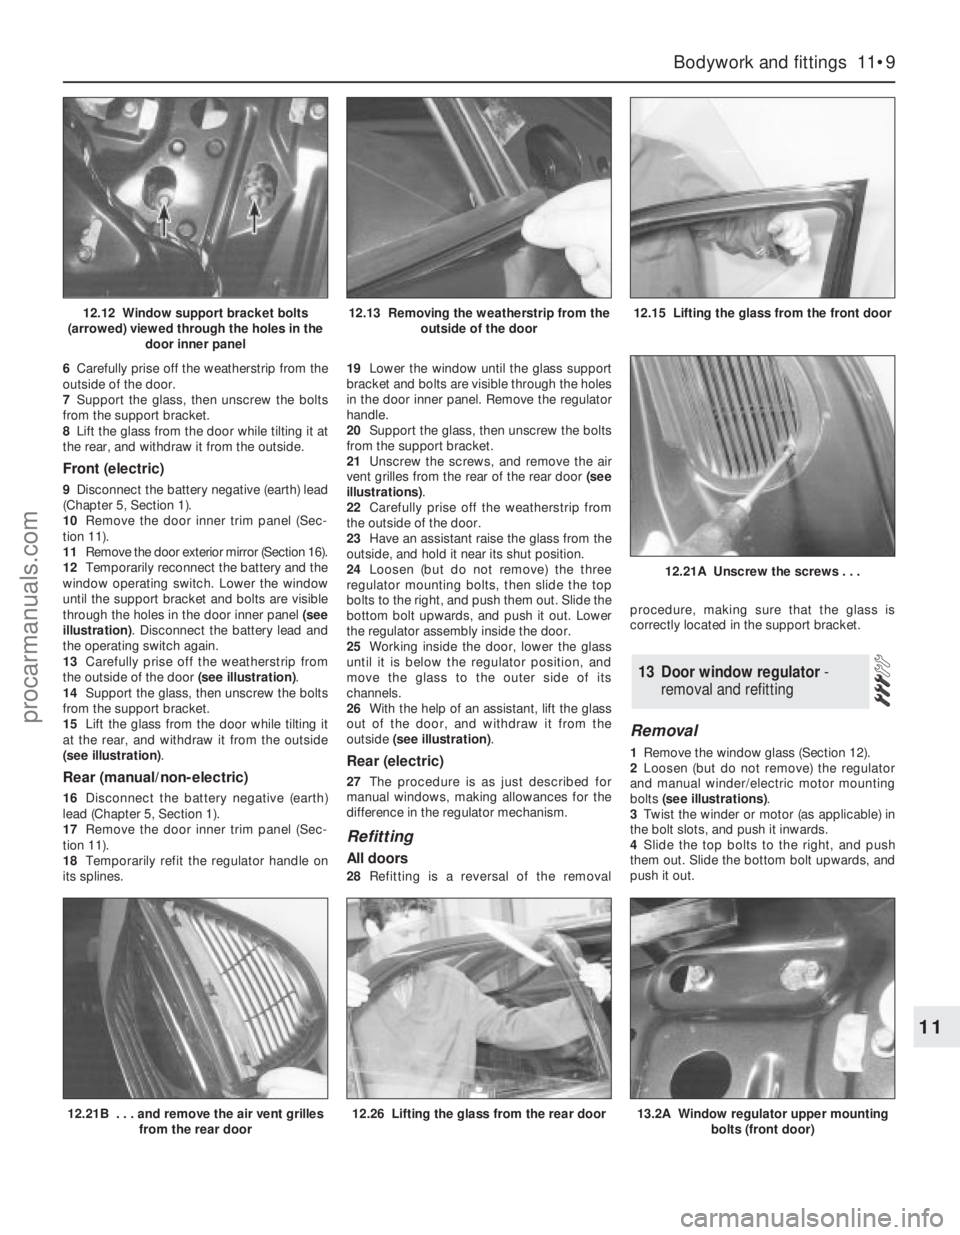
through the holes in the door inner panel (see
illustration). Disconnect the battery lead and
the operating switch again.
13Carefully prise off the weatherstrip from
the outside of the door (see illustration).
14Support the glass, then unscrew the bolts
from the support bracket.
15Lift the glass from the door while tilting it
at the rear, and withdraw it from the outside
(see illustration).
Rear (manual/non-electric)
16Disconnect the battery negative (earth)
lead (Chapter 5, Section 1).
17Remove the door inner trim panel (Sec-
tion 11).
18Temporarily refit the regulator handle on
its splines.19Lower the window until the glass support
bracket and bolts are visible through the holes
in the door inner panel. Remove the regulator
handle.
20Support the glass, then unscrew the bolts
from the support bracket.
21Unscrew the screws, and remove the air
vent grilles from the rear of the rear door (see
illustrations).
22Carefully prise off the weatherstrip from
the outside of the door.
23Have an assistant raise the glass from the
outside, and hold it near its shut position.
24Loosen (but do not remove) the three
regulator mounting bolts, then slide the top
bolts to the right, and push them out. Slide the
bottom bolt upwards, and push it out. Lower
the regulator assembly inside the door.
25Working inside the door, lower the glass
until it is below the regulator position, and
move the glass to the outer side of its
channels.
26With the help of an assistant, lift the glass
out of the door, and withdraw it from the
outside (see illustration).
Rear (electric)
27The procedure is as just described for
manual windows, making allowances for the
difference in the regulator mechanism.
Refitting
All doors
28Refitting is a reversal of the removalprocedure, making sure that the glass is
correctly located in the support bracket.
Removal
1Remove the window glass (Section 12).
2Loosen (but do not remove) the regulator
and manual winder/electric motor mounting
bolts (see illustrations).
3Twist the winder or motor (as applicable) in
the bolt slots, and push it inwards.
4Slide the top bolts to the right, and push
them out. Slide the bottom bolt upwards, and
push it out.
13 Door window regulator-
removal and refitting
Bodywork and fittings 11•9
11
12.21B . . . and remove the air vent grilles
from the rear door12.26 Lifting the glass from the rear door13.2A Window regulator upper mounting
bolts (front door)
12.12 Window support bracket bolts
(arrowed) viewed through the holes in the
door inner panel12.13 Removing the weatherstrip from the
outside of the door12.15 Lifting the glass from the front door
12.21A Unscrew the screws . . .
procarmanuals.com