1990 VOLKSWAGEN TRANSPORTER window
[x] Cancel search: windowPage 4 of 165

Downloaded from www.Manualslib.com manuals search engine
1
INSTRUMENT PANEL
Illustration instruments and controls
Warning and indicator light symbols
CONTROLS AND EQUIPMENT
Keys,
central locking system .... 7, 8
Doors 9
Rear lid 11
Windows, mirrors 12, 13 Safety belts, head restraints . . . .14,19
Seats 20 Luggage compartment, pedals . 28,29
Brakes, Transmission 29, 32 Differential lock 33
Automatic-transmission 35 Steering lock/ignition/starter switch . 38
Starting procedures 39 Instrument cluster 40
Warning/indicator lights 43 Switches 46 Emergency flasher 46
Light switch, turn signals .... 46,48
Cruise control 49
Windshield wipers 50 Ventilation/Heating 51
Air conditioning 54
Heater 57
Sliding roof 62
Roof-rack 68 VEHICLE OPERATION
Break-in period - and afterwards . . 69
Operate your vehicle safety 70
Operate your vehicle economically
and minimize pollution 72
Trailer towing 73 Driving with the all-wheel drive ... 75
VEHICLE CARE
Fuel tank, fuel supply 85,86
Vehicle care (exterior/interior) . . 90, 93 Maintenance, inspection intervals . . 95 Engine compartment lid,
engine compartment 97 Lubricants, engine oil 98,99
Engine oil filter 101
Transmission oil 102
Power steering 103
Cooling system 104 Brake fluid 108
Battery 109
Windshield washers/wipers . . . 112,113
Tires/wheels 114 Difficult operating conditions .... 120
Winter driving 121
Accessories 122
DO-IT-YOURSELF SERVICE
Jack and tools 123 Spare wheel 124
Changing a wheel 125 Fuses, bulbs 128, 130 Adjusting headlights
134
Installing,
replacing the radio . . . . 135
Emergency starting 136
Emergency towing 138
Lifting vehicle . . 140
TECHNICAL DESCRIPTION
Engine, transmission 142
Steering,
suspension, brakes,
body, chassis 143 Emission-control-system 144
TECHNICAL DATA
Engine, spark plugs .
V-belts capacities . . Dimensions
Weights
Vehicle identification 146
147
148
150 151
CONSUMER INFORMATION
Service manuals 152
GAS STATION INFORMATION
Location of servicing points 156
ALPHABETICAL INDEX 158
www.westfaliaT3.info - a useful website for owners and enthusiasts of VW Westfalia T25 / T3 Campervans
Page 6 of 165
Downloaded from www.Manualslib.com manuals search engine
INSTRUMENT PANEL AND CONTROLS
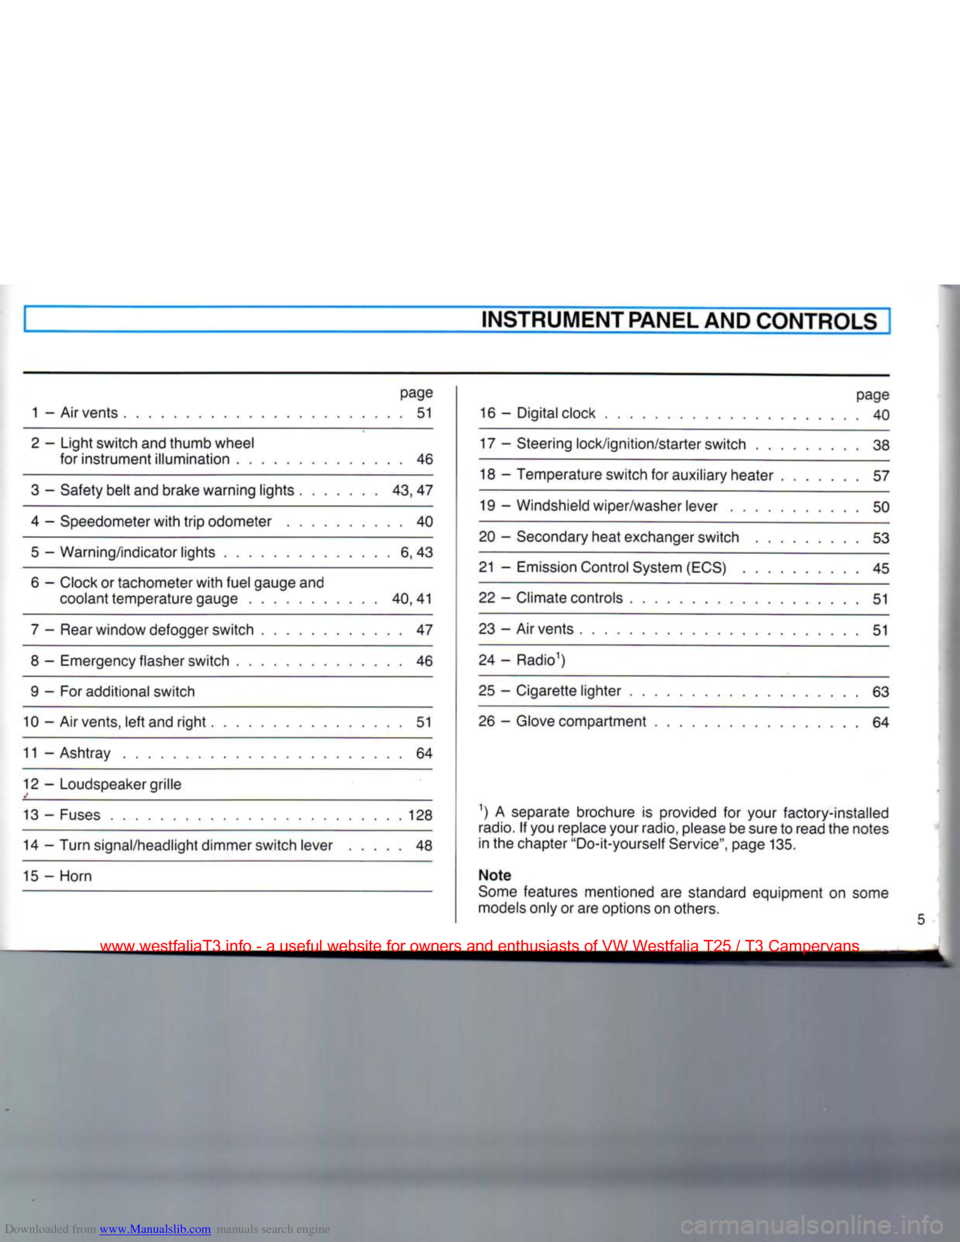
page
1 - Air vents 51
2 - Light switch and thumb wheel for instrument illumination 46
3 - Safety belt and brake warning lights 43, 47
4 - Speedometer with trip odometer 40 5 — Warning/indicator lights 6, 43
6 - Clock or tachometer with fuel gauge and coolant temperature gauge 40,41
7 - Rear window defogger switch 47
8 - Emergency flasher switch 46 9 - For additional switch
10 - Air vents, left and right 51
11 - Ashtray 64
12 - Loudspeaker grille
13 - Fuses 128 14 - Turn signal/headlight dimmer switch lever 48
15 - Horn page
16 - Digital clock 40
17 - Steering lock/ignition/starter switch 38
18 - Temperature switch for auxiliary heater 57
19 - Windshield wiper/washer lever 50
20 - Secondary heat exchanger switch 53
21 - Emission Control System (ECS) 45
22 - Climate controls 51
23 - Air vents 51
24 - Radio1)
25 - Cigarette lighter 63 26 - Glove compartment 64
1) A separate brochure is provided for your factory-installed
radio.
If you replace your radio, please be sure to read the notes
in the chapter "Do-it-yourself Service", page 135.
Note
Some features mentioned are standard equipment on some
models only or are options on others.
www.westfaliaT3.info - a useful website for owners and enthusiasts of VW Westfalia T25 / T3 Campervans
Page 7 of 165
Downloaded from www.Manualslib.com manuals search engine
[INSTRUMENT
PANEL
AND
CONTROLS
WARNING AND
INDICATOR
LIGHT
SYMBOLS
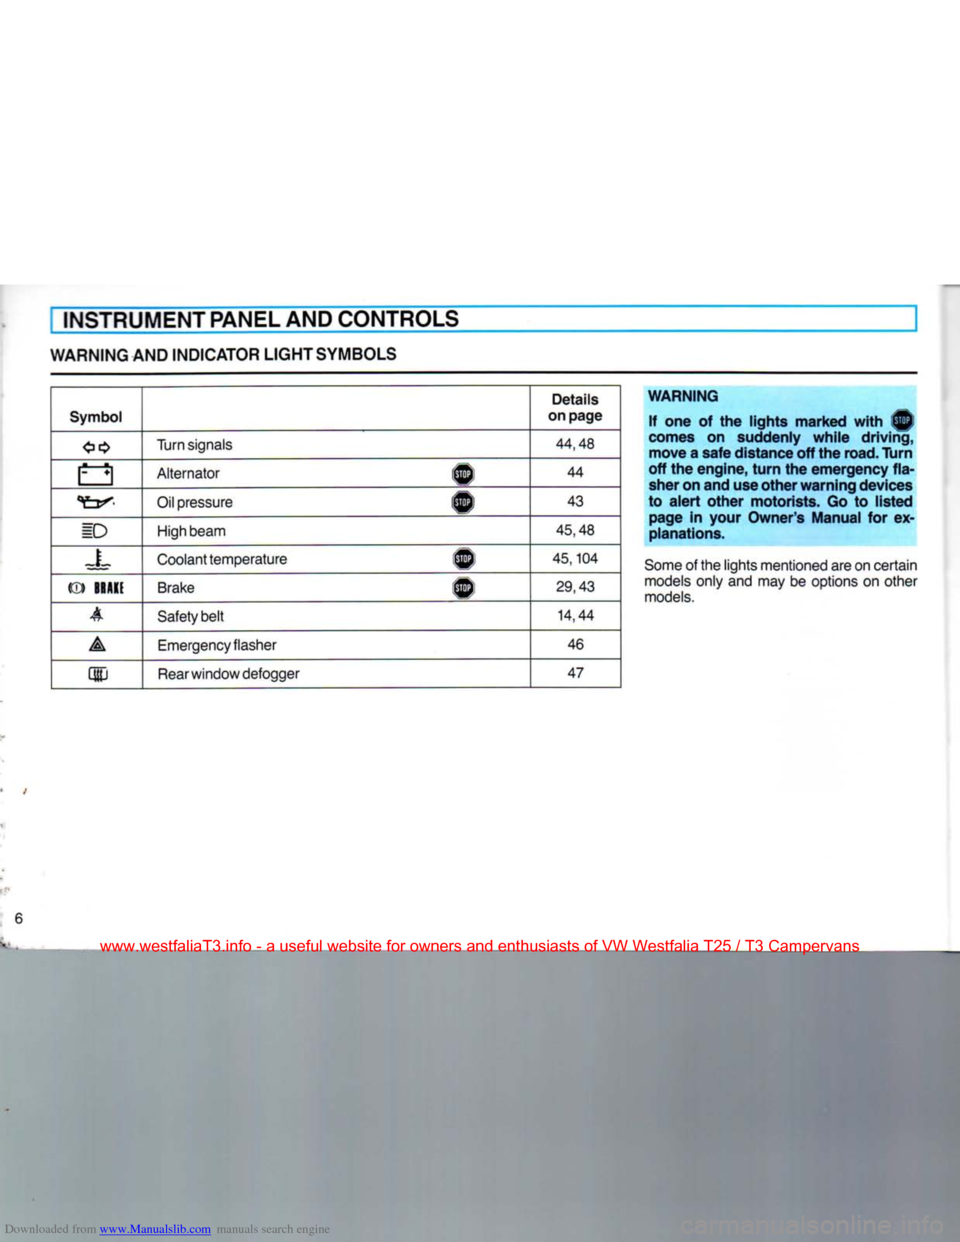
Symbol
Details
on
page
Turn
signals
44,48
a Alternator A
44
Oil pressure 1^1
43
ID
High beam
45,48
=L Coolant temperature 1^
45,104
(®)
BRAKE
Brake
®
29,43
A Safety belt
14,44
A Emergency flasher
46
m
Rear
window defogger
47
WARNING
If one of the lights marked with ®
comes
on suddenly while driving, move a safe distance off the
road.
Turn
off the engine,
turn
the emergency
fla
sher on and use other warning devices
to alert other motorists. Go to listed page in
your
Owner's
Manual for ex
planations.
Some
of the lights mentioned are on certain
models
only and may be options on other
models.
6
www.westfaliaT3.info - a useful website for owners and enthusiasts of VW Westfalia T25 / T3 Campervans
Page 8 of 165
Downloaded from www.Manualslib.com manuals search engine
CONTROLS AND
EQUIPMENT
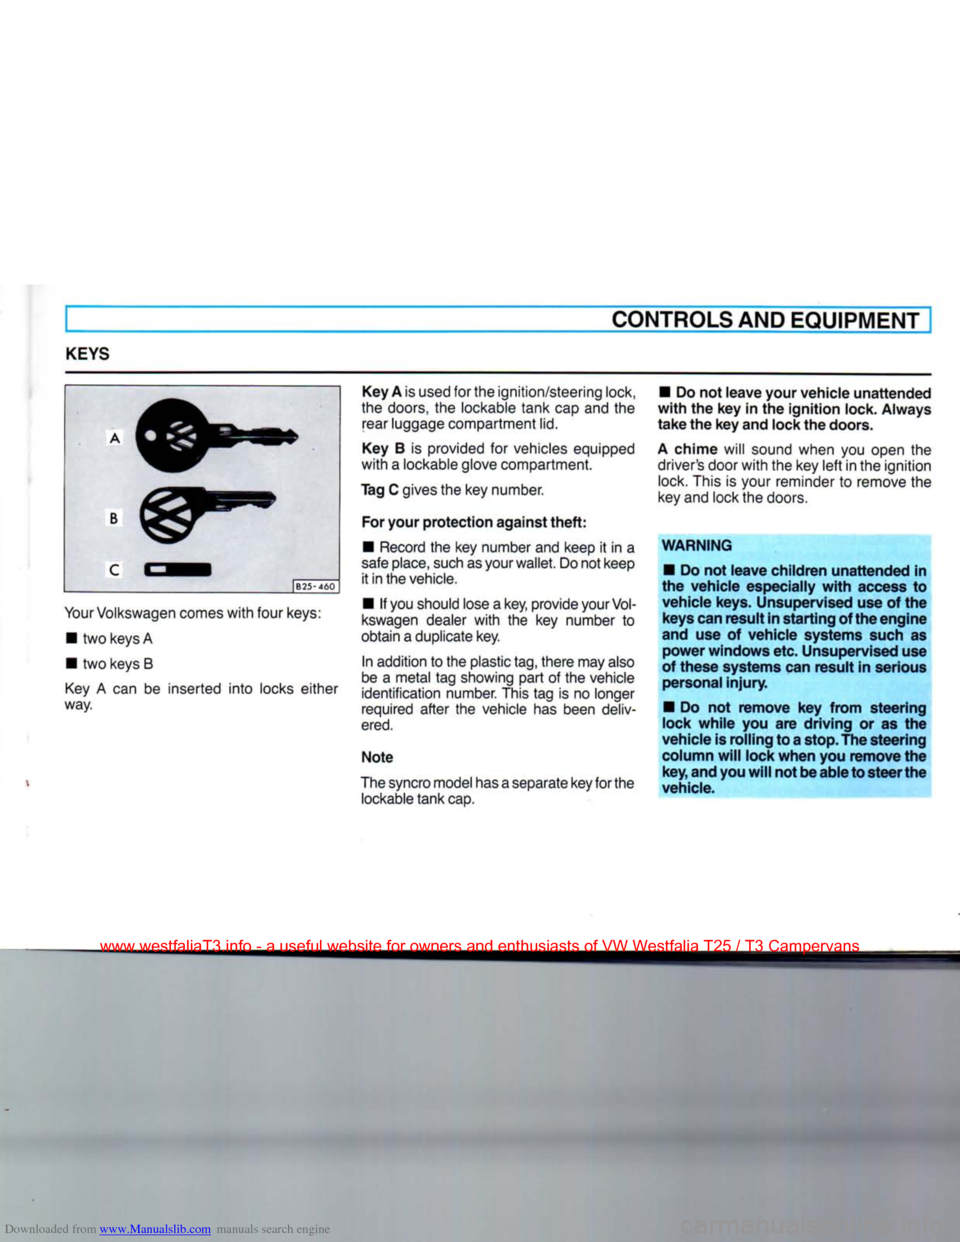
Key A is used for the ignition/steering lock, • Do not
leave
your
vehicle
unattended
the doors, the lockable tank cap and the
with
the key in the
ignition
lock.
Always
rear luggage compartment lid.
take
the key and lock the doors.
KEYS
B25-460
Your
Volkswagen comes
with
four keys: • two keys A
• two keys B
Key
A can be inserted
into
locks either
way. Key B is provided for vehicles equipped
with
a lockable glove compartment.
Tag C gives the key number.
For
your
protection
against
theft:
• Record the key number and keep it in a
safe
place, such as your wallet. Do not keep it in the vehicle.
• If you should lose a key, provide your
Vol
kswagen dealer
with
the key number to
obtain a duplicate key.
In addition to the plastic tag, there may also
be a metal tag snowing part of the vehicle
identification number. This tag is no longer
required after the vehicle has been deliv
ered.
Note
The syncro model has a separate key for the lockable tank cap.
A
chime
will sound when you open the
driver's door
with
the key
left
in the ignition lock. This is your reminder to remove the
key and lock the doors.
WARNING
• Do not
leave
children
unattended
in
the
vehicle
especially
with
access to
vehicle
keys. Unsupervised use of the
keys
can
result
in
starting
of the
engine
and use of
vehicle
systems such as
power
windows
etc. Unsupervised use
of
these
systems can
result
in serious
personal
injury.
• Do not
remove
key
from
steering
lock
while
you are
driving
or as the
vehicle
is
rolling
to a stop. The
steering
column
will
lock
when
you
remove
the key, and you
will
not be
able
to
steer
the
vehicle.
www.westfaliaT3.info - a useful website for owners and enthusiasts of VW Westfalia T25 / T3 Campervans
Page 9 of 165
Downloaded from www.Manualslib.com manuals search engine
CONTROLS AND EQUIPMENT
CENTRAL
LOCKING SYSTEM*
The
central locking system locks or un
locks
doors and rear lid simultaneously. It
is
actuated from the driver's and
passen
ger's
door.
• To lock and unlock from the outside,
turn
key in lock of driver's and passenger's
door.
• To lock and unlock from the inside, raise
or depress locking knob on window sill of
driver's and passenger's door.
When
you unlock the
driver's
and pas senger's door
with
the key
from
the
out
side or
raise
the locking knobs
from
the inside,
wait
until
both
locking knobs are
raised
before
you open one of the doors.
When
the central locking system is ac tuated, both locking knobs on window sills
should
move simultaneously. If one knob
does
not move when locking doors, open
that
particular door and close it properly.
Sliding
door and rear lid can be locked and
unlocked
individually
with
the key; manual lock operation will override the power lock
system.
WARNING
• Locking doors
from
the inside can
help
prevent
inadvertent
door opening
during
an
accident
and
generally
while
the
vehicle
is in
motion.
Locked doors can also
prevent
unwanted
entry
from
the outside.
Locked doors can,
however,
also
delay
assistance to
vehicle
occupants and rescue
from
the
outside
in the
event
of
an
accident
or
other
emergency.
• Do not
leave
children
inside the
vehicle
without
supervision. If locking
knob
in
driver's
and passenger's door is depressed,
both
doors
will
be locked
automatically.
In an
emergency
it
would
be impossible to open the doors
from
outside
without
the key.
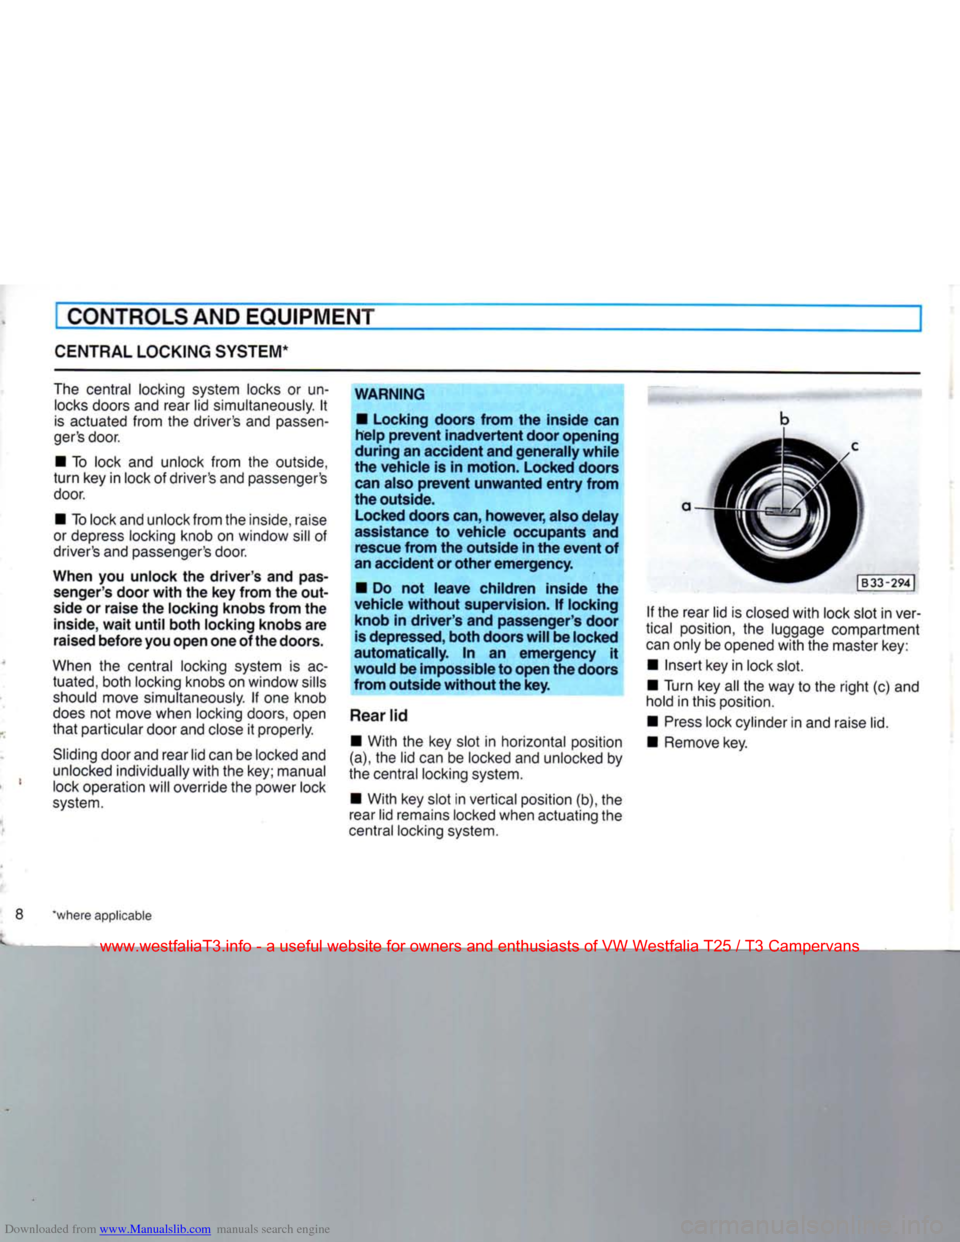
Rear
lid • With the key slot in horizontal position
(a), the lid can be locked and unlocked by
the central locking system.
• With key slot in vertical position (b), the
rear lid remains locked when actuating the
central locking system. If the rear lid is closed
with
lock slot in ver
tical position, the luggage compartment
can
only be opened
with
the master key:
• Insert key in lock slot.
• Turn key all the way to the
right
(c) and
hold in this position.
•
Press
lock cylinder in and raise lid.
• Remove key.
'where applicable
www.westfaliaT3.info - a useful website for owners and enthusiasts of VW Westfalia T25 / T3 Campervans
Page 12 of 165
![VOLKSWAGEN TRANSPORTER 1990 T4 / 4.G Owners Manual Downloaded from www.Manualslib.com manuals search engine
CONTROLS
AND
EQUIPMENT]
REAR LID
10
unlock the rear lid, use
the
key
A.
•
Insert
key
into vertical lock slot position
and
t VOLKSWAGEN TRANSPORTER 1990 T4 / 4.G Owners Manual Downloaded from www.Manualslib.com manuals search engine
CONTROLS
AND
EQUIPMENT]
REAR LID
10
unlock the rear lid, use
the
key
A.
•
Insert
key
into vertical lock slot position
and
t](/manual-img/18/7415/w960_7415-11.png)
Downloaded from www.Manualslib.com manuals search engine
CONTROLS
AND
EQUIPMENT]
REAR LID
10
unlock the rear lid, use
the
key
A.
•
Insert
key
into vertical lock slot position
and
turn
to
left.
•
Press lock cylinder
in
and lift lid.
The open hatchback will stay
in
position
at
any desired height.
•
To
close, swing
lid
down.
•
Lock with
key.
Be
careful when loading
or
removing
large objects. Sharp edged articles
may damage the defogger wires in
the
rear window.
For safety reasons keep
the
rear
lid
locked
at
all
times. WARNING
To help
prevent
poisonous exhaust
gas from being drawn into the vehicle,
always keep the rear lid closed while
driving.
Do
not
transport objects larger than
those fitting safely into
the
luggage
area.
www.westfaliaT3.info - a useful website for owners and enthusiasts of VW Westfalia T25 / T3 Campervans
Page 13 of 165
Downloaded from www.Manualslib.com manuals search engine
CONTROLS
AND EQUIPMENT
WINDOWS
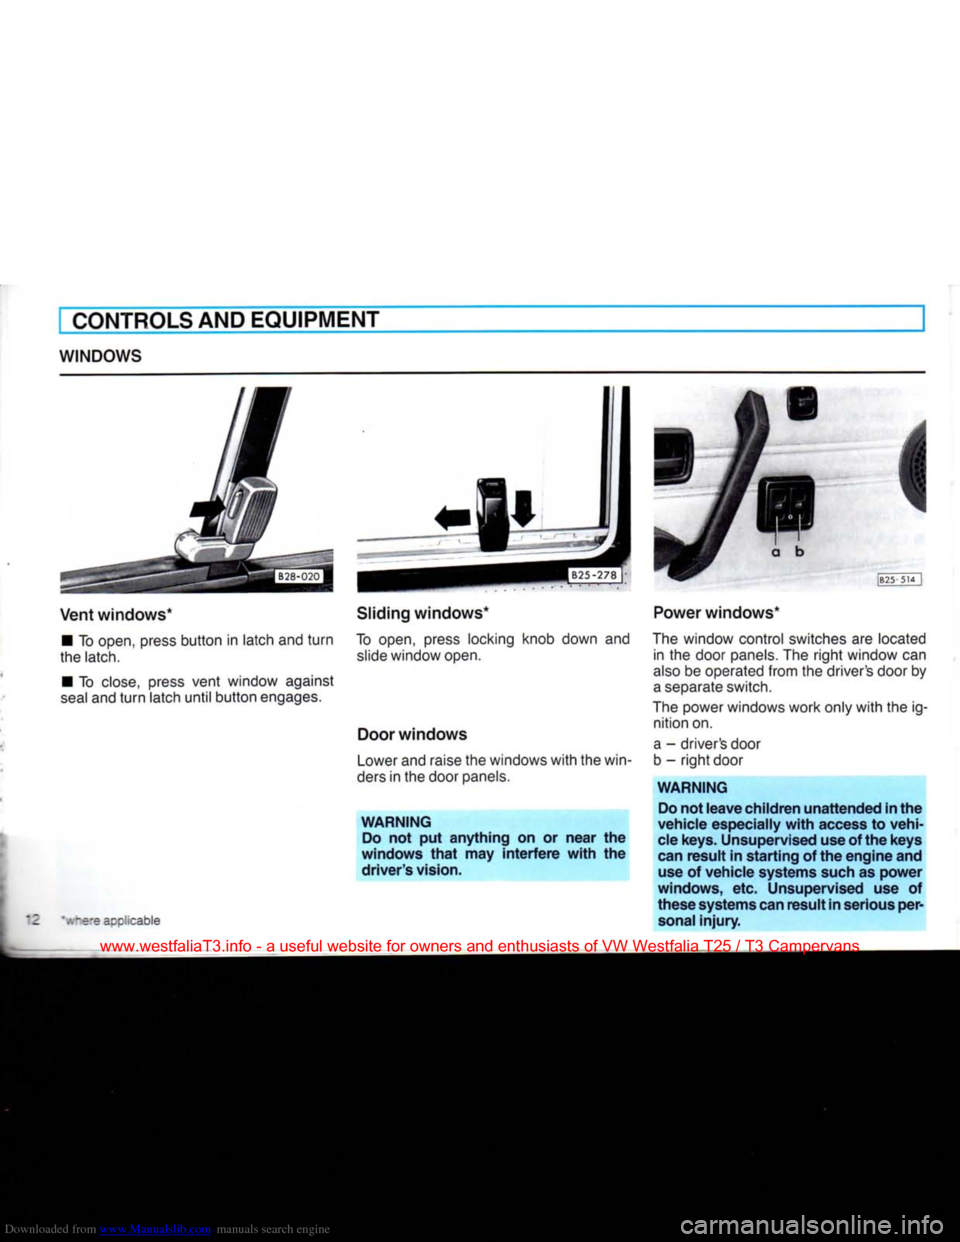
Vent windows*
•
To
open,
press
button in latch and turn
the
latch.
•
To
close,
press
vent window
against
seal
and turn latch until button
engages.
Sliding
windows*
To
open,
press
locking
knob down and
slide
window
open.
Door
windows
Lower
and
raise
the windows with the
win
ders
in the
door
panels.
WARNING
Do
not put anything on or near the
windows
that
may
interfere
with
the driver's vision.
~s's
aco'icable
Power windows*
The
window control
switches
are
located
in
the
door
panels.
The right window can
also
be
operated
from the driver's
door
by
a
separate
switch.
The
power
windows work only with the ig
nition
on.
a
- driver's
door
b
- right
door
WARNING
Do
not leave children unattended in the
vehicle especially
with
access
to vehi
cle
keys. Unsupervised use of the keys
can
result in starting of the engine and
use
of vehicle systems such as power
windows, etc. Unsupervised use of
these systems can result in serious per
sonal
injury.
www.westfaliaT3.info - a useful website for owners and enthusiasts of VW Westfalia T25 / T3 Campervans
Page 14 of 165
Downloaded from www.Manualslib.com manuals search engine
CONTROLS AND EQUIPMENT
MIRRORS
Adjust
the
outside
and
inside mirrors
be
fore driving and after adjusting your seat
to
proper driving position.
It is
important
for
safe driving that
you
have good vision
to
the rear.
WARNING
The right hand outside mirror may have a curved (convex) surface. Always remember that vehicles or other objects
seen in a convex mirror will look
smaller and appear farther away than
when seen in a flat mirror. Do not use
this mirror to estimate distances of
following cars when changing lanes.
Whenever possible, use the inside mir ror to determine the actual distance
and size of vehicles or objects seen in
the convex mirror.
Outside mirrors
The outside mirrors
are
hinged
and
fold flat against
the
vehicle when pressed from either direction.
Fold mirrors flat against
the
side windows
when taking your vehicle through
an
auto matic
car
wash
to
prevent possible dam
age.
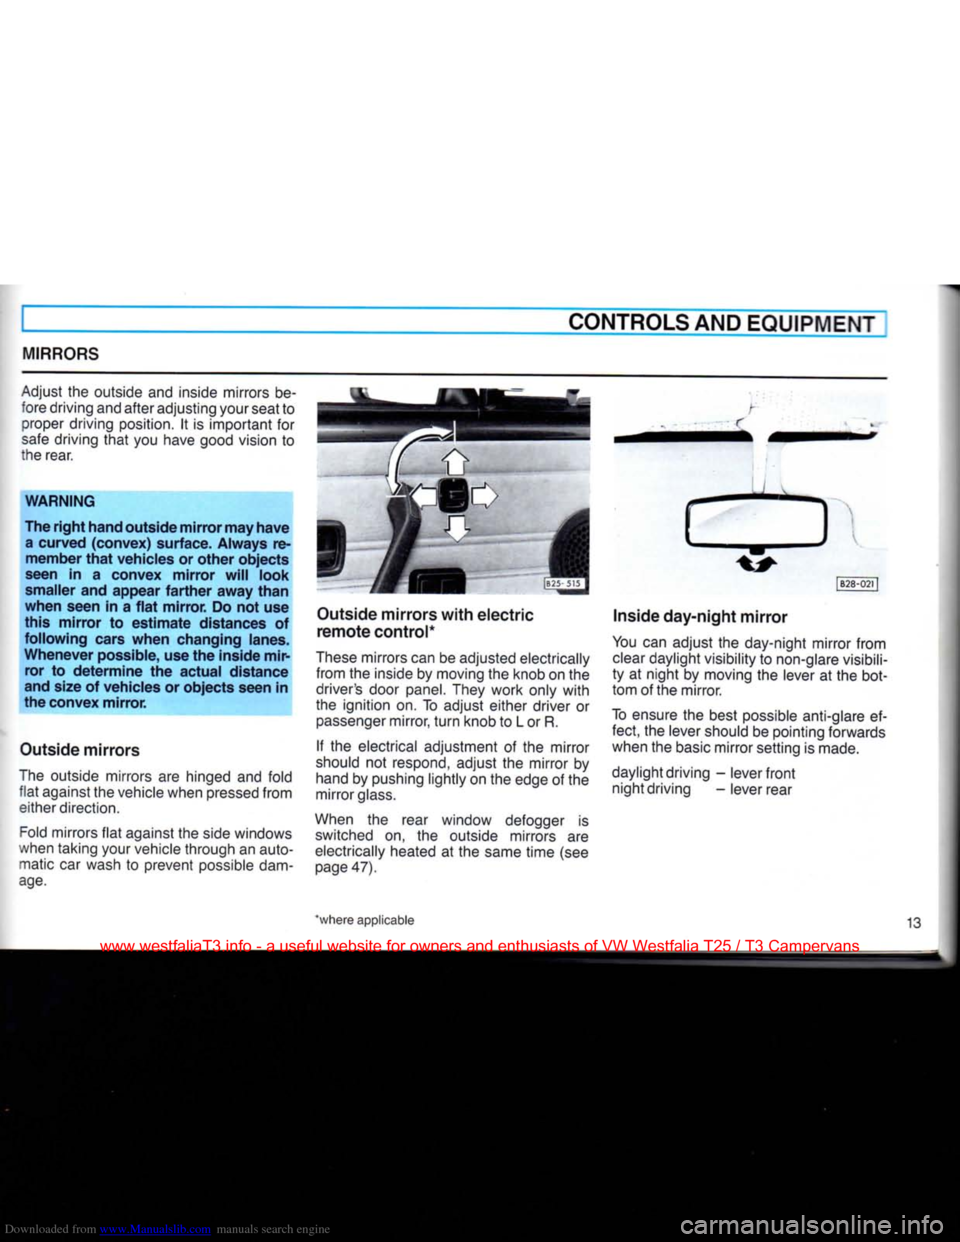
Outside mirrors with electric
remote control*
These mirrors can
be
adjusted electrically from
the
inside
by
moving
the
knob
on the
driver's door panel. They work only with
the ignition
on. To
adjust either driver
or
passenger mirror, turn knob
to L or R.
If
the
electrical adjustment
of the
mirror
should
not
respond, adjust
the
mirror
by
hand
by
pushing lightly
on the
edge
of the
mirror glass.
When
the
rear window defogger
is
switched
on, the
outside mirrors
are
electrically heated
at the
same time
(see
page 47). |B28-021
|
Inside day-night mirror
You
can
adjust
the
day-night mirror from clear daylight visibility
to
non-glare visibili
ty
at
night
by
moving
the
lever
at the
bot
tom
of
the mirror.
To ensure
the
best possible anti-glare
ef
fect,
the
lever should
be
pointing forwards
when
the
basic mirror setting
is
made.
daylight driving
-
lever front night driving
-
lever rear
*where applicable 13
www.westfaliaT3.info - a useful website for owners and enthusiasts of VW Westfalia T25 / T3 Campervans