1989 FORD FIESTA engine overheat
[x] Cancel search: engine overheatPage 18 of 296
point at the engine to the end of the tailpipe.
Ideally, this should be done on a hoist, where
unrestricted access is available; if a hoist is
not available, raise and support the vehicle on
axle stands.
2Check the pipes and connections for
evidence of leaks, severe corrosion, or
damage. Make sure that all brackets and
rubber mountings are in good condition, and
tight; if any of the mountings are to be
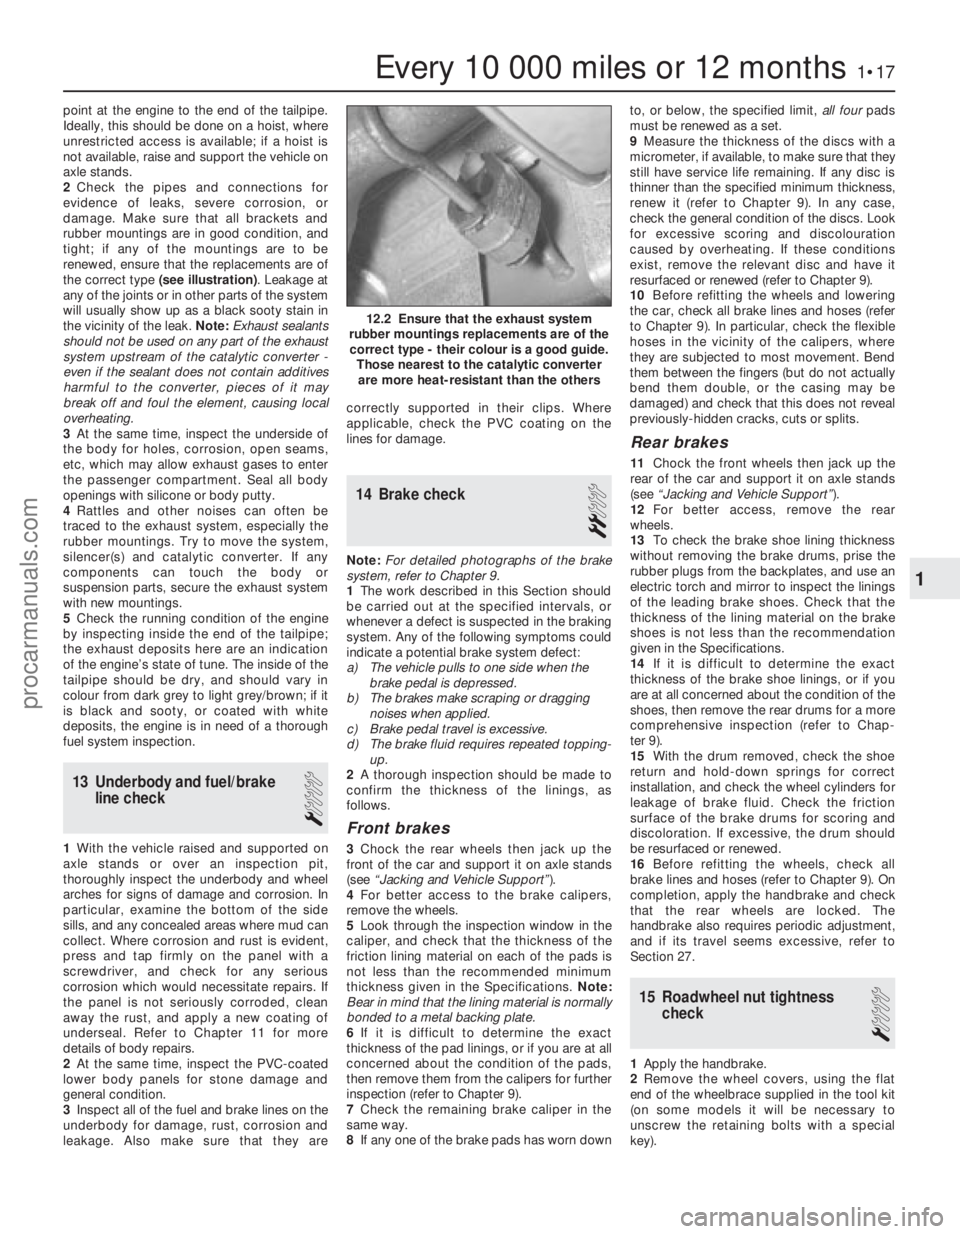
renewed, ensure that the replacements are of
the correct type (see illustration) . Leakage at
any of the joints or in other parts of the system
will usually show up as a black sooty stain in
the vicinity of the leak. Note: Exhaust sealants
should not be used on any part of the exhaust
system upstream of the catalytic converter -
even if the sealant does not contain additives
harmful to the converter, pieces of it may
break off and foul the element, causing local
overheating.
3 At the same time, inspect the underside of
the body for holes, corrosion, open seams,
etc, which may allow exhaust gases to enter
the passenger compartment. Seal all body
openings with silicone or body putty.
4 Rattles and other noises can often be
traced to the exhaust system, especially the
rubber mountings. Try to move the system,
silencer(s) and catalytic converter. If any
components can touch the body or
suspension parts, secure the exhaust system
with new mountings.
5 Check the running condition of the engine
by inspecting inside the end of the tailpipe;
the exhaust deposits here are an indication
of the engine’s state of tune. The inside of the
tailpipe should be dry, and should vary in
colour from dark grey to light grey/brown; if it
is black and sooty, or coated with white
deposits, the engine is in need of a thorough
fuel system inspection.
13 Underbody and fuel/brake line check
1
1With the vehicle raised and supported on
axle stands or over an inspection pit,
thoroughly inspect the underbody and wheel
arches for signs of damage and corrosion. In
particular, examine the bottom of the side
sills, and any concealed areas where mud can
collect. Where corrosion and rust is evident,
press and tap firmly on the panel with a
screwdriver, and check for any serious
corrosion which would necessitate repairs. If
the panel is not seriously corroded, clean
away the rust, and apply a new coating of
underseal. Refer to Chapter 11 for more
details of body repairs.
2 At the same time, inspect the PVC-coated
lower body panels for stone damage and
general condition.
3 Inspect all of the fuel and brake lines on the
underbody for damage, rust, corrosion and
leakage. Also make sure that they are correctly supported in their clips. Where
applicable, check the PVC coating on the
lines for damage.
14 Brake check
2
Note:
For detailed photographs of the brake
system, refer to Chapter 9.
1 The work described in this Section should
be carried out at the specified intervals, or
whenever a defect is suspected in the braking
system. Any of the following symptoms could
indicate a potential brake system defect:
a) The vehicle pulls to one side when the brake pedal is depressed.
b) The brakes make scraping or dragging
noises when applied.
c) Brake pedal travel is excessive.
d) The brake fluid requires repeated topping-
up.
2 A thorough inspection should be made to
confirm the thickness of the linings, as
follows.
Front brakes
3 Chock the rear wheels then jack up the
front of the car and support it on axle stands
(see “Jacking and Vehicle Support” ).
4 For better access to the brake calipers,
remove the wheels.
5 Look through the inspection window in the
caliper, and check that the thickness of the
friction lining material on each of the pads is
not less than the recommended minimum
thickness given in the Specifications. Note:
Bear in mind that the lining material is normally
bonded to a metal backing plate.
6 If it is difficult to determine the exact
thickness of the pad linings, or if you are at all
concerned about the condition of the pads,
then remove them from the calipers for further
inspection (refer to Chapter 9).
7 Check the remaining brake caliper in the
same way.
8 If any one of the brake pads has worn down to, or below, the specified limit,
all fourpads
must be renewed as a set.
9 Measure the thickness of the discs with a
micrometer, if available, to make sure that they
still have service life remaining. If any disc is
thinner than the specified minimum thickness,
renew it (refer to Chapter 9). In any case,
check the general condition of the discs. Look
for excessive scoring and discolouration
caused by overheating. If these conditions
exist, remove the relevant disc and have it
resurfaced or renewed (refer to Chapter 9).
10 Before refitting the wheels and lowering
the car, check all brake lines and hoses (refer
to Chapter 9). In particular, check the flexible
hoses in the vicinity of the calipers, where
they are subjected to most movement. Bend
them between the fingers (but do not actually
bend them double, or the casing may be
damaged) and check that this does not reveal
previously-hidden cracks, cuts or splits.
Rear brakes
11 Chock the front wheels then jack up the
rear of the car and support it on axle stands
(see “Jacking and Vehicle Support” ).
12 For better access, remove the rear
wheels.
13 To check the brake shoe lining thickness
without removing the brake drums, prise the
rubber plugs from the backplates, and use an
electric torch and mirror to inspect the linings
of the leading brake shoes. Check that the
thickness of the lining material on the brake
shoes is not less than the recommendation
given in the Specifications.
14 If it is difficult to determine the exact
thickness of the brake shoe linings, or if you
are at all concerned about the condition of the
shoes, then remove the rear drums for a more
comprehensive inspection (refer to Chap-
ter 9).
15 With the drum removed, check the shoe
return and hold-down springs for correct
installation, and check the wheel cylinders for
leakage of brake fluid. Check the friction
surface of the brake drums for scoring and
discoloration. If excessive, the drum should
be resurfaced or renewed.
16 Before refitting the wheels, check all
brake lines and hoses (refer to Chapter 9). On
completion, apply the handbrake and check
that the rear wheels are locked. The
handbrake also requires periodic adjustment,
and if its travel seems excessive, refer to
Section 27.
15 Roadwheel nut tightness check
1
1Apply the handbrake.
2 Remove the wheel covers, using the flat
end of the wheelbrace supplied in the tool kit
(on some models it will be necessary to
unscrew the retaining bolts with a special
key).
Every 10 000 miles or 12 months1•17
12.2 Ensure that the exhaust system
rubber mountings replacements are of the correct type - their colour is a good guide. Those nearest to the catalytic converterare more heat-resistant than the others
1
1595Ford Fiesta Remakeprocarmanuals.com
http://vnx.su
Page 22 of 296
23 Coolant renewal
1
Note: If the antifreeze used is Ford’s own, the
coolant need not be renewed for the life of the
vehicle. If the vehicle’s history is unknown, if
antifreeze of lesser quality is known to be in
the system, or simply if you prefer to follow
conventional servicing intervals, the coolant
should be changed periodically (typically,
every 3 years) as described here. Refer also to
“Antifreeze - notes on renewal” in this
Section.
Warning: Do not allow
antifreeze to come in contact
with your skin or painted
surfaces of the vehicle. Flush
contaminated areas immediately with
plenty of water. Don’t store new coolant,
or leave old coolant lying around, where
it’s accessible to children or pets - they’re
attracted by its sweet smell. Ingestion of
even a small amount of coolant can be
fatal! Wipe up garage-floor and drip-pan
spills immediately. Keep antifreeze
containers covered, and repair cooling
system leaks as soon as they’re noticed.
Warning: Never remove the expansion
tank filler cap when the engine is running,
or has just been switched off, as the
cooling system will be hot, and the
consequent escaping steam and scalding
coolant could cause serious injury.
Coolant draining
Warning: Wait until the engine is
cold before starting this
procedure.
1 To drain the system, first remove the
expansion tank filler cap (see “Weekly
Checks” ).
2 If additional working clearance is required,
raise the front of the vehicle and support it securely on axle stands (see
“Jacking and
Vehicle Support” ).
3 Place a large drain tray beneath the
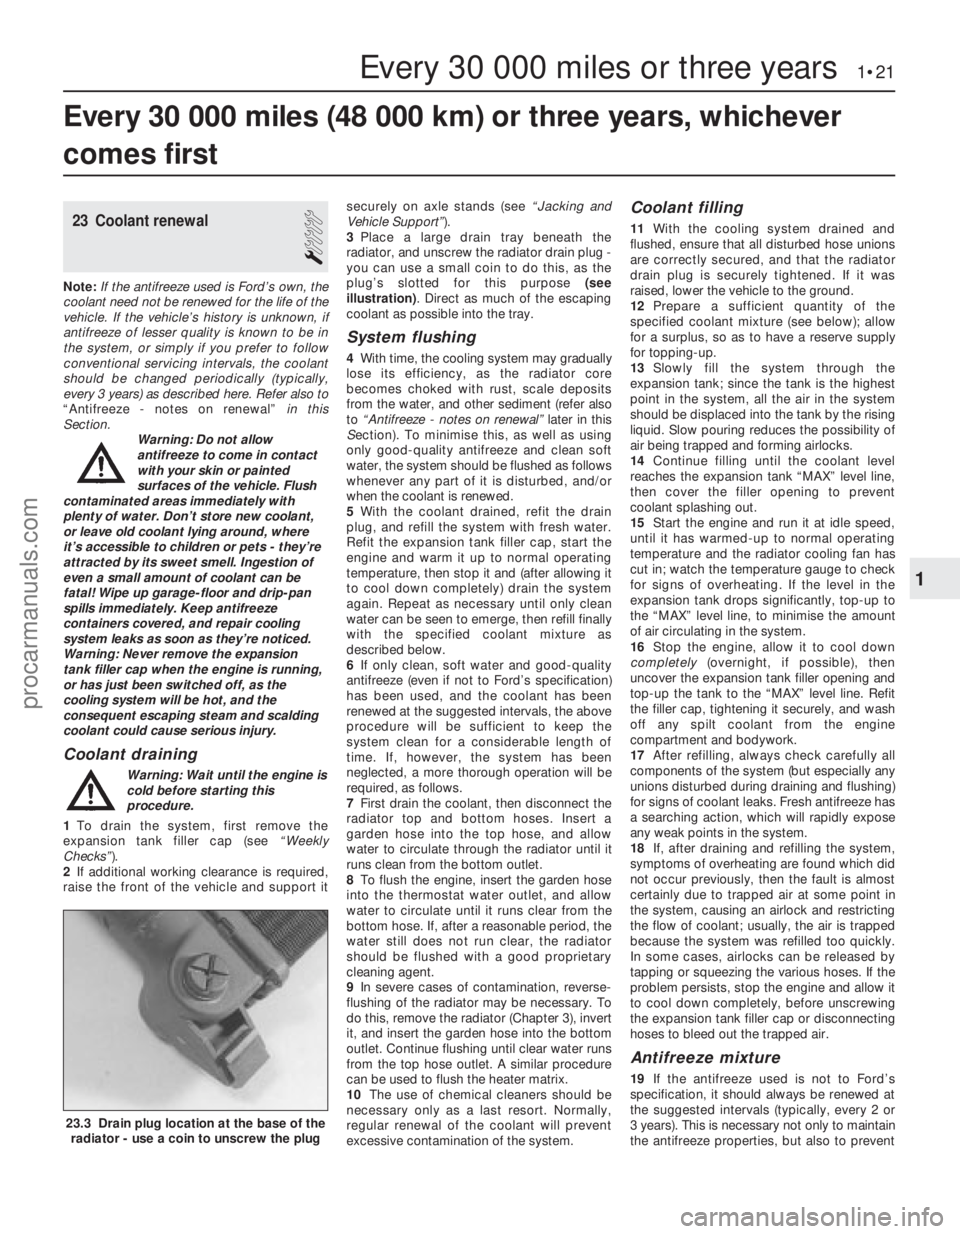
radiator, and unscrew the radiator drain plug -
you can use a small coin to do this, as the
plug’s slotted for this purpose (see
illustration) . Direct as much of the escaping
coolant as possible into the tray.
System flushing
4 With time, the cooling system may gradually
lose its efficiency, as the radiator core
becomes choked with rust, scale deposits
from the water, and other sediment (refer also
to “Antifreeze - notes on renewal” later in this
S ection). To minimise this, as well as using
only good-quality antifreeze and clean soft
water, the system should be flushed as follows
whenever any part of it is disturbed, and/or
when the coolant is renewed.
5 With the coolant drained, refit the drain
plug, and refill the system with fresh water.
Refit the expansion tank filler cap, start the
engine and warm it up to normal operating
temperature, then stop it and (after allowing it
to cool down completely) drain the system
again. Repeat as necessary until only clean
water can be seen to emerge, then refill finally
with the specified coolant mixture as
described below.
6 If only clean, soft water and good-quality
antifreeze (even if not to Ford’s specification)
has been used, and the coolant has been
renewed at the suggested intervals, the above
procedure will be sufficient to keep the
system clean for a considerable length of
time. If, however, the system has been
neglected, a more thorough operation will be
required, as follows.
7 First drain the coolant, then disconnect the
radiator top and bottom hoses. Insert a
garden hose into the top hose, and allow
water to circulate through the radiator until it
runs clean from the bottom outlet.
8 To flush the engine, insert the garden hose
into the thermostat water outlet, and allow
water to circulate until it runs clear from the
bottom hose. If, after a reasonable period, the
water still does not run clear, the radiator
should be flushed with a good proprietary
cleaning agent.
9 In severe cases of contamination, reverse-
flushing of the radiator may be necessary. To
do this, remove the radiator (Chapter 3), invert
it, and insert the garden hose into the bottom
outlet. Continue flushing until clear water runs
from the top hose outlet. A similar procedure
can be used to flush the heater matrix.
10 The use of chemical cleaners should be
necessary only as a last resort. Normally,
regular renewal of the coolant will prevent
excessive contamination of the system.
Coolant filling
11 With the cooling system drained and
flushed, ensure that all disturbed hose unions
are correctly secured, and that the radiator
drain plug is securely tightened. If it was
raised, lower the vehicle to the ground.
12 Prepare a sufficient quantity of the
specified coolant mixture (see below); allow
for a surplus, so as to have a reserve supply
for topping-up.
13 Slowly fill the system through the
expansion tank; since the tank is the highest
point in the system, all the air in the system
should be displaced into the tank by the rising
liquid. Slow pouring reduces the possibility of
air being trapped and forming airlocks.
14 Continue filling until the coolant level
reaches the expansion tank “MAX” level line,
then cover the filler opening to prevent
coolant splashing out.
15 Start the engine and run it at idle speed,
until it has warmed-up to normal operating
temperature and the radiator cooling fan has
cut in; watch the temperature gauge to check
for signs of overheating. If the level in the
expansion tank drops significantly, top-up to
the “MAX” level line, to minimise the amount
of air circulating in the system.
16 Stop the engine, allow it to cool down
completely (overnight, if possible), then
uncover the expansion tank filler opening and
top-up the tank to the “MAX” level line. Refit
the filler cap, tightening it securely, and wash
off any spilt coolant from the engine
compartment and bodywork.
17 After refilling, always check carefully all
components of the system (but especially any
unions disturbed during draining and flushing)
for signs of coolant leaks. Fresh antifreeze has
a searching action, which will rapidly expose
any weak points in the system.
18 If, after draining and refilling the system,
symptoms of overheating are found which did
not occur previously, then the fault is almost
certainly due to trapped air at some point in
the system, causing an airlock and restricting
the flow of coolant; usually, the air is trapped
because the system was refilled too quickly.
In some cases, airlocks can be released by
tapping or squeezing the various hoses. If the
problem persists, stop the engine and allow it
to cool down completely, before unscrewing
the expansion tank filler cap or disconnecting
hoses to bleed out the trapped air.
Antifreeze mixture
19 If the antifreeze used is not to Ford’s
specification, it should always be renewed at
the suggested intervals (typically, every 2 or
3 years). This is necessary not only to maintain
the antifreeze properties, but also to prevent
Every 30 000 miles (48 000 km) or three years, whichever
comes first
Every 30 000 miles or three years 1•21
23.3 Drain plug location at the base of the radiator - use a coin to unscrew the plug
1
1595Ford Fiesta Remakeprocarmanuals.com
http://vnx.su
Page 38 of 296
rear, and lower the transmission bearer from
the vehicle. Note plate fitment, as applicable,
for reassembly.
14Unscrew the single nut securing each
mounting and its retainer to the transmission
support bracket, and remove. The
transmission support brackets are fixed
externally to the transmission casing and do
not need to be removed for this operation.
All mountings
15 Refitting of all mountings is a reversal of
removal. Make sure that the original sequence
of assembly of washers and plates is
maintained.
16 Do not fully tighten any mounting bolts
until they are all located. As the mounting
bolts and nuts are tightened, check that the
mounting rubbers do not twist.
16 Flywheel - removal, inspection
and refitting
3
Refitting
1 Remove the transmission as described in
Chapter 7A, then remove the clutch as
described in Chapter 6. 2
Unscrew the six retaining bolts, and remove
the flywheel from the rear end flange of the
crankshaft - take care not to drop the
flywheel, as it is heavy. A tool similar to that
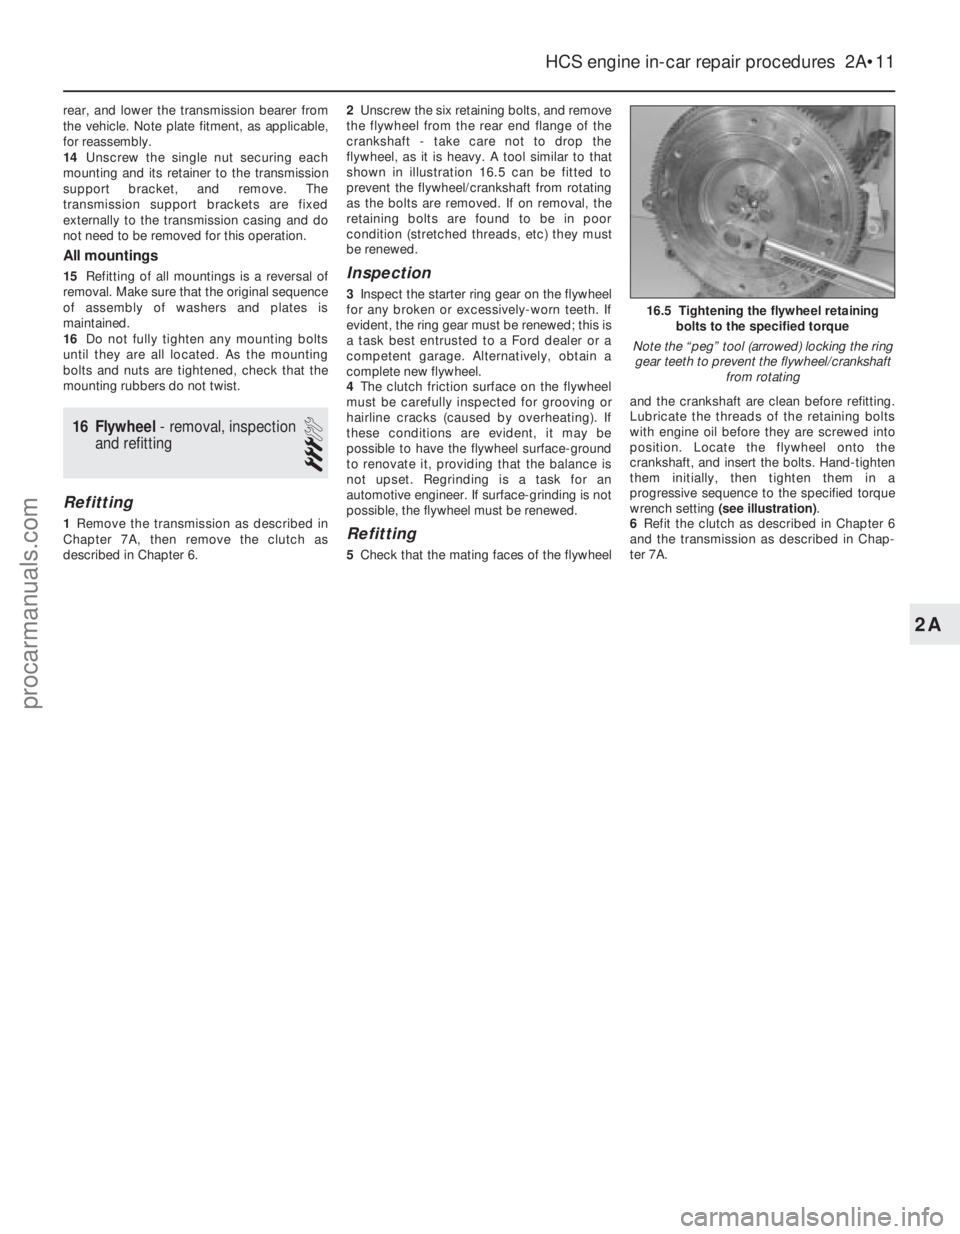
shown in illustration 16.5 can be fitted to
prevent the flywheel/crankshaft from rotating
as the bolts are removed. If on removal, the
retaining bolts are found to be in poor
condition (stretched threads, etc) they must
be renewed.
Inspection
3 Inspect the starter ring gear on the flywheel
for any broken or excessively-worn teeth. If
evident, the ring gear must be renewed; this is
a task best entrusted to a Ford dealer or a
competent garage. Alternatively, obtain a
complete new flywheel.
4 The clutch friction surface on the flywheel
must be carefully inspected for grooving or
hairline cracks (caused by overheating). If
these conditions are evident, it may be
possible to have the flywheel surface-ground
to renovate it, providing that the balance is
not upset. Regrinding is a task for an
automotive engineer. If surface-grinding is not
possible, the flywheel must be renewed.
Refitting
5 Check that the mating faces of the flywheel and the crankshaft are clean before refitting.
Lubricate the threads of the retaining bolts
with engine oil before they are screwed into
position. Locate the flywheel onto the
crankshaft, and insert the bolts. Hand-tighten
them initially, then tighten them in a
progressive sequence to the specified torque
wrench setting
(see illustration) .
6 Refit the clutch as described in Chapter 6
and the transmission as described in Chap-
ter 7A.
HCS engine in-car repair procedures 2A•11
16.5 Tightening the flywheel retaining bolts to the specified torque
Note the “peg” tool (arrowed) locking the ring gear teeth to prevent the flywheel/crankshaft from rotating
2A
1595Ford Fiesta Remakeprocarmanuals.com
http://vnx.su
Page 62 of 296
and evenly the pressure of the valve springs
on the caps.
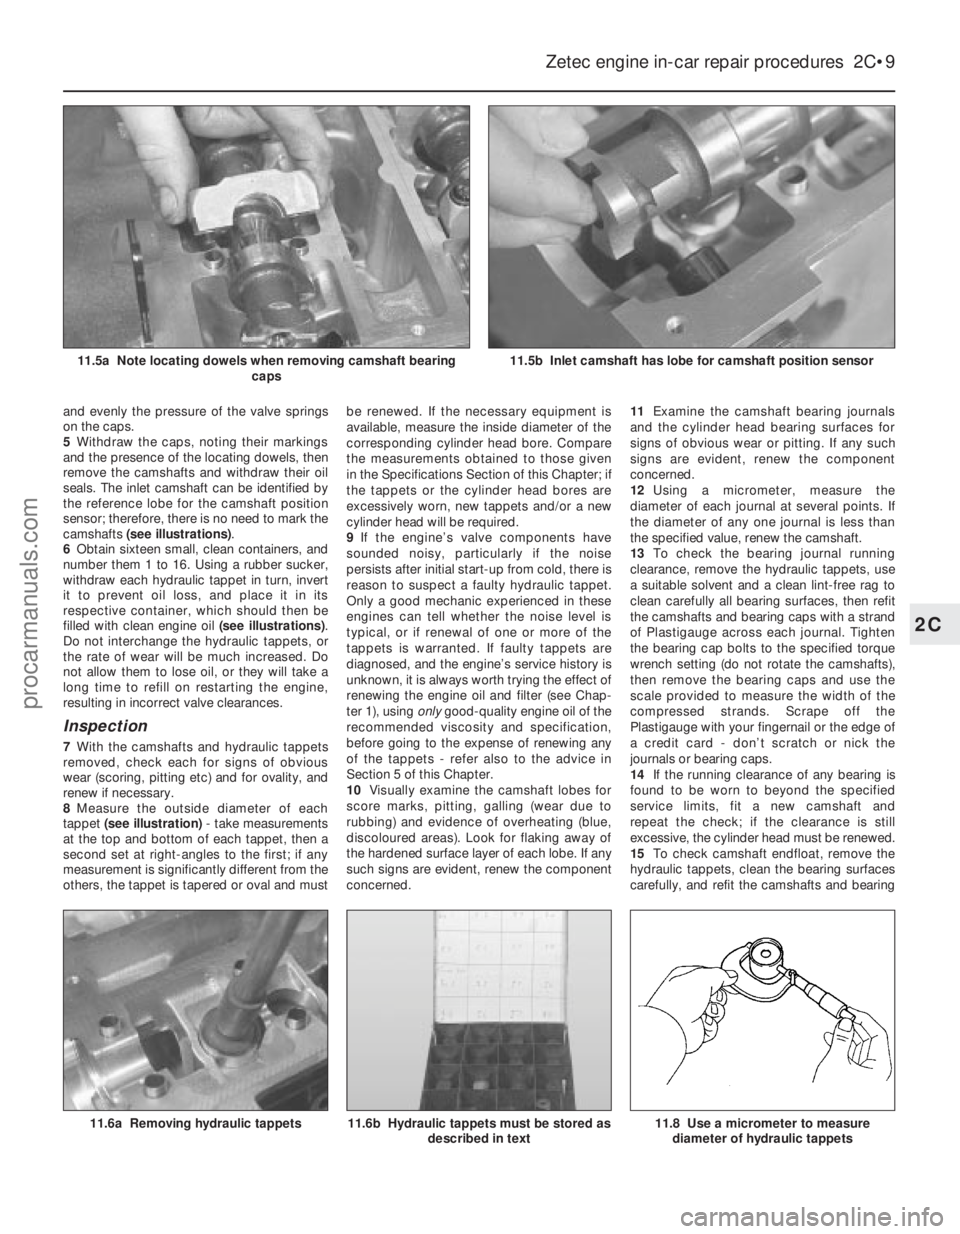
5Withdraw the caps, noting their markings
and the presence of the locating dowels, then
remove the camshafts and withdraw their oil
seals. The inlet camshaft can be identified by
the reference lobe for the camshaft position
sensor; therefore, there is no need to mark the
camshafts (see illustrations) .
6 Obtain sixteen small, clean containers, and
number them 1 to 16. Using a rubber sucker,
withdraw each hydraulic tappet in turn, invert
it to prevent oil loss, and place it in its
respective container, which should then be
filled with clean engine oil (see illustrations).
Do not interchange the hydraulic tappets, or
the rate of wear will be much increased. Do
not allow them to lose oil, or they will take a
long time to refill on restarting the engine,
resulting in incorrect valve clearances.
Inspection
7 With the camshafts and hydraulic tappets
removed, check each for signs of obvious
wear (scoring, pitting etc) and for ovality, and
renew if necessary.
8 Measure the outside diameter of each
tappet (see illustration) - take measurements
at the top and bottom of each tappet, then a
second set at right-angles to the first; if any
measurement is significantly different from the
others, the tappet is tapered or oval and must be renewed. If the necessary equipment is
available, measure the inside diameter of the
corresponding cylinder head bore. Compare
the measurements obtained to those given
in the Specifications Section of this Chapter; if
the tappets or the cylinder head bores are
excessively worn, new tappets and/or a new
cylinder head will be required.
9
If the engine’s valve components have
sounded noisy, particularly if the noise
persists after initial start-up from cold, there is
reason to suspect a faulty hydraulic tappet.
Only a good mechanic experienced in these
engines can tell whether the noise level is
typical, or if renewal of one or more of the
tappets is warranted. If faulty tappets are
diagnosed, and the engine’s service history is
unknown, it is always worth trying the effect of
renewing the engine oil and filter (see Chap-
ter 1), using onlygood-quality engine oil of the
recommended viscosity and specification,
before going to the expense of renewing any
of the tappets - refer also to the advice in
Section 5 of this Chapter.
10 Visually examine the camshaft lobes for
score marks, pitting, galling (wear due to
rubbing) and evidence of overheating (blue,
discoloured areas). Look for flaking away of
the hardened surface layer of each lobe. If any
such signs are evident, renew the component
concerned. 11
Examine the camshaft bearing journals
and the cylinder head bearing surfaces for
signs of obvious wear or pitting. If any such
signs are evident, renew the component
concerned.
12 Using a micrometer, measure the
diameter of each journal at several points. If
the diameter of any one journal is less than
the specified value, renew the camshaft.
13 To check the bearing journal running
clearance, remove the hydraulic tappets, use
a suitable solvent and a clean lint-free rag to
clean carefully all bearing surfaces, then refit
the camshafts and bearing caps with a strand
of Plastigauge across each journal. Tighten
the bearing cap bolts to the specified torque
wrench setting (do not rotate the camshafts),
then remove the bearing caps and use the
scale provided to measure the width of the
compressed strands. Scrape off the
Plastigauge with your fingernail or the edge of
a credit card - don’t scratch or nick the
journals or bearing caps.
14 If the running clearance of any bearing is
found to be worn to beyond the specified
service limits, fit a new camshaft and
repeat the check; if the clearance is still
excessive, the cylinder head must be renewed.
15 To check camshaft endfloat, remove the
hydraulic tappets, clean the bearing surfaces
carefully, and refit the camshafts and bearing
Zetec engine in-car repair procedures 2C•9
11.6a Removing hydraulic tappets
11.5b Inlet camshaft has lobe for camshaft position sensor11.5a Note locating dowels when removing camshaft bearing caps
11.8 Use a micrometer to measurediameter of hydraulic tappets11.6b Hydraulic tappets must be stored as described in text
2C
1595Ford Fiesta Remakeprocarmanuals.com
http://vnx.su
Page 83 of 296
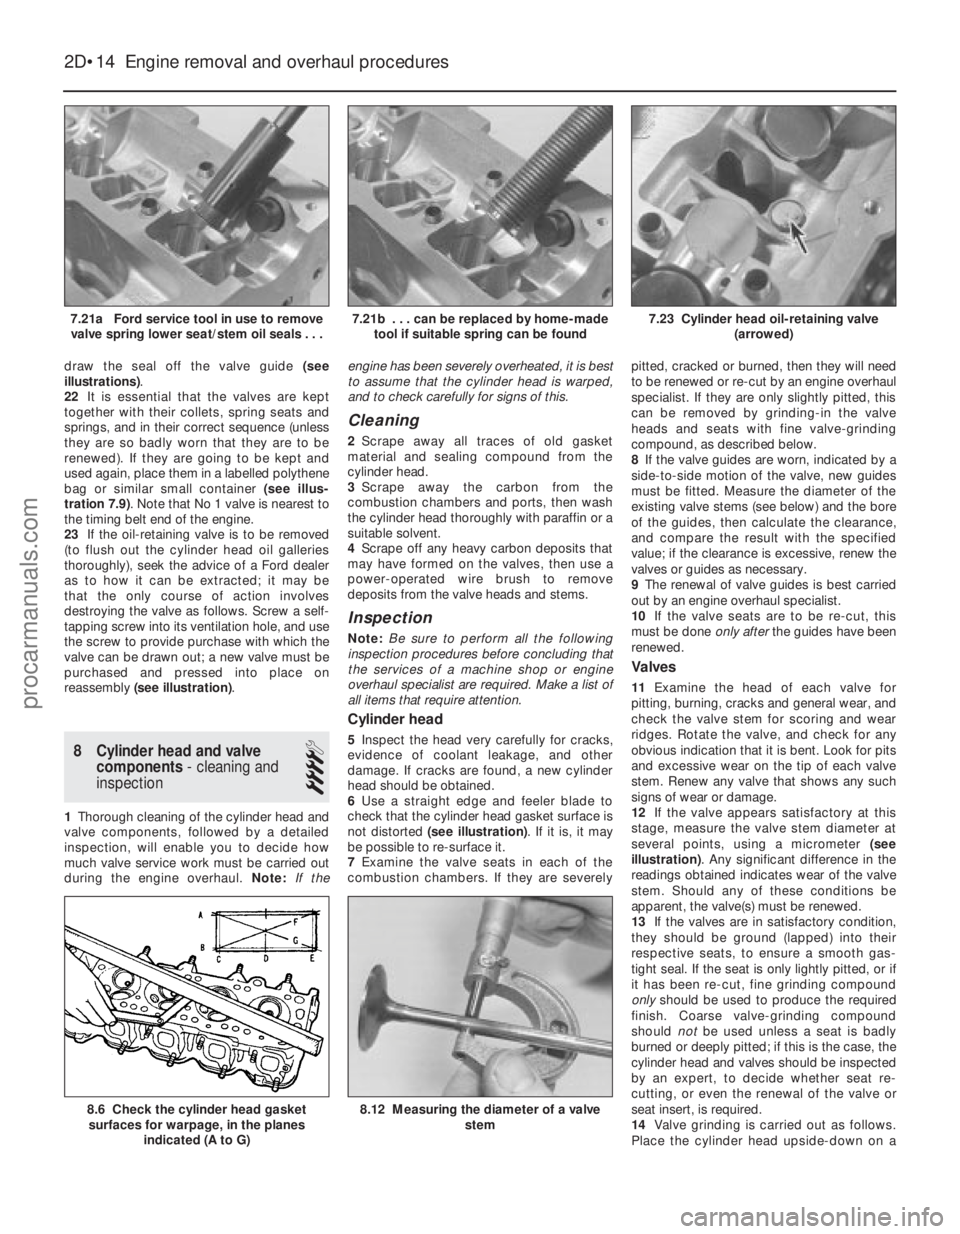
draw the seal off the valve guide (see
illustrations) .
22 It is essential that the valves are kept
together with their collets, spring seats and
springs, and in their correct sequence (unless
they are so badly worn that they are to be
renewed). If they are going to be kept and
used again, place them in a labelled polythene
bag or similar small container (see illus-
tration 7.9) . Note that No 1 valve is nearest to
the timing belt end of the engine.
23 If the oil-retaining valve is to be removed
(to flush out the cylinder head oil galleries
thoroughly), seek the advice of a Ford dealer
as to how it can be extracted; it may be
that the only course of action involves
destroying the valve as follows. Screw a self-
tapping screw into its ventilation hole, and use
the screw to provide purchase with which the
valve can be drawn out; a new valve must be
purchased and pressed into place on
reassembly (see illustration) .
8 Cylinder head and valve
components - cleaning and
inspection
4
1 Thorough cleaning of the cylinder head and
valve components, followed by a detailed
inspection, will enable you to decide how
much valve service work must be carried out
during the engine overhaul. Note:If the engine has been severely overheated, it is best
to assume that the cylinder head is warped,
and to check carefully for signs of this.
Cleaning
2
Scrape away all traces of old gasket
material and sealing compound from the
cylinder head.
3 Scrape away the carbon from the
combustion chambers and ports, then wash
the cylinder head thoroughly with paraffin or a
suitable solvent.
4 Scrape off any heavy carbon deposits that
may have formed on the valves, then use a
power-operated wire brush to remove
deposits from the valve heads and stems.
Inspection
Note: Be sure to perform all the following
inspection procedures before concluding that
the services of a machine shop or engine
overhaul specialist are required. Make a list of
all items that require attention.
Cylinder head
5 Inspect the head very carefully for cracks,
evidence of coolant leakage, and other
damage. If cracks are found, a new cylinder
head should be obtained.
6 Use a straight edge and feeler blade to
check that the cylinder head gasket surface is
not distorted (see illustration) . If it is, it may
be possible to re-surface it.
7 Examine the valve seats in each of the
combustion chambers. If they are severely pitted, cracked or burned, then they will need
to be renewed or re-cut by an engine overhaul
specialist. If they are only slightly pitted, this
can be removed by grinding-in the valve
heads and seats with fine valve-grinding
compound, as described below.
8
If the valve guides are worn, indicated by a
side-to-side motion of the valve, new guides
must be fitted. Measure the diameter of the
existing valve stems (see below) and the bore
of the guides, then calculate the clearance,
and compare the result with the specified
value; if the clearance is excessive, renew the
valves or guides as necessary.
9 The renewal of valve guides is best carried
out by an engine overhaul specialist.
10 If the valve seats are to be re-cut, this
must be done only afterthe guides have been
renewed.
Valves
11 Examine the head of each valve for
pitting, burning, cracks and general wear, and
check the valve stem for scoring and wear
ridges. Rotate the valve, and check for any
obvious indication that it is bent. Look for pits
and excessive wear on the tip of each valve
stem. Renew any valve that shows any such
signs of wear or damage.
12 If the valve appears satisfactory at this
stage, measure the valve stem diameter at
several points, using a micrometer (see
illustration) . Any significant difference in the
readings obtained indicates wear of the valve
stem. Should any of these conditions be
apparent, the valve(s) must be renewed.
13 If the valves are in satisfactory condition,
they should be ground (lapped) into their
respective seats, to ensure a smooth gas-
tight seal. If the seat is only lightly pitted, or if
it has been re-cut, fine grinding compound
only should be used to produce the required
finish. Coarse valve-grinding compound
should notbe used unless a seat is badly
burned or deeply pitted; if this is the case, the
cylinder head and valves should be inspected
by an expert, to decide whether seat re-
cutting, or even the renewal of the valve or
seat insert, is required.
14 Valve grinding is carried out as follows.
Place the cylinder head upside-down on a
2D•14 Engine removal and overhaul procedures
8.12 Measuring the diameter of a valve
stem8.6 Check the cylinder head gasketsurfaces for warpage, in the planes
indicated (A to G)
7.23 Cylinder head oil-retaining valve (arrowed)7.21b . . . can be replaced by home-madetool if suitable spring can be found7.21a Ford service tool in use to removevalve spring lower seat/stem oil seals . . .
1595Ford Fiesta Remakeprocarmanuals.com
http://vnx.su
Page 87 of 296
12After removal, reassemble the big-end
bearing caps and shells on their respective
connecting rods, and refit the bolts finger-
tight. Leaving the old shells in place until
reassembly will help prevent the bearing
recesses from being accidentally nicked or
gouged. New shells should be used on
reassembly.
Inspection
13 Before the inspection process can begin,
the piston/connecting rod assemblies must
be cleaned, and the original piston rings
removed from the pistons.
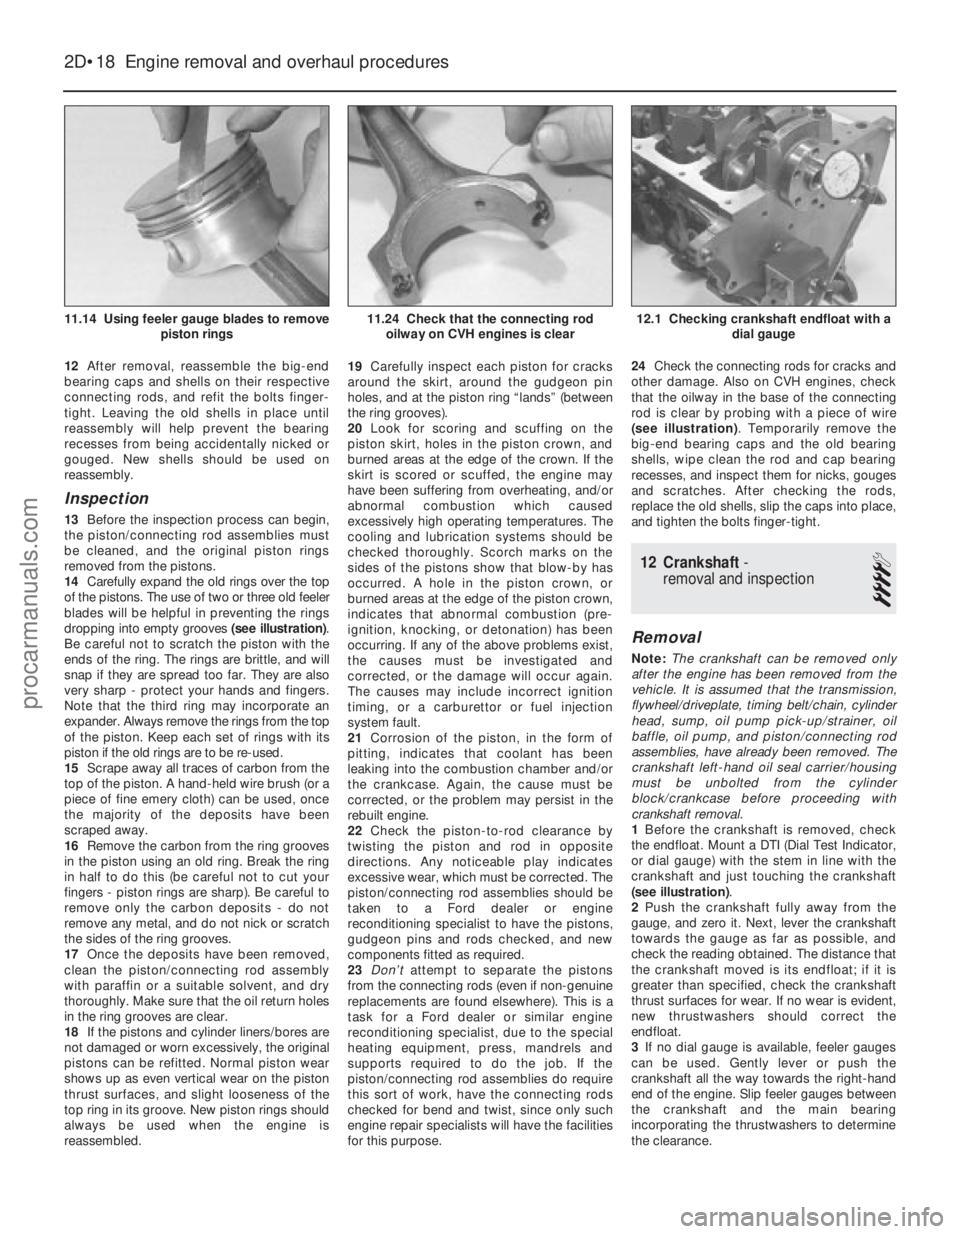
14 Carefully expand the old rings over the top
of the pistons. The use of two or three old feeler
blades will be helpful in preventing the rings
dropping into empty grooves (see illustration).
Be careful not to scratch the piston with the
ends of the ring. The rings are brittle, and will
snap if they are spread too far. They are also
very sharp - protect your hands and fingers.
Note that the third ring may incorporate an
expander. Always remove the rings from the top
of the piston. Keep each set of rings with its
piston if the old rings are to be re-used.
15 Scrape away all traces of carbon from the
top of the piston. A hand-held wire brush (or a
piece of fine emery cloth) can be used, once
the majority of the deposits have been
scraped away.
16 Remove the carbon from the ring grooves
in the piston using an old ring. Break the ring
in half to do this (be careful not to cut your
fingers - piston rings are sharp). Be careful to
remove only the carbon deposits - do not
remove any metal, and do not nick or scratch
the sides of the ring grooves.
17 Once the deposits have been removed,
clean the piston/connecting rod assembly
with paraffin or a suitable solvent, and dry
thoroughly. Make sure that the oil return holes
in the ring grooves are clear.
18 If the pistons and cylinder liners/bores are
not damaged or worn excessively, the original
pistons can be refitted. Normal piston wear
shows up as even vertical wear on the piston
thrust surfaces, and slight looseness of the
top ring in its groove. New piston rings should
always be used when the engine is
reassembled. 19
Carefully inspect each piston for cracks
around the skirt, around the gudgeon pin
holes, and at the piston ring “lands” (between
the ring grooves).
20 Look for scoring and scuffing on the
piston skirt, holes in the piston crown, and
burned areas at the edge of the crown. If the
skirt is scored or scuffed, the engine may
have been suffering from overheating, and/or
abnormal combustion which caused
excessively high operating temperatures. The
cooling and lubrication systems should be
checked thoroughly. Scorch marks on the
sides of the pistons show that blow-by has
occurred. A hole in the piston crown, or
burned areas at the edge of the piston crown,
indicates that abnormal combustion (pre-
ignition, knocking, or detonation) has been
occurring. If any of the above problems exist,
the causes must be investigated and
corrected, or the damage will occur again.
The causes may include incorrect ignition
timing, or a carburettor or fuel injection
system fault.
21 Corrosion of the piston, in the form of
pitting, indicates that coolant has been
leaking into the combustion chamber and/or
the crankcase. Again, the cause must be
corrected, or the problem may persist in the
rebuilt engine.
22 Check the piston-to-rod clearance by
twisting the piston and rod in opposite
directions. Any noticeable play indicates
excessive wear, which must be corrected. The
piston/connecting rod assemblies should be
taken to a Ford dealer or engine
reconditioning specialist to have the pistons,
gudgeon pins and rods checked, and new
components fitted as required.
23 Don’t attempt to separate the pistons
from the connecting rods (even if non-genuine
replacements are found elsewhere). This is a
task for a Ford dealer or similar engine
reconditioning specialist, due to the special
heating equipment, press, mandrels and
supports required to do the job. If the
piston/connecting rod assemblies do require
this sort of work, have the connecting rods
checked for bend and twist, since only such
engine repair specialists will have the facilities
for this purpose. 24
Check the connecting rods for cracks and
other damage. Also on CVH engines, check
that the oilway in the base of the connecting
rod is clear by probing with a piece of wire
(see illustration) . Temporarily remove the
big-end bearing caps and the old bearing
shells, wipe clean the rod and cap bearing
recesses, and inspect them for nicks, gouges
and scratches. After checking the rods,
replace the old shells, slip the caps into place,
and tighten the bolts finger-tight.
12 Crankshaft -
removal and inspection
4
Removal
Note: The crankshaft can be removed only
after the engine has been removed from the
vehicle. It is assumed that the transmission,
flywheel/driveplate, timing belt/chain, cylinder
head, sump, oil pump pick-up/strainer, oil
baffle, oil pump, and piston/connecting rod
assemblies, have already been removed. The
crankshaft left-hand oil seal carrier/housing
must be unbolted from the cylinder
block/crankcase before proceeding with
crankshaft removal.
1 Before the crankshaft is removed, check
the endfloat. Mount a DTI (Dial Test Indicator,
or dial gauge) with the stem in line with the
crankshaft and just touching the crankshaft
(see illustration) .
2 Push the crankshaft fully away from the
gauge, and zero it. Next, lever the crankshaft
towards the gauge as far as possible, and
check the reading obtained. The distance that
the crankshaft moved is its endfloat; if it is
greater than specified, check the crankshaft
thrust surfaces for wear. If no wear is evident,
new thrustwashers should correct the
endfloat.
3 If no dial gauge is available, feeler gauges
can be used. Gently lever or push the
crankshaft all the way towards the right-hand
end of the engine. Slip feeler gauges between
the crankshaft and the main bearing
incorporating the thrustwashers to determine
the clearance.
2D•18 Engine removal and overhaul procedures
12.1 Checking crankshaft endfloat with a dial gauge11.24 Check that the connecting rodoilway on CVH engines is clear11.14 Using feeler gauge blades to remove piston rings
1595Ford Fiesta Remakeprocarmanuals.com
http://vnx.su
Page 90 of 296
diameter from the bore measurement. If the
precision measuring tools shown are not
available, the condition of the pistons and
bores can be assessed, though not quite as
accurately, by using feeler gauges as follows.
Select a feeler gauge of thickness equal to the
specified piston-to-bore clearance, and slip it
into the cylinder along with the matching
piston. The piston must be positioned exactly
as it normally would be. The feeler gauge
must be between the piston and cylinder on
one of the thrust faces (at right-angles to the
gudgeon pin bore). The piston should slip
through the cylinder (with the feeler gauge in
place) with moderate pressure; if it falls
through or slides through easily, the clearance
is excessive, and a new piston will be
required. If the piston binds at the lower end
of the cylinder, and is loose toward the top,
the cylinder is tapered. If tight spots are
encountered as the piston/feeler gauge is
rotated in the cylinder, the cylinder is
out-of-round (oval).15 Repeat these procedures for the
remaining pistons and cylinder bores.
16 Compare the results with the
Specifications at the beginning of this
Chapter; if any measurement is beyond the
dimensions specified for that class (check the
piston crown marking to establish the class
of piston fitted), or if any bore measurement is
significantly different from the others
(indicating that the bore is tapered or oval),
the piston or bore is excessively-worn.
17 Worn pistons must be renewed; on some
engines, the pistons are available as Ford
replacement parts only as part of the
complete piston/connecting rod assembly.
See a Ford dealer or engine reconditioning
specialist for advice.
18 If any of the cylinder bores are badly
scuffed or scored, or if they are excessively-
worn, out-of-round or tapered, the usual
course of action would be to have the cylinder
block/crankcase rebored, and to fit new,
oversized, pistons on reassembly. See a Ford
dealer or engine reconditioning specialist for
advice.
19 If the bores are in reasonably good
condition and not excessively-worn, then it
may only be necessary to renew the piston
rings.
20 If this is the case, the bores should be
honed, to allow the new rings to bed in
correctly and provide the best possible seal.
Honing is an operation that will be carried out
for you by an engine reconditioning specialist.
21 After all the machining operations have
been carried out, the entire block/crankcase
must be washed very thoroughly with warm
soapy water to remove all traces of abrasive
grit produced during the machining
operations. When completely clean, rinse it
thoroughly and dry it, then lightly oil all
exposed machined surfaces to prevent
rusting.
22 The cylinder block/crankcase should now
be completely clean and dry, with all components checked for wear or damage,
and repaired or overhauled as necessary.
Refit as many ancillary components as
possible, for safekeeping. If reassembly is not
to start immediately, cover the block with a
large plastic bag to keep it clean.
14 Main and big-end bearings
-
inspection
4
1 Even though the main and big-end bearing
shells should be renewed during the engine
overhaul, the old shells should be retained for
close examination, as they may reveal
valuable information about the condition of
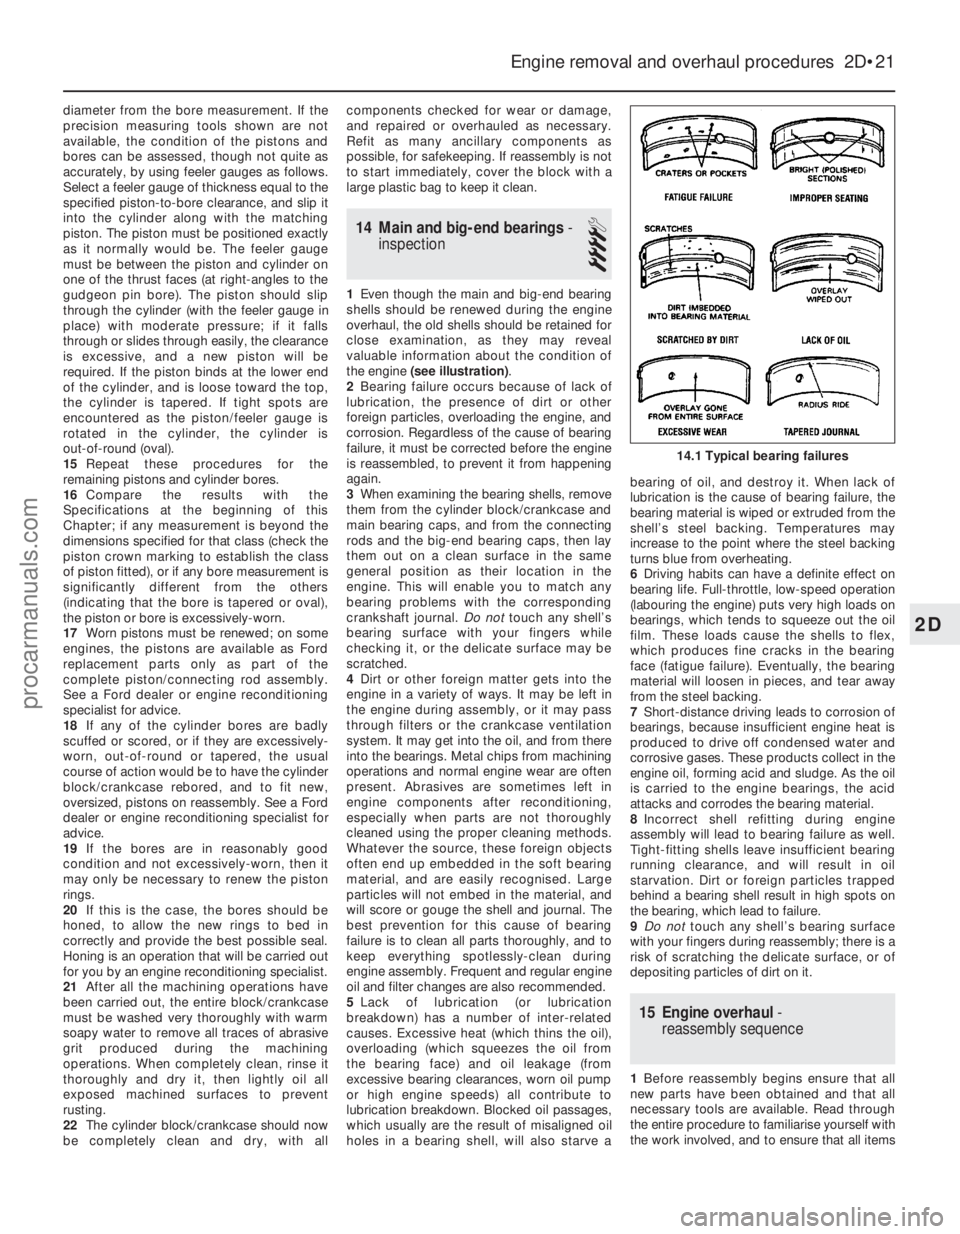
the engine (see illustration) .
2 Bearing failure occurs because of lack of
lubrication, the presence of dirt or other
foreign particles, overloading the engine, and
corrosion. Regardless of the cause of bearing
failure, it must be corrected before the engine
is reassembled, to prevent it from happening
again.
3 When examining the bearing shells, remove
them from the cylinder block/crankcase and
main bearing caps, and from the connecting
rods and the big-end bearing caps, then lay
them out on a clean surface in the same
general position as their location in the
engine. This will enable you to match any
bearing problems with the corresponding
crankshaft journal. Do nottouch any shell’s
bearing surface with your fingers while
checking it, or the delicate surface may be
scratched.
4 Dirt or other foreign matter gets into the
engine in a variety of ways. It may be left in
the engine during assembly, or it may pass
through filters or the crankcase ventilation
system. It may get into the oil, and from there
into the bearings. Metal chips from machining
operations and normal engine wear are often
present. Abrasives are sometimes left in
engine components after reconditioning,
especially when parts are not thoroughly
cleaned using the proper cleaning methods.
Whatever the source, these foreign objects
often end up embedded in the soft bearing
material, and are easily recognised. Large
particles will not embed in the material, and
will score or gouge the shell and journal. The
best prevention for this cause of bearing
failure is to clean all parts thoroughly, and to
keep everything spotlessly-clean during
engine assembly. Frequent and regular engine
oil and filter changes are also recommended.
5 Lack of lubrication (or lubrication
breakdown) has a number of inter-related
causes. Excessive heat (which thins the oil),
overloading (which squeezes the oil from
the bearing face) and oil leakage (from
excessive bearing clearances, worn oil pump
or high engine speeds) all contribute to
lubrication breakdown. Blocked oil passages,
which usually are the result of misaligned oil
holes in a bearing shell, will also starve a bearing of oil, and destroy it. When lack of
lubrication is the cause of bearing failure, the
bearing material is wiped or extruded from the
shell’s steel backing. Temperatures may
increase to the point where the steel backing
turns blue from overheating.
6
Driving habits can have a definite effect on
bearing life. Full-throttle, low-speed operation
(labouring the engine) puts very high loads on
bearings, which tends to squeeze out the oil
film. These loads cause the shells to flex,
which produces fine cracks in the bearing
face (fatigue failure). Eventually, the bearing
material will loosen in pieces, and tear away
from the steel backing.
7 Short-distance driving leads to corrosion of
bearings, because insufficient engine heat is
produced to drive off condensed water and
corrosive gases. These products collect in the
engine oil, forming acid and sludge. As the oil
is carried to the engine bearings, the acid
attacks and corrodes the bearing material.
8 Incorrect shell refitting during engine
assembly will lead to bearing failure as well.
Tight-fitting shells leave insufficient bearing
running clearance, and will result in oil
starvation. Dirt or foreign particles trapped
behind a bearing shell result in high spots on
the bearing, which lead to failure.
9 Do not touch any shell’s bearing surface
with your fingers during reassembly; there is a
risk of scratching the delicate surface, or of
depositing particles of dirt on it.
15 Engine overhaul -
reassembly sequence
1 Before reassembly begins ensure that all
new parts have been obtained and that all
necessary tools are available. Read through
the entire procedure to familiarise yourself with
the work involved, and to ensure that all items
Engine removal and overhaul procedures 2D•21
14.1 Typical bearing failures
2D
1595Ford Fiesta Remakeprocarmanuals.com
http://vnx.su
Page 100 of 296
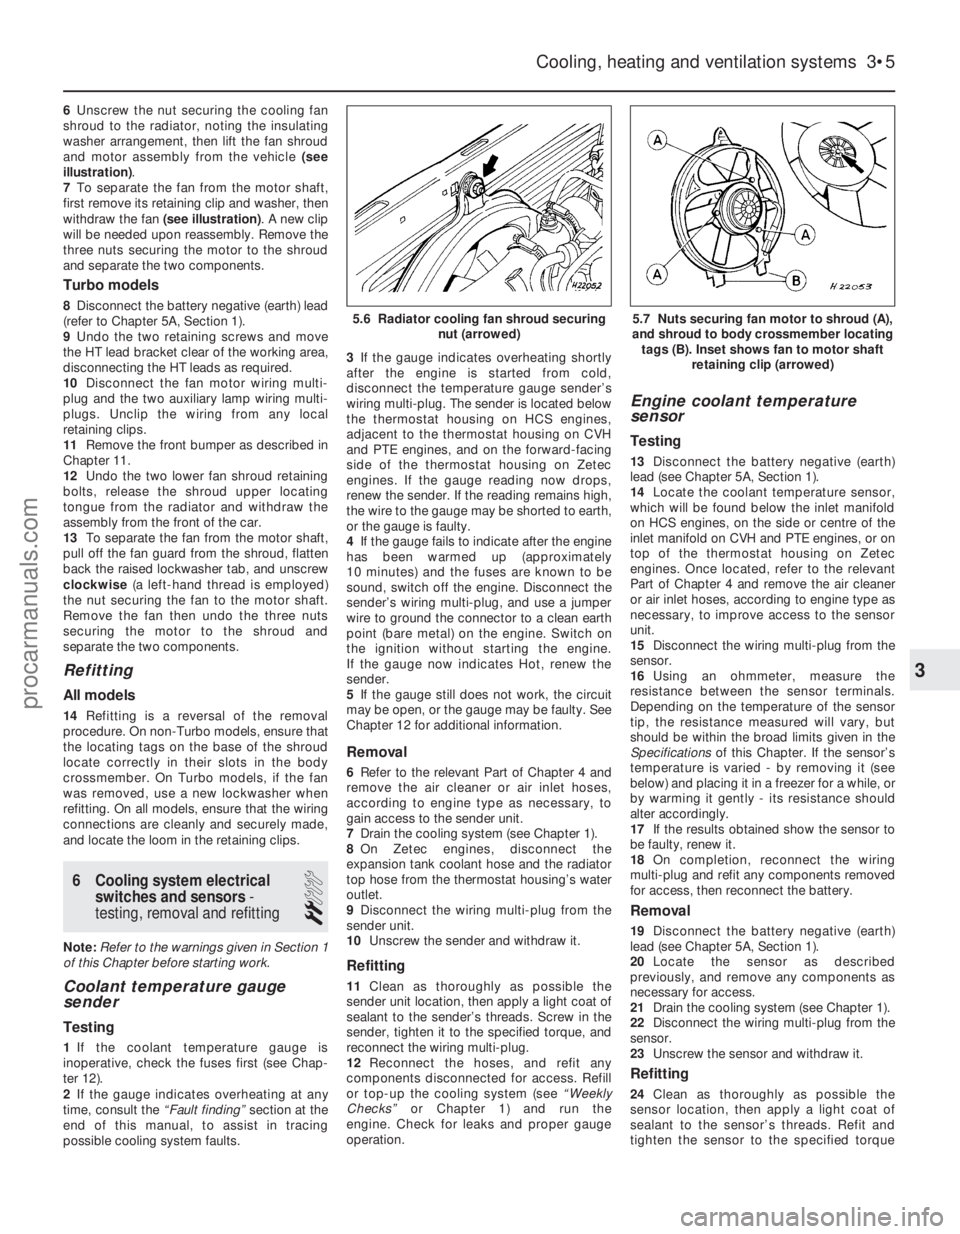
6Unscrew the nut securing the cooling fan
shroud to the radiator, noting the insulating
washer arrangement, then lift the fan shroud
and motor assembly from the vehicle (see
illustration) .
7 To separate the fan from the motor shaft,
first remove its retaining clip and washer, then
withdraw the fan (see illustration) . A new clip
will be needed upon reassembly. Remove the
three nuts securing the motor to the shroud
and separate the two components.
Turbo models
8 Disconnect the battery negative (earth) lead
(refer to Chapter 5A, Section 1).
9 Undo the two retaining screws and move
the HT lead bracket clear of the working area,
disconnecting the HT leads as required.
10 Disconnect the fan motor wiring multi-
plug and the two auxiliary lamp wiring multi-
plugs. Unclip the wiring from any local
retaining clips.
11 Remove the front bumper as described in
Chapter 11.
12 Undo the two lower fan shroud retaining
bolts, release the shroud upper locating
tongue from the radiator and withdraw the
assembly from the front of the car.
13 To separate the fan from the motor shaft,
pull off the fan guard from the shroud, flatten
back the raised lockwasher tab, and unscrew
clockwise (a left-hand thread is employed)
the nut securing the fan to the motor shaft.
Remove the fan then undo the three nuts
securing the motor to the shroud and
separate the two components.
Refitting
All models
14 Refitting is a reversal of the removal
procedure. On non-Turbo models, ensure that
the locating tags on the base of the shroud
locate correctly in their slots in the body
crossmember. On Turbo models, if the fan
was removed, use a new lockwasher when
refitting. On all models, ensure that the wiring
connections are cleanly and securely made,
and locate the loom in the retaining clips.
6 Cooling system electrical switches and sensors -
testing, removal and refitting
2
Note: Refer to the warnings given in Section 1
of this Chapter before starting work.
Coolant temperature gauge
sender
Testing
1 If the coolant temperature gauge is
inoperative, check the fuses first (see Chap-
ter 12).
2 If the gauge indicates overheating at any
time, consult the “Fault finding” section at the
end of this manual, to assist in tracing
possible cooling system faults. 3
If the gauge indicates overheating shortly
after the engine is started from cold,
disconnect the temperature gauge sender’s
wiring multi-plug. The sender is located below
the thermostat housing on HCS engines,
adjacent to the thermostat housing on CVH
and PTE engines, and on the forward-facing
side of the thermostat housing on Zetec
engines. If the gauge reading now drops,
renew the sender. If the reading remains high,
the wire to the gauge may be shorted to earth,
or the gauge is faulty.
4 If the gauge fails to indicate after the engine
has been warmed up (approximately
10 minutes) and the fuses are known to be
sound, switch off the engine. Disconnect the
sender’s wiring multi-plug, and use a jumper
wire to ground the connector to a clean earth
point (bare metal) on the engine. Switch on
the ignition without starting the engine.
If the gauge now indicates Hot, renew the
sender.
5 If the gauge still does not work, the circuit
may be open, or the gauge may be faulty. See
Chapter 12 for additional information.
Removal
6 Refer to the relevant Part of Chapter 4 and
remove the air cleaner or air inlet hoses,
according to engine type as necessary, to
gain access to the sender unit.
7 Drain the cooling system (see Chapter 1).
8 On Zetec engines, disconnect the
expansion tank coolant hose and the radiator
top hose from the thermostat housing’s water
outlet.
9 Disconnect the wiring multi-plug from the
sender unit.
10 Unscrew the sender and withdraw it.
Refitting
11Clean as thoroughly as possible the
sender unit location, then apply a light coat of
sealant to the sender’s threads. Screw in the
sender, tighten it to the specified torque, and
reconnect the wiring multi-plug.
12 Reconnect the hoses, and refit any
components disconnected for access. Refill
or top-up the cooling system (see “Weekly
Checks” or Chapter 1) and run the
engine. Check for leaks and proper gauge
operation.
Engine coolant temperature
sensor
Testing
13 Disconnect the battery negative (earth)
lead (see Chapter 5A, Section 1).
14 Locate the coolant temperature sensor,
which will be found below the inlet manifold
on HCS engines, on the side or centre of the
inlet manifold on CVH and PTE engines, or on
top of the thermostat housing on Zetec
engines. Once located, refer to the relevant
Part of Chapter 4 and remove the air cleaner
or air inlet hoses, according to engine type as
necessary, to improve access to the sensor
unit.
15 Disconnect the wiring multi-plug from the
sensor.
16 Using an ohmmeter, measure the
resistance between the sensor terminals.
Depending on the temperature of the sensor
tip, the resistance measured will vary, but
should be within the broad limits given in the
Specifications of this Chapter. If the sensor’s
temperature is varied - by removing it (see
below) and placing it in a freezer for a while, or
by warming it gently - its resistance should
alter accordingly.
17 If the results obtained show the sensor to
be faulty, renew it.
18 On completion, reconnect the wiring
multi-plug and refit any components removed
for access, then reconnect the battery.
Removal
19 Disconnect the battery negative (earth)
lead (see Chapter 5A, Section 1).
20 Locate the sensor as described
previously, and remove any components as
necessary for access.
21 Drain the cooling system (see Chapter 1).
22 Disconnect the wiring multi-plug from the
sensor.
23 Unscrew the sensor and withdraw it.
Refitting
24Clean as thoroughly as possible the
sensor location, then apply a light coat of
sealant to the sensor’s threads. Refit and
tighten the sensor to the specified torque
Cooling, heating and ventilation systems 3•5
5.7 Nuts securing fan motor to shroud (A),
and shroud to body crossmember locating tags (B). Inset shows fan to motor shaft retaining clip (arrowed)5.6 Radiator cooling fan shroud securing nut (arrowed)
3
1595Ford Fiesta Remakeprocarmanuals.com
http://vnx.su