1988 PONTIAC FIERO automatic transmission fluid
[x] Cancel search: automatic transmission fluidPage 1131 of 1825
7A1-12 AUTOMATIC TRANSMISSION ON-VEHICLE SERVICE
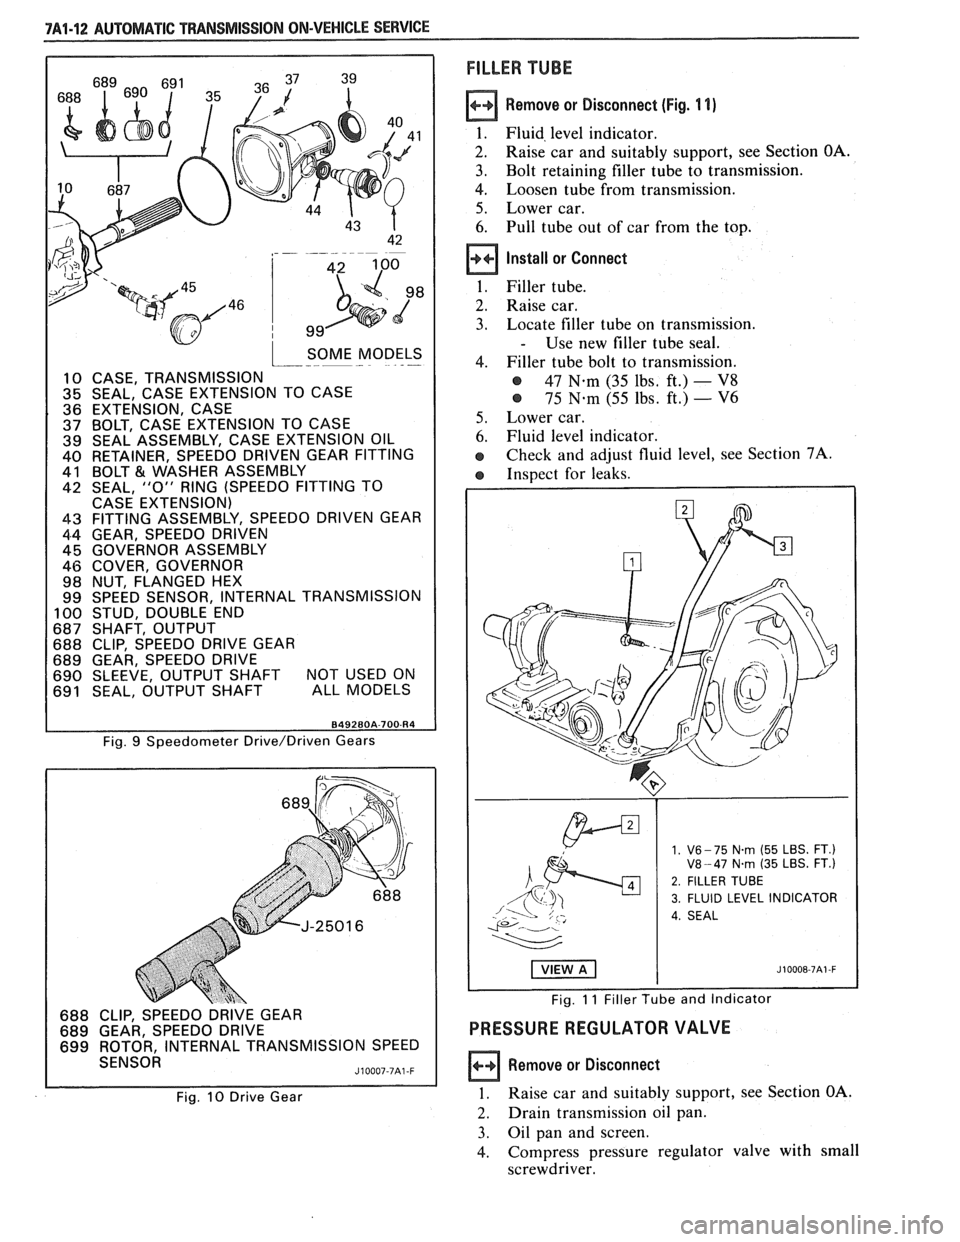
SOME MODELS I--- - .-
10 CASE, TRANSMISSION 35 SEAL, CASE EXTENSION TO CASE
36 EXTENSION, CASE 37 BOLT, CASE EXTENSION TO CASE 39 SEAL ASSEMBLY, CASE EXTENSION OIL 40 RETAINER, SPEEDO DRIVEN GEAR FITTING
41 BOLT €31 WASHER ASSEMBLY 42 SEAL, "0" RING (SPEEDO FITTING TO
CASE EXTENSION)
43 FITTING ASSEMBLY, SPEEDO DRIVEN GEAR
44 GEAR, SPEEDO DRIVEN 45 GOVERNOR ASSEMBLY
46 COVER, GOVERNOR
98 NUT, FLANGED HEX
99 SPEED SENSOR, INTERNAL TRANSMISSION
100 STUD, DOUBLE END 687 SHAFT, OUTPUT 688 CLIP, SPEEDO DRIVE GEAR
689 GEAR, SPEEDO DRIVE
690 SLEEVE, OUTPUT SHAFT NOT USED ON 691 SEAL, OUTPUT SHAFT ALL MODELS
FILLER TUBE
Remove or Disconnect (Fig. 1 1)
1. Fluid, level indicator.
2. Raise car and suitably support, see Section OA.
3. Bolt retaining filler tube to transmission.
4. Loosen tube from transmission.
5. Lower car.
6. Pull tube out of car from the top.
Install or Connect
1. Filler tube.
2. Raise car.
3. Locate filler tube on transmission.
- Use new filler tube seal.
4. Filler tube bolt to transmission.
@ 47 N.m (35 lbs, ft.) - V8
@ 75 N-m (55 lbs. ft.) - V6
5. Lower car.
6. Fluid level indicator.
e Check and adjust fluid level, see Section 7A.
e Inspect for leaks.
Fig. 9 Speedometer Drive/Driven Gears
688 CLIP, SPEEDO DRIVE GEAR
689 GEAR, SPEEDO DRIVE
699 ROTOR, INTERNAL TRANSMISSION SPEED
SENSOR
J10007-7A1 -F
Fig. 10 Drive Gear
1. V6- 75 N.rn (55 LBS. FT.) V8-47 N.rn (35 LBS. FT.)
2. FILLER TUBE
3. FLUID LEVEL INDICATOR
4. SEAL
Fig. 11 Filler Tube and Indicator
PRESSURE REGULATOR VALVE
Remove or Disconnect
1. Raise car and suitably support, see Section OA.
2. Drain transmission oil pan.
3. Oil pan and screen.
4. Compress
pressure regulator valve with small
screwdriver.
Page 1132 of 1825
AUTOMATIC TRANSMISSION ON-VEHICLE SERVICE 7A1-13
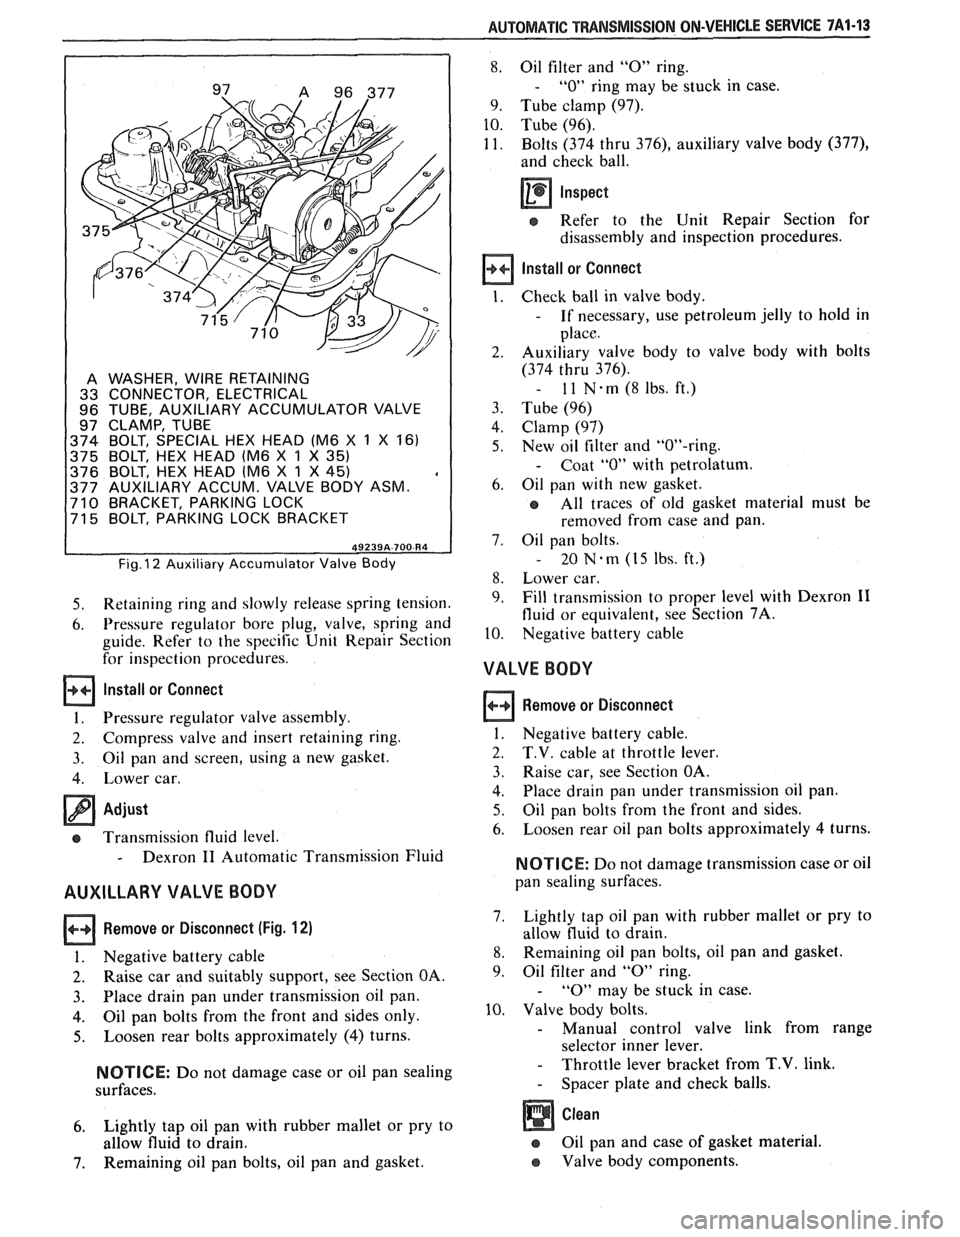
A WASHER, WIRE RETAINING
33 CONNECTOR, ELECTRICAL
96 TUBE, AUXILIARY ACCUMULATOR VALVE
97 CLAMP, TUBE
374 BOLT, SPECIAL HEX HEAD (M6
X 1 X 161
375 BOLT, HEX HEAD lM6
X 1 X 35)
376 BOLT, HEX HEAD lM6 X 1 X 45) , 377 AUXILIARY ACCUM. VALVE BODY ASM. 710 BRACKET, PARKING LOCK
71 5 BOLT, PARKING LOCK BRACKET
Fig. I2 Auxiliary Accumulator Valve Body
5. Retaining ring and slowly release spring tension.
6. Pressure regulator bore plug, valve, spring and
guide. Refer to the specific Unit Repair Section
for inspection procedures.
Install or Connect
1. Pressure regulator valve assembly.
2. Compress valve and insert retaining ring.
3. Oil pan
and screen, using a new gasket.
4. Lower car.
Adjust
cs Transmission fluid level.
- Dexron I1 Automatic Transmission Fluid
AUXILLARY VALVE BODY
Remove or Disconnect (Fig. 12)
I. Negative battery cable
2. Raise car and suitably support, see Section OA.
3. Place drain
pan under transmission oil pan.
4. Oil pan bolts from the front and sides only.
5. Loosen rear bolts approximately (4) turns.
NOTICE: Do not damage case or oil pan sealing
surfaces.
6. Lightly tap oil pan with rubber mallet or pry to
allow fluid to drain.
7. Remaining oil pan bolts, oil pan and gasket.
8. Oil filter and "0" ring.
- "0" ring may be stuck in case.
9. Tube clamp (97).
10. Tube (96).
11. Bolts (374 thru
376), auxiliary valve body (377),
and check ball.
Inspect
e Refer to the Unit Repair Section for
disassembly and inspection procedures.
Install or Connect
Check ball in valve body.
- If necessary, use petroleum jelly to hold in
place.
Auxiliary valve body to valve body with bolts
(374 thru 376).
- 11 N-rn(8lbs.ft.)
Tube (96)
Clamp (97)
New oil filter and "OW-ring.
- Coat "0" with petrolatum.
Oil pan with new gasket.
All traces of old gasket material must be
removed from case and pan.
Oil pan bolts.
- 20 Nem (15 Ibs. ft.)
Lower car.
Fill transmission to proper level with Dexron
I1
fluid or equivalent, see Section 7A.
Negative battery cable
VALVE BODY
Remove or Disconnect
1. Negative battery cable.
2. T.V. cable at throttle lever.
3. Raise car, see Section OA.
4. Place
drain pan under transmission oil pan.
5. Oil pan bolts from the front and sides.
6. Loosen
rear oil pan bolts approximately 4 turns.
NOTICE: Do not damage transmission case or oil
pan sealing surfaces.
7. Lightly
tap oil pan with rubber mallet or pry to
allow fluid to drain.
8. Remaining oil pan bolts, oil pan and gasket.
9. Oil
filter and
"0" ring.
- "0" may be stuck in case.
10. Valve body bolts.
- Manual control valve link from range
selector inner lever.
- Throttle lever bracket from T.V. link.
- Spacer plate and check balls.
Oil pan and case of gasket material.
e Valve body components.
Page 1133 of 1825
7A1-44 AUTOMATIC TRANSMISSION ON-VEHICLE SERVICE
Inspect
e Refer to the Unit Repair Section for
disassembly and inspection procedures.
Install or Connect
1. Valve body, spacer, check balls and bolts as
outlined in the Unit Repair Section.
2. New
"0" ring
seal and oil filter.
- Coat "0" ring seal with petrolatum.
3. New gasket, oil pan and bolts.
- 20 N.m (15 lbs. ft.)
4. Lower car.
5. Fill
transmission to proper level with Dexron
I1
fluid or equivalent, see Section 7A.
Adjust
e T.V. cable, see Figs. 5 thru 7.
REAR OIL SEAL
Remove or Disconnect
Tool Required:
J 21426 Seal Installer
1. Raise car and suitably support, see Section OA.
2. Propeller shaft, see Section 4A.
3. Pry out lip seal with a suitable tool.
Install or Connect
I. Coat outer casing of new lip oil seal with
non-hardening sealer and tap in place with
J
2 1426.
2. Propeller
shaft, see Section 4A.
3. Lower car.
Adjust
e Transmission fluid level.
- Dexron 11 Automatic Transmission Fluid
OIL COOLER LINES AND/OR FITTINGS
Figs. 13 and 14
If replacement of transmission cooler lines is
required, use only double wrapped and brazed steel
tubing meeting
GM specification 123M or equivalent.
Tubing should be double flared.
NOTICE: Allow sufficient clearance around
cooler lines to prevent damage or wear which may
cause fluid loss.
OIL COOLER FLUSHING
Tools Required:
J 35944 Cooler Flushing Tool
J 35944-20 Flushing Solution
Water Supply
Air Supply (with water and oil fil-
ter)
Oil Drain Container
5 Gallon Pail
1. Remove the fill cap on J 35944 and fill with .6
liters (20-21 ounces) of J 35944-20 flushing
solution.
@ Do not over fill
@ Follow manufacture's suggested proce-
dures for solution handling.
Replace cap on
J 35944 and pressurize it to 550-
700
kPa (80-100 psi).
Connect
J 35944 to the transaxle end of the oil
cooler pipe that feeds the BOTTOM fitting of
the oil cooler.
Connect the discharge hose to the TOP oil
cooler pipe and clip the discharge hose to the oil
drain container.
With the water valve on
J 35944 in the "off'
position, connect the water supply to the tool.
Turn the water valve off.
Flush the transaxle fluid by opening the water
valve to the "on" position for about 10 seconds.
Important
@ If water does not flow thru the cooler the
system is completely plugged. Do not
complete the flushing procedure. Replace
the cooler
and/or the cooler pipes as
required.
8. Close the water valve and clip the discharge
hose to the 5 gallon pail. Cover the pail with a
shop towel to prevent splash.
9. Turn the water valve to
the
"on" positon and
depress the trigger to mix flushing solution into
the water flow. Use the bail clip provided to
hold the trigger down.
10. Flush the
cooler with water and solution for 2
minutes. During this flush, attach the air supply
to the air valve located on the tool, for 3 to 5
seconds every 15-20 seconds. This will create a
surging action to ensure complete cleaning.
11. Release the trigger and turn the water valve off.
12. Disconnect both hoses from the oil cooler pipes.
13. Reconnect the hoses to the pipes opposite the
initial flush to preform a backflush.
14. Repeat steps 9 and 10
15. Release the trigger and allow water to rinse
for
one minute.
16. Turn the water valve off.
17. Attatch the air supply to the air valve and dry the
system out with air until no moisture is seen
leaving the discharge hose.
18. Connect the Cooler Feed Pipe to the transaxle.
19. Clip the discharge hose to the oil drain con-
tainer.
20. After filling the transaxle with
fluid,
start the
engine and run for 30 seconds. This will remove
any residual
moistrue from the oil cooler. A
minimum of 2 quarts of fluid should flow during
the 30 second period. If fluid flow is sufficient,
check the fluid flow by disconnecting the feed
Page 1136 of 1825
AUTOMATIC TFIANSMISSION ON-VEHICLE SERVICE 7A1-17
Fluid Capacity
@ Pi111 Kcmoval .................. 10 pinls (4.7 1,ilres)
@ Ovcrliaul ..................... 13 pints ( l0.0 I,irrcs)
Recommended Fluid
Dcxroli I1 Auronii~tic 11.ansniission I-'luitl # 105 1x55
@ Shift control cable.
T.V. cable
@ Fluid level
- Dexron I1 Automatic Transmission Fluid
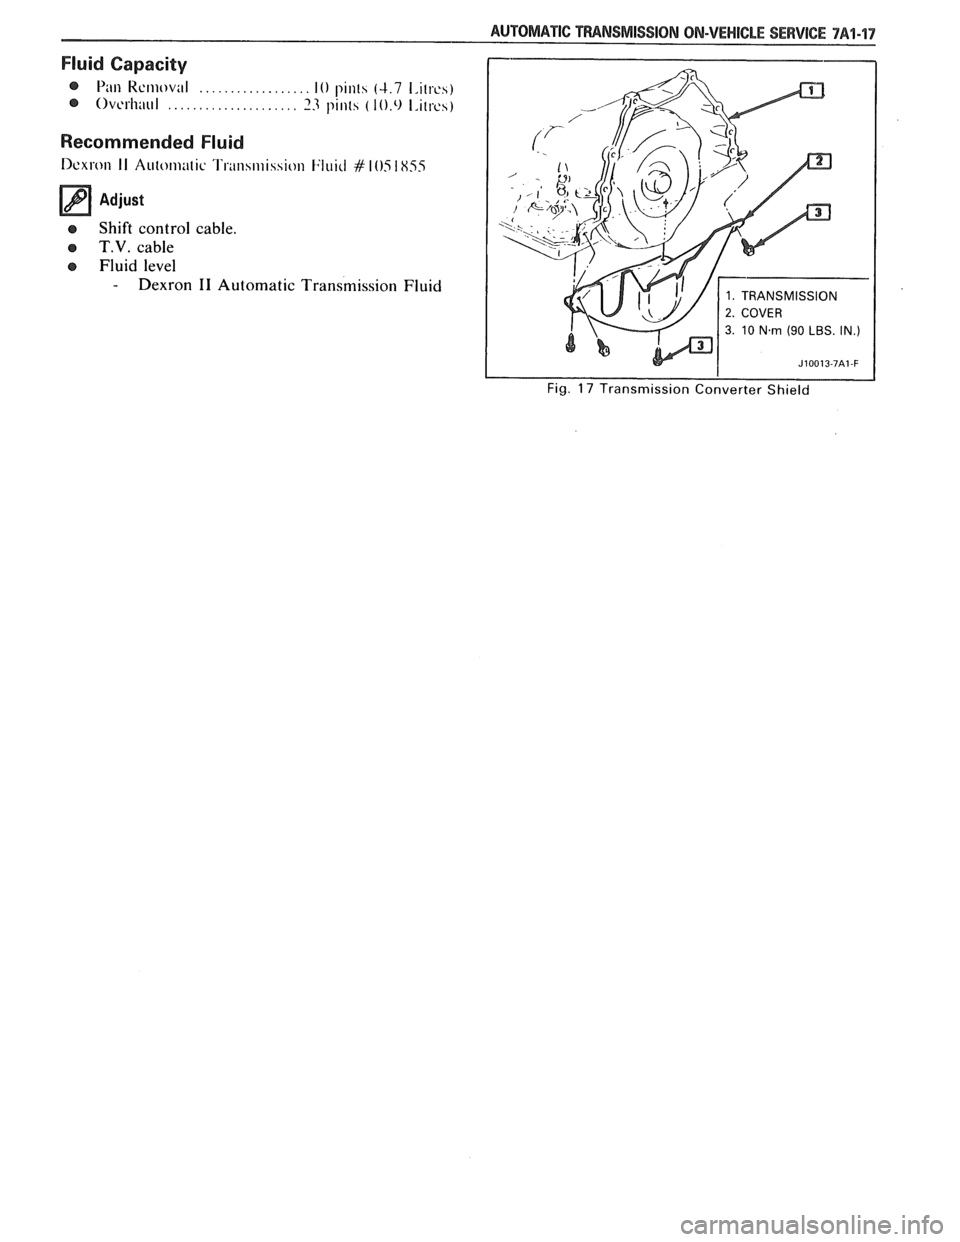
Fig. 17 Transmission Converter Shield
Page 1817 of 1825
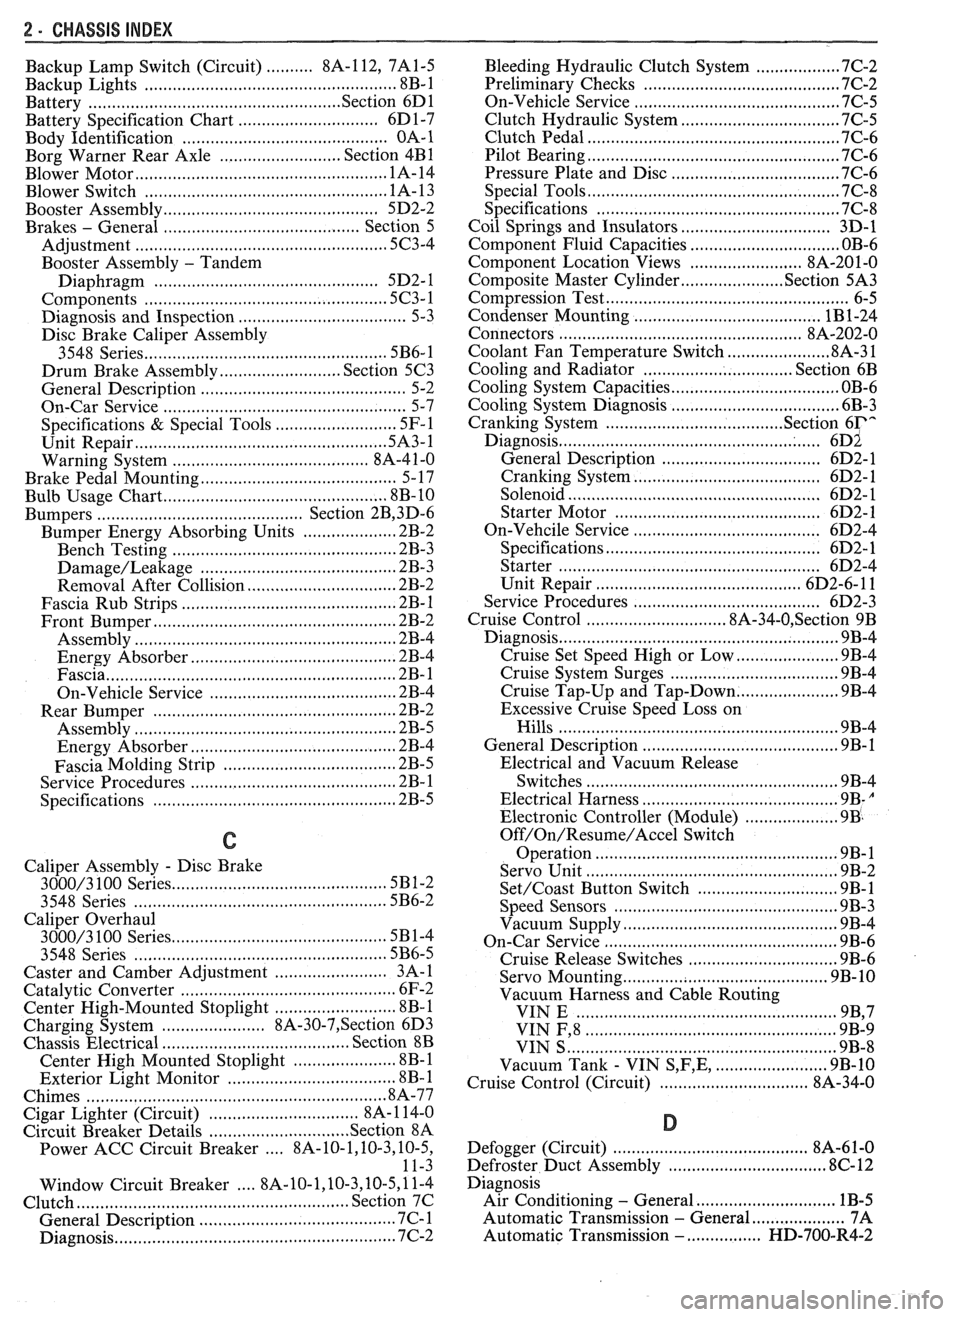
2 - CHASSIS INDEX
Backup Lamp Switch (Circuit) .......... 8A- 1 12. 7A 1-5
Backup Lights
..................................................... 8B-1
...................................................... Battery Section 6D 1
............................ Battery Specification Chart 6D 1-7
.................................... Body Identification ... .... OA- 1
Borg Warner Rear Axle .......................... Section 4B1
...................................................... Blower Motor 1A-14
Blower Switch
.................................................... 1 A- 13
Booster Assembly
............................................. 5D2-2
Brakes
- General ......................................... Section 5
Adjustment
.................................................... 5C3-4
Booster Assembly
. Tandem
Diaphragm
................... .... ..................... 5D2- 1
................................................ Components 5C3- 1
Diagnosis and Inspection
................................. 5-3
Disc Brake Caliper Assembly
.................................................... 3548 Series 5B6-1
Drum Brake Assembly ........................ Section 5C3
General Description
.......................................... 5-2
On-Car Service
.................................................... 5-7
Specifications & Special Tools ......................... .5 F. 1
...................................................... Unit Repair 5A3- 1
.......................................... Warning System 8A-4 1-0
............ Brake Pedal Mounting .. ......................... 5-1 7
Bulb Usage Chart
............................................ 8B-10
............................................ Bumpers Section 2B,3 D.6
Bumper Energy Absorbing Units
.................... 2B-2
Bench Testing
................................................ 2B-3
........................................ Damage/Leakage 2B-3
................................ Removal After Collision 2B-2
............................................. Fascia Rub Strips .2 B. 1
.................................................... Front Bumper 2B-2
Assembly
........................................................ 2B-4
Energy Absorber
........................................... 2B-4
............................................................. Fascia .2 B. 1
On-Vehicle Service
...................................... 2B-4
Rear Bumper
.................................... .... ............ 2B-2
........................................................ Assembly 2B-5
Energy Absorber
............................................ 2B-4
............. .................... Fascia Molding Strip .. 2B-5 ........................................... Service Procedures .2 B. 1
.................................................. Specifications 2B-5
C
Caliper Assembly . Disc Brake
.............................................. 3000/3 100 Series 5B 1-2
3548 Series
...................................................... 5B6-2
Caliper Overhaul
....................... 3000/3 100 Series .. ............... 5B 1-4
3548 Series
.................................................... 5B6-5
Caster and Camber Adjustment
........................ 3A- 1
............................................. Catalytic Converter 6F-2
Center High-Mounted Stoplight
....................... ... 8B- 1
Charging System
...................... 8A.30.7, Section 6D3
Chassis Electrical
.................................... Section 8B
Center High Mounted Stoplight
...................... 8B-1 ................................. Exterior Light Monitor .8 B. 1
................................................................ Chimes 8A-77
................................ Cigar Lighter (Circuit) 8A- 1
14-0
.............................. Circuit Breaker Details Section 8A
Power ACC Circuit Breaker .... 8A- 10.1.10.3.10.5.
11-3
.... Window Circuit Breaker 8A~10~1,10~3.10~5.1 1.4
Clutch
........................................................ Section 7C
......................................... General Description .7 C. 1 ........................................................... Diagnosis 7C-2 Bleeding
Hydraulic Clutch System
................. .7 C.2
Preliminary Checks ..................................... ... 7C-2
On-Vehicle Service
........................................... 7C-5
Clutch Hydraulic System
.................................. 7C-5
Clutch Pedal ...................................................... 7C-6
Pilot Bearing
..................................................... 7C-6
Pressure Plate and Disc
.................................... 7C-6
Special Tools
......................... ....... ................ 7C-8
Specifications
................................................... 7C-8
Coil Springs and Insulators .............................. 3D-1
Component Fluid Capacities
................................ OB-6
Component Location Views
........................ 8A-201-0
Composite Master Cylinder
................... Section 5A3
Compression Test
.................. .. ............................. 6-5
Condenser Mounting
....................................... 1B 1-24
Connectors
.................................................... 8A-202-0
Coolant Fan Temperature Switch
...................... 8A-3 1
Cooling and Radiator
................................ Section 6B
Cooling System Capacities
................................. OB-6
Cooling System Diagnosis
.................................... 6B-3
Cranking System
...................................... Section 6P*
Diagnosis ..................................................... 6~2
General Description ................................ 6D2- 1
Cranking System
........................................ 6D2- 1
Solenoid
................................................... 6D2- 1
Starter Motor ......................................... 6D2-1
On-Vehcile Service
...................................... 6D2-4
Specifications
............................................ 6D2- 1
Starter
........................................................ 6D2-4
Unit Repair
............................................ 6D2-6- 11
Service Procedures
...................................... 6D2-3
Cruise Control
.............................. 8A-34-0, Section 9B
Diagnosis
............................................................ 9B-4
Cruise Set Speed High or Low
.................... 9B-4
Cruise System Surges
.................................. 9B-4
Cruise Tap-Up and Tap-Down
...................... 9B-4
Excessive Cruise Speed Loss on
Hills
........................................................... 9B-4
General Description
........................................ 9B-1
Electrical and Vacuum Release
Switches
...................................................... 9B-4
Electrical Harness
.......................................... 9B-A
Electronic Controller (Module) .................... 9B .
Off/On/Resume/Accel Switch
Operation
.................................................. .91 B-
Servo Unit
.................................................... 9B-2
Set/Coast Button Switch .............................. 9B-1
................................................ Speed Sensors 9B-3
Vacuum Supply
............................................ 9B-4
On-Car Service
.................................................. 9B-6
................................ Cruise Release Switches 9B-6
.......................................... Servo Mounting 9B-10
Vacuum Harness and Cable Routing
VIN
E ................................. .. .................. 9B,7
.................................................... VIN F, 8 9B-9
....................................................... VIN S 9B-8
........................ Vacuum Tank - VIN S,F,E, 9B-10
.............................. Cruise Control (Circuit) 8A-34-0
D
......................................... Defogger (Circuit) $A-6 1-0
..................... ...... Defroster Duct Assembly ... .812 C-
Diagnosis
Air Conditioning
- General ........................... 1B-5
.................... Automatic Transmission - General 7A
Automatic Transmission
- ................ HD-700-R4-2
Page 1823 of 1825
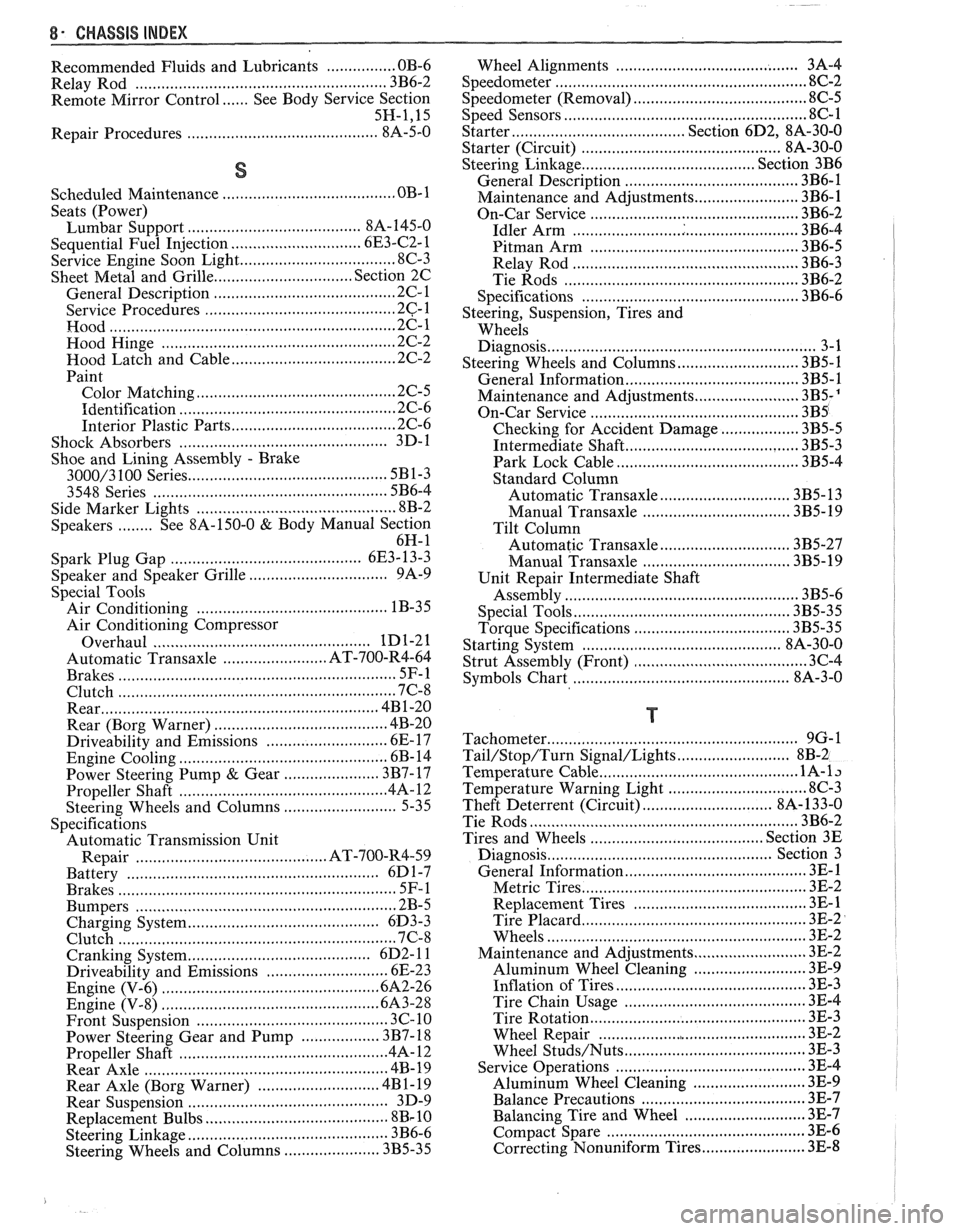
8- CHASSIS INDEX
Recommended Fluids and Lubricants ................ OB-6
Relay Rod
......................................................... 3B6-2
Remote Mirror Control
...... See Body Service Section
5H.1. 15
Repair Procedures
.......................................... 88-50
S
........................................ Scheduled Maintenance OB- 1
Seats (Power) ....................................... Lumbar Support 8A- 145-0
............................. Sequential Fuel Injection 6E3-C2- 1
Service Engine Soon Light
.................................... 8C-3
Sheet Metal and Grille
................................ Section 2C
......................................... General Description .2 C. 1
........................................... Service Procedures .2 C. 1
................................................................. Hood .2 C. 1
...................................................... Hood Hinge 2C-2
Hood Latch and Cable
...................................... 2C-2
Paint
.............................................. Color Matching 2C-5
................................................ Identification -32-6
Interior Plastic Parts ...................................... 2C-6
................................................ Shock Absorbers 3D-
1
Shoe and Lining Assembly
. Brake
............................................ 3000/3 100 Series 5B1-3
3548 Series ...................................................... 5B6-4
Side Marker Lights
.............................................. 8B-2
........ Speakers See 8A- 150-0 & Body
Manual Section
6H- 1
.................... Spark Plug Gap .. .................. 6E3-13-3
................................ Speaker and Speaker Grille 9A-9
Special Tools
............................................ Air Conditioning 1 B-3 5
Air Conditioning Compressor
................................................. Overhaul 1D1-21
........................ Automatic Transaxle AT-700-R4-64
................................................................ Brakes SF-1
Clutch ................................................................ 7C-8
................................................................ Rear 4B1-20
....................................... Rear (Borg Warner) 4B-20
........................... Driveability and Emissions .6 E. 17
................................................ Engine Cooling 6B- 14
Power Steering Pump
& Gear ...................... 3B7-17
............................................... Propeller Shaft .4 A. 12
Steering Wheels and Columns
.......................... 5-35
Specifications Automatic Transmission Unit
............................................ Repair AT-700-R4-59
..................................................... Battery 6D 1-7
................................................................ Brakes 5F-1
Bumpers
......................................................... 2B-5
Charging System
................ .. ................... 6D3-3
.............................................................. Clutch .7 (2.8
....................................... Cranking System 6D2- 1 1
Driveability and Emissions ............................ 6E-23
................................................ Engine (V-6) ..6A 2.26
Engine (V-8) .................................................. 683-28
........................................ Front Suspension 3C- 10
Power Steering Gear and Pump
.................. 3B7-18 ............................................. Propeller Shaft .4 A. 12 ........................................................ Rear Axle 4B-19 ............................ Rear Axle (Borg Warner) 4B 1- 19
Rear Suspension
.............................................. 3D-9
.......................................... Replacement Bulbs 8Br 10 .............................................. Steering Linkage 3B6-6
Steering Wheels and Columns
...................... 3B5-35
........................................ Wheel Alignments 3A-4
....................................................... Speedometer 8C-2
........................................ Speedometer (Removal) 8C-5
...................................................... Speed Sensors 8C-1
Starter ........................................ Section 6D2. 8A-30-0
............................................. Starter (Circuit) 8A-30-0
Steering Linkage ...................................... Section 3B6
....................................... General Description 3B6-1
........................ Maintenance and Adjustments 3B6-1
................................................ On-Car Service 3B6-2
..................................................... Idler Arm 3B6-4
................................................ Pitman Arm 3B6-5
.................................................... Relay Rod 3B6-3
Tie Rods
...................................................... 3B6-2
.................................................. Specifications 3B6-6
Steering, Suspension, Tires and
Wheels Diagnosis
............................................................. 3-1
Steering Wheels and Columns
............................ 3B5-1
..................................... General Information 3B5- 1
Maintenance and Adjustments
...................... 3B5-'
On-Car Service .............................. .. ........... 3B5
Checking for Accident Damage
.................. 3B5-5
Intermediate Shaft ............... .. .................... 3B5-3
Park Lock Cable .......................................... 3B5-4
Standard Column
............................. Automatic Transaxle 3B5-13
Manual Transaxle ................................. 3B5- 19
Tilt Column
.............................. Automatic Transaxle 3B5-27
.................................. Manual Transaxle 3B5-19
Unit Repair Intermediate Shaft
...................................................... Assembly 3B5-6
................................................. Special Tools 3B5-35
Torque Specifications
.................................... 3B5-35
............................................. Starting System 8A-30-0
........................................ Strut Assembly (Front) 3C-4
.................................... ..... Symbols Chart ... 8A-3-0
T
.......................................................... Tachometer 9G-1
Tail/Stop/Turn Signal/Lights .......................... 8B-2
Temperature Cable
.............................................. 112 A-
Temperature Warning Light ................................ 8C-3
Theft Deterrent (Circuit)
.............................. 8A-133-0
Tie Rods
.............................................................. 3B6-2
Tires and Wheels
........................................ Section 3E
Diagnosis
.................................................. Section 3
General Information
......................................... 3E-1
................................................... Metric Tires 3E-2
....................................... Replacement Tires .31 E-
.................................................... Tire Placard 3E-2
........................................................... Wheels 3E-2
Maintenance and Adjustments
.......................... 3E-2
.......................... Aluminum Wheel Cleaning 3E-9
............................. ......... Inflation of Tires .. 3E-3
........................................ Tire Chain Usage 3E-4
.................................................. Tire Rotation 3E-3
.............................................. Wheel Repair 3E-2
...................................... Wheel Studs/Nuts 3E-3
........................................... Service Operations 3E-4
........................ Aluminum Wheel Cleaning 3E-9
.................................... Balance Precautions 3E-7
............................ Balancing Tire and Wheel 3E-7
.............................................. Compact Spare 3E-6
........................ Correcting Nonuniform Tires 3E-8