Page 317 of 878
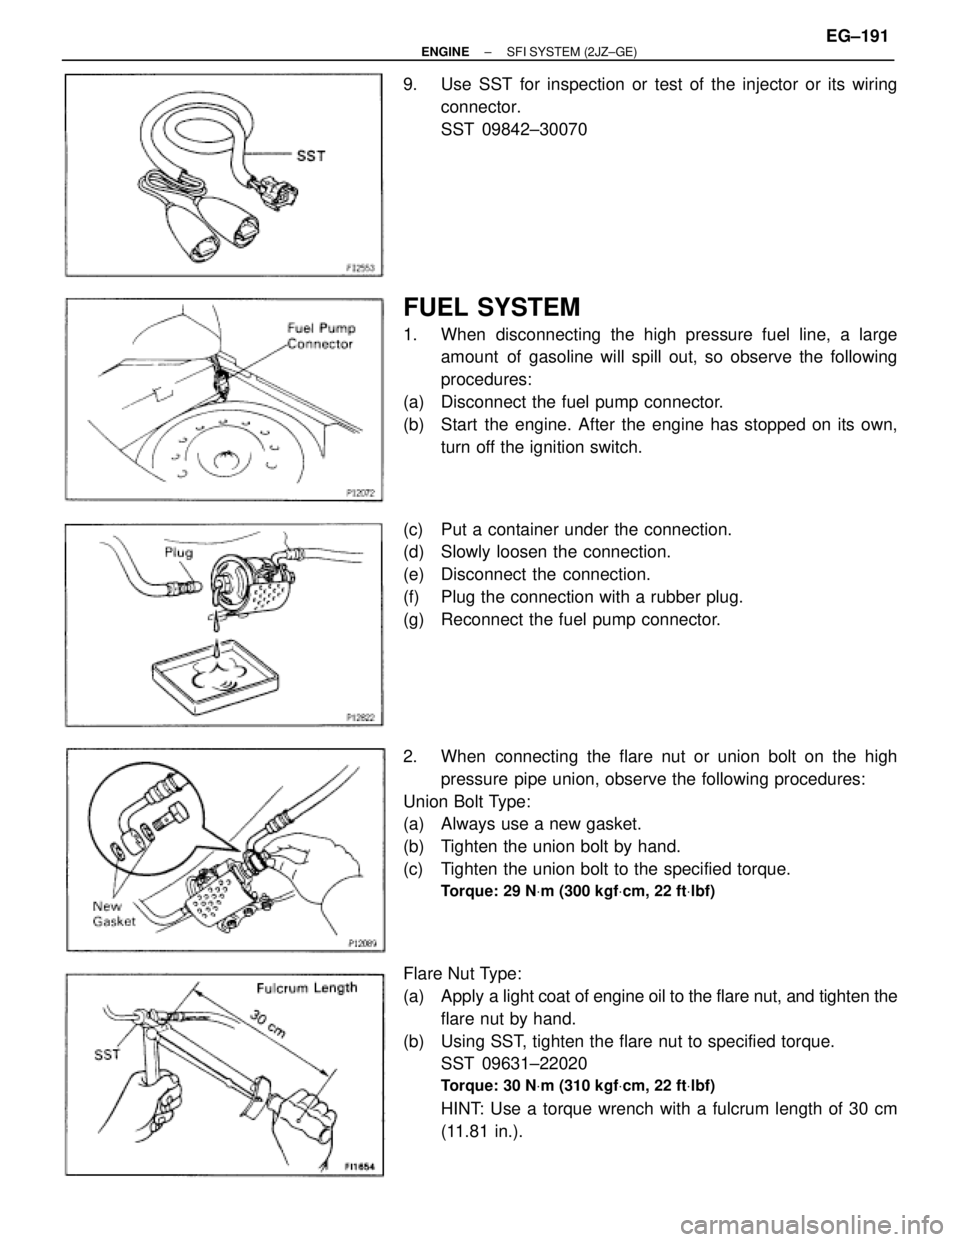
9. Use SST for inspection or test of the injector or its wiring
connector.
SST 09842±30070
FUEL SYSTEM
1. When disconnecting the high pressure fuel line, a large
amount of gasoline will spill out, so observe the following
procedures:
(a) Disconnect the fuel pump connector.
(b) Start the engine. After the engine has stopped on its own,
turn off the ignition switch.
(c) Put a container under the connection.
(d) Slowly loosen the connection.
(e) Disconnect the connection.
(f) Plug the connection with a rubber plug.
(g) Reconnect the fuel pump connector.
2. When connecting the flare nut or union bolt on the high
pressure pipe union, observe the following procedures:
Union Bolt Type:
(a) Always use a new gasket.
(b) Tighten the union bolt by hand.
(c) Tighten the union bolt to the specified torque.
Torque: 29 NVm (300 kgfVcm, 22 ftVlbf)
Flare Nut Type:
(a) Apply a light coat of engine oil to the flare nut, and tighten the
flare nut by hand.
(b) Using SST, tighten the flare nut to specified torque.
SST 09631±22020
Torque: 30 NVm (310 kgfVcm, 22 ftVlbf)
HINT: Use a torque wrench with a fulcrum length of 30 cm
(11.81 in.).
± ENGINESFI SYSTEM (2JZ±GE)EG±191
Page 318 of 878
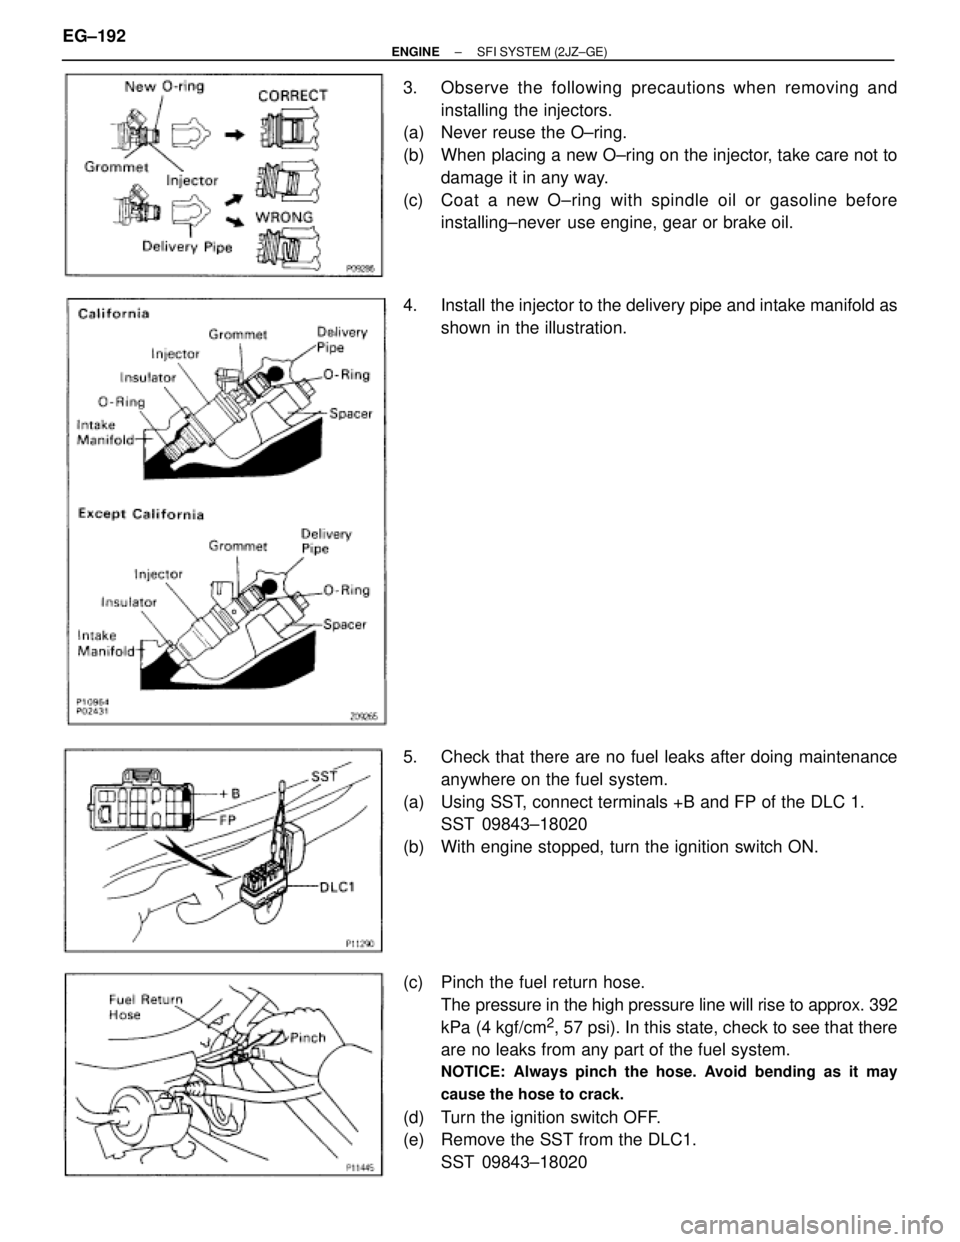
3. Observe the following precautions when removing and
installing the injectors.
(a) Never reuse the O±ring.
(b) When placing a new O±ring on the injector, take care not to
damage it in any way.
(c) Coat a new O±ring with spindle oil or gasoline before
installing±never use engine, gear or brake oil.
4. Install the injector to the delivery pipe and intake manifold as
shown in the illustration.
5. Check that there are no fuel leaks after doing maintenance
anywhere on the fuel system.
(a) Using SST, connect terminals +B and FP of the DLC 1.
SST 09843±18020
(b) With engine stopped, turn the ignition switch ON.
(c) Pinch the fuel return hose.
The pressure in the high pressure line will rise to approx. 392
kPa (4 kgf/cm
2, 57 psi). In this state, check to see that there
are no leaks from any part of the fuel system.
NOTICE: Always pinch the hose. Avoid bending as it may
cause the hose to crack.
(d) Turn the ignition switch OFF.
(e) Remove the SST from the DLC1.
SST 09843±18020 EG±192
± ENGINESFI SYSTEM (2JZ±GE)
Page 319 of 878
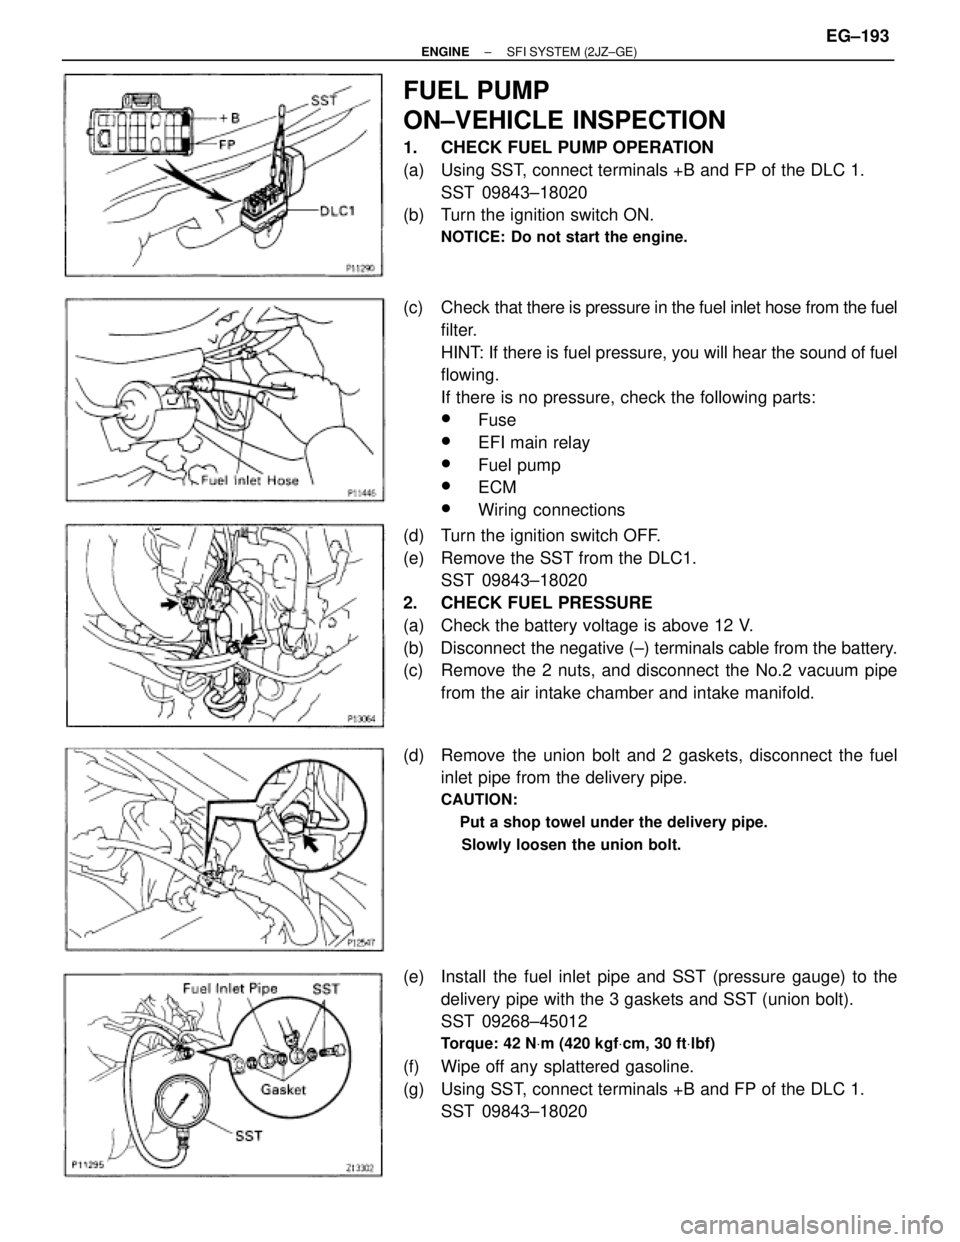
FUEL PUMP
ON±VEHICLE INSPECTION
1. CHECK FUEL PUMP OPERATION
(a) Using SST, connect terminals +B and FP of the DLC 1.
SST 09843±18020
(b) Turn the ignition switch ON.
NOTICE: Do not start the engine.
(c) Check that there is pressure in the fuel inlet hose from the fuel
filter.
HINT: If there is fuel pressure, you will hear the sound of fuel
flowing.
If there is no pressure, check the following parts:
wFuse
wEFI main relay
wFuel pump
wECM
wWiring connections
(d) Turn the ignition switch OFF.
(e) Remove the SST from the DLC1.
SST 09843±18020
2. CHECK FUEL PRESSURE
(a) Check the battery voltage is above 12 V.
(b) Disconnect the negative (±) terminals cable from the battery.
(c) Remove the 2 nuts, and disconnect the No.2 vacuum pipe
from the air intake chamber and intake manifold.
(d) Remove the union bolt and 2 gaskets, disconnect the fuel
inlet pipe from the delivery pipe.
CAUTION:
� Put a shop towel under the delivery pipe.
� Slowly loosen the union bolt.
(e) Install the fuel inlet pipe and SST (pressure gauge) to the
delivery pipe with the 3 gaskets and SST (union bolt).
SST 09268±45012
Torque: 42 NVm (420 kgfVcm, 30 ftVlbf)
(f) Wipe off any splattered gasoline.
(g) Using SST, connect terminals +B and FP of the DLC 1.
SST 09843±18020
± ENGINESFI SYSTEM (2JZ±GE)EG±193
Page 320 of 878
(h) Reconnect the negative (±) terminal cable to the battery.
(i) Turn the ignition switch ON.
(j) Measure the fuel pressure.
Fuel pressure:
265±304 kPa (2.7±3.1 kgf/cm
2, 38±44 psi)
If pressure is high, replace the fuel pressure regulator.
If pressure is low, check the following parts:
wFuel hoses and connections
wFuel pump
wFuel filter
wFuel pressure regulator
(k) Remove the SST from the DLC1.
SST 09843±18020
(l) Start the engine.
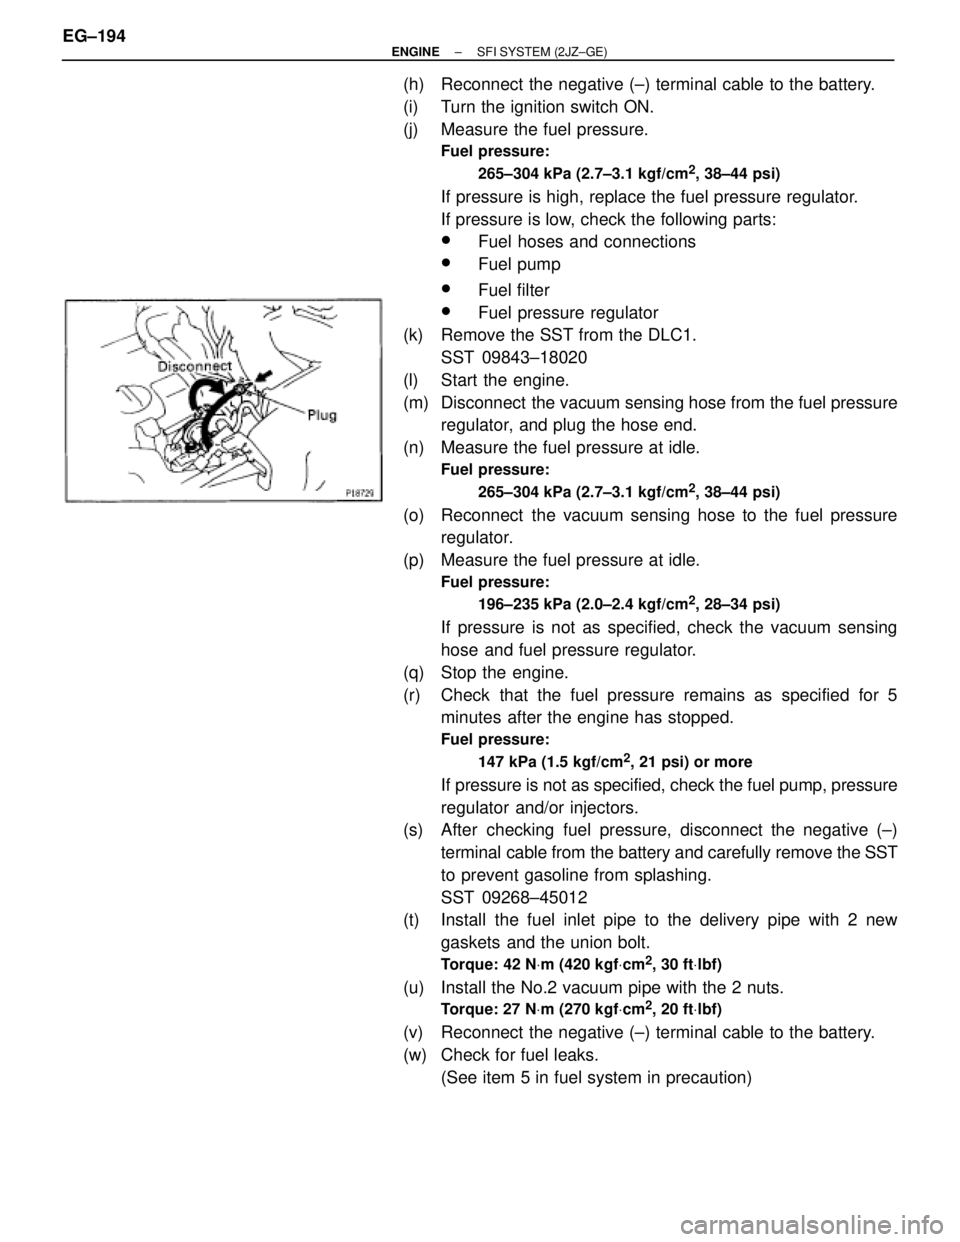
(m) Disconnect the vacuum sensing hose from the fuel pressure
regulator, and plug the hose end.
(n) Measure the fuel pressure at idle.
Fuel pressure:
265±304 kPa (2.7±3.1 kgf/cm
2, 38±44 psi)
(o) Reconnect the vacuum sensing hose to the fuel pressure
regulator.
(p) Measure the fuel pressure at idle.
Fuel pressure:
196±235 kPa (2.0±2.4 kgf/cm
2, 28±34 psi)
If pressure is not as specified, check the vacuum sensing
hose and fuel pressure regulator.
(q) Stop the engine.
(r) Check that the fuel pressure remains as specified for 5
minutes after the engine has stopped.
Fuel pressure:
147 kPa (1.5 kgf/cm
2, 21 psi) or more
If pressure is not as specified, check the fuel pump, pressure
regulator and/or injectors.
(s) After checking fuel pressure, disconnect the negative (±)
terminal cable from the battery and carefully remove the SST
to prevent gasoline from splashing.
SST 09268±45012
(t) Install the fuel inlet pipe to the delivery pipe with 2 new
gaskets and the union bolt.
Torque: 42 NVm (420 kgfVcm2, 30 ftVlbf)
(u) Install the No.2 vacuum pipe with the 2 nuts.
Torque: 27 NVm (270 kgfVcm2, 20 ftVlbf)
(v) Reconnect the negative (±) terminal cable to the battery.
(w) Check for fuel leaks.
(See item 5 in fuel system in precaution) EG±194
± ENGINESFI SYSTEM (2JZ±GE)
Page 335 of 878
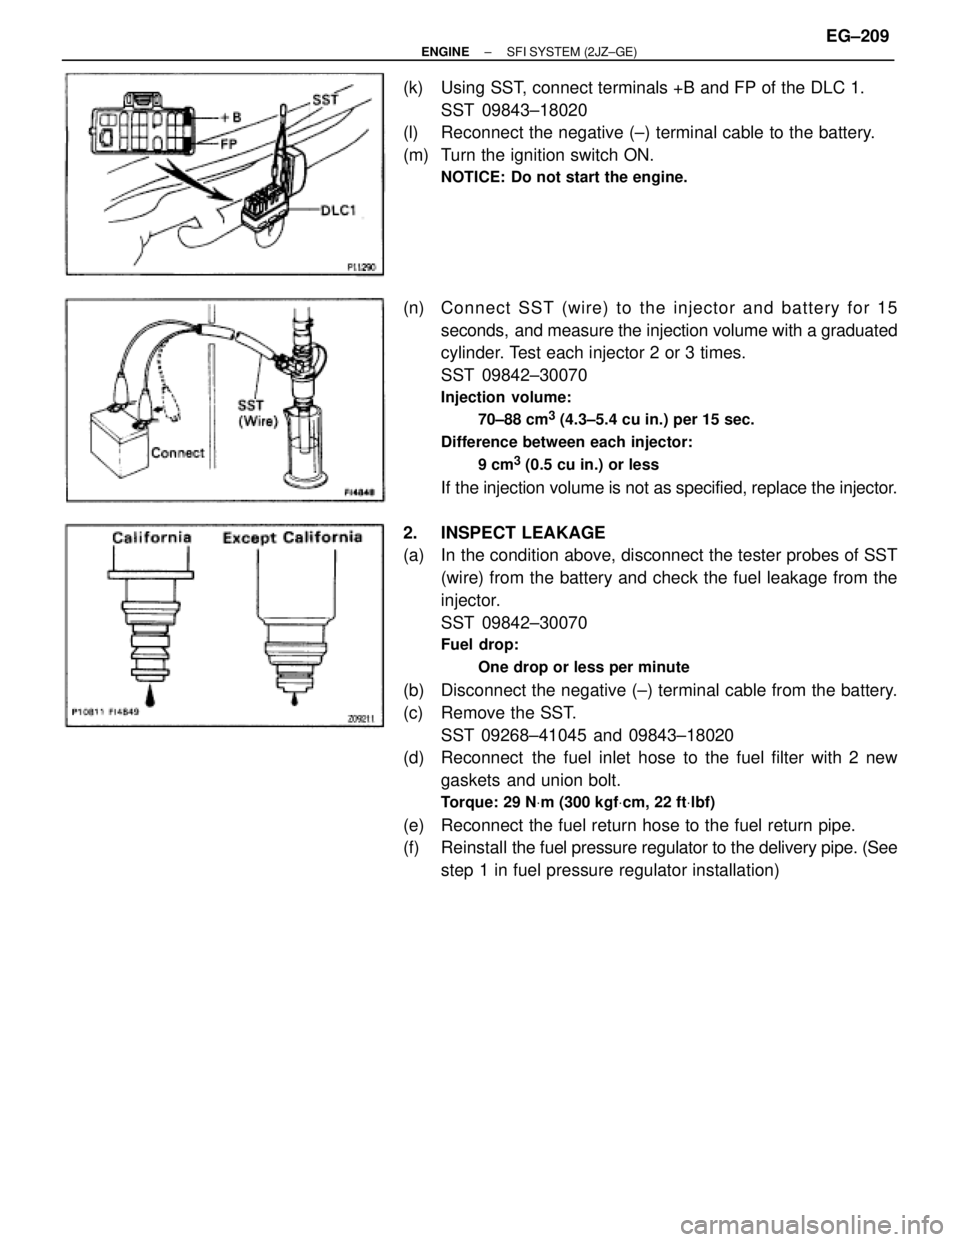
(k) Using SST, connect terminals +B and FP of the DLC 1.
SST 09843±18020
(l) Reconnect the negative (±) terminal cable to the battery.
(m) Turn the ignition switch ON.
NOTICE: Do not start the engine.
(n) Connect SST (wire) to the injector and battery for 15
seconds, and measure the injection volume with a graduated
cylinder. Test each injector 2 or 3 times.
SST 09842±30070
Injection volume:
70±88 cm
3 (4.3±5.4 cu in.) per 15 sec.
Difference between each injector:
9 cm
3 (0.5 cu in.) or less
If the injection volume is not as specified, replace the injector.
2. INSPECT LEAKAGE
(a) In the condition above, disconnect the tester probes of SST
(wire) from the battery and check the fuel leakage from the
injector.
SST 09842±30070
Fuel drop:
One drop or less per minute
(b) Disconnect the negative (±) terminal cable from the battery.
(c) Remove the SST.
SST 09268±41045 and 09843±18020
(d) Reconnect the fuel inlet hose to the fuel filter with 2 new
gaskets and union bolt.
Torque: 29 NVm (300 kgfVcm, 22 ftVlbf)
(e) Reconnect the fuel return hose to the fuel return pipe.
(f) Reinstall the fuel pressure regulator to the delivery pipe. (See
step 1 in fuel pressure regulator installation)
± ENGINESFI SYSTEM (2JZ±GE)EG±209
Page 381 of 878
FUEL CUT RPM
FUEL CUT RPM INSPECTION
1. WARM UP ENGINE
Allow the engine to warm up to normal operating tempera-
ture.
2. CONNECT TACHOMETER TO ENGINE
Connect the tester probe of a tachometer to terminal IG� of
the DLC1.
NOTICE:
wNever allow the tachometer terminal to touch ground as
it could result in damage to the igniter and/or ignition
coil.
wAs some tachometers are not compatible with this igni-
tion system, we recommend that you confirm the compat-
ibility of your unit before use.
3. INSPECT FUEL CUTOFF OPERATION
(a) Increase the engine speed to at least 3,000 rpm.
(b) Check for injector operating noise.
(c) Check that when the throttle lever is released, injector
operation noise stops momentarily and then resumes.
HINT: Measure with the A/C OFF.
Fuel return speed:
1,400 rpm
4. DISCONNECT TACHOMETER
± ENGINESFI SYSTEM (2JZ±GE)EG±255
Page 390 of 878
IDLE AND OR 2500 RPM CO HC CHECK
HINT: This check is used only to determine whether or not the
idle CO/HC complies with regulations.
1. INITIAL CONDITIONS
(a) Engine at normal operating temperature
(b) Air cleaner installed
(c) All pipes and hoses of air induction system connected
(d) All accessories switched OFF
(e) All vacuum lines properly connected
HINT: All vacuum hoses for EGR system, etc. should be prop-
erly connected.
(f) SFI system wiring connectors fully plugged
(g) Ignition timing set correctly
(h) Transmission in neutral position
(i) Tachometer and CO/HC meter calibrated by hand
2. START ENGINE
3. RACE ENGINE AT 2,500 RPM FOR APPROX. 180
SECONDS
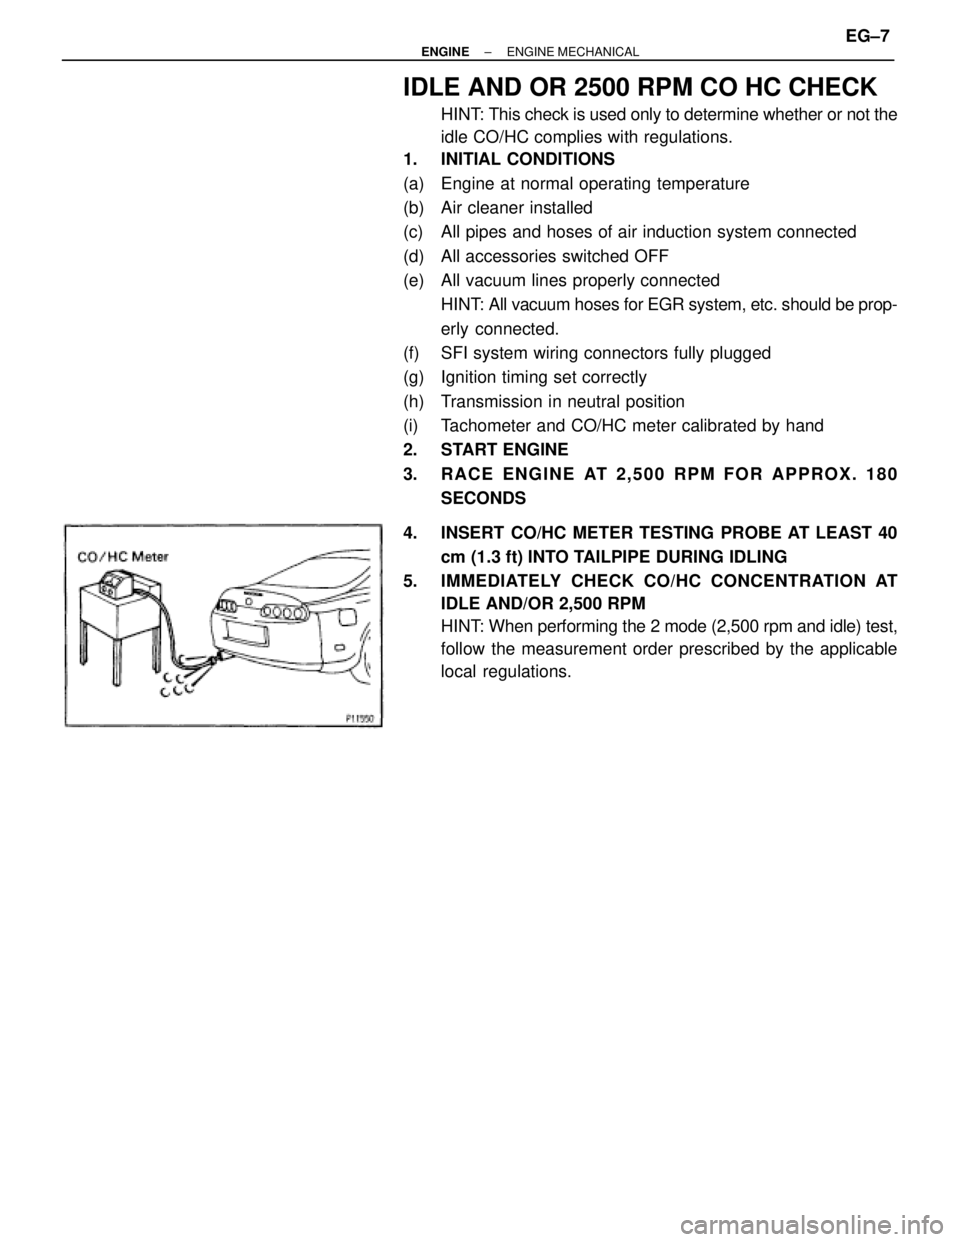
4. INSERT CO/HC METER TESTING PROBE AT LEAST 40
cm (1.3 ft) INTO TAILPIPE DURING IDLING
5. IMMEDIATELY CHECK CO/HC CONCENTRATION AT
IDLE AND/OR 2,500 RPM
HINT: When performing the 2 mode (2,500 rpm and idle) test,
follow the measurement order prescribed by the applicable
local regulations.
± ENGINEENGINE MECHANICALEG±7
Page 391 of 878
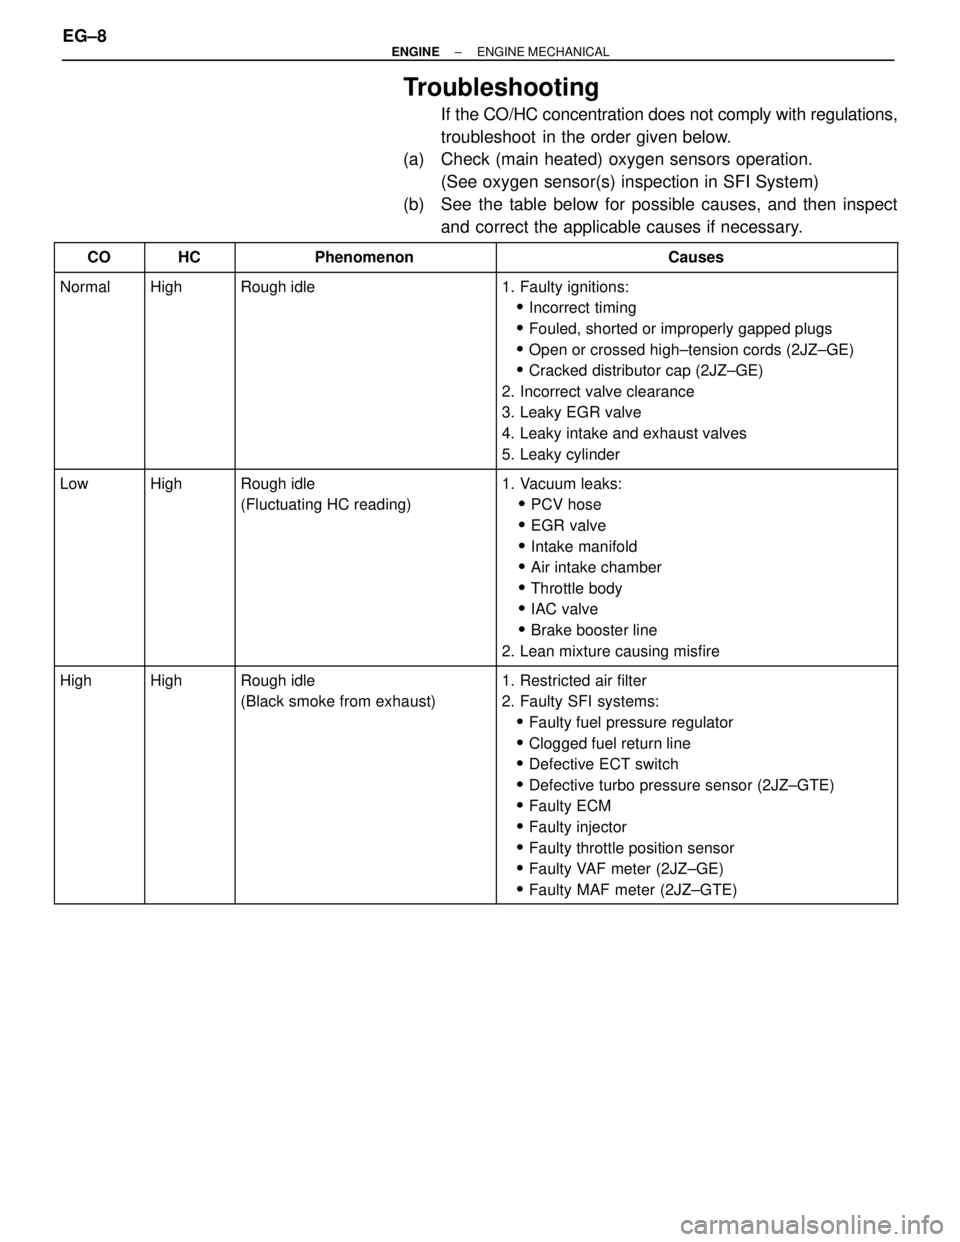
Troubleshooting
If the CO/HC concentration does not comply with regulations,
troubleshoot in the order given below.
(a) Check (main heated) oxygen sensors operation.
(See oxygen sensor(s) inspection in SFI System)
(b) See the table below for possible causes, and then inspect
and correct the applicable causes if necessary.
���� ����CO����� �����HC������������ ������������Phenomenon������������������ ������������������Causes
���� �
��� �
��� �
��� �
��� �
��� �
��� �
��� ����
Normal����� �
���� �
���� �
���� �
���� �
���� �
���� �
���� �����
High������������ �
����������� �
����������� �
����������� �
����������� �
����������� �
����������� �
����������� ������������
Rough idle������������������ �
����������������� �
����������������� �
����������������� �
����������������� �
����������������� �
����������������� �
����������������� ������������������
1. Faulty ignitions:
�Incorrect timing
�Fouled, shorted or improperly gapped plugs
�Open or crossed high±tension cords (2JZ±GE)
�Cracked distributor cap (2JZ±GE)
2. Incorrect valve clearance
3. Leaky EGR valve
4. Leaky intake and exhaust valves
5. Leaky cylinder
���� �
��� �
��� �
��� �
��� �
��� �
��� �
��� ����
Low����� �
���� �
���� �
���� �
���� �
���� �
���� �
���� �����
High������������ �
����������� �
����������� �
����������� �
����������� �
����������� �
����������� �
����������� ������������
Rough idle
(Fluctuating HC reading)������������������ �
����������������� �
����������������� �
����������������� �
����������������� �
����������������� �
����������������� �
����������������� ������������������
1. Vacuum leaks:
�PCV hose
�EGR valve
�Intake manifold
�Air intake chamber
�Throttle body
�IAC valve
�Brake booster line
2. Lean mixture causing misfire
���� �
��� �
��� �
��� �
��� �
��� �
��� �
��� �
��� �
��� ����
High����� �
���� �
���� �
���� �
���� �
���� �
���� �
���� �
���� �
���� �����
High������������ �
����������� �
����������� �
����������� �
����������� �
����������� �
����������� �
����������� �
����������� �
����������� ������������
Rough idle
(Black smoke from exhaust)������������������ �
����������������� �
����������������� �
����������������� �
����������������� �
����������������� �
����������������� �
����������������� �
����������������� �
����������������� ������������������
1. Restricted air filter
2. Faulty SFI systems:
�Faulty fuel pressure regulator
�Clogged fuel return line
�Defective ECT switch
�Defective turbo pressure sensor (2JZ±GTE)
�Faulty ECM
�Faulty injector
�Faulty throttle position sensor
�Faulty VAF meter (2JZ±GE)
�Faulty MAF meter (2JZ±GTE)
EG±8± ENGINEENGINE MECHANICAL