Page 1880 of 2389
ON±VEHICLE WHEEL BALANCING
NOTICE:
1. When doing on±vehicle wheel balancing on a fulltime 4WD
vehicle, to prevent the wheels from rotating at different
speeds or in different directions from each other (which
could lead to damage to the center differential or trans-
axle gears), always be sure to observe the following pre-
cautions:
(1) A11 four wheels should be jacked up, completely clear
of the ground.
(2) The wheels should be driven by both the engine and
the wheel balancer.
(3) The center differential control switch should be in the
OFF condition.
(4) The mode select lever on the transaxle should be in
the LOCK position.
(5) The parking brake lever should be fully released.
(6) None of the brakes should be allowed to drag.
2. Avoid sudden acceleration, deceleration and braking.
3. Carry out the wheel balancing with the transmission in D
range.
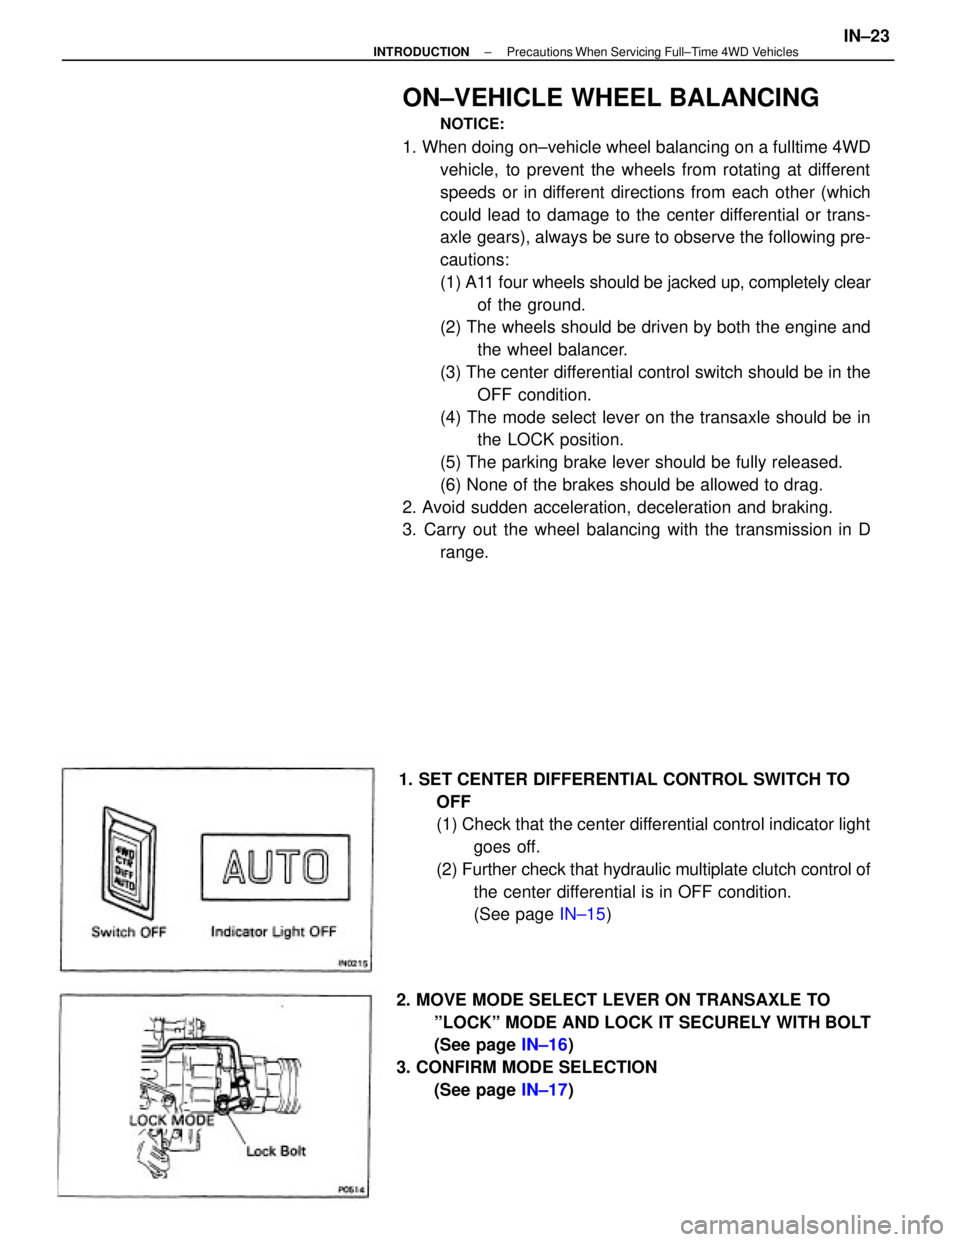
1. SET CENTER DIFFERENTIAL CONTROL SWITCH TO
OFF
(1) Check that the center differential control indicator light
goes off.
(2) Further check that hydraulic multiplate clutch control of
the center differential is in OFF condition.
(See page IN±15)
2. MOVE MODE SELECT LEVER ON TRANSAXLE TO
ºLOCKº MODE AND LOCK IT SECURELY WITH BOLT
(See page IN±16)
3. CONFIRM MODE SELECTION
(See page IN±17)
± INTRODUCTIONPrecautions When Servicing Full±Time 4WD VehiclesIN±23
Page 1882 of 2389
10. ROTATE WHEELS USING BOTH THE ENGINE'S
DRIVING FORCE AND DRIVING FORCE OF WHEEL
BALANCER AND CHECK WHEEL BALANCE
HINT:
1. When doing this be careful of the other wheel which will ro-
tate at the same time.
2. Completely the measurement quickly, within a short time.
11. AFTER FINISHING WHEEL BALANCING, RETURN
MODE SELECT LEVER TO ºFREE (NORMAL)º MODE
POSITION AND LOCK IT SECURELY WITH BOLT
12. SET CENTER DIFFERENTIAL CONTROL SWITCH TO
AUTO
± INTRODUCTIONPrecautions When Servicing Full±Time 4WD VehiclesIN±25
Page 1885 of 2389
ABBREVIATIONS USED IN THIS
MANUAL
A.B.S. Anti±Lock Brake System
A/C Air Conditioner
ALR Automatic Locking Retractor
Approx. Approximation
A/T, ATM Automatic Transaxle
ATF Automatic Transmission Fluid
B
0 Overdrive Brake
B
1 Second Coast Brake
B
2 Second Brake
B
3 First and Reverse Brake
BDC Bottom Dead Center
BTDC Before Top Dead Center
BVSV Bimetal Vacuum Switching Valve
C
0 Overdrive Clutch
C
1 Forward Clutch
C
2 Direct Clutch
CB Circuit Breaker
DP Dash Pot
CRS Child Restraint System
ECT Electronic Controlled Transaxle
ECU Electronic Controlled Unit
EFI Electronic Fuel Injection
E/G Engine
EGR Exhaust Gas Recirculation
ELR Emergency Locking Retractor
ESA Electronic Spark Advance
EVAP Evaporative (Emission Control)
EX Exhaust (manifold, valve)
Ex. Except
F
0 Overdrive One±Way Clutch
F
1 No. 1 One±Way Clutch
F
2 No. 2 One±Way Clutch
FIPG Formed in Place Gasket
FL Fusible Link
Fr Front
IG Ignition
IN Intake (manifold, valve)
ISC Idle Speed Control
LED Light Emitting Diode
LH Left±Hand
LSPV Load Sensing Proportioning Valve
Max. Maximum
Min. Minimum
MP Multipurpose
M/T, MTM Manual Transaxle
O/D, OD Overdrive
O/S Oversize
PCV Positive Crankcase Ventilation
PKB Parking Brake
± INTRODUCTIONAbbreviations Used in This ManualIN±28
Page 1894 of 2389
1. REMOVE HOOD
2. RAISE VEHICLE
NOTICE: Be sure the vehicle is securely supported.
3. REMOVE ENGINE UNDER COVERS
4. DRAIN ENGINE OIL (See page LU±7)
5. REMOVE FRONT EXHAUST PIPE
(See step 25 on page EM±110)
6. REMOVE SUSPENSION LOWER CROSSMEMBER
7. REMOVE ENGINE MOUNTING CENTER MEMBER
OIL PUMP (3S±FE)
REMOVAL OF OIL PUMP
HINT: When repairing the oil pump, the oil pan and strainer
should be removed and cleaned.
± LUBRICATION SYSTEMOil Pump (3S±FE)LU±9
Page 1901 of 2389
1. REMOVE HOOD
2. RAISE VEHICLE
NOTICE: Be sure the vehicle is securely supported.
3. REMOVE ENGINE UNDER COVERS
4. DRAIN ENGINE OIL (See page LU±7)
5. REMOVE SUSPENSION LOWER CROSSMEMBER
(See step 26 on page EM±142)
6. REMOVE FRONT EXHAUST PIPE
(See step 27 on page EM±142)
7. REMOVE ENGINE MOUNTING CENTER MEMBER
(See step 31 on page EM±143)
8. REMOVE FRONT ENGINE MOUNTING INSULATOR
AND BRACKET
OIL PUMP (2VZ±FE)
REMOVAL OF OIL PUMP
HINT: When repairing the oil pump, the oil pan and strainer
should be removed and cleaned.
± LUBRICATION SYSTEMOil Pump (2VZ±FE)LU±16
Page 1914 of 2389
GENERAL MAINTENANCE
These are the maintenance and inspection items
which are considered to be the owner's responsibility,
They can be performed by the owner or he
can have then done at a service shop. These items
include those which should be checked on a daily ba-
sis, those which, in most cases, do not require
(special) tools and those which are considered to be
reasonable for the owner to perform.
Items and procedures for general maintenance are as
follows:
OUTSIDE VEHICLE
1. TIRES
(a) Check the pressure with a gauge. Adjust
if necessary.
(b) Check for cuts, damage or excessive wear.
2. WHEEL NUTS
When checking the tires, check the nuts for looseness
or for missing nuts. If necessary,
tighten them.
3. TIRE ROTATION
It is recommended that tires be rotated every
7,500 miles (12,000 km).
4. WINDSHIELD WIPER BLADES
Check for wear or cracks whenever they do not wipe
clean. Replace if necessary.
5. FLUID LEAKS
(a) Check underneath for leaking fuel, oil, water or
other fluid.
(b) If you smell gasoline fumes or notice any leak,
have the cause found and corrected.
6. DOORS AND ENGINE HOOD
(a) Check that all doors including the trunk lid and
back door operate smoothly, and that all
latches lock securely.
(b) Check that the engine hood secondary latch se-
cures the hood from opening when the prima-
ry latch is released.
INSIDE VEHICLE
7. LIGHTS
(a) Check that the headlights, stop lights, taillights,
turn signal lights, and other
lights are all working.
(b) Check the headlight aiming.8. WARNING LIGHTS AND BUZZERS
Check that all warning lights and buzzers func-
tion properly.
9. HORN
Check that it is working.
10. WINDSHIELD GLASS
Check for scratches, pits or abrasions.
11. WINDSHIELD WIPER AND WASHER
(a) Check operation of the wipers and washer.
(b) Check that the wipers do not streak.
12. WINDSHIELD DEFROSTER
Check that air comes out from the defroster out-
let when operating the heater or air conditioner
at defroster mode.
13. REAR VIEW MIRROR
Check that it is mounted securely.
14. SUN VISORS
Check that they move freely and are mounted
securely.
15. STEERING WHEEL
Check that it has the specified freeplay. Be alert
for changes in steering condition, such as hard
steering, excessive freeplay or strange noise.
16. SEATS
(a) Check that all front seat controls such as
seat adjusters, seatback recliner, etc.
operate smoothly.
(b) Check that a11 latches lock securely in
any position.
(c) Check that the locks hold securely in any
latched position.
(d) Check that the head restraints move up
and down smoothly and that the locks
hold securely in any latched position.
(e) For folding±down rear seat backs, check
that the latches lock securely.
17. SEAT BELTS
(a) Check that the seat belt system such as
buckles, retractors and anchors operate
properly and smoothly.
(b) Check that the belt webbing is not cut,
frayed, worn or damaged.
± MAINTENANCEGeneral MaintenanceMA±16
Page 1915 of 2389
18. ACCELERATOR PEDAL
Check the pedal for smooth operation and uneven
pedal effort or catching.
19. CLUTCH PEDAL (See page CL±3)
Check the pedal for smooth operation.
Check that the pedal has the proper freeplay.
20. BRAKE PEDAL (See page BR±6)
(a) Check the pedal for smooth operation.
(b) Check that the pedal has the proper reserve
distance and freeplay.
(c) Check the brake booster function.
21. BRAKES
At a safe place, check that the brakes do not pull
to one side when applied.
22. PARKING BRAKE (See page BR±8)
(a) Check that the lever has the proper travel.
(b) On a safe incline, check that the vehicle is
held securely with only the parking brake
applied.
23. AUTOMATIC TRANSMISSION PARK
MECHANISM
(a) Check the lock release button of the selector
lever for proper and smooth operation.
(b) On a safe incline, check that vehicle is held
securely with the selector lever in the ºPº
position and all brakes released.
UNDER HOOD
24. WINDSHIELD WASHER FLUID
Check that there is sufficient fluid in the tank.
25. ENGINE COOLANT LEVEL
Check that the coolant level is between the
ºFULLº and ºLOWº lines on the see±through reser-
voir.
26. RADIATOR AND HOSES
(a) Check that the front of the radiator is clean
and not blocked with leaves, dirt or bugs.
(b) Check the hoses for cracks, kinks, rot or
loose connections.
27. BATTERY ELECTROLYTE LEVEL
Check that the electrolyte level of all battery cells
is between the upper and lower level lines on the
case. If level is low, add distilled water only.28. BRAKE AND CLUTCH FLUID LEVELS
(a) Check that the brake fluid level is near the
upper level line on the see±through reser-
voir.
(b) Check that the clutch fluid level is within
+ 5 mm (0.20 in.) of the reservoir hem.
29. ENGINE DRIVE BELTS
Check all drive belts for fraying, cracks, wear or
oiliness.
30. ENGINE OIL LEVEL
Check the level on the dipstick with the engine
turned off.
31. POWER STEERING FLUID LEVEL
Check the level.
The level should be in the ºHOTº or ºCOLDº
range depending on the fluid temperature.
32. AUTOMATIC TRANSMISSION FLUID
LEVEL
(a) Park the vehicle on a level surface.
(b) With the engine idling and the parking
brake applied, shift the selector into all
positions from ºPº to ºLº, and then shift
into ºPº.
(c) Pull out the dipstick and wipe off the fluid
with a clean rag. Re±insert the dipstick
and check that the fluid level is in the HOT
range.
(d) Perform this check with the fluid at normal
driving temperature (70 ± 80
°C or
158 ± 176°F).
NOTE: Wait about 30 minutes before check-
ing the fluid level after extended driving at high
speeds i n hot weather, driving i n heavy traffic
or with a trailer.
33. EXHAUST SYSTEM
Visually inspect for cracks, holes or loose sup-
ports.
If any change in the sound of the exhaust oK
smell of the exhaust fumes is noticed, have the
cause located and corrected.
± MAINTENANCEGeneral MaintenanceMA±17
Page 1923 of 2389
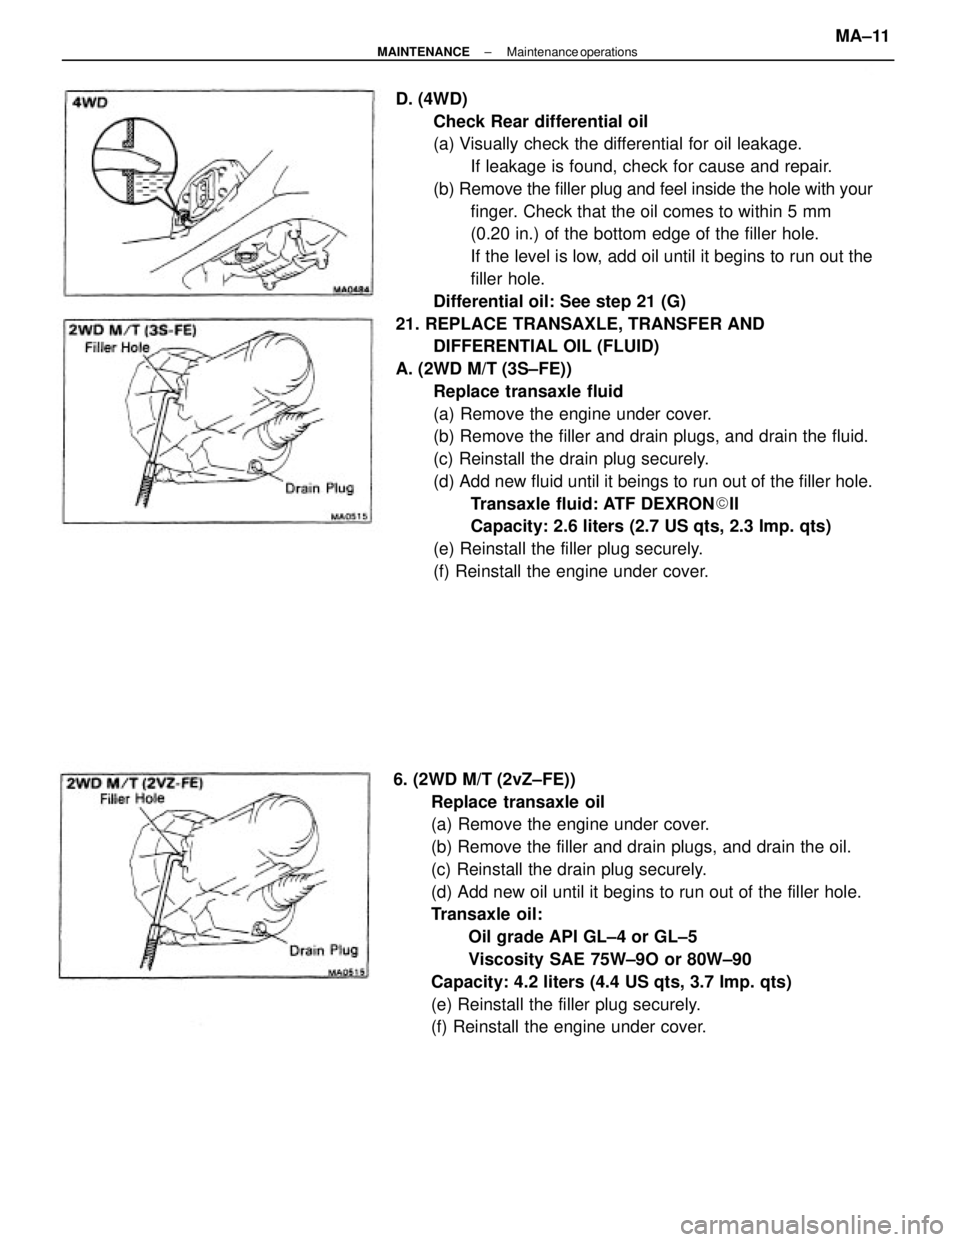
D. (4WD)
Check Rear differential oil
(a) Visually check the differential for oil leakage.
If leakage is found, check for cause and repair.
(b) Remove the filler plug and feel inside the hole with your
finger. Check that the oil comes to within 5 mm
(0.20 in.) of the bottom edge of the filler hole.
If the level is low, add oil until it begins to run out the
filler hole.
Differential oil: See step 21 (G)
21. REPLACE TRANSAXLE, TRANSFER AND
DIFFERENTIAL OIL (FLUID)
A. (2WD M/T (3S±FE))
Replace transaxle fluid
(a) Remove the engine under cover.
(b) Remove the filler and drain plugs, and drain the fluid.
(c) Reinstall the drain plug securely.
(d) Add new fluid until it beings to run out of the filler hole.
Transaxle fluid: ATF DEXRON�II
Capacity: 2.6 liters (2.7 US qts, 2.3 Imp. qts)
(e) Reinstall the filler plug securely.
(f) Reinstall the engine under cover.
6. (2WD M/T (2vZ±FE))
Replace transaxle oil
(a) Remove the engine under cover.
(b) Remove the filler and drain plugs, and drain the oil.
(c) Reinstall the drain plug securely.
(d) Add new oil until it begins to run out of the filler hole.
Transaxle oil:
Oil grade API GL±4 or GL±5
Viscosity SAE 75W±9O or 80W±90
Capacity: 4.2 liters (4.4 US qts, 3.7 Imp. qts)
(e) Reinstall the filler plug securely.
(f) Reinstall the engine under cover.
± MAINTENANCEMaintenance operationsMA±11