Page 65 of 105
")
Downloaded from www.Manualslib.com manuals search engine 3. Install wheel and tire assembly and install hub cap by pushing or hitting
into place (the wheel can be mounted with hub cap in place). The hub cap
must be oriented by engaging the bump on the side of the hub cap
retention tab with the cutout on the side of the wheel pilot hole.
Compact Spare
The compact spare tire is designed to save space in your stowage area, and
its lighter weight makes it easier to install if a flat tire occurs. The lighter weight also helps improve fuel economy. ~--~------~~
" you have a flat tire, follow the jacking Instructions in this section, while keepingihese points in mind:
• Check the tire inflaiionpressureas soon as practical after installing the
spare (we suggest you use a 'pocket-type high'pressure inflation gage) and
adjust the pressure to 415
kilopascals (60 pounds per square inch). The
tire pressure should be checked at least monthly and kept at 415 kPa (60
psi) while the tire is stored . Also at least monthly , ·qheck that the spare lire is stowed securely ; tighten it if ~ is not.
NOTICE: Bee ... this tire is smaller than the standard tire, vehicle ground clearance is reduced. Do not take your vehicle through an automatic car wash while ~ spare I. Installed; the vehicle may catch on the equipment, possibly resulting In property damag_.
• YOU can expect a tread life up to 3,000 miles (4 800 kilometers), dependiQg on road conditions and your driving habits. The tire was designed to let you
finish an extended trip (up to 3,000 miles/4 800 kilometers) and buy a replacement tire, -if needed, at a store of your choice. However, to conserve
tire tread ~fe, return the spare to the stowage area as' soon as it is
convenient to have your standard tire repaired or replaced.
• Because the compact spare was specnically designed for your vehicle , ~ should not be used on any other vehicle.
• The compact spare tire and wheel are designed for use with each other.
The compact spare tire should not be mounted on any other type of wheel, and the compact spare wheel should not have any other type of tire
mounted on it. Also, do not try to use wheel covers or trim rings on the
CQr1l>aCt spare whe el since they will not fit. If such use is attempted,
damage to tIlese items or other vehicle components may occur.
• Do not use tire chains with your :compact spare tire. Because of the smaller tire size, a tire chain will not fit properly. This could cause damage to the
vehicle and result in loss of the chain.
3-7
Page 66 of 105
 and local laws which")
Downloaded from www.Manualslib.com manuals search engine TOWING
Proper equipment must be used to prevent damage to vehicles during any
towing . State (provincial in
Canada) and local laws which apply to vehicles in .'
tow must be foltowed. Gel detailed towing instructions from your dealer.
Your vehicle, if equipped with
an automatic transaxle, may be towed on alt four
wheels at speeds less than
35 mph (55 km/h) for distances up to 50 miles (80
kilometers). These speed and distance restrictions do not apply if your vehicle
has a manual transaxle . The driveline and steering must be normalty operable.
For such towing, the steering must
be unlocked, transaxle in neutral and the
parking brake released.
Connect to main structural parts of the vehicle. Do NOT attach to bumpers or brackets. Remember also that power assist for
brakes
and steering wilt not be available when the engine is off.
n the vehicle is to be towed by a wrecker , use only equipment designed for this
purpose, following
the instructions of the wrecker manufacturer . Towing on the rear wheels is preferred because of the front-wheel drive. However, if
necessary, your vehicle may be towed backwards on the front drive wheels at speeds up to 35 mph (55 km/h) for distances of 50 miles (80 kilometers) if it is
equipped with
an automatic transaxle. These speed and distance restrictions do not apply ij your vehicle has a manual transaxle. Severe damage to the
transaxle may result
II speeder distance ~m~s are exceeded.
A safety chain system must
be used. for alt towing .
FREEING VEHICLE FROM SAND, MUD, SNOW OR ICE
n your vehicle gets stuck in sand, mUd, snow or ice, shift the transaxle from a
forward range to reverse in a repeat pattern.
(On manual transaxle models, shift the Ifansaxle from First or Second to Reverse .) Apply a tight pressure to
the accelerator pedal
while the transaxle is in gear. Remove your foot from the
accelerator while shifting.
Do not race the engine. For best traction, avoid
spinning the wheels. Incorrect rocking of your' vehicle while it is stuck may
resuh in damage to vehicle components.
CAUTION: Do ............ -.. _ IN. 35 ""'" ,55 Om/h). _ In)ufy .... .-nave (including tire, vehicle body parte. and/or tr.., .. xle failure) mIIy mutt from exCQ:live wheel spinning.
If the vehicle remains stuck after several rocking attempts, seek other
assistance. Also
see the Notice under "Automatic Transaxles" in "Starting and
Operating", Section 2 01 this manual .
Extended Vehicle Storage
If you plan to store your vehicle over an extended period of time, certain steps
should
be taken to give it maximum protection. It is recommended that you
write the Consumer Relations Department , Chevrolet Motor Division, Warren,
Michigan 48090,
(in Canada, write to General Motors of canada Um~ed,
Customer Services Departmeht, Oshawa, Ontario L 1 J5Z6) for detailed
instructions on how to prepare your vehicle for storage .
3-8
Page 67 of 105

Downloaded from www.Manualslib.com manuals search engine SECTION 4
APPEARANCE CARE
CAUTION: Follow the manufacturer'. advic:e WHENEVER cleaning agents or other chemicals are used, inside, or outaide the vehicle. Some clelner. may be poisonous or flammable, and improper UM may cause personal injury or daf1lllge. When cleaning the Inaide or outsideot the vehic~, DO NOT USE volatile cleaning aolYents such Ia: acetone, lacquer thinners, enamel reducers, nail poUsh removers; or such cleaning mmeriliis .. laundry soaps, bleaches or redudng agents except as noted In the fIIbric clHning MtYlce on stein removal which: faNow. . NEVER use carbon tetrlChlorkle, gasoline, benzene, or naphtha for any cleaning purpose .
()pen aM vehicle doors tor ventlillUon when ANY c5unlng agenu or other -chemk:ata _. uaed In the interior. Overexposure to some YIjIpOI'S may Nautt In a health -probtem which I. more likely to occur in small, unvent8ated spaces.
NonCE: Toavoidpoasible permanent discoloration ,Of, white or light COlored leN, DO NOT let triaterials with un .. able dyes come in contact with seat trim material, until
these rMterials are totally dry. (ThIs Includes cet:t-~YP8' of casual clothing. such •• colored denims, corduroys , IeMhers and suedes; alsodecorltive paper, etc.)
CARE AND CLEANING OF THE INTERIOR
With the use of modern trim materials, ~ is VERY IMPORTANT that you use
proper cleaning techniques and cleaners. Failing to do this on the fi'st cleaning may result in water spots, spot rings, or setting of stains or soilage -all of
which are more difficult to remove in a second cleaning :
Dust
and loose dirt that collect on interior fabrics should be removed often with
a vacuum
cleaner or soft bristle brush. Wipe vinyl or leather trim regularly with
a clean damp cloth. Normal trim soilage, spots, or stains can be cleaned with
these
GM c leaners :
GMCLEANERS
Container GM Part Cleaner Size Number
GM"Spot Lifter 80z. 1051398 (Solv en t Type) 10.237 L)
GM Multj-Purpose SIbs. P owdered Clean er 12.72 kg.} 1050429 (Foa m Type)
The above products are excellent cleaners when used properly. Tlley are
available through your authorized
dealer.
Remember these basic steps before cleaning:
t. Remove stains as quickly as possible before they beoome "set."
2. Use a clean Cloth or sponge, and change to a clean area often. (A soft
brush may be used if stains persist.)
3 . Use solvent-type cleaners
only in a well ventilated area; also, do not
saturate the stained area.
4 .
If a ring forms after spot cleaning , clean the entire area immediately .
5. Follow specific instruction s on cleaner labels.
4-1
Page 68 of 105
 With Foam
Type
Cleaner
GM Mul")
Downloaded from www.Manualslib.com manuals search engine Cleaning General Soilage Or Water Spots From Fabric-Type
Trim
(Including Fleece and Pigskin Suede Leather) With Foam
Type
Cleaner
GM Multi-Purpose Powdered Cleaner is excellent for this type of cleaning and for cleaning panel sections where small cleaning rings may be left from spot
cleaning .
• Vacuum the area thoroughly to remove any loose dirt.
• ALWAYS clean a full trim assembly or complete trim section . Mask
surrounding trim along stitch or welt lines.
•
Mix Muiji -Purpose Powdered Cleaner in strict accordance with the
directions
on the container label. Mix in proportion for smaller quantities .
• USE SUDS ONlY ON A CLEAN SPONGE OR SOFT BRISTLE BRUSH . 00 NOT SATURATE THE FABRIC OR RUB IT HARSHLY WITH A BRUSH.
IMMEDIATELY
AFTER CLEANING, WIPE OFF EXCESS SUDS WITH A SLIGHTLY DAMP ABSORBENT TOWEL OR CLOTH.
•
IMPORTANT -IMMEDIATELY AFTER WIPING, FORCE-DRY THE FABRIC
WITH . AN AIR HOSE. FOR MATERIALS OTHER THAN PIGSKIN SUEDE
LEATHER A HEAT DRYER OR HEAT LAMP MAY BE USED. (Use caution wijh heat dryer or lamp to help prevent fabric damage. )
• When trim materials wijh a sheen or luster finish are dry, wipe the fabric
lightly with a soft, dry, clean cloth to restore ijs sheen or luster.
Spot Cleaning Fabric Type Trim (Except Pigskin Suede
Leather) with Solvent Type Cleaner
Before trying to remove a spot or stain from fabric, determine as accurately as
you can the type and age
of the spot or stain . Some spots or stains can be
removed with water
or mild soap solulion (see "Removal of Spec~ic Stains").
Spots or stains should always be removed as soon as possible .
Some types of stains or soilage, such as lipstick, inks and grease, are very
difficufl (sometimes impossible) to completely remove. When cleaning this type
of stain
or soilage, be sure not to. enlarge the soiled area .
GM Fabric
Cleaner (Solvent Type) is excellent for spot cleaning grease, oil, or fat stains .
NonCE: Solvent type cle.ners MUST NOT be used on pigskin suede leather. Damage 10 the materia' may result from such use.
• Gently scrape excess stain from the trim material with a clean , DULL kn~e or scraper. USE VERY LITTLE CLEANER , light pressure and clean cloths
(preferably cheesecloth) . Cleaning should start at the outside of the stain,
"FEATHERING" toward the center. Keep changing to a clean section of the cloth.
• When you clean a stain from fabric, immediately dry the area with an air
hose, heat dryer, or heat lamp to help prevent a cleaning ring. (Use caution
with a heat dryer or lamp to help prevent fabric damage).
• ij a ring forms, immediately repeat the cleaning operation over a slightly larger area with emphasis on '.'FEATHERING" towards its center . ij a ring
remains, mask
off surrounding trim sections and clean the entire ajijected
area wijh GM Mufti-Purpose Powdered Cleaner (as described under "Cleaning General Soilage or Water Spots from Fabric Type Trim with
Foam Type Cleaner").
4-2
Page 69 of 105

Grease or Oil Stains ~ Includes grease, oil, butter, margarine, shoe polish")
Downloaded from www.Manualslib.com manuals search engine Removal Of Specific Stains (Except from Pigskin Suede
Leather)
Grease or Oil Stains ~ Includes grease, oil, butter, margarine, shoe polish, coffee with cream, chewing gum, cosmetic creams, vegetable oils, wax crayon,
tar and asphalts.
•
Carefully scrape off excess stain, then use GM Fabric Cleaner (Solvent Type) as previously described.
• Shoe polish, wax crayons, tar and asphalts will stain if left on trim; they
should be removed as soon as possible. Use caution as the cleaner will
dissolve them and may cause them to "bleed."
Non-Greasy Stains -Includes catsup, coffee (black), egg, fruit, fruit juice, milk,
soft drinks, wine, vomit and blood.
• Carefully scrape off excess stain, then sponge the stain with cool water.
• If a stain remains, use Multi-Purpose Powdered Cleaner (Foam Type) as previously described.
• If an odor lingers after cleaning vomit or urine, treat the area with a water /
baking soda solution: 5 milliliters (1 teaspoon) of baking soda to 250 milliliters (1 cup) of lukewarm water.
• Finally, if needed, clean lightly with Fabric Cleaner (Solvent Type).
Combination
Stains -Includes candy, ice cream, mayonnaise, chili sauce and
unknown stains.
• Carefully scrape off excess stain, then clean with cool water and allow to
dry.
• U a stain remains, clean it with Fabric Cleaner (Solvent Type).
Removal of Specific Stains from Pigskin Suede Leather
For the removal of all grease or oil, non-greasy and combination stains on
Pigskin Suede Leather, GM recommends the use of a qualified professional
cleaner who has been trained to care for suede leather.
Cleaning Vinyl Or Leather Trim (Except Pigskin Suede
Leather)
Ordinary soilage can be removed from vinyl or leather wlth warm water and a
mild soap such as saddle soap or oil soap, or an equivalent.
• Apply a small amount of soap solution and let it soak for a few minutes to loosen dirt; then, rub briskly with a clean, damp cloth to remove dirt and
traces of soap. (This may ba repeated several times, if needed.)
• Soilage such as tars, asphalts, shoe polish, etc. will stain if left on trim.
They should be wiped off as quickly as possible and the area cleaned with
a
clean cloth dampened with GM Vinyl/Leather Cleaner (Solvent Type).
Seat Belt Care
• Keep belts clean and dry.
• Clean seat belts only with mild soap and lukewarm water.
• Do not bleach or dye belts since this may severely weaken them.
4-3
Page 70 of 105

Downloaded from www.Manualslib.com manuals search engine Glass Surfaces
Glass surfaces should be cleaned on a regular baSis. Use of GM Glass
Cleaner
or a commercial househo .1d glass cleaner will remove normal tobacco
srooke and dust films sometimes caused by ingredients used in vinyls and
interior plastics.
Never use abrasive cleaners on any vehicle gl~s, as they may cause,
scratches. If abrasive cleaners are used on the insieje of the rear window, any electric defogger element may be damaged. Avoid placing decals on the inside
rear window , since they may have to be scraped off later. Any temporary
license , etc. should not be 'att ached across the defogger grid.
Cleaning Glass Roof Panels
Never use abrasive cleaners on any glass roof panels, such as Vista-Vent
panels , as such cleaners may cause scratches. Also, if you use such cleaners on the inside surface, the tinted coating may be damaged . Avoid placing decals on the inside surface, since they may later have to be scraped off.
CARE AND CLEANING OF THE EXTERIOR
Exterior Rnish
The paint finish on your vehicle prOVides-beauty, depth 01 color , gloss retention
and durabiMy .
Washing Your Vehicle
The best way to preserve your vehicle's finish is to keep it clean by frequent
washings. Wash the
vehicle in lukewarm or cold water.
Do not use hot water or wash your
vehicle in the direct rays 01 the sun. Do not
use strong soap or
chemical detergents. All cleaning agents should be flushed proinptly from the surface and not allowed to dry on the linish .
POlishing and Waxing
Polishing is recommended to remove built-up residue and eliminate any "weathered" appearance.
Your dealer offers several polishes and cleaners which have proven value in maintaining original finish appearance and durability.
Protecting Exterior Bright Metal Parts
Bright metal parts should be cleaned regularly to keep their luster. Washing
with water
is all that is usually needed. However , you may use GM Chrome polish on chrome or stainless steel trim, n necessary .
Use special care with
aluminum trim. To avoid damag ing protective trim, never use auto or chrome polish, steam or caustic soap to clean aluminum. A coating
of wax, rubbed to a high polish, is recommended for all bright metal parts.
Cleaning Aluminum Wheels
Preserve the original appearance of aluminum wheels (il your vehicle has
them) by keeping them
clean and free from build-up of road dirt and/or road salt. Regular cleaning followed by a' coat Of wax is recommended. Do not use
abrasive
cleaners , as they could damage the protective coating.
4-4
Page 71 of 105

Downloaded from www.Manualslib.com manuals search engine Cleaning White Sidewall Tires
Use GM White Sidewall Tire Cleaner or a tire cleaner which will not harm aluminum wheel trim. A stiff brush may be used with the cleaner.
CORROSION PROTECTION
'four vehicle has been designed and built to resist corrosion. Special materials and protective finishes were used on most parts of your vehicle when it was
built to help maintain good looks, strength and reliable operation. However,
some parts which normally are not visible (such as certain parts under the
vehicle and under the hood) are such that surface rust will not affect their reliability. So, corrosion protection is not needed or used on these parts.
Sheet Metal Damage
If your vehicle is damaged and requires sheet metal repair or replacement, make sure the body repair shop applies anti-corrosion material to the parts
repaired or replaced so that corrosion protection is restored. (Also see "Finish Damage" which follows.)
Foreign Material Deposits
Calcium chloride and other salts, ice melting agents, road oil and tar, tree sap, bird droppings, chemicals from industrial chimneys, and other foreign matter
may damage vehicle finishes if left on painted surfaces.
Prompt washing may not completely remove all of these deposits. Other cleaners may be needed. When using chemical cleaners, be sure they are safe
for use on painted surfaces.
Finish Damage
Any stone chips, fractures or deep scratches in the finish should be repaired
promptly. Bare metal will corrode quickly and may develop into a major repair
expense.
Minor chips and scratches can be repaired with touch-up materials available from your dealer or other service outlets. Larger areas of finish damage can be
corrected in your dealer's body and paint shop.
Underbody Maintenance
Corrosive materials used for ice and snow removal and dust control can collect on the underbody. If these materials are not removed, accelerated corrosion
(rust) can occur on underbody parts such as fuel lines, frame, floor pan, and
exhaust system even though they have been provided with corrosion
protection.
At
least every spring, flush these materials from the underbody with plain
water. Take care to clean any areas where mud and other debris can collect.
Sediment packed in closed areas of the frame should be loosened before being flushed. If desired, your authorized dealer can do this service for you.
4-5
Page 72 of 105

Downloaded from www.Manualslib.com manuals search engine NOTICE TO NEW CHEVROLET OWNERS REGARDING
CHEMICAL PAINT SPOTTING
Chevrolet believes that certain weather and atmospheric conditions· may create
a chemical fallout whereby certain airborne pollutants fall upon and attack
vehicle paints. Occurrences have taken place primarily in the northeastern
seaboard
area. The paint damage takes two forms: blotchy, ringlet-shaped
discoforations, and small irregular dark spots etched into the paint surface.
Paint spotting as a result of the fallout is not related to a defect. in paint materials or workmanship. For this reason, claims arising from this condition
are not considered to be warranty related. Nevertheless, because Chevrolet
shares the pride which our owners take in preserving and maintaining the
appearance of their vehicles, Chevrolet has authorized its dealers to repair, at no charge to the owner, the surfaces of new vehicles damaged by this fallout
condition within 12 months or 12,000 miles (20 000 kilometers) of purchase,
whichever comes first.
4-6
 1
1 2
2 3
3 4
4 5
5 6
6 7
7 8
8 9
9 10
10 11
11 12
12 13
13 14
14 15
15 16
16 17
17 18
18 19
19 20
20 21
21 22
22 23
23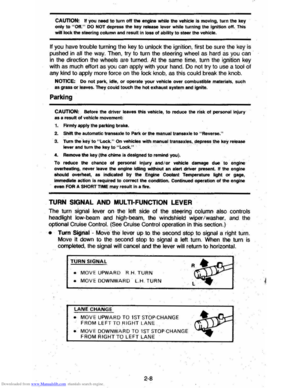 24
24 25
25 26
26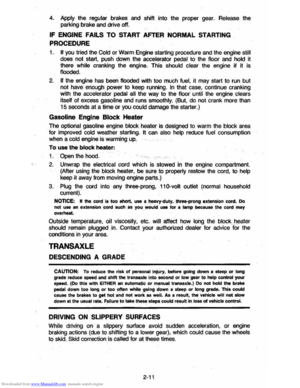 27
27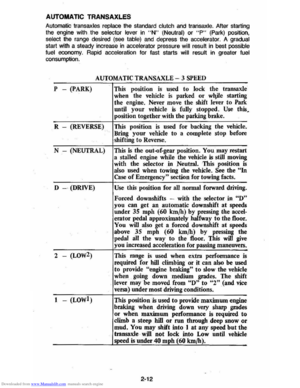 28
28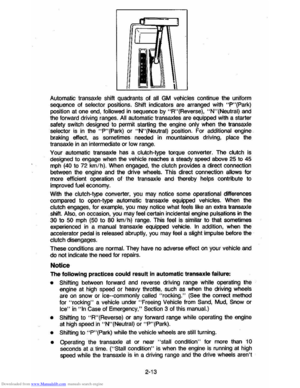 29
29 30
30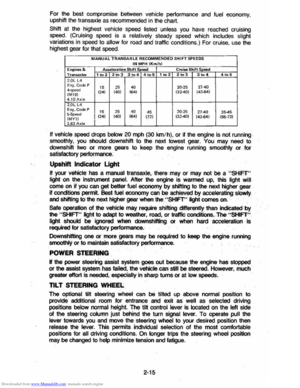 31
31 32
32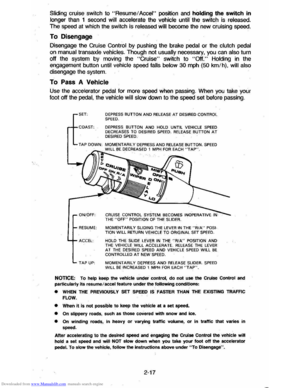 33
33 34
34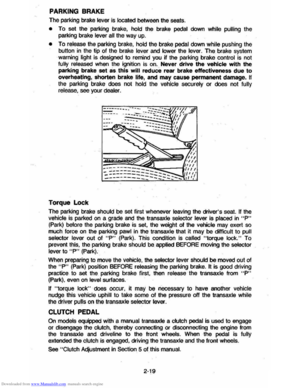 35
35 36
36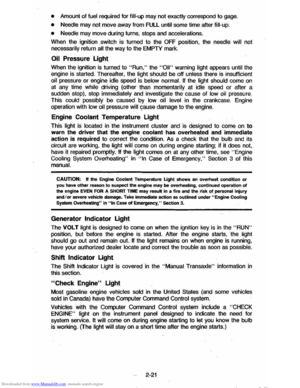 37
37 38
38 39
39 40
40 41
41 42
42 43
43 44
44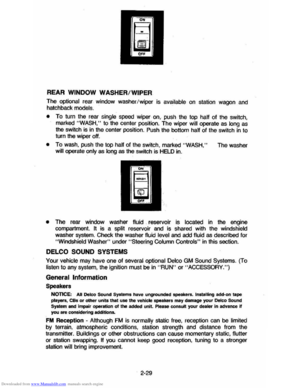 45
45 46
46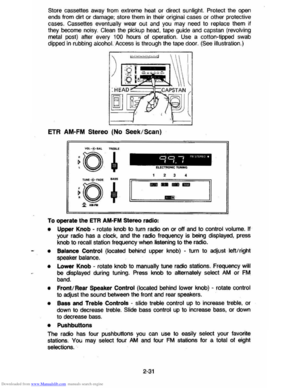 47
47 48
48 49
49 50
50 51
51 52
52 53
53 54
54 55
55 56
56 57
57 58
58 59
59 60
60 61
61 62
62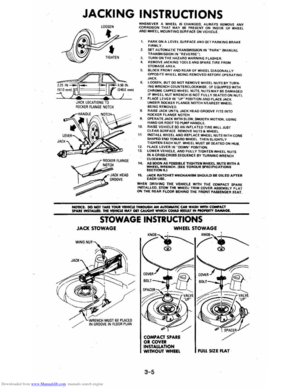 63
63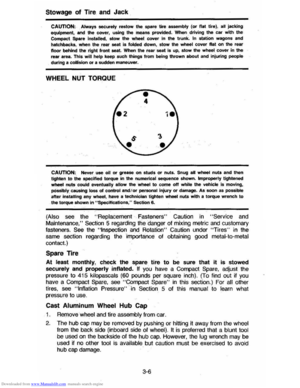 64
64 65
65 66
66 67
67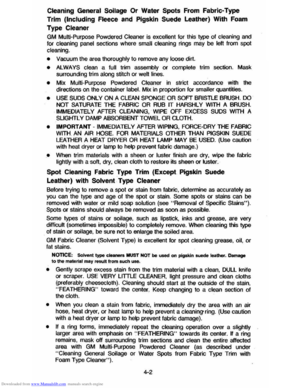 68
68 69
69 70
70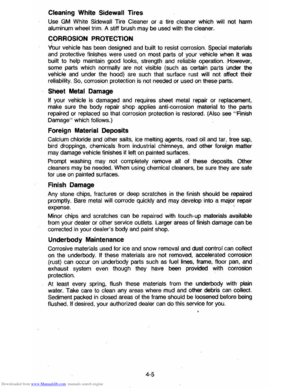 71
71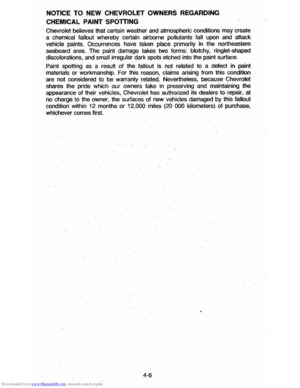 72
72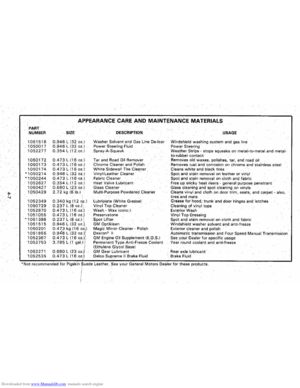 73
73 74
74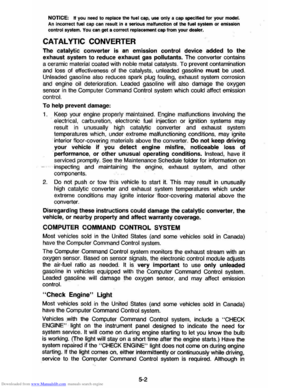 75
75 76
76 77
77 78
78 79
79 80
80 81
81 82
82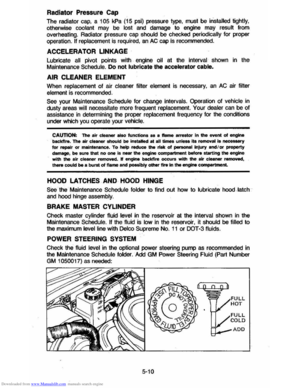 83
83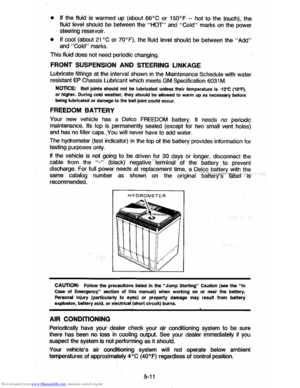 84
84 85
85 86
86 87
87 88
88 89
89 90
90 91
91 92
92 93
93 94
94 95
95 96
96 97
97 98
98 99
99 100
100 101
101 102
102 103
103 104
104