1968 DATSUN 510 air suspension
[x] Cancel search: air suspensionPage 172 of 252

DIFFERENTIAL
REAR
AXLE
AND
REAR
SUSPENSION
167
REAR
SUSPENSION
pICK
UP
Rear
Suspension
Inspection
nnd
Repair
Pick
up
1
Check
spnngs
for
cracks
breaks
and
general
conditIon
Replace
as
reqwred
If
a
spnng
on
one
Side
IS
replaced
also
replace
the
other
one
2
Check
U
bolts
for
bends
stripped
threads
and
general
conditIon
Replace
as
reqUIred
3
Check
rubber
bumpers
and
bushings
for
cracks
wear
and
general
condll1on
Replace
if
defecl1ve
4
Check
shock
absorbers
for
leaks
or
other
damage
Replace
as
required
Rear
Suspension
Installation
Pick
up
1
Replace
the
rear
suspension
components
m
the
reverse
order
of
removal
2
When
msta11mg
rubber
bushmgs
coat
them
hghtly
With
a
soap
solution
3
Torque
parts
as
follows
Shackle
Pin
Spnng
Pm
U
Bolt
Secunng
Nut
Shock
Absorber
Upper
Nut
Shock
Absorber
Lower
Nut
Dnve
Shalt
Secunng
Bolt
83
to
94
It
Ib
11
5
to
13
kg
m
83
to
94
It
Ib
115
to
13
kg
m
61
to
72
ItAb
85
to
10
kg
m
26
to
31
It
Ib
36
t04
3
kg
m
10
to
12
ft
Ib
1
4
to
1
6
kg
m
18
to
22
ft
Ib
25
to
30
kg
m
NOTE
Retighten
bolts
and
nuts
that
hold
bushmgs
after
vehicle
has
been
removed
from
Jack
and
stands
Page 178 of 252
FRONT
AXLE
FRONT
SUSPENSION
AND
STEERING
173
Spindle
Nut
21
7
to
253ft
Ib
30to35kg
m
528
to
716
ft
Ib
7
3
to
9
9
kg
m
282
to
38
3
fl
Ib
3
9to
5
3
kg
m
195
to
26
8
fl
b
2
7to3
7
kg
m
Caliper
FIXing
Bolts
Rotor
Flxmg
Bolls
Back
Plate
fiXIng
Boft
STABILIZER
SEDAN
AND
WAGON
SfBbilizer
Removal
Sednn
and
Wagon
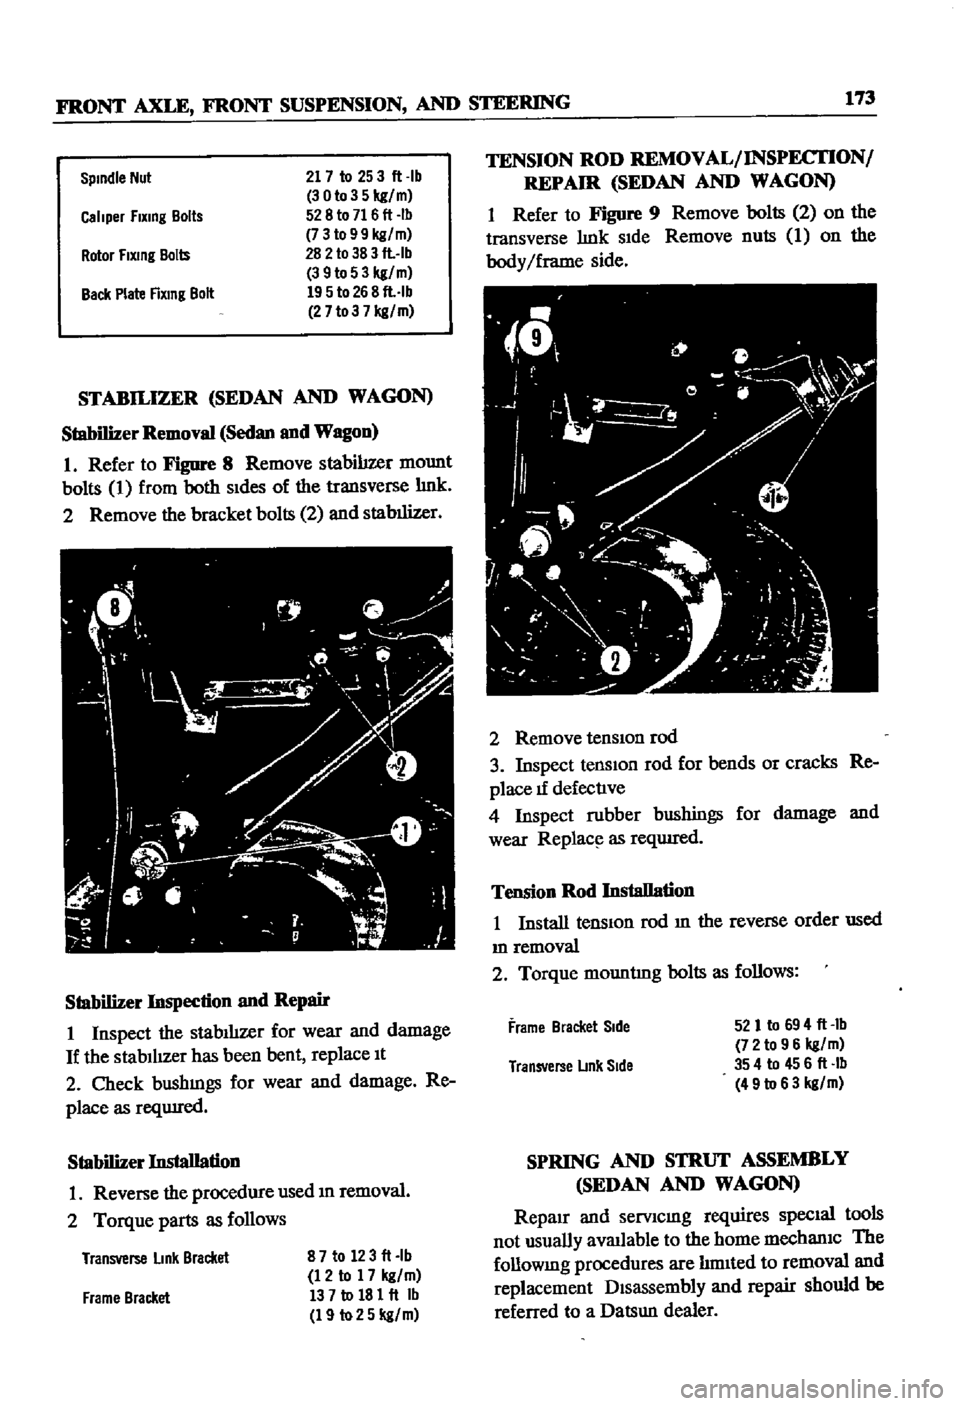
1
Refer
to
Figure
8
Remove
stabilizer
mount
bolts
1
from
both
Sides
of
the
transverse
hnk
2
Remove
the
bracket
bolts
2
and
stabilizer
Stabilizer
Inspection
nnd
Repair
1
Inspect
the
stablhzer
for
wear
and
damage
If
the
stabilIzer
has
been
bent
replace
It
2
Check
bushmgs
for
wear
and
damage
Re
place
as
reqUIred
Stabilizer
Installation
1
Reverse
the
procedure
used
m
removal
2
Torque
parts
as
follows
Transverse
link
Bracket
87to
123ft
lb
12
to
17
kg
m
137tol81ft
Ib
19
to25
kg
m
Frame
Bracket
TENSION
ROD
REMOVAL
INSPECTION
REPAIR
SEDAN
AND
WAGON
1
Refer
to
Figure
9
Remove
bolts
2
on
the
transverse
hnk
SIde
Remove
nuts
1
on
the
body
Iframe
side
2
Remove
tensIOn
rod
3
Inspect
tensIOn
rod
for
bends
or
cracks
Re
place
1f
defective
4
Inspect
rubber
bushings
for
damage
and
wear
Replac
l
as
reqwred
Tension
Rod
Installation
1
Install
tension
rod
m
the
reverse
order
used
m
removal
2
Torque
mountIng
bolts
as
follows
Frame
Bracket
Side
521
to
694
ft
Ib
72
to
96
kg
m
354
to
456ft
Ib
49
to
63
kg
m
Transverse
LInk
Side
SPRING
AND
STRUT
ASSEMBLY
SEDAN
AND
WAGON
Repair
and
serVicmg
requires
SpecIal
tools
not
usually
avaJlable
to
the
home
mechaniC
The
followmg
procedures
are
hmIted
to
removal
and
replacement
Disassembly
and
repair
should
be
referred
to
a
Datsun
dealer
Page 181 of 252
176
CHAPTER
TInRTEEN
@
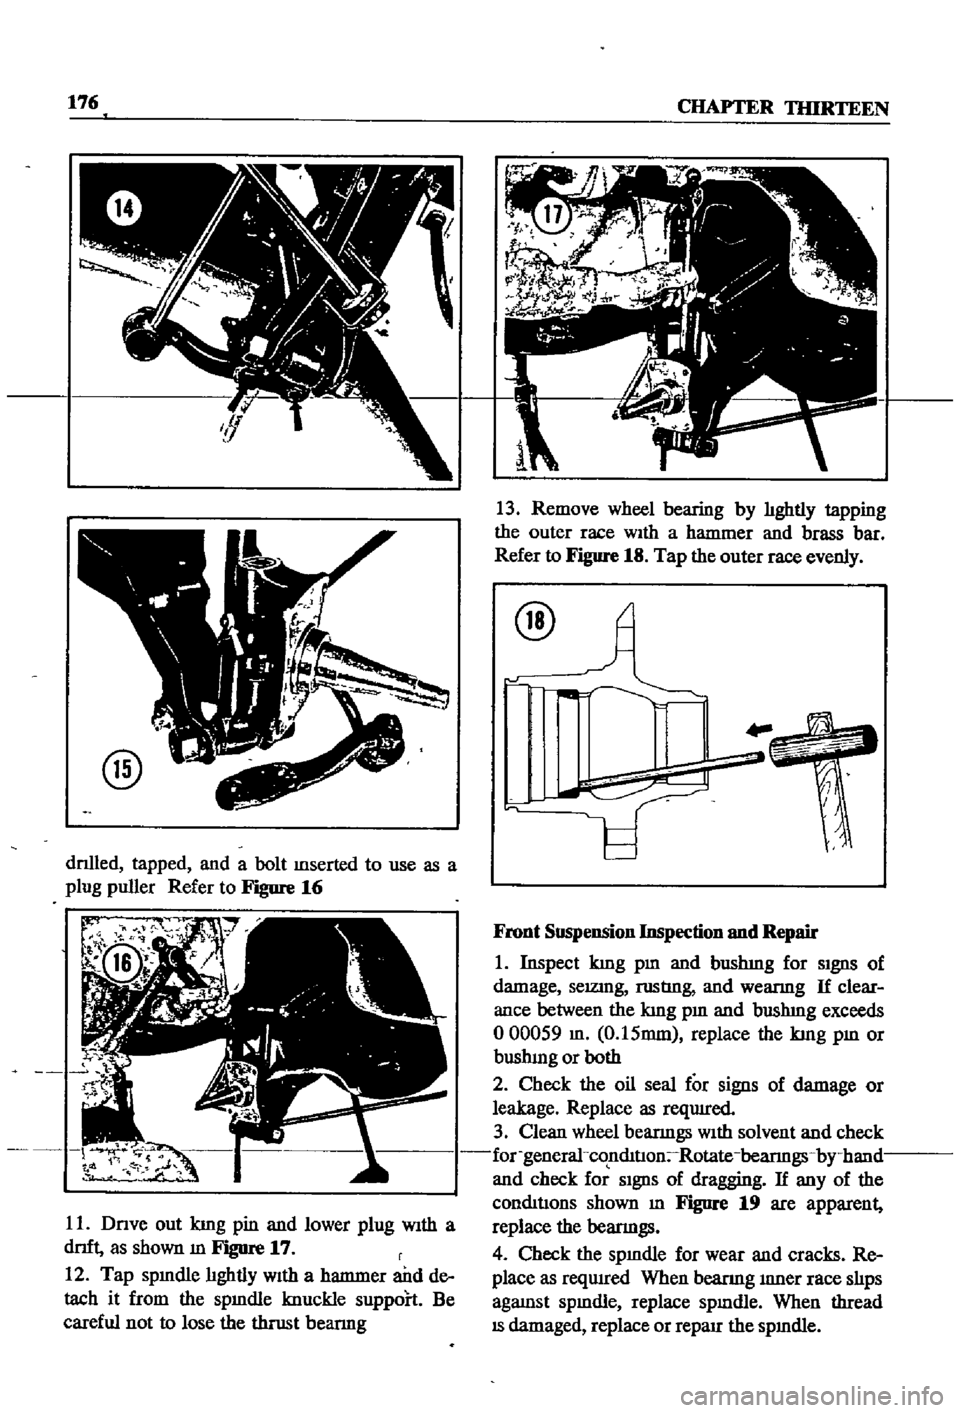
dnlled
tapped
and
a
bolt
mserted
to
use
as
a
plug
puller
Refer
to
Figure
16
r
r
t
t
rJ
11
Dnve
out
kmg
pin
and
lower
plug
With
a
dnft
as
shown
m
Figure
17
r
12
Tap
spmdle
hghtly
With
a
hanrmer
and
de
tach
it
from
the
spmdle
knuckle
suppoh
Be
careful
not
to
lose
the
thrust
bearmg
13
Remove
wheel
bearing
by
hghtly
tapping
the
outer
race
WIth
a
hanrmer
and
brass
bar
Refer
to
Figure
18
Tap
the
outer
race
evenly
@
Front
Suspension
Inspection
nnd
Repair
1
Inspect
kmg
pm
and
bushmg
for
SIgnS
of
damage
selZlDg
rustIng
and
wearmg
If
clear
ance
between
the
kmg
pm
and
bushmg
exceeds
000059
m
0
15mm
replace
the
kmg
pm
or
bushmg
or
both
2
Check
the
oil
seal
for
signs
of
damage
or
leakage
Replace
as
reqUIred
3
Clean
wheel
bearmgs
With
solvent
and
check
for
general
co
nmtIon
Rotate
bearmgs
by
hand
and
check
for
SIgnS
of
dragging
If
any
of
the
conmtJons
shown
m
Figure
19
are
apparent
replace
the
bearmgs
4
Check
the
spmdle
for
wear
and
cracks
Re
place
as
reqwred
When
beanng
mner
race
shps
agaJDst
spmdle
replace
spmdle
When
thread
IS
damaged
replace
or
reparr
the
spmdle
Page 184 of 252
FRONT
AXLE
FRONT
SUSPENSION
AND
STEERING
179
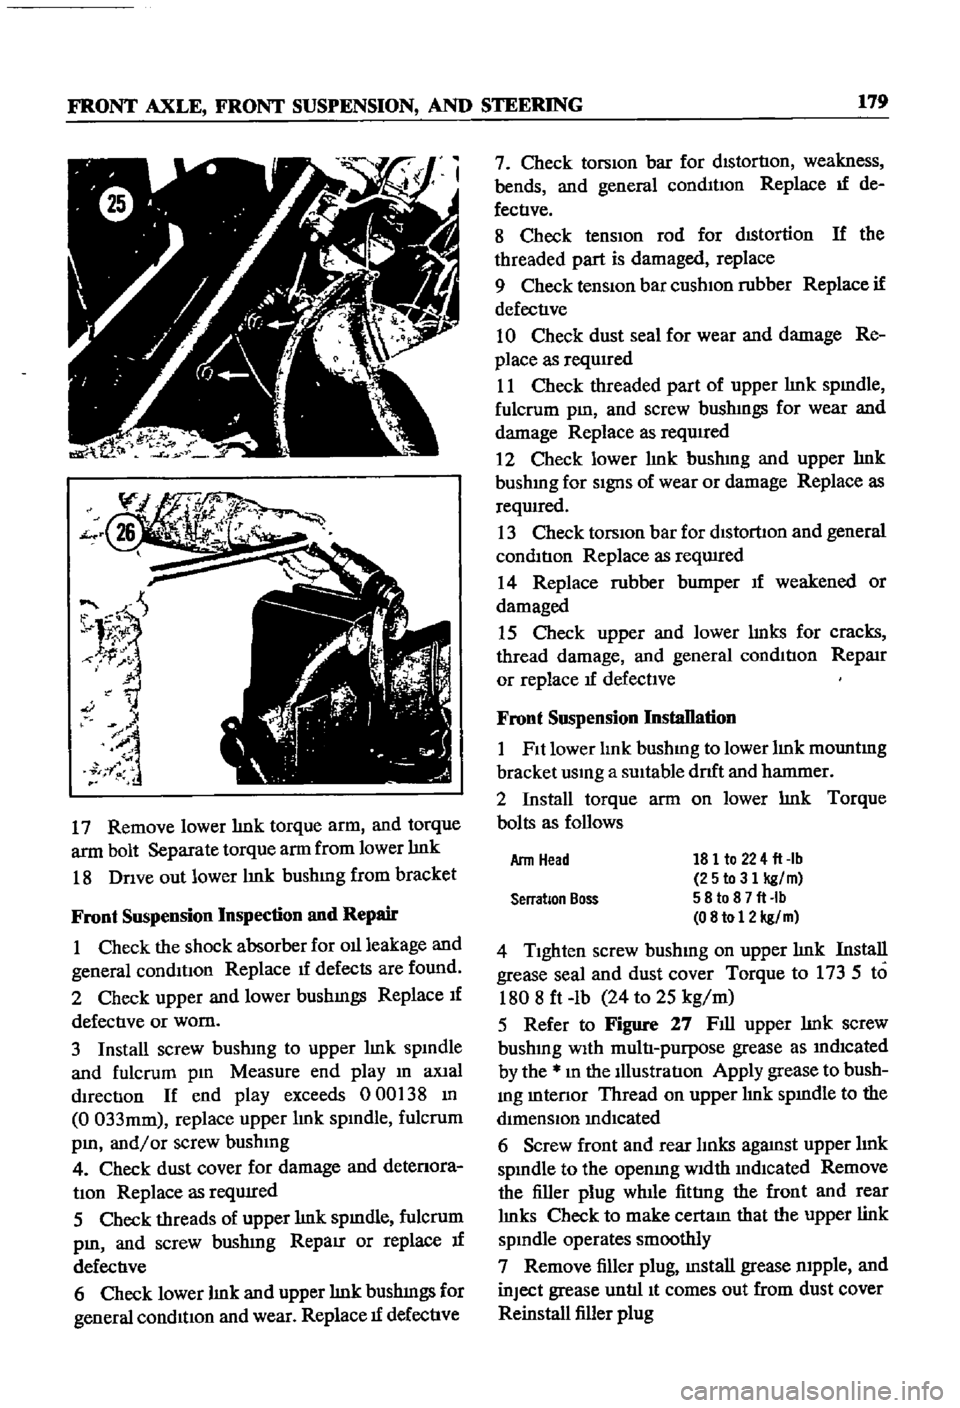
17
Remove
lower
lmk
torque
arm
and
torque
arm
bolt
Separate
torque
arm
from
lower
lmk
18
Dnve
out
lower
lmk
bushmg
from
bracket
Front
Suspension
Inspection
and
Repair
1
Check
the
shock
absorber
for
011
leakage
and
general
conditIon
Replace
1f
defects
are
found
2
Check
upper
and
lower
bushmgs
Replace
If
defective
or
worn
3
Install
screw
bushmg
to
upper
lmk
spmdle
and
fulcrum
pm
Measure
end
play
m
aXial
dIrection
If
end
play
exceeds
000
38
m
0
033mm
replace
upper
lmk
spmdle
fulcrum
pm
and
or
screw
bushmg
4
Check
dust
cover
for
damage
and
detenora
tIon
Replace
as
reqUIred
5
Check
threads
of
upper
lmk
spmdle
fulcrum
pm
and
screw
bushmg
RepaIr
or
replace
If
defective
6
Check
lower
lmk
and
upper
lmk
bushmgs
for
general
condition
and
wear
Replace
1f
defective
7
Check
torsion
bar
for
distortion
weakness
bends
and
general
conmtIon
Replace
If
de
fectIve
8
Check
tensIOn
rod
for
dIStortion
If
the
threaded
part
is
damaged
replace
9
Check
tenSiOn
bar
cushIOn
rubber
Replace
if
defective
10
Check
dust
seal
for
wear
and
damage
Re
place
as
requIred
11
Check
threaded
part
of
upper
lmk
spmdle
fulcrum
pm
and
screw
bushmgs
for
wear
and
damage
Replace
as
required
2
Check
lower
hnk
bushmg
and
upper
hnk
bushmg
for
SignS
of
wear
or
damage
Replace
as
reqwred
13
Check
torsIOn
bar
for
dlstorllon
and
general
condition
Replace
as
reqwred
14
Replace
rubber
bumper
If
weakened
or
damaged
15
Check
upper
and
lower
lmks
for
cracks
thread
damage
and
general
condition
RepaIr
or
replace
If
defectIve
Front
Suspension
Installation
1
Fit
lower
lmk
bushmg
to
lower
lmk
mountmg
bracket
usmg
a
SUItable
drlft
and
hanmIer
2
Install
torque
arm
on
lower
lmk
Torque
bolts
as
follows
181
to
224
fl
lb
25to31
kg
m
58
to
8
7
fl
Ib
08
to
12
kg
m
4
Tighten
screw
bushmg
on
upper
lmk
Install
grease
seal
and
dust
cover
Torque
to
173
5
to
1808
ft
lb
24
to
25
kg
m
5
Refer
to
Figure
27
Fill
upper
lmk
screw
bushmg
With
multi
purpose
grease
as
mdlcated
by
the
m
the
Illustration
Apply
grease
to
bush
mg
mtenor
Thread
on
upper
lmk
spmdle
to
the
dimenSIOn
mdIcated
6
Screw
front
and
rear
lInks
agaJnst
upper
hnk
spmdle
to
the
openmg
Width
mdlcated
Remove
the
filler
plug
while
fittIng
the
front
and
rear
lmks
Check
to
make
cectam
that
the
upper
link
spmdle
operates
smoothly
7
Remove
filler
plug
mstall
grease
mpple
and
inJect
grease
untIl
It
comes
out
from
dust
cover
Reinstall
filler
plug
Arm
Head
Serration
Boss
Page 244 of 252
138
INDEX
H
OIl
pump
Descnptlon
36
Handbrake
Exploded
view
29
Adjustment
202
Inspection
and
repaIr
28
Cable
removal
front
sedan
and
wagon
197
Installation
58
Cable
removal
rear
pick
up
201
Removal
28
40
Cable
removal
rear
sedan
and
wagon
197
Cross
rod
removal
wagon
201
Exploded
views
198
200
p
Inspection
and
repair
201
Installation
201
Penodlc
mamtenance
Headlights
MaIntenance
mtervals
chart
7
Bulb
replacement
210
Penodlc
checks
6
Descnptlon
210
Recommended
lubncants
8
Exploded
view
219
Routine
checks
6
HeatIng
system
Piston
nngs
Descnptlon
210
Exploded
view
pick
up
213
Inspection
50
Exploded
VIews
sedan
and
wagon
214
215
Removal
45
Hood
lock
control
RIng
gap
50
Exploded
View
pick
up
225
Pistons
Descnptlon
34
Exploded
VIew
sedan
and
wagon
226
Inspection
50
Reassembly
54
Igmtlon
coil
111
R
Igmtlon
system
Tlmmg
23
Radiator
Troubleshooting
13
Exploded
view
90
Instrument
meters
and
panels
Removal
and
replacement
90
Descnptlon
210
Rear
axle
pick
up
Exploded
View
pick
up
213
Axle
case
166
Exploded
view
sedan
and
wagon
Inspection
and
mstalIatlon
164
1970
1972
212
Removal
164
Exploded
view
sedan
and
wagon
Sectional
view
163
through
1969
211
Rear
axle
wagon
Intake
manifold
Disassembly
158
Descnptlon
36
Exploded
view
158
Removal
42
Inspection
and
reassembly
160
InstallatIOn
160
Removal
158
M
Rear
axle
and
suspenSion
sedan
Exploded
view
152
153
Mam
beanngs
52
Inspection
and
repaIr
154
MaIntenance
penodlc
6
8
InstalIatlon
154
Master
cylInder
Removal
151
Exploded
vIew
smgle
188
Rear
spnngs
pick
up
166
Exploded
view
tandem
189
Rear
spnngs
wagon
161
Inspection
and
repllIr
188
Rear
axle
shaft
sedan
155
156
Reassembly
and
InstalIatlon
190
Rear
suspension
arm
sedan
155
Removal
and
disassembly
188
Rear
suspenSion
pick
up
Modelldentdicatlon
1
Exploded
view
166
Inspection
and
repllIr
167
InstalIatlon
167
0
Rear
spnngs
166
Removal
165
011
filler
30
Spnngs
166
d
43
Torques
67
Page 245 of 252
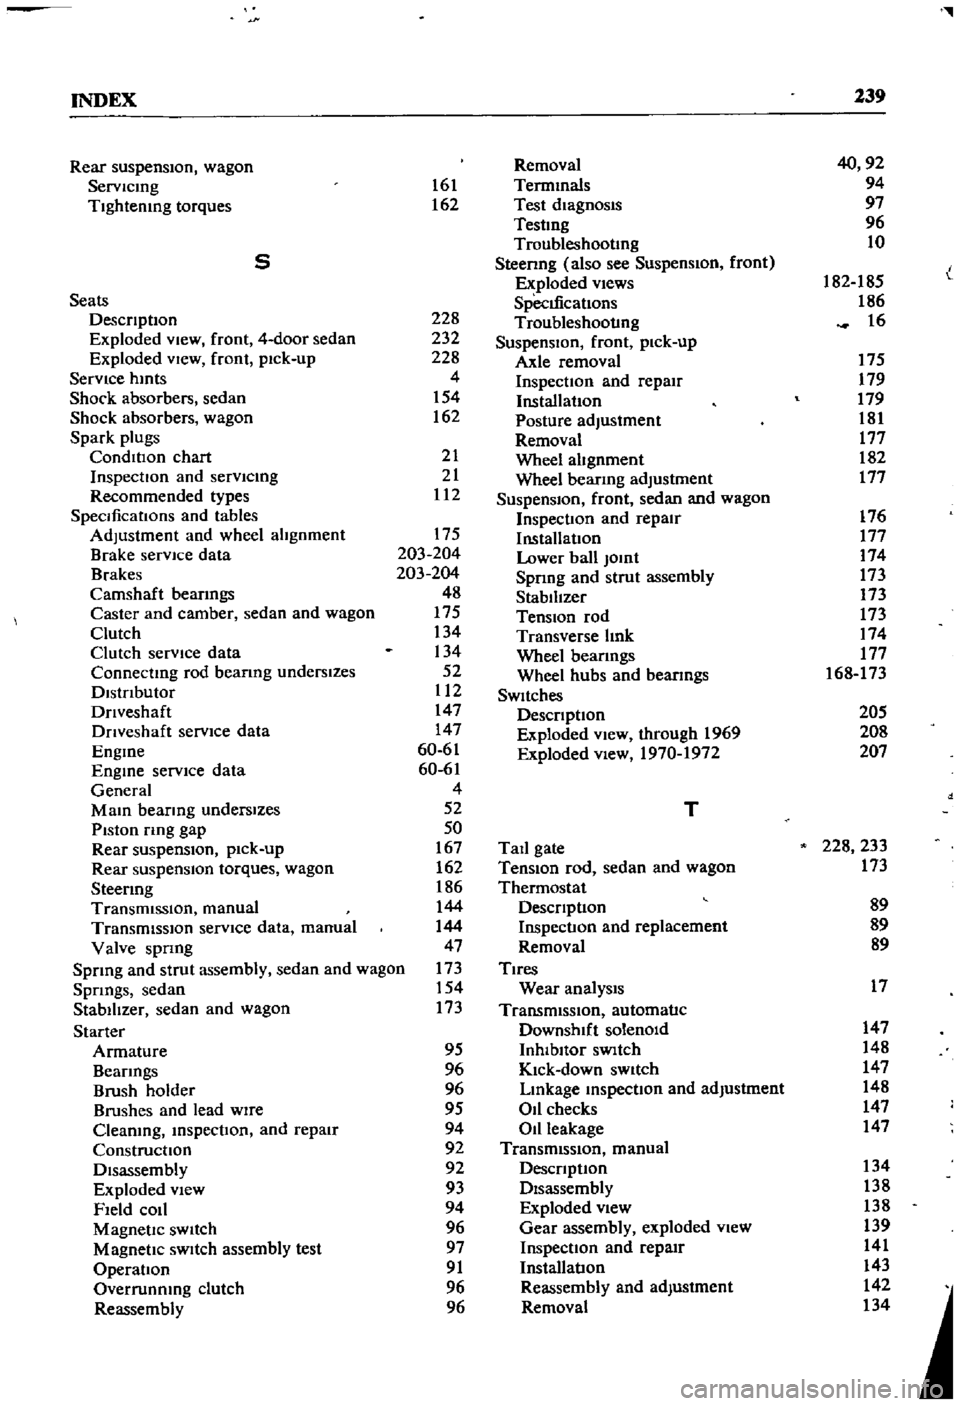
l
INDEX
239
Rear
suspensIOn
wagon
Removal
40
92
Servlcmg
161
Termmals
94
Tightening
torques
162
Test
diagnosIs
97
Testmg
96
Troubleshootmg
10
5
Steenng
also
see
Suspension
front
I
Exploded
views
182
185
L
Seats
SpecIfications
186
DescnptIon
228
Troubleshooting
16
Exploded
View
front
4
door
sedan
232
SuspensIOn
front
pick
up
Exploded
VIew
front
pick
up
228
Axle
removal
175
Service
hmts
4
Inspection
and
repair
179
Shock
absorbers
sedan
154
Installation
179
Shock
absorbers
wagon
162
Posture
adjustment
181
Spark
plugs
Removal
177
CondlllOn
chart
21
Wheel
abgnment
182
InspectIon
and
servlcmg
21
Wheel
bearmg
adjustment
177
Recommended
types
112
Suspension
front
sedan
and
wagon
SpecificatIOns
and
tables
Inspection
and
repair
176
Adjustment
and
wheel
alignment
175
InstallatIOn
177
Brake
service
data
203
204
Lower
ball
Jomt
174
Brakes
203
204
Spnng
and
strut
assembly
173
Camshaft
beanngs
48
Stabilizer
173
Caster
and
camber
sedan
and
wagon
175
TenSIOn
rod
173
Clutch
134
Transverse
bnk
174
Clutch
service
data
134
Wheel
beanngs
177
Connectmg
rod
beanng
underslzes
52
Wheel
hubs
and
bearmgs
168
173
Dlstnbutor
112
SWItches
Dnveshaft
147
DescnptIon
205
Dnveshaft
service
dala
147
Exploded
View
through
1969
208
Engme
60
61
Exploded
view
1970
1972
207
Engme
service
data
60
61
General
4
Mam
bearmg
underslzes
52
T
Piston
rmg
gap
50
Rear
suspenSIOn
pick
up
167
Tail
gate
228
233
Rear
suspensIOn
torques
wagon
162
TenSIOn
rod
sedan
and
wagon
173
Steermg
186
Thermostat
TransmiSSion
manual
144
DescnptIon
89
TransmiSSion
service
data
manual
144
Inspection
and
replacement
89
Valve
spnng
47
Removal
89
Sprmg
and
strut
assembly
sedan
and
wagon
173
Tires
Spnngs
sedan
154
Wear
analYSIS
17
Stabilizer
sedan
and
wagon
173
TransmiSSion
automatic
Starter
Downshift
solenOid
147
Armature
95
Inhlbllor
SWItch
148
Beanngs
96
Kick
down
SWitch
147
Brush
holder
96
Lmkage
mspectIon
and
adjustment
148
Brushes
and
lead
WIre
95
011
checks
147
Cleaning
mspectIon
and
repair
94
Oil
leakage
147
Construcllon
92
TransmiSSion
manual
Disassembly
92
DescnptIon
134
Exploded
View
93
Disassembly
138
Field
COIl
94
Exploded
view
138
Magnetic
SWItch
96
Gear
assembly
exploded
view
139
Magnetic
SWItch
assembly
test
97
Inspection
and
repair
141
Operation
91
Installation
143
Overrunnmg
clutch
96
Reassembly
and
adjustment
142
Reassembly
96
Removal
134
Page 246 of 252
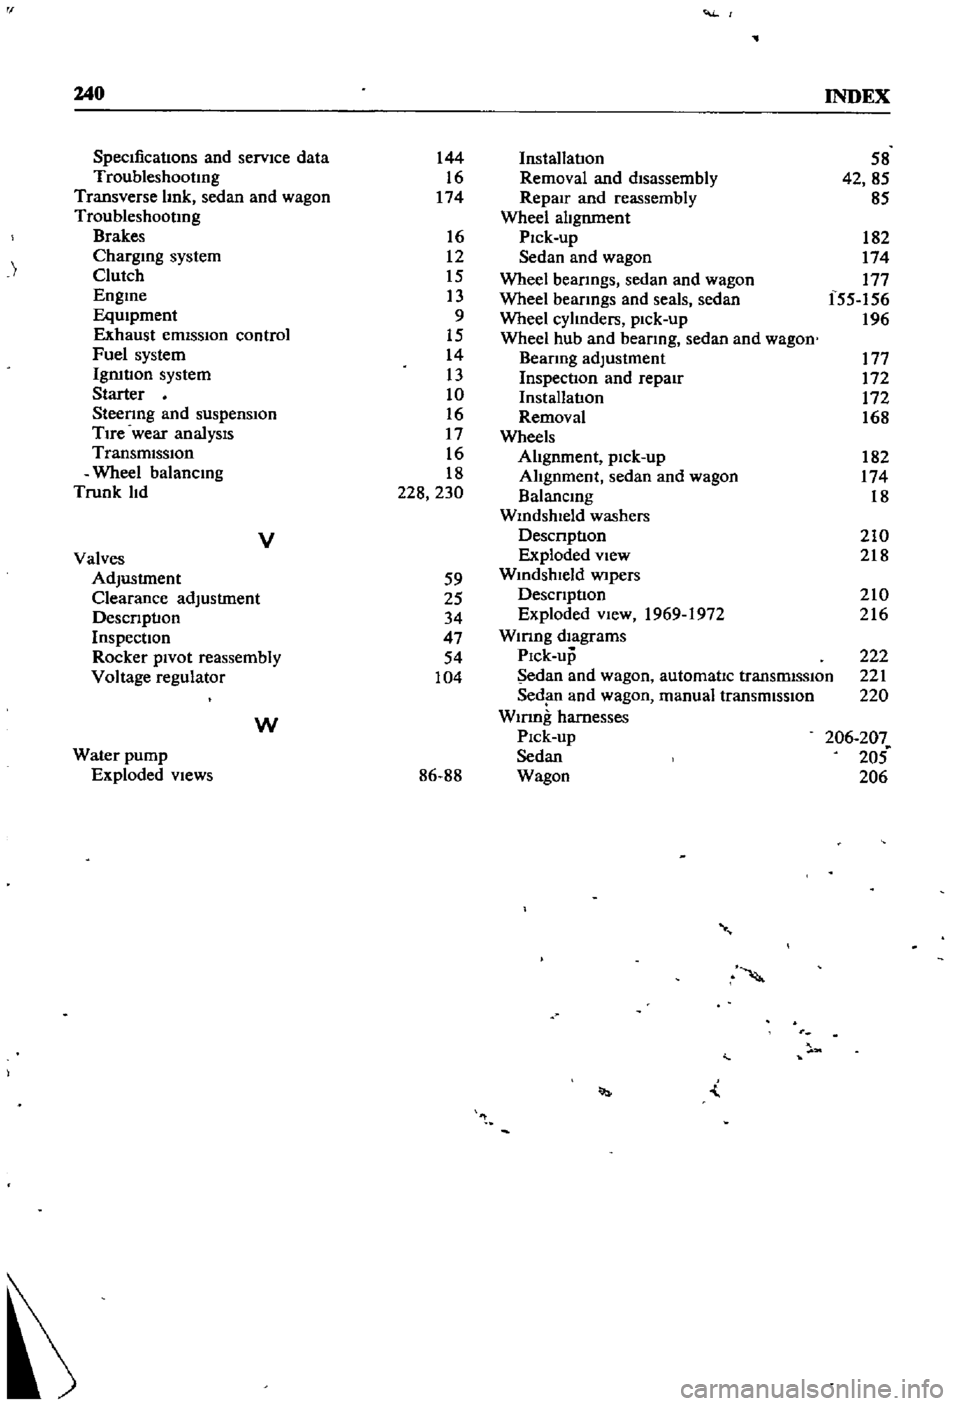
240
INDEX
SpecIfications
and
service
data
144
Installation
58
Troubleshootmg
16
Removal
and
disassembly
42
85
Transverse
hnk
sedan
and
wagon
174
Repair
and
reassembly
85
Troubleshootmg
Wheel
ahgnment
Brakes
16
Pick
up
182
Chargmg
system
12
Sedan
and
wagon
174
Clutch
15
Wheel
bearIngs
sedan
and
wagon
177
Engme
13
Wheel
bearIngs
and
seals
sedan
f55
156
EqUipment
9
Wheel
cyhnders
pick
up
196
Exhaust
emiSSIOn
control
15
Wheel
hub
and
bearIng
sedan
and
wagon
Fuel
system
14
BearIng
adjustment
177
Igrutlon
system
13
InspectIOn
and
repair
172
Starter
10
Installation
172
SteerIng
and
suspension
16
Removal
168
Tire
wear
analysIs
17
Wheels
TransmiSSion
16
Ahgnment
pick
up
182
Wheel
balancmg
18
Ahgnment
sedan
and
wagon
174
Trunk
hd
228
230
Balancmg
18
Wmdshleld
washers
V
Descnptlon
210
Valves
Exploded
view
218
Adjustment
59
Wmdshleld
WIperS
Clearance
adjustment
25
DeSCrIption
210
DesCrIption
34
Exploded
view
1969
1972
216
Inspection
47
Wmng
diagrams
Rocker
pivot
reassembly
54
Pick
up
222
Voltage
regulator
104
Sedan
and
wagon
automatic
transmiSSIOn
221
Sediln
and
wagon
manual
transmission
220
W
Wmng
harnesses
Pick
up
206
207
Water
pump
Sedan
205
Exploded
views
86
88
Wagon
206
l