1968 DATSUN 510 air suspension
[x] Cancel search: air suspensionPage 21 of 252
16
CHAPTER
TIlREE
sary
Also
check
all
parts
for
mlSaltgnment
and
uneven
wear
TRANSMISSION
1
Difficult
to
mesh
gears
Make
certam
the
clutch
pressure
plate
and
re
lease
beanng
are
m
good
condItion
The
trouble
can
be
caused
by
worn
gears
shaft
and
or
bear
mgs
DISassemble
and
repaIr
as
requIred
Also
can
be
caused
by
msufficlent
operatmg
stroke
due
to
worn
or
loose
sltdmg
parts
or
a
defective
synchronIZer
DIsassemble
carefully
InSpect
and
replace
as
requIred
2
Gears
slip
out
of
mesh
Generally
thIS
trouble
occurs
when
the
mterlock
plunger
check
ball
and
or
spnng
IS
weakened
or
worn
The
trouble
can
also
be
caused
by
worn
fork
rod
ball
groove
damaged
bearings
or
dam
aged
gears
DIsassemble
carefully
mspect
and
replace
as
required
3
NOIse
If
nOISes
are
heard
wIth
the
engme
idlmg
and
the
clutch
disengaged
the
nOIse
IS
probably
conung
from
the
transmISSIOn
Several
Items
can
cause
nOISes
either
smgly
or
m
combmatIon
Check
the
qualIty
and
quantity
of
lubrIcant
in
the
trans
mISSIon
Replace
or
replenISh
as
necessary
Worn
bearIngs
wIll
usually
produce
a
lugh
humming
at
hIgh
speed
and
a
cycltc
knockIng
sound
at
low
speed
Worn
or
damaged
splInes
and
bushmgs
will
also
cause
nOIse
BRAKES
1
Brake
pedal
goes
to
floor
There
are
numerous
causes
for
thIS
includIng
excessIvely
worn
Itnmgs
aIr
in
the
hydraultc
sys
tem
leaky
brake
lmes
leaky
wheel
cylmders
or
leaky
or
worn
master
cylmder
Check
for
leaks
and
thIn
brake
linmgs
Bleed
and
adjust
the
brakes
If
thIS
doesn
t
cure
the
trouble
rebwld
wheel
cylmders
a
nd
or
master
cylmder
2
Spongy
pedal
Normally
caused
by
aIr
m
the
system
blee
d
and
adjust
the
brakes
3
Brakes
pull
Check
brake
adjustment
Also
check
for
contam
inated
brake
Itmngs
from
leaks
leaky
wheel
cyltnders
loose
caltpers
frozen
or
seIZed
pIstons
and
restrIcted
brake
lmes
or
hoses
In
addItion
check
front
end
alignment
and
suspensIOn
dam
age
such
as
broken
front
or
rear
sprmgs
shocks
etc
Check
condItIon
of
tIres
4
Brakes
squeal
or
chatter
Check
brake
lmmg
thickness
and
brake
drum
roundness
Ensure
that
the
shoes
have
cham
ferred
ends
and
are
not
loose
Inspect
the
condI
tion
of
the
rotors
on
the
front
wheel
dISC
brakes
to
make
certain
they
are
not
scored
or
damaged
Clean
away
all
dIrt
on
shoes
pads
rotors
or
drums
5
Draggmg
brakes
Check
brake
adjustment
includmg
handbrake
Check
for
broken
or
weak
shoe
return
springs
swollen
rubber
parts
due
to
unproper
brake
flUId
or
other
contammatIon
Clean
or
replace
de
fectIve
parts
6
Hard
pedal
Check
brake
linmgs
for
contammation
Also
check
for
restrIcted
brake
lines
and
hoses
7
High
speed
fade
Check
for
dIstorted
or
out
of
round
drums
and
contamInated
brake
lmmgs
Make
certam
the
recommended
brake
flUId
IS
used
Dram
entIre
system
and
refill
If
In
doubt
8
Pulsatmg
pedal
Check
for
dIStorted
or
out
of
round
drums
or
rotors
Check
for
excessIVe
brake
dISC
run
out
STEERING
AND
SUSPENSION
NOTE
Unusual
steermg
pullmg
or
wandermg
IS
usually
caused
by
bent
or
otherwise
mIsaligned
suspenszon
parts
Because
of
the
speCialized
equIp
ment
reqUired
to
evaluate
and
correct
these
faults
It
IS
recommended
t
tat
servIce
to
the
steermg
and
suspension
system
be
referred
to
your
Datsun
dealer
oca
quallfied
specrallst
m
thiS
field
1
VibratIOn
felt
m
steermg
wheel
VIbratIon
can
be
caused
by
several
thmgs
includ
ing
lll1proper
aIr
pressure
m
tIres
uneven
wear
Page 22 of 252

TROUBLESHOOTING
17
of
tIre
loose
wheels
unproper
adjustment
or
wear
of
front
wheel
bearIngs
faulty
wheel
align
ment
or
wear
of
transverse
lInk
and
tension
rod
bushings
Inspect
all
parts
carefully
for
wear
or
damage
Replace
or
replUI
parts
as
required
2
Shock
transmltled
through
steering
wheel
This
is
usually
most
noticeable
when
traveling
over
bad
roads
at
relatively
high
speeds
Causes
Include
damage
to
the
idler
ann
insuffiCient
tIghtening
of
steenng
gear
box
wear
of
the
steer
Ing
linkage
and
wear
of
the
suspension
ball
joint
Inspect
all
parts
for
wear
or
damage
Refer
to
Chapter
ThIrteen
for
service
or
repair
you
can
perform
and
for
procedures
which
should
be
referred
to
your
deal
r
3
Shlmmymg
This
is
usually
most
noticeable
when
a
specIfic
speed
IS
attained
and
will
normally
repeat
at
that
speed
Causes
are
generally
unbalanced
wheels
unproper
adjustment
of
steenng
gear
insuffi
cient
backlash
malfunction
of
the
shock
ab
sorbers
or
loose
bolts
for
the
strut
mountIng
Reparr
or
replace
defective
parts
as
required
Refer
to
Chapter
Thirteen
4
Wandermg
of
car
m
one
dlrectlOnl
This
problem
can
be
caused
by
improper
air
pressure
loose
wheel
nuts
difference
in
tire
tread
wear
from
left
to
right
side
Incorrect
adjustment
of
wheel
bearings
defectIve
wheel
beanngs
collapsing
or
twistIng
of
front
spnng
or
Incorrect
wheel
alignment
Also
binding
of
the
brake
shoes
worn
bushings
in
the
transverse
link
or
the
tension
rod
and
deformation
of
s
enng
lInkage
and
suspension
link
can
cause
wander
Carefully
iuspect
all
parts
for
looseness
and
wear
and
re
place
or
repaIr
as
required
In
some
c
ases
a
de
fective
rear
suspension
may
also
cause
the
vehicle
to
wander
5
InstabIlity
Instability
can
be
caused
by
unproper
tIre
pres
sures
worn
bushings
in
the
transverse
link
and
tension
rod
mcorrect
wheel
alignment
worn
steenng
linkage
Incorrect
adjustment
of
steer
ing
gear
and
unbalanced
wheels
Inspect
all
parts
carefully
for
wear
and
damage
Adjust
repair
or
replace
as
required
6
Heavy
feelmg
m
steering
This
can
be
caused
by
improper
tIre
pressures
insuffiCient
or
contamInated
lubncant
in
gear
box
damage
or
insuffiCient
grease
In
suspeuslon
ball
Joint
damaged
or
badly
adjusted
wheel
bearIngs
worn
or
damaged
steermg
gear
dam
age
of
upper
strut
bearing
and
mterference
of
steenng
column
With
turn
signal
SWitch
Inspect
all
parts
carefully
for
wear
and
damage
Adjust
repair
or
replace
as
required
7
ExceSSIve
play
m
steermg
wheel
This
is
usually
caused
by
Incorrect
adjustment
of
the
steenng
gear
worn
bushings
in
the
steering
linkage
or
Idler
arm
mcorrect
adjustment
of
the
front
wheel
bearings
worn
bushIngs
in
the
trans
verse
lInk
and
tension
rod
Carefully
inspect
all
parts
for
wear
or
damage
Adjust
repair
or
re
place
as
reqUIred
TIRE
WEAR
ANALYSIS
Abnormal
tIre
wear
should
always
be
ana
lyzed
to
deternune
the
cause
The
most
common
are
Incorrect
tIre
pressure
improper
dnving
overloading
and
Incorrect
wheel
ahgDment
Figures
2A
through
2F
identify
wear
patterns
and
mdicate
likely
causes
Of
I
1
l
D
1
Undennflatlon
Worn
more
on
Sides
than
In
center
Page 154 of 252
CHAPTER
TWELVE
DIFFERENTIAL
REAR
AXLE
AND
REAR
SUSPENSION
The
dIfferential
rear
axle
and
rear
suspen
sIon
dIffer
for
the
various
models
ThIS
chapter
deals
WIth
each
separately
Due
to
the
need
for
SpecIal
tools
and
exper
Ience
to
dIsassemble
and
repaIr
these
unItS
the
followmg
procedures
generally
cover
removal
InspectIon
and
replacement
only
If
mechanIcal
dIfficultIes
eXIst
WIthIn
the
dIfferentIal
and
rear
axle
components
refer
servIce
and
repair
to
a
Datsun
dealer
or
competent
garage
DIFFERENTIAL
SEDAN
The
cast
Iron
dIfferentIal
assembly
used
in
the
sedan
is
shown
in
Figure
1
next
page
Proper
lubncatlOn
of
the
gear
housmg
IS
essen
tIal
Check
lubncant
every
3
000
mlles
and
re
plenISh
as
necessary
Drain
and
refill
lubncant
at
least
every
30
000
miles
Differential
Removal
Sedan
1
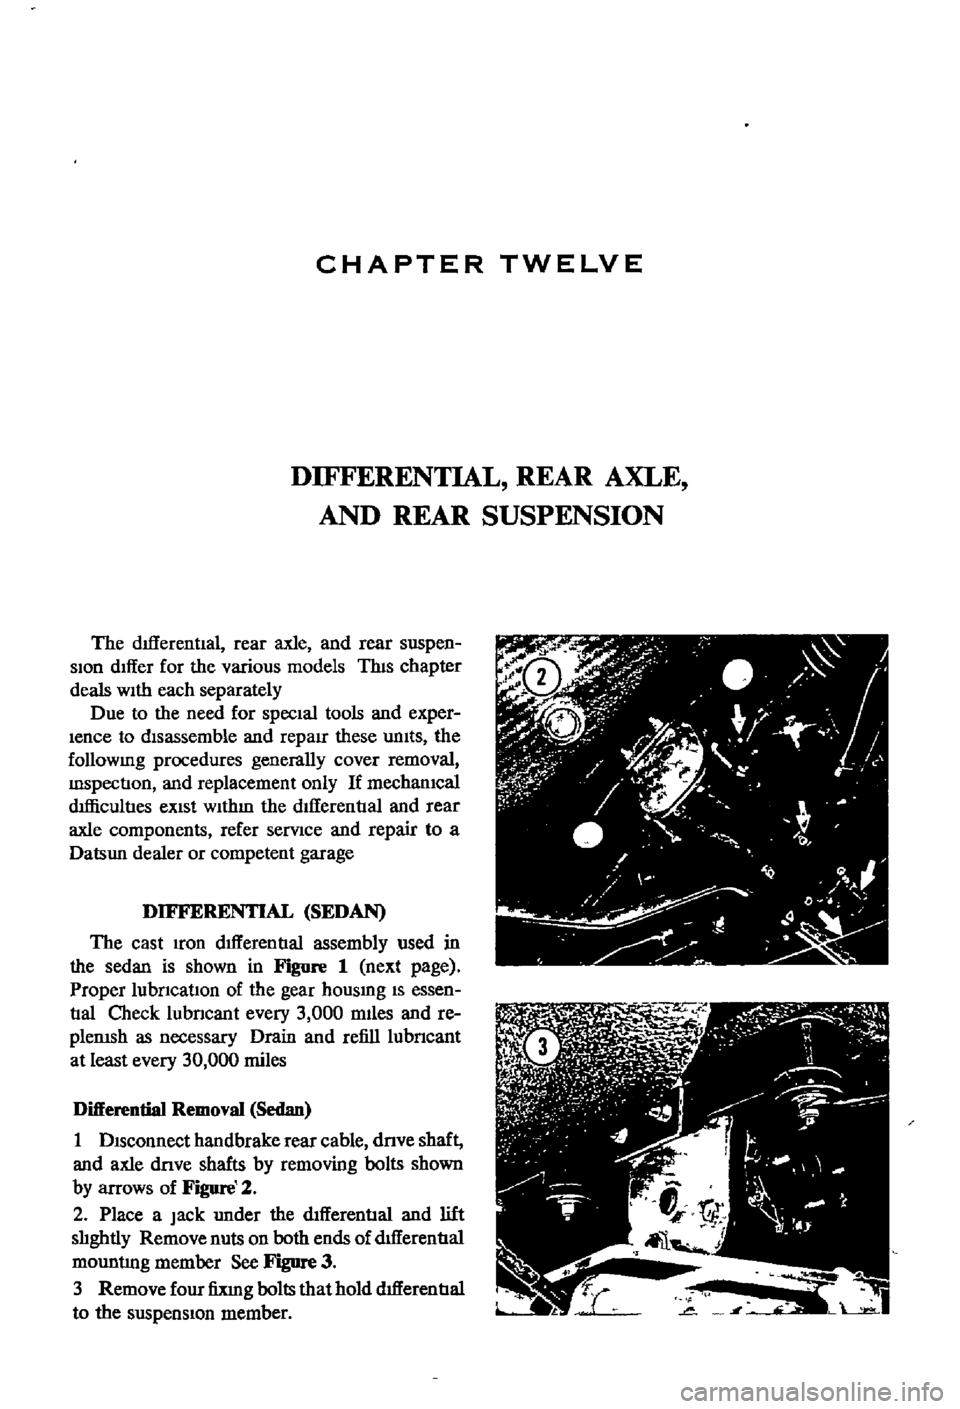
DISconnect
handbrake
rear
cable
dnve
shaft
and
axle
dove
shafts
by
removing
bolts
shown
by
arrows
of
Figure
2
2
Place
a
Jack
under
the
dIfferential
and
lift
slIghtly
Remove
nuts
on
both
ends
of
dtfferentIal
mountlng
member
See
Figure
3
3
Remove
four
fixIng
bolts
that
hold
dIfferentIal
to
the
suspensIon
member
Page 156 of 252

DIFFERENTIAL
REAR
AXLE
AND
REAR
SUSPENSION
151
4
Lower
the
Jack
and
r
move
dIfferentIal
from
rear
of
vehIcle
See
Figure
4
After
removal
sup
port
suspensIon
member
wIth
a
stand
to
prevent
distortlon
and
damage
to
the
Insulators
Differential
Inspection
Sedan
The
followmg
mspectIon
can
be
done
WIthout
disassembly
of
the
dIfferential
If
abnormalitIes
or
damage
eXiSts
refer
further
servIce
and
reparr
to
your
dealer
1
Check
the
tooth
contact
pattern
With
lead
oXide
at
two
or
three
pomts
after
removmg
rear
cover
Refer
to
Figure
5
which
shows
the
cor
rect
contact
pattern
If
the
contact
pattern
IS
m
correct
dIsassembly
and
adjustment
of
dIffer
entlalls
reqUIred
CD
TOE
HEEL
DRIVE
SIDE
HEEL
COAST
SIDE
2
Use
a
dIal
mdtcator
to
measure
backlash
be
tween
the
dnve
gear
and
pmIOn
Backlash
should
be
0
0039
to
0
0079
m
0
10
to
o
20mm
Check
all
gear
teeth
for
damage
and
cracks
3
Check
runout
at
the
rear
of
the
dnve
gear
If
the
tooth
contact
pattern
or
backlash
IS
ab
normal
Runout
should
be
less
than
00031
m
0
08mm
See
Figure
6
4
Rotate
the
gears
and
lIsten
for
SignS
of
de
fective
bearmgs
If
noises
are
eVIdent
the
dIf
ferential
must
be
dIsassembled
and
repaired
CD
Diflerentiallnstallation
Sedan
1
Mount
the
dIfferentIal
assembly
to
the
rear
suspensIOn
member
2
FIt
the
dIfferentIal
mountlng
member
to
the
fittmg
hole
by
pushIng
It
forward
with
a
bar
Torque
the
nuts
to
61
ft
lb
8
5
kg
m
3
Install
axle
dnve
shafts
dnve
shaft
and
handbrake
rear
cable
REAR
AXLE
AND
SUSPENSION
SEDAN
Figure
7
and
Figure
8
page
153
are
ex
ploded
dIagrams
of
the
sedan
rear
axle
and
suspensIOn
The
fully
independent
rear
suspen
SIon
IS
a
semI
traIlIng
arm
deSIgn
With
a
sus
penSIOn
member
suspensIOn
arms
coIl
spnngs
and
hydraulIc
shock
absorbers
The
wheel
bearings
are
lIfetime
lubncated
Rear
Axle
and
Suspension
Removal
Sedan
1
Jack
up
the
rear
of
the
veh1cle
and
support
It
on
stands
2
Remove
wheels
3
Refer
to
Figure
9
and
dtsconnect
handbrake
lInkage
and
rerum
sprmg
Remove
tall
pIpe
and
muffler
4
DISconnect
brake
hose
from
brake
tube
Re
move
four
bolts
holdmg
dnve
shaft
to
dIf
ferential
Lower
dnve
shaft
gently
to
ground
Page 159 of 252
154
CHAPTER
tWELVE
move
two
nuts
attachmg
dtfferenual
suspension
member
to
the
body
7
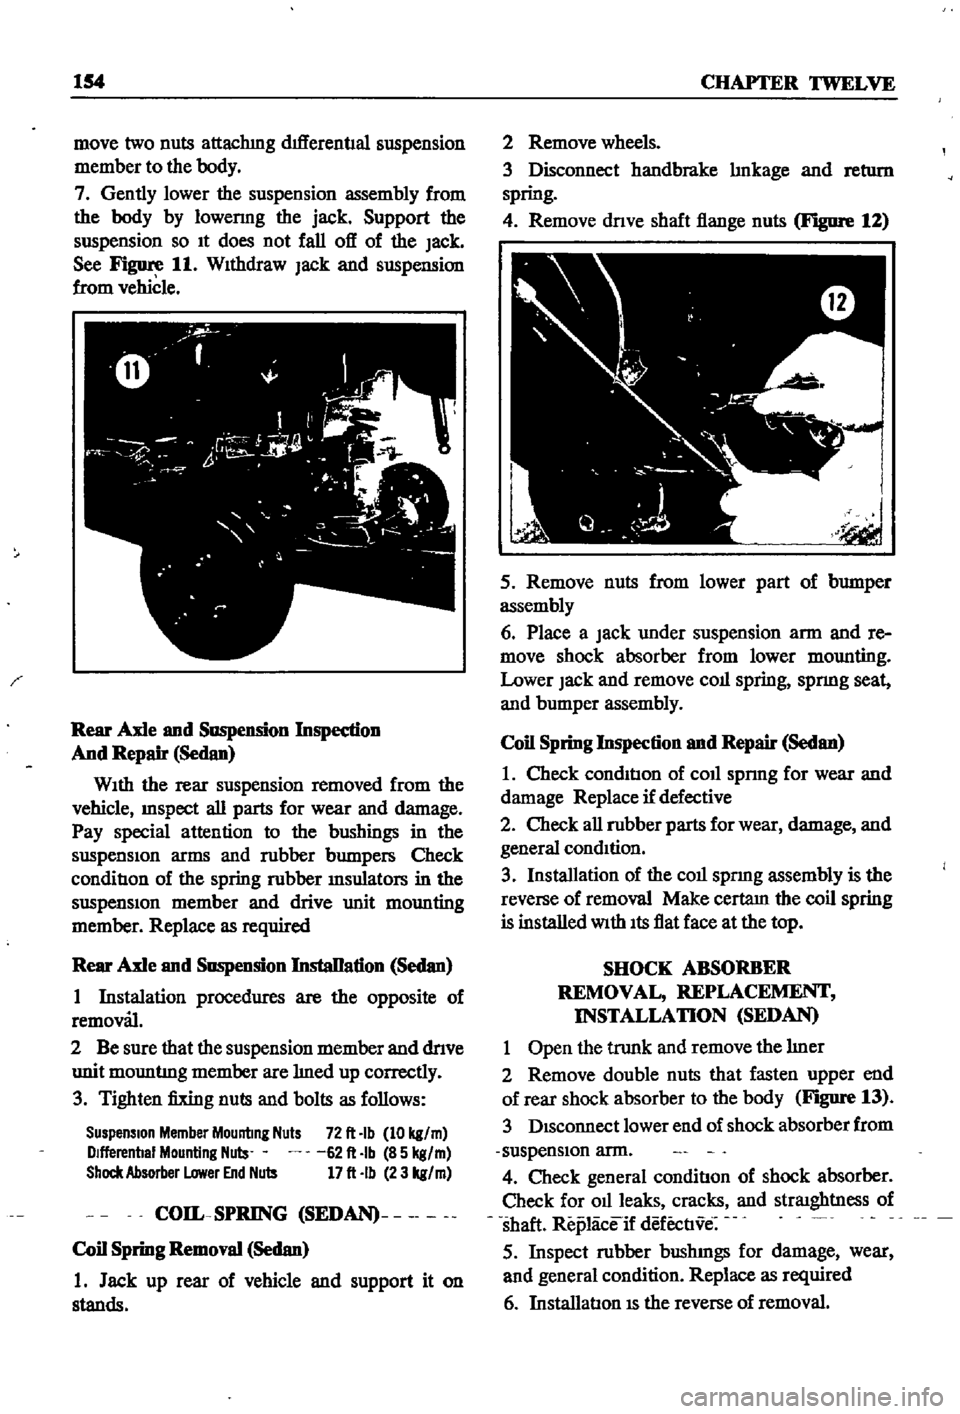
Gently
lower
the
suspension
assembly
from
the
body
by
10wermg
the
jack
Support
the
suspension
so
It
does
not
fall
off
of
the
Jack
See
Figure
11
WIthdraw
Jack
and
suspension
from
vehicle
Rear
Axle
and
Suspension
Inspedion
And
Repair
Sedan
WIth
the
rear
suspension
removed
from
the
vehicle
InSpect
all
parts
for
wear
and
damage
Pay
special
attention
to
the
bushings
in
the
suspensIon
arms
and
robber
bumpers
Check
conditIon
of
the
spring
robber
msulators
in
the
suspensIOn
member
and
drive
unit
mounting
member
Replace
as
required
Rear
Axle
and
Suspension
InstaDation
Sedan
1
Instalation
procedures
are
the
opposite
of
removal
2
Be
sure
that
the
suspension
member
and
dnve
unit
mountmg
member
are
med
up
correctly
3
Tighten
fixing
nuts
and
bolts
as
follows
Suspension
Member
Mounting
Nuts
72
It
Ib
10
kg
m
Dlfferenbal
Mounting
Nuls
62
It
Ib
85
kg
m
Shock
Absorber
Lower
End
Nuts
17
It
Ib
23
kg
m
COIL
SPRING
SEDAN
Coil
Spring
Removal
Sedan
1
Jack
up
rear
of
vehicle
and
support
it
on
stands
2
Remove
wheels
3
Disconnect
handbrake
mkage
and
retl1rn
spring
4
Remove
dnve
shaft
flange
nuts
Figure
12
5
Remove
nuts
from
lower
part
of
bumper
assembly
6
Place
a
Jack
under
suspension
arm
and
re
move
shock
absorber
from
lower
mounting
Lower
Jack
and
remove
coll
spring
spnng
seat
and
bumper
assembly
Coil
Spring
Inspection
and
Repair
Sedan
1
Check
condItIon
of
coll
sprmg
for
wear
and
damage
Replace
if
defective
2
Check
all
robber
parts
for
wear
damage
and
general
condItion
3
Installation
of
the
coll
spnng
assembly
is
the
reverse
of
removal
Make
certam
the
coil
spring
is
installed
With
Its
flat
face
at
the
top
SHOCK
ABSORBER
REMOVAL
REPLACEMENT
INSTALLATION
SEDAN
1
Open
the
trunk
and
remove
the
mer
2
Remove
double
nuts
that
fasten
upper
end
of
rear
shock
absorber
to
the
body
Figure
13
3
DIsconnect
lower
end
of
shock
absorber
from
suspensIon
arm
4
Check
general
conditIon
of
shock
absorber
Check
for
011
leaks
cracks
and
straIghtness
of
shaft
Replaceif
defectIve
5
Inspect
robber
bushmgs
for
damage
wear
and
general
condition
Replace
as
required
6
InstallatIon
IS
the
reverse
of
removal
Page 160 of 252
DIFFERENTIAL
REAR
AXLE
AND
REAR
SUSPENSION
155
i
I
I
I
REAR
SUSPENSION
ARM
SEDAN
Rear
Suspension
Arm
Removal
Sedan
1
Jack
up
the
rear
of
the
vehIcle
and
support
It
on
stands
2
Remove
wheel
and
brake
drum
3
DIsconnect
dnve
shaft
from
axle
shaft
4
Remove
handbrake
cable
from
lever
attached
to
wheel
cylInder
5
Plug
brake
tube
to
prevent
loss
of
brake
flwd
6
Remove
wheel
beanng
lock
nut
rear
axle
shaft
wheel
beanngs
and
OIl
seal
Remove
rear
brake
assembly
from
suspensIOn
arm
7
Place
Jack
under
suspenSIon
arm
remove
shock
absorber
from
lower
bracket
lower
Jack
gradually
remove
coll
spnng
spnng
seat
and
bumper
assembly
8
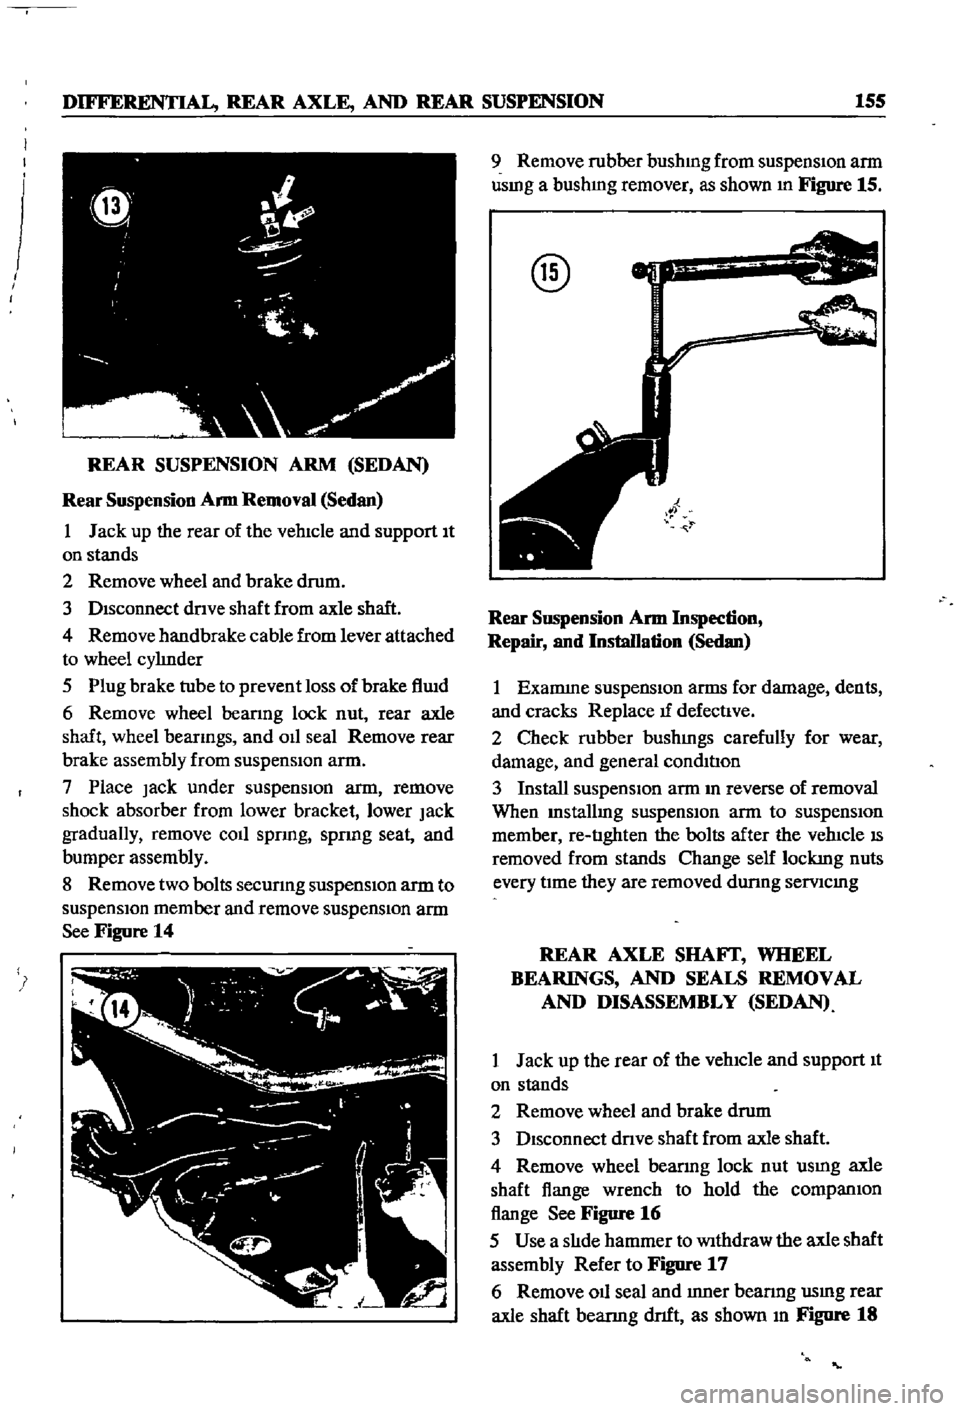
Remove
two
bolts
secunng
suspensIOn
arm
to
suspensIOn
member
and
remove
suspensIOn
arm
See
Figure
14
9
Remove
rubber
bushmg
from
suspensIon
arm
usmg
a
bushmg
remover
as
shown
In
Figure
15
@
Rear
SllSpension
Arm
Inspection
Repair
and
Installation
Sedan
1
Examme
suspensIOn
arms
for
damage
dents
and
cracks
Replace
tf
defectIve
2
Check
rubber
bushmgs
carefully
for
wear
damage
and
general
condItIon
3
Install
suspensIOn
arm
m
reverse
of
removal
When
Installmg
suspensIOn
arm
to
suspensIOn
member
re
tIghten
the
bolts
after
the
vehIcle
IS
removed
from
stands
Change
self
lockmg
nuts
every
tIme
they
are
removed
dunng
semcmg
REAR
AXLE
SHAFf
WHEEL
BEARINGS
AND
SEALS
REMOVAL
AND
DISASSEMBLY
SEDAN
1
Jack
up
the
rear
of
the
vehIcle
and
support
It
on
stands
2
Remove
wheel
and
brake
drum
3
DIsconnect
dnve
shaft
from
axle
shaft
4
Remove
wheel
bearmg
lock
nut
usmg
axle
shaft
flange
wrench
to
hold
the
companIOn
flange
See
Figure
16
5
Use
a
slIde
hammer
to
Withdraw
the
axle
shaft
assembly
Refer
to
Figure
17
6
Remove
011
seal
and
Inner
bearmg
usmg
rear
axle
shaft
bearmg
dnft
as
shown
In
Figure
18
Page 162 of 252

DIFFERENTIAL
REAR
AXLE
AND
REAR
SUSPENSION
157
DIFFERENTIAL
WAGON
The
dIfferentIal
carner
is
made
of
alumInum
alloy
and
uses
a
hypoid
bevel
gear
Proper
lubri
catIon
IS
essentIal
Check
and
replemsh
the
lub
rIcant
every
3
000
mIles
Dram
and
refill
every
30
000
mlles
Figure
20
IS
an
exploded
dIagram
of
the
differential
used
in
the
wagon
Difterential
Removal
Wagon
1
Jack
up
the
rear
wheels
and
support
vehicle
with
stands
l
2
DIsconnect
drIve
pmlon
companion
flange
to
yoke
connectIon
3
Remove
rear
wheel
axles
as
descnbed
later
m
thIS
chapter
4
Remove
dtfferentIal
from
vehIcle
Difterential
Inspection
Wagon
The
followmg
Inspection
can
be
done
Without
dISassembly
of
the
differentIal
Perform
the
fol
lOWIng
mspectIon
and
If
abnormalitIes
or
dam
age
eXISts
refer
further
service
and
repair
to
YOI
f
dealer
1
Check
the
tooth
contact
pattern
with
lead
oXIde
at
two
or
three
pomts
after
remoVIng
rear
cover
Refer
to
FIgure
5
for
correct
contact
pat
tern
If
the
pattern
IS
not
correct
dIsassembly
and
adjustment
of
the
dtfferentIalIS
reqUIred
2
Measure
backlash
between
dnve
gear
and
pInIOn
WIth
a
dIal
mdlcator
Backlash
should
be
00059
to
00079
in
0
15
to
0
20mm
3
Rotate
the
gears
and
lIsten
for
SIgnS
of
bear
Ing
nOIse
DefectIve
beanngs
should
be
replaced
by
a
dealer
4
Inspect
gear
teeth
for
signs
of
damage
or
cracks
r
Difterential
Installation
Wagon
Install
the
dIfferentIal
by
reversing
the
pro
cedures
used
for
removal
2
Olfferenllal
case
16
Pmlon
10Ckmg
pm
28
42
AdjusllRg
washer
t
3
Beanng
stud
17
Dlflerenbal
Side
beanng
43
47
Adjusting
shim
4
Plem
washer
18
22
Adjusting
shim
53
Oil
seal
5
Locking
nut
23
Rear
plRlOn
gear
54
Range
assembly
6
Lockmg
nut
24
Front
plRlOn
beanng
55
Nut
7
PIRlOn
gear
set
25
27
Spacer
56
Wesher
Iff
8
Hex
bolt
9
Bolt
locking
strap
7
10
Case
@
11
Side
gear
12
PmlOn
mete
is
Thrust
washer
13
14
Thrust
washer
10
15
PIRlOn
shaft
23
43
47
2S
27
7
J
I
18
22
17
l
24
S3
S6
S4
55
Page 166 of 252
DIFFERENTIAL
REAR
AXLE
AND
REAR
SUSPENSION
161
T
8
0
to
9
0
kg
m
57
8
to
65
11b
ft
@
T
2
8
to
3
9
kg
m
20
2
to
28
2
Ib
ft
Apply
grease
on
the
surface
of
the
collar
when
replacing
oil
seal
Brake
tube
T
1
7
to
2
0
kg
m
23
3
to
14
5
Ib
ft
Tread
1260
Use
the
shims
to
adjust
the
gap
C
between
the
wheel
bearing
and
the
recess
in
the
axle
tube
end
The
gap
should
be
beteewn
0
to
0
1
mm
0
to
0
0039
in
12
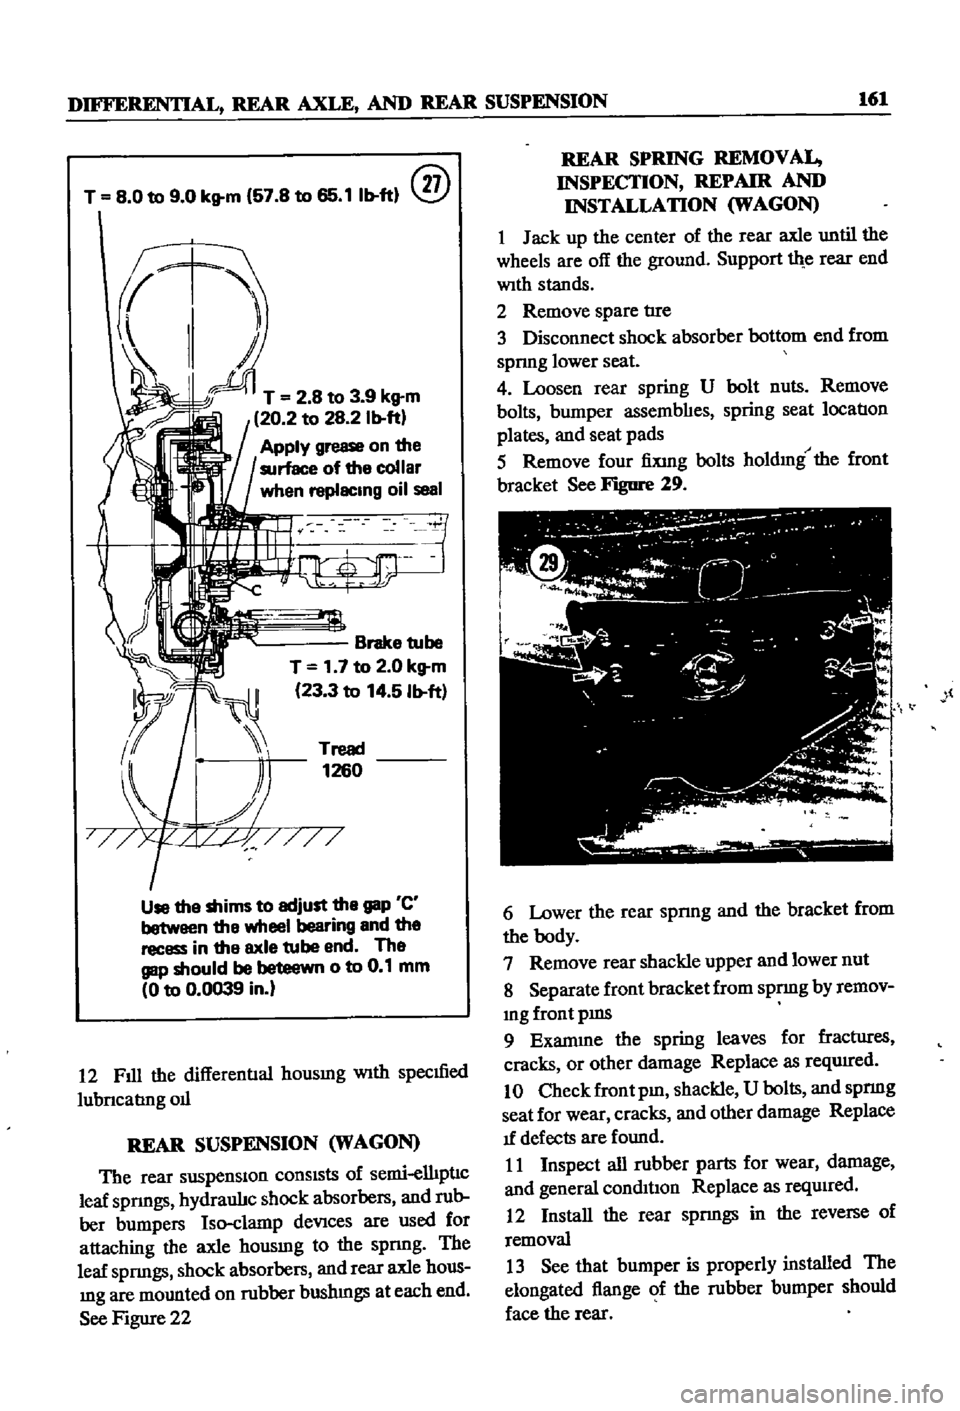
Fill
the
differentIal
housmg
With
specmed
lubncabng
011
REAR
SUSPENSION
WAGON
The
rear
suspensiOn
consists
of
semi
elhpnc
leaf
spnngs
hydraulJc
shock
absorbers
and
rub
ber
bumpers
Iso
clamp
deVices
are
used
for
attaching
the
axle
housmg
to
the
spnng
The
leaf
spnngs
shock
absorbers
and
rear
axle
hous
mg
are
mounted
on
rubber
bushmgs
at
each
end
See
Figure
22
REAR
SPRING
REMOVAL
INSPECTION
REPAIR
AND
INSTALLATION
WAGON
1
Jack
up
the
center
of
the
rear
axle
until
the
wheels
are
off
the
ground
Support
th
e
rear
end
With
stands
2
Remove
spare
tIre
3
Disconnect
shock
absorber
bottom
end
from
spnng
lower
seat
4
Loosen
rear
spring
U
bolt
nuts
Remove
bolts
bumper
assembhes
spring
seat
location
plates
and
seat
pads
5
Remove
four
fiXing
bolts
holdmg
the
front
bracket
See
Figure
29
l
6
Lower
the
rear
spnng
and
the
bracket
from
the
body
7
Remove
rear
shackle
upper
and
lower
nut
8
Separate
front
bracket
from
spnng
by
remov
mg
front
pms
9
Exanune
the
spring
leaves
for
fractIires
cracks
or
other
damage
Replace
as
reqwred
10
Check
front
pm
shackle
U
bolts
and
spnng
seat
for
wear
cracks
and
other
damage
Replace
1f
defects
are
found
11
Inspect
all
rubber
parts
for
wear
damage
and
general
condil1on
Replace
as
reqUired
12
Install
the
rear
spnngs
in
the
reverse
of
removal
13
See
that
bumper
is
properly
installed
The
elongated
flange
of
the
rubber
bumper
should
face
the
rear