2024 FORD F650/750 cooling
[x] Cancel search: coolingPage 139 of 386
9.Start your vehicle.
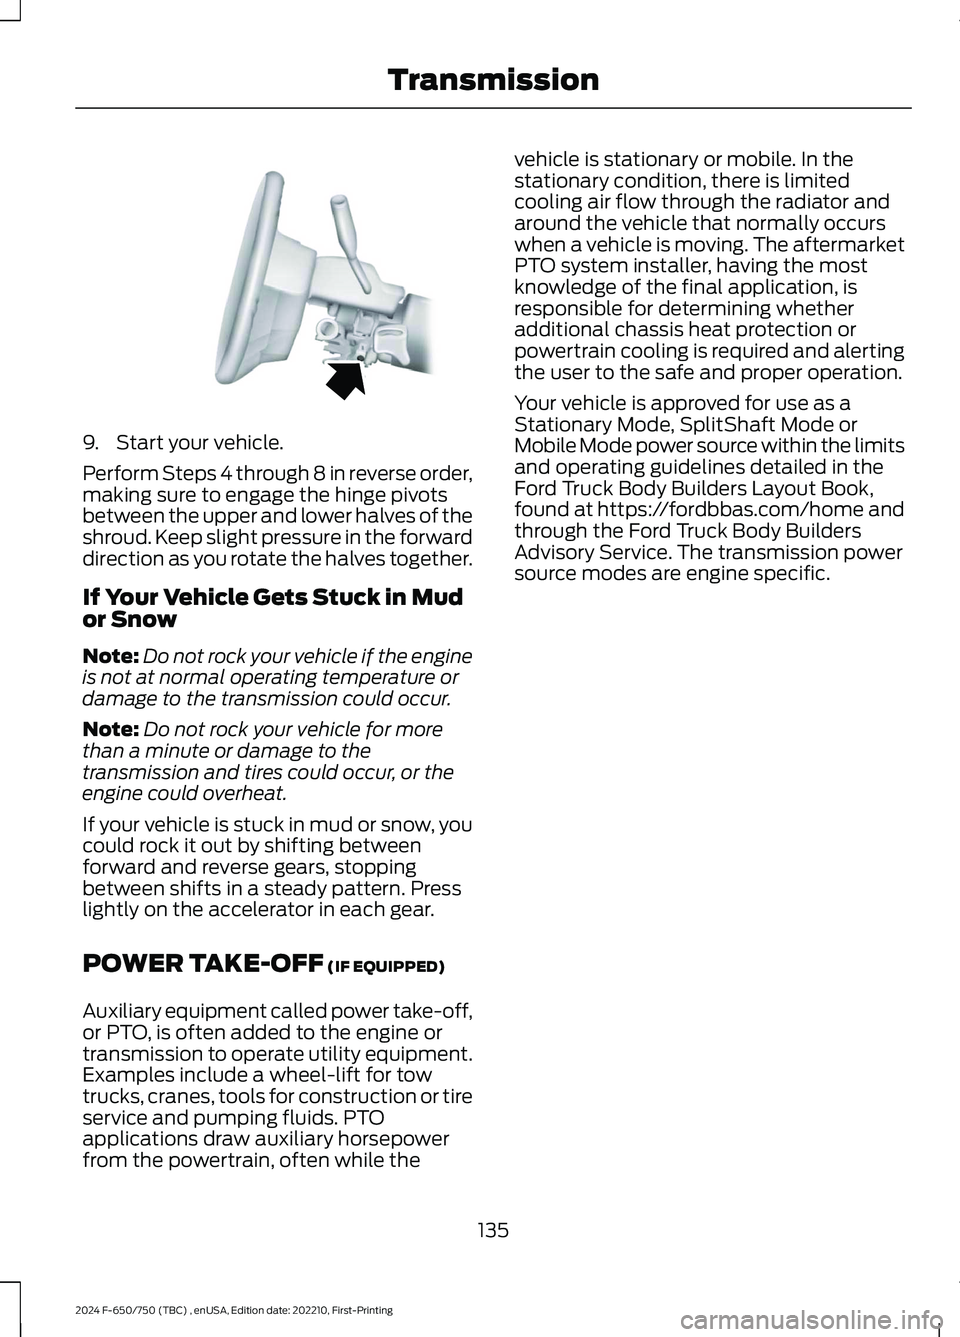
Perform Steps 4 through 8 in reverse order,making sure to engage the hinge pivotsbetween the upper and lower halves of theshroud. Keep slight pressure in the forwarddirection as you rotate the halves together.
If Your Vehicle Gets Stuck in Mudor Snow
Note:Do not rock your vehicle if the engineis not at normal operating temperature ordamage to the transmission could occur.
Note:Do not rock your vehicle for morethan a minute or damage to thetransmission and tires could occur, or theengine could overheat.
If your vehicle is stuck in mud or snow, youcould rock it out by shifting betweenforward and reverse gears, stoppingbetween shifts in a steady pattern. Presslightly on the accelerator in each gear.
POWER TAKE-OFF (IF EQUIPPED)
Auxiliary equipment called power take-off,or PTO, is often added to the engine ortransmission to operate utility equipment.Examples include a wheel-lift for towtrucks, cranes, tools for construction or tireservice and pumping fluids. PTOapplications draw auxiliary horsepowerfrom the powertrain, often while the
vehicle is stationary or mobile. In thestationary condition, there is limitedcooling air flow through the radiator andaround the vehicle that normally occurswhen a vehicle is moving. The aftermarketPTO system installer, having the mostknowledge of the final application, isresponsible for determining whetheradditional chassis heat protection orpowertrain cooling is required and alertingthe user to the safe and proper operation.
Your vehicle is approved for use as aStationary Mode, SplitShaft Mode orMobile Mode power source within the limitsand operating guidelines detailed in theFord Truck Body Builders Layout Book,found at https://fordbbas.com/home andthrough the Ford Truck Body BuildersAdvisory Service. The transmission powersource modes are engine specific.
135
2024 F-650/750 (TBC) , enUSA, Edition date: 202210, First-PrintingTransmissionE163186
Page 187 of 386
ESSENTIAL TOWING CHECKS
See Load limits in the Load Carryingchapter for load specification terms foundon the tire label and Safety Compliancelabel and instructions on calculating yourvehicle's load.
Remember to account for the trailertongue weight as part of your vehicle loadwhen calculating the total vehicle weight.
Hitches
Do not use a hitch that either clamps ontothe bumper or attaches to the axle. Youmust distribute the load in your trailer sothat 10-15% of the total weight of thetrailer is on the tongue.
Safety Chains
Note:Do not attach safety chains to thebumper.
Always connect the safety chains to theframe or hook retainers of your vehiclehitch.
To connect the safety chains, cross thechains under the trailer tongue and allowenough slack for turning tight corners. Donot allow the chains to drag on the ground.
Trailer Brakes
WARNING: Do not connect atrailer's hydraulic brake system directlyto your vehicle's brake system. Yourvehicle may not have enough brakingpower and your chances of having acollision greatly increase.
Electric brakes and manual, automatic orsurge-type trailer brakes are safe if youinstall them properly and adjust them tothe manufacturer's specifications. Thetrailer brakes must meet local and federalregulations.
The rating for the tow vehicle's brakingsystem operation is at the gross vehicleweight rating, not the gross combinedweight rating.
Trailer Lamps
WARNING: Never connect anytrailer lamp wiring to the vehicle's taillamp wiring; this may damage theelectrical system resulting in fire. Contactyour authorized dealer as soon aspossible for assistance in proper trailertow wiring installation. Additionalelectrical equipment may be required.
Trailer lamps are required on most towedvehicles. Make sure all running lights, brakelights, turn signals and hazard lights areworking.
Before Towing a Trailer
Practice turning, stopping and backing upto get the feel of your vehicle-trailercombination before starting on a trip.When turning, make wider turns so thetrailer wheels clear curbs and otherobstacles.
When Towing a Trailer
•Check your hitch, electrical connectionsand trailer wheel lug nuts thoroughlyafter you have traveled 50 mph(80 km/h).
•When stopped in congested or heavytraffic during hot weather, place thetransmission in park (P) or neutral (N)to aid engine and transmission coolingand to help air conditioningperformance.
•Turn off the speed control with heavyloads or in hilly terrain. The speedcontrol may turn off automaticallywhen you are towing on long, steepgrades.
183
2024 F-650/750 (TBC) , enUSA, Edition date: 202210, First-PrintingTowing
Page 188 of 386
•Shift to a lower gear when driving downa long or steep hill. Do not apply thebrakes continuously, as they mayoverheat and become less effective.
•If your transmission is equipped withthe Tow/Haul feature, use this featurewhen towing. This provides enginebraking and helps eliminate excessivetransmission shifting for optimum fueleconomy and transmission cooling.
•Allow more distance for stopping witha trailer attached. Anticipate stops andbrake gradually.
FIFTH WHEEL OPERATION (IF
EQUIPPED)
WARNING: Failure to follow thefifth wheel manufacturer’s instructionsfor hooking and unhooking as well assliding the fifth wheel could result in anaccident, personal injury or death.
WARNING: When the tractor andtrailer are parked unattended, the trailerbrake hand control should never be usedto apply the brake, since air may leakfrom the system, allowing vehiclemovement, resulting in possible propertydamage, personal injury or death.
Before hook-up, make sure:
•The fifth wheel jaws are fully open.
•The fifth wheel is fully tilted back toprevent body damage when the tractoris backed under a trailer.
•You block the trailer wheels and adjustand apply the trailer spring brakes.Never chase a trailer.
•The brake hoses and light cords areclear of the fifth wheel.
Hook-up
1.Back the tractor squarely under thetrailer, engaging the fifth-wheel jawson the kingpin. Always back up slowly;make sure the trailer is neither too highnor too low. Avoid backing under thetrailer from an angle.
2.Connect the service and emergencybrake hoses and trailer light connector.
3.Inspect the jaws of the fifth wheel tobe sure they have fully closed on thetrailer kingpin and the trailer plate isresting securely on the fifth wheel.
4.Make sure the coupler release lever isin the locked position.
5.Charge the trailer brake system. Setthe trailer brakes, with either the handvalve or tractor protection valve. Pullagainst the trailer for an extra check ofproper hook-up. Do not pull hardenough to damage or strain theequipment.
6.Set the tractor parking brakes and fullyraise the trailer landing gear.
7.Check the operation of all trailer lightsand correct any lights that may befaulty.
Un-hook
1.Try to keep the tractor and trailer in astraight line.
2.Apply the parking brakes.
3.Lower the trailer landing gear, makingsure it is on solid, level ground. Theweight of the trailer is to be on thelanding gear.
4.Block the trailer wheels.
5.Disconnect the brake hoses and lightcords. Be sure hoses and cords areclear.
6.Pull coupler release lever to disengagethe fifth wheel jaws.
184
2024 F-650/750 (TBC) , enUSA, Edition date: 202210, First-PrintingTowing
Page 208 of 386

Protected ComponentRatingItem
Not used.—26
Upfitter battery feed.20 A27
Not used.—28
Glow plug relay coil.10 A29
Not used.—30
Hydromax pump.60 A31
Powertrain control module.20 A32
Heater exhaust gas oxygensensor 11 (gas).20 A33
Heater exhaust gas oxygensensor 12 (gas).Heater exhaust gas oxygensensor 21 (gas).Canister vent solenoid (gas).Canister purge solenoid(gas).Variable camshaft timingactuator 11 (gas).Exhaust gas recirculationcooling bypass valve(diesel).
A/C clutch relay (diesel).10 A34Variable oil pump (diesel).Cooling fan (diesel).Fan clutch (gas).Exhaust brake switch(diesel).Variable oil pressure control(gas).Customer access vehiclepower 3 feed.
Coil on plug (gas).20 A35Nitrogen oxide sensorcontrol module feedgas(diesel).Nitrogen oxide sensorcontrol module midbed(diesel).
204
2024 F-650/750 (TBC) , enUSA, Edition date: 202210, First-PrintingFuses
Page 229 of 386

UNDER HOOD OVERVIEW - 6.7L DIESEL
Engine compartment fuse box. See Fuses (page 202).A
Windshield washer fluid reservoir. See Washer Fluid Check (page 249).B
Secondary Cooling System Reservoir. See Engine Coolant Check (page 235).C
Engine coolant reservoir. See Engine Coolant Check (page 235).D
Secondary fuel filter. See Draining the Fuel Filter Water Trap (page 234).E
Engine oil separator. See Changing the Engine Oil and Oil Filter (page 228).F
Engine oil filler cap. See Engine Oil Check (page 227).G
Brake fluid reservoir. See Brake Fluid Check (page 245).H
Power steering fluid reservoir. See Power Steering Fluid Check (page 246).I
Air brake compressor. See Brake System Inspection (page 256).J
Engine oil dipstick. See Engine Oil Dipstick (page 227).K
Air cleaner assembly. See Changing the Engine Air Filter (page 230).L
225
2024 F-650/750 (TBC) , enUSA, Edition date: 202210, First-PrintingMaintenanceE389955
Page 239 of 386
3.Rotate the drain counterclockwise untilthe O-ring is visible. Allow the dieselfuel conditioner module to drain forapproximately 25 seconds or untilclean fuel is observed. Rotate the drainclockwise to tighten it. If no liquiddrains, there may be a clog in the drain.Have the conditioner module servicedby an authorized dealer.
4.Make sure that you fully tighten thedrain valve and then remove thecontainer from under your vehicle.
5.Restart the engine. If the Water in FuelDrain Filter message and lightcontinues to illuminate, have the fuelsystem checked and repaired.
ENGINE COOLANT CHECK -
6.7L DIESEL
WARNING: Do not remove thecoolant reservoir cap when the engine ison or the cooling system is hot. Wait 10minutes for the cooling system to cooldown. Cover the coolant reservoir capwith a thick cloth to prevent thepossibility of scalding and slowly removethe cap. Failure to follow this instructioncould result in personal injury.
WARNING: To reduce the risk ofpersonal injury, make sure the engine iscool before unscrewing the coolantpressure relief cap. The cooling systemis under pressure. Steam and hot liquidcan come out forcefully when you loosenthe cap slightly.
When the engine is cold, check theconcentration and level of the coolant atthe intervals listed in the scheduledmaintenance information. See ScheduledMaintenance (page 325).
Note:Make sure that the coolant level isbetween the MIN and the MAX marks onthe coolant reservoir.
Note: Coolant expands when it is hot. Thelevel may extend beyond the MAX mark.
Maintain coolant concentration within48% to 50%, which equates to a freezepoint between -30°F (-34°C) and -34°F(-37°C). Coolant concentration should bechecked using a refractometer. We do notrecommend the use of hydrometers orcoolant test strips for measuring coolantconcentration.
Adding Coolant
WARNING: Do not put coolant inthe windshield washer reservoir. Ifsprayed on the windshield, coolant couldmake it difficult to see through thewindshield.
WARNING: Do not add coolantfurther than the MAX mark.
WARNING: Do not add coolantwhen the vehicle is on or the coolingsystem is hot. Failure to follow thisinstruction could result in personal injury.
WARNING: Do not remove thecoolant reservoir cap when the engine ison or the cooling system is hot. Wait 10minutes for the cooling system to cooldown. Cover the coolant reservoir capwith a thick cloth to prevent thepossibility of scalding and slowly removethe cap. Failure to follow this instructioncould result in personal injury.
Note: Automotive fluids are notinterchangeable. Do not use coolant orwindshield washer fluid outside of itsspecified function and vehicle location.
235
2024 F-650/750 (TBC) , enUSA, Edition date: 202210, First-PrintingMaintenance
Page 240 of 386
Note: Do not use stop leak pellets, coolingsystem sealants, or non-specified additivesas they can cause damage to the enginecooling or heating systems. Resultingcomponent damage may not be covered bythe vehicle warranty.
It is very important to use predilutedcoolant approved to the correctspecification to avoid plugging the smallpassageways in the engine cooling system.See Cooling System Capacity andSpecification (page 301). Do not mixdifferent colors or types of coolant in yourvehicle. Mixing of engine coolants or usingan incorrect coolant may harm the engineor cooling system components and maynot be covered by the vehicle warranty.
Note: Coolants marketed for all makes andmodels may not be approved to Fordspecifications and may cause damage tothe cooling system. Resulting componentdamage may not be covered by the vehicleWarranty.
If the coolant level is at or below theminimum mark, add prediluted coolantimmediately.
For vehicles with overflow coolant systemswith a non-pressurized cap on the coolantrecovery system, add coolant to thecoolant recovery reservoir when the engineis cool. Add prediluted coolant to themaximum level. For all vehicles which havea coolant degas system with a pressurizedcap, or if it is necessary to remove thecoolant pressure relief cap on the radiator,follow these steps to add engine coolant:
1.Turn the engine off and let it cool.
2.Unscrew the cap slowly. Any pressureescapes as you unscrew the cap.
3.Fill the coolant reservoir slowly withprediluted engine coolant to within theminimum and maximum range on theengine coolant reservoir. If youremoved the radiator cap in anoverflow system, fill the radiator until
the coolant is visible and the radiatoris almost full. If coolant is added tobring the level within the minimum andmaximum range when the engine is notcold, the system may remain underfilled.
4.Replace the coolant reservoir cap, turnit clockwise until you feel a strongresistance.
5.Check the coolant level in the coolantreservoir the next few times you driveyour vehicle. If necessary, add enoughprediluted engine coolant to bring thecoolant level to the proper level.
Note:If prediluted coolant is not available,use the approved antifreeze concentratediluting it to 50/50 with distilled water. SeeCooling System Capacity andSpecification (page 301). Using water thathas not been deionized may contribute todeposit formation, corrosion or plugging ofthe small cooling system passageways.
If you have to add more than 1.1 qt (1 L) ofengine coolant per month, have yourvehicle checked as soon as possible.Operating an engine with a low level ofcoolant can result in engine overheatingand possible engine damage.
Note:During normal vehicle operation, thecoolant may change color from orange topink or light red. As long as the coolant isclear and uncontaminated, this color changedoes not indicate the coolant has degradednor does it require the coolant to be drained,the system to be flushed, or the coolant tobe replaced.
In case of emergency, you can add a largeamount of water without predilutedcoolant to reach a vehicle service location.On arrival do the following:
1.Drain the cooling system.
2.Chemically clean the cooling system.We recommend Motorcraft PremiumCooling System Flush.
236
2024 F-650/750 (TBC) , enUSA, Edition date: 202210, First-PrintingMaintenance
Page 241 of 386
3.Refill with prediluted coolant as soonas possible.
Water alone, without prediluted coolant,can cause engine damage from corrosion,overheating or freezing.
Do not use the following as a coolantsubstitute:
•Alcohol.
•Methanol.
•Brine.
•Any coolant mixed with alcohol ormethanol antifreeze.
Alcohol and other liquids can cause enginedamage from overheating or freezing.
Do not add extra inhibitors or non-specifiedadditives to the coolant. These can beharmful and compromise the corrosionprotection of the coolant.
Engine and Secondary CoolingSystem Refill Procedure
Use the following procedure when refillingthe engine or secondary cooling systemsafter it has been drained or becomeextremely low:
1.Before you remove the cap, turn theengine off and let it cool.
2.When the engine is cool, wrap a thickcloth around the cap. Slowly turn thecap counterclockwise until pressurebegins to release.
3.Step back when the pressure releases.
4.When you are sure that all the pressurehas been released, use the cloth to turnthe cap counterclockwise and thenremove it.
5.Slowly add prediluted engine coolantto the coolant reservoir until thecoolant level is within the minimumand maximum range as listed on thereservoir.
6.Reinstall the pressure relief cap.
7.Start and run the engine at 2000 rpmfor 2 minutes.
8.Switch the engine off and remove thepressure relief cap as previouslyoutlined.
9.If required, add prediluted enginecoolant to the coolant reservoir untilthe coolant level is within the minimumand maximum range as listed on thereservoir.
10.Engine cooling system: Repeat steps5 through 9 until the coolant level hasstabilized (is no longer dropping aftereach step) and the upper radiatorhose at the radiator is warm to thetouch (indicating that the enginethermostat is open and coolant isflowing through the radiator).
11.Check the secondary cooling system.Repeat steps 1 through 10 until thecoolant level has stabilized (is nolonger dropping after each step) andthe lower passenger side of thesecondary radiator is warm to thetouch (indicating secondarythermostat is open and coolant isflowing through the entire system).
12.Check the coolant level in bothsystems before you drive your vehiclethe next few times.
13.If necessary, add prediluted enginecoolant to the coolant reservoirs untilthe coolant level is within theminimum and maximum range aslisted on the reservoir. After anycoolant has been added, check thecoolant concentration.
Recycled Coolant
We do not recommend the use of recycledcoolant as an approved recycling processis not yet available.
Dispose of used engine coolant in anappropriate manner.
237
2024 F-650/750 (TBC) , enUSA, Edition date: 202210, First-PrintingMaintenance