2024 FORD F650/750 brakes
[x] Cancel search: brakesPage 7 of 386
2-Speed Rear Axle......................................136
Pneumatic Locking Differ-ential
What Is the Pneumatic LockingDifferential..................................................137
How Does the Pneumatic LockingDifferential Work......................................137
Pneumatic Locking DifferentialPrecautions................................................137
Switching the Pneumatic LockingDifferential On and Off..........................137
Pneumatic Locking DifferentialIndicators....................................................138
Brakes
General Information...................................139
Hints on Driving With Anti-Lock Brakes........................................................................140
Parking Brake................................................140
Hill Start Assist - Vehicles With:Hydraulic Brakes......................................143
Air Brakes........................................................144
Exhaust Brake...............................................145
Trailer Brakes.................................................147
Traction Control
Principle of Operation.................................151
Using Traction Control - Vehicles With:Air Brakes.....................................................151
Using Traction Control - Vehicles With:Hydraulic Brakes.......................................151
Stability Control
Principle of Operation - Vehicles With:Hydraulic Brakes......................................153
Principle of Operation - Vehicles With:Air Brakes....................................................154
Using Stability Control...............................155
Parking Aids
Rear View Camera.......................................157
Cruise Control
What Is Cruise Control...............................158
Switching Cruise Control On and Off.........................................................................158
Setting the Cruise Control Speed.........158
Canceling the Set Speed..........................159
Resuming the Set Speed..........................159
Cruise Control Indicators..........................159
Using Adaptive Cruise Control...............159
Driving Aids
Driver Alert.....................................................166
Lane Keeping System................................167
Steering...........................................................170
Pre-Collision Assist - Vehicles With: AirBrakes..........................................................170
Pre-Collision Assist - Vehicles With:Hydraulic Brakes.......................................173
Load Carrying
Load Limit.......................................................178
Air Suspension..............................................179
Towing
Towing a Trailer.............................................181
Recommended Towing Weights...........182
Essential Towing Checks..........................183
Fifth Wheel Operation...............................184
Driving Hints
General Driving Points...............................186
Economical Driving.....................................187
Cold Weather Precautions - 6.7L Diesel.........................................................................187
Cold Weather Precautions - 7.3L...........188
Breaking-In....................................................188
Driving Through Water..............................189
Roadside Emergencies
Hazard Flashers...........................................190
3
2024 F-650/750 (TBC) , enUSA, Edition date: 202210, First-PrintingTable of Contents
Page 15 of 386

DATA RECORDING
WARNING: Do not connectwireless plug-in devices to the data linkconnector. Unauthorized third partiescould gain access to vehicle data andimpair the performance of safety relatedsystems. Only allow repair facilities thatfollow our service and repair instructionsto connect their equipment to the datalink connector.
We respect your privacy and arecommitted to protecting it. Theinformation contained in this publicationwas correct at the time of going to print,but as technology rapidly changes, werecommend that you visit the regional Fordwebsite for the latest information.
Your vehicle has electronic control unitsthat have data recording functionality andthe ability to permanently or temporarilystore data. This data could includeinformation on the condition and status ofyour vehicle, vehicle maintenancerequirements, events and malfunctions.The types of data that can be recorded aredescribed in this section. Some of the datarecorded is stored in event logs or errorlogs.
Note:Error logs are reset following a serviceor repair.
Note:We may provide information inresponse to requests from law enforcement,other government authorities and thirdparties acting with lawful authority orthrough a legal process. Such informationcould be used by them in legal proceedings.
Data recorded includes, for example:
•Operating states of systemcomponents, for example, fuel level,tire pressure and battery charge level.
•Vehicle and component status, forexample, wheel speed, deceleration,lateral acceleration and seatbeltstatus.
•Events or errors in essential systems,for example, headlamps and brakes.
•System responses to driving situations,for example, airbag deployment andstability control.
•Environmental conditions, for example,temperature.
Some of this data, when used incombination with other information, forexample, an accident report, damage to avehicle or eyewitness statements, couldbe associated with a specific person.
Service Data
Service data recorders in your vehicle arecapable of collecting and storingdiagnostic information about your vehicle.This potentially includes information aboutthe performance or status of varioussystems and modules in the vehicle, suchas engine, throttle, steering or brakesystems. In order to properly diagnose andservice your vehicle, Ford Motor Company(Ford of Canada in Canada), and serviceand repair facilities may access or shareamong them vehicle diagnosticinformation received through a directconnection to your vehicle whendiagnosing or servicing your vehicle.Additionally, Ford Motor Company (Fordof Canada, in Canada) may, wherepermitted by law, use vehicle diagnosticinformation for vehicle improvement orwith other information we may have aboutyou, for example, your contact information,to offer you products or services that mayinterest you. Data may be provided to our
11
2024 F-650/750 (TBC) , enUSA, Edition date: 202210, First-PrintingIntroduction
Page 45 of 386
Using Seatbelts During Pregnancy
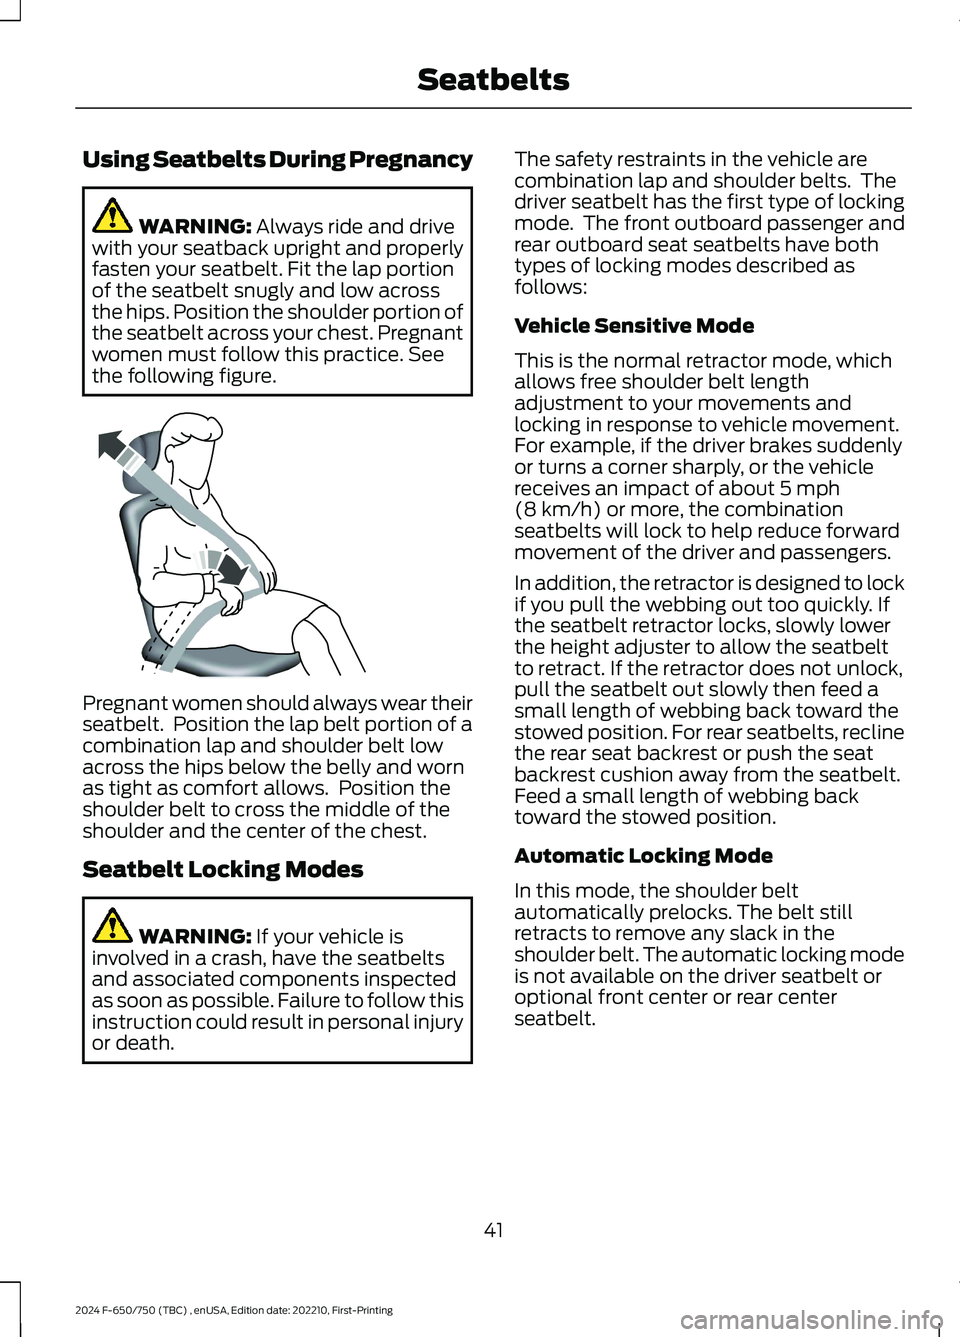
WARNING: Always ride and drivewith your seatback upright and properlyfasten your seatbelt. Fit the lap portionof the seatbelt snugly and low acrossthe hips. Position the shoulder portion ofthe seatbelt across your chest. Pregnantwomen must follow this practice. Seethe following figure.
Pregnant women should always wear theirseatbelt. Position the lap belt portion of acombination lap and shoulder belt lowacross the hips below the belly and wornas tight as comfort allows. Position theshoulder belt to cross the middle of theshoulder and the center of the chest.
Seatbelt Locking Modes
WARNING: If your vehicle isinvolved in a crash, have the seatbeltsand associated components inspectedas soon as possible. Failure to follow thisinstruction could result in personal injuryor death.
The safety restraints in the vehicle arecombination lap and shoulder belts. Thedriver seatbelt has the first type of lockingmode. The front outboard passenger andrear outboard seat seatbelts have bothtypes of locking modes described asfollows:
Vehicle Sensitive Mode
This is the normal retractor mode, whichallows free shoulder belt lengthadjustment to your movements andlocking in response to vehicle movement.For example, if the driver brakes suddenlyor turns a corner sharply, or the vehiclereceives an impact of about 5 mph(8 km/h) or more, the combinationseatbelts will lock to help reduce forwardmovement of the driver and passengers.
In addition, the retractor is designed to lockif you pull the webbing out too quickly. Ifthe seatbelt retractor locks, slowly lowerthe height adjuster to allow the seatbeltto retract. If the retractor does not unlock,pull the seatbelt out slowly then feed asmall length of webbing back toward thestowed position. For rear seatbelts, reclinethe rear seat backrest or push the seatbackrest cushion away from the seatbelt.Feed a small length of webbing backtoward the stowed position.
Automatic Locking Mode
In this mode, the shoulder beltautomatically prelocks. The belt stillretracts to remove any slack in theshoulder belt. The automatic locking modeis not available on the driver seatbelt oroptional front center or rear centerseatbelt.
41
2024 F-650/750 (TBC) , enUSA, Edition date: 202210, First-PrintingSeatbeltsE142590
Page 106 of 386

Note:When you switch the ignition off andleave your vehicle, do not leave your key inthe ignition. This could cause your vehiclebattery to lose charge.
I (accessory) - Allows the electricalaccessories, such as the radio, to operatewhile the engine is not running.
Note:Do not leave the ignition key in thisposition for too long. This could cause yourvehicle battery to lose charge.
II (on) - All electrical circuits areoperational and the warning lamps andindicators illuminate.
III (start) - Cranks the engine.
STARTING A GASOLINE
ENGINE
When you start the engine, the idle speedincreases helping to warm up the engine.If the engine idle speed does not slowdown, have your vehicle checked as soonas possible.
Before starting the engine check thefollowing:
•Make sure all occupants fasten theirseatbelts.
•Make sure the headlamps andelectrical accessories are off.
•Make sure the parking brake is on.
•Make sure the transmission is in park(P) or neutral (N).
•Turn the ignition key to the on position.
Note:Do not press the accelerator pedal.
1.Fully press the brake pedal.
2.Turn the key to the start position tostart the engine. Release the key whenthe engine starts.
Note:The engine may continue crankingfor up to 15 seconds or until it starts.
Note:If you cannot start the engine on thefirst try, wait for a short period and try again.
Failure to Start
If you cannot start the engine after threeattempts, wait 10 seconds and follow thisprocedure:
1.Fully press the brake pedal.
2.Shift into park (P).
3.Fully press and hold the acceleratorpedal.
4.Attempt to start your vehicle and waituntil the engine stops cranking.
5.Release the accelerator pedal.
6.Start the engine.
Stopping the Engine When YourVehicle is Stationary
1.Shift into park (P) or neutral (N).
2.Turn the key to the off position.
3.Apply the parking brake.
Stopping the Engine When YourVehicle is Moving
WARNING: Switching off theengine when your vehicle is still movingresults in a significant decrease inbraking assistance. Higher effort isrequired to apply the brakes and to stopyour vehicle. A significant decrease insteering assistance could also occur. Thesteering does not lock, but higher effortcould be required to steer your vehicle.When you switch the ignition off, someelectrical circuits, for example airbags,also turn off. If you unintentionally switchthe ignition off, shift into neutral (N) andrestart the engine.
1.Switch the ignition off to stop theengine.
102
2024 F-650/750 (TBC) , enUSA, Edition date: 202210, First-PrintingStarting and Stopping the Engine
Page 107 of 386
2.Put the transmission into neutral (N)and use the brakes to bring your vehicleto a safe stop.
3.When your vehicle has stopped, shiftinto park (P).
4.Apply the parking brake.
Guarding Against Exhaust Fumes
WARNING: Exhaust leaks mayresult in entry of harmful and potentiallylethal fumes into the passengercompartment. If you smell exhaustfumes inside your vehicle, have yourvehicle inspected immediately. Do notdrive if you smell exhaust fumes.
Important Ventilating Information
If you stop your vehicle and leave theengine idling for long periods of time, werecommend you either open the windowsat least 1 in (3 cm) or set the climatecontrol to outside air.
STARTING A DIESEL ENGINE
Read all starting instructions carefullybefore you start your vehicle.
The 6.7L diesel engine incorporates a delaybetween a crank command and starterengagement to crank the engine. Thisdelay ensures robust starting performancein all environmental conditions includingextreme cold. The crank command isinitiated by the operator by turning theignition key. The delay varies with enginecoolant temperature. There is no delay forhot coolant temperature. The delayincreases at colder coolant temperatures.Maximum delay of 2.5 seconds isexperienced below -13.0°F (-25°C).
Diesel Engine Fast Start Glow PlugSystem
The diesel engine glow system consists of:
•Eight glow plugs, one per cylinder.
•Glow plug control module.
•Engine coolant temperature sensor.
•Barometric pressure sensor.
•Environmental temperature sensor.
The powertrain and glow plug controlmodules electronically control the glowplug system. After you switch the ignitionon, the glow plug control moduleimmediately energizes the glow plugs. Theglow plug control module, using the enginecoolant temperature, barometric pressuresensor and environmental temperaturesensor, determines how long the glowplugs stay energized. The required time forthe glow plugs to be energized decreasesas the coolant temperature, barometricpressure and environmental temperatureincrease.
Before starting the engine, check thefollowing:
•Make sure all occupants fasten theirseatbelt.
•Make sure the headlamps andelectrical accessories are off.
•Make sure the parking brake is on.
•Make sure the transmission is in park(P) or neutral (N).
•Turn the ignition key to the on position.
Note:Do not press the accelerator duringstarting.
1.Fully press the brake pedal.
2.Turn the key to the start position tostart the engine. Release the key whenthe engine starts.
103
2024 F-650/750 (TBC) , enUSA, Edition date: 202210, First-PrintingStarting and Stopping the Engine
Page 138 of 386

Automatic Transmission AdaptiveLearning
This feature could increase durability andprovide consistent shift feel over the lifeof your vehicle. A new vehicle ortransmission may have firm shifts, softshifts, or both. This is normal and does notaffect the function or durability of thetransmission. Over time, the adaptivelearning process fully updates transmissionoperation.
Brake-Shift Interlock
WARNING: Do not drive yourvehicle until you verify that thestoplamps are working.
WARNING: When doing thisprocedure, you need to take thetransmission out of park (P) whichmeans your vehicle can roll freely. Toavoid unwanted vehicle movement,apply the parking brake prior to doingthis procedure. Use wheel chocks ifappropriate.
WARNING: If the parking brake isfully released, but the brake warninglamp remains illuminated, the brakesmay not be working properly. Have yourvehicle checked as soon as possible.
Your vehicle has a brake-shift interlockfeature that prevents the gearshift leverfrom moving from park (P) when youswitch the ignition on but have not pressedthe brake pedal.
If you cannot move the gearshift lever outof the park (P) position with the ignition inthe on position and the brake pedalpressed, a malfunction could haveoccurred. It is possible that a fuse hasblown, or your vehicle’s brake lamps arenot operating properly. See FuseSpecification Chart (page 202).
If you do not have a blown fuse and thebrake lamps are working properly, thefollowing procedure allows you to movethe gearshift lever from park (P):
1.Apply the parking brake. Switch theignition key to off, then remove the key.
2.Move the steering column to the fulldown and full rearward position,toward the driver seat.
3.Remove the gearshift lever boot.
4.Place your fingers into the hole whereyou removed the gearshift lever bootand pull the top half of the shroud upand forward to separate it from thelower half of the shroud. There is ahinge at the forward edge of the top ofthe shroud. Roll the top half of theshroud upward on the hinge point, thenpull straight rearward toward the driverseat to remove.
5.Remove the top half of the shroud.
6.Remove the three fasteners under thecolumn that secure the lower shroudhalf to the column.
7.Pull the lock lever into the full unlockedposition and remove the lower shroudcover by pulling the lever handlethrough the slot in the cover.
8.Apply the brake. Gently lift the overridedisk and move the gearshift lever intoneutral (N).
134
2024 F-650/750 (TBC) , enUSA, Edition date: 202210, First-PrintingTransmissionE163185
Page 140 of 386
GENERAL INFORMATION
WARNING: Exceeding these ratingsby overloading can cause componentfailure resulting in property damage,personal injury or death.
Fluid Temperature
If the operating temperature exceeds250°F (121°C), the rate of axle lubricationoxidation increases and shortens the lifeof the lubricant and seals, requiring axlelubrication changes to become morefrequent to preserve the axle. Do notconsistently run extreme pressure (EP)lubricants above 250°F (121°C).
Axle Conversions
WARNING: When operating aloaded vehicle, the driver must keep alladjustable axles on the ground at alltimes, supporting their share of thevehicle’s load. Failure to do so canoverload other axles, tires, wheels,springs, steering components, brakesand frames, resulting in early componentfailure, loss of vehicle control, possibleproperty damage and personal injury.
We do not recommend, or approve,performing axle conversions. However, weunderstand that, on occasion, others installaftermarket add-on axles on the truckchassis that allow operator control forweight transfer from other axles (such asair lift axles).
2-SPEED REAR AXLE (IF EQUIPPED)
WARNING: Never shift atwo-speed axle when descending asteep grade as this may cause loss ofvehicle control and result in personalinjury.
Note:Do not shift between ranges whenthe speed control is on.
A two-speed rear axle allows the driver toselect a low range for greater pulling powerand a high range for greater road speedand fuel economy. You can also use theseranges to provide extra steps betweentransmission shifts when driving on steepgrades or fuel economy may be factors.
Axle Shifting
Note:Do not shift the axle to LOW whenyour vehicle is moving. Use LOW when youdrive a fully loaded vehicle on a severe gradeor in congested traffic. Use HIGH for allnormal driving conditions with a lightlyloaded or partially loaded vehicle.
Note:The axle is set to HIGH by default.
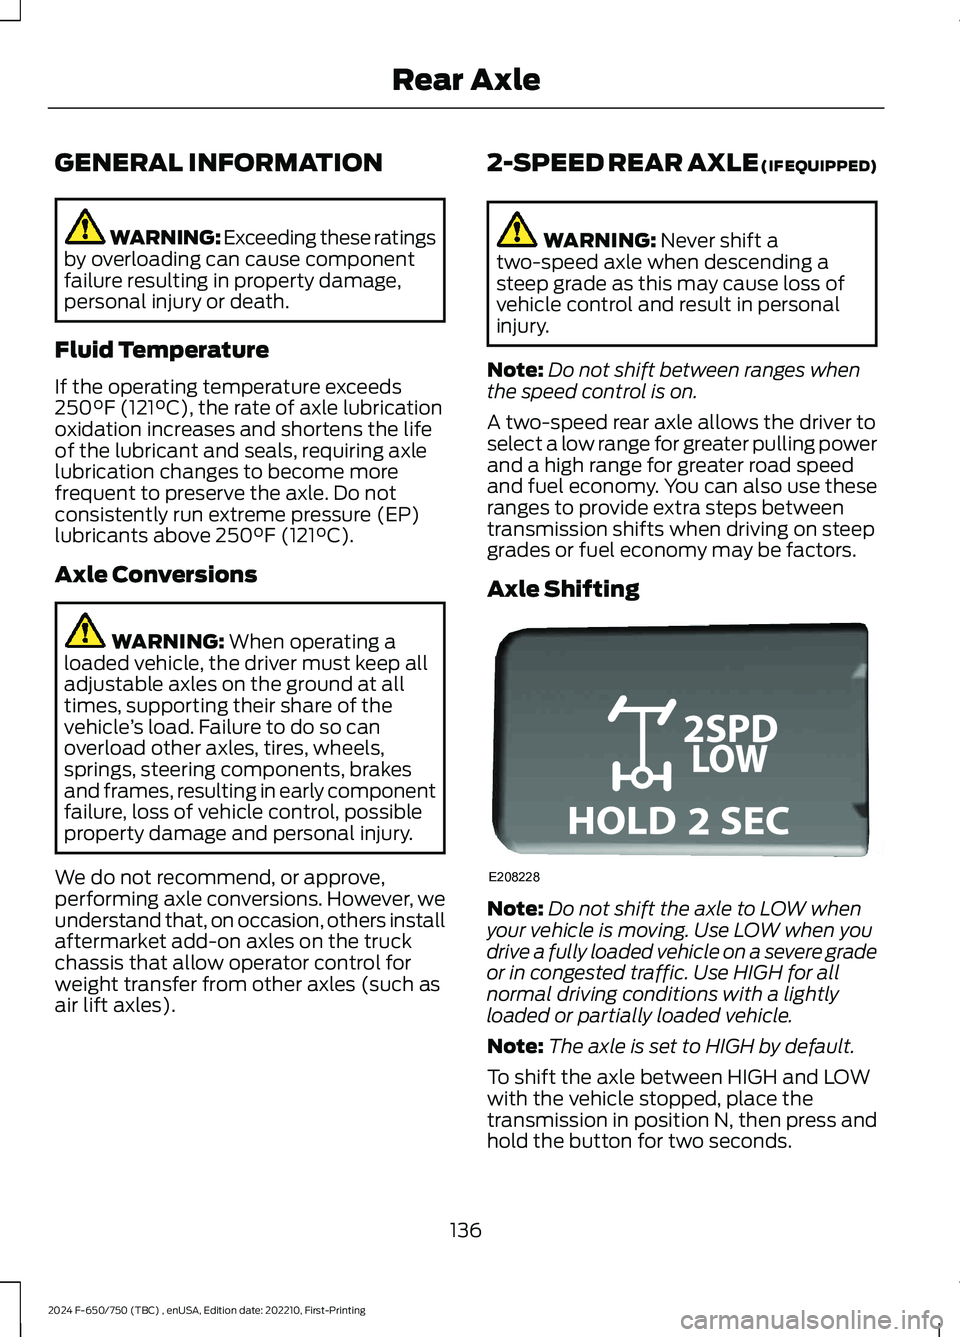
To shift the axle between HIGH and LOWwith the vehicle stopped, place thetransmission in position N, then press andhold the button for two seconds.
136
2024 F-650/750 (TBC) , enUSA, Edition date: 202210, First-PrintingRear AxleE208228
Page 143 of 386
GENERAL INFORMATION
Note: Occasional brake noise is normal. Ifa metal-to-metal, continuous grinding orcontinuous squeal sound is present, thebrake linings may be worn-out. Have thesystem checked as soon as possible. If thevehicle has continuous vibration or shudderin the steering wheel while braking, have thesystem checked as soon as possible.
All standard equipment brakes areself-adjusting. Automatic adjustment,when required, occurs whenever you applyand release the brakes during forward orreverse operation.
Know the required stopping distances forall driving conditions you may encounter.For longer brake lining life, take fulladvantage of engine braking power whencoming to a stop.
Wet brakes result in reduced brakingefficiency. Gently press the brake pedal afew times when driving from a car wash orstanding water to dry the brakes.
If the brakes do not grip well:
•Check brake adjustment.
•Check the brake linings for excessivewear.
•Check the system air pressure onvehicles with air brakes.
•Let the brakes cool if you have beenusing them excessively, as in mountaindriving or after several fast, high-speedstops.
•If you have been driving through deepwater, gently apply the brakes severaltimes while your vehicle is movingslowly.
Brake Over Accelerator
In the event the accelerator pedalbecomes stuck or entrapped, apply steadyand firm pressure to the brake pedal toslow the vehicle and reduce engine power.If you experience this condition, apply thebrakes and bring your vehicle to a safestop. Move the transmission to park (P),switch the engine off and apply the parkingbrake. Inspect the accelerator pedal forany interference. If none are found and thecondition persists, have your vehicle towedto the nearest authorized dealer
Anti-lock Brake System
This system helps you maintain steeringcontrol during emergency stops by keepingthe brakes from locking.
If the light does not illuminateduring start up, remains on orflashes, the system may bedisabled. It also momentarily illuminateswhen you switch the ignition on to confirmthe lamp is functional. If it does notilluminate when you switch the ignition on,or begins to flash at any time, have thesystem checked.
If you connect a PLC trailer withthe ignition on, the trailer ABSlight also illuminates. If the lightfails to illuminate, if it remains on after youstart the vehicle or continues to flash, havethe system serviced immediately.
See Warning Lamps and Indicators(page 67).
139
2024 F-650/750 (TBC) , enUSA, Edition date: 202210, First-PrintingBrakesE67020 E210335