2024 FORD F650/750 service interval
[x] Cancel search: service intervalPage 12 of 386

Right-hand side.A
Left-hand side.B
Warnings
WARNING: Throughout this guide,you will find warnings identified by thewarning symbol. Warnings remind youto be especially careful to reduce the riskof personal injury.
Diesel Engine Information
The diesel engine fuel system is apressurized two-stage filtration systemand consists of:
•A frame-mounted Fuel and WaterSeparator primary filter with an electricfuel pump and water drain
•An engine-mounted secondary fuelfilter
•A fuel injector for each cylinder (8total)
•A high-pressure fuel pump
•A high-pressure fuel rail for eachcylinder bank (2 total)
•Numerous high-pressure pipes fromthe high-pressure pump to the rails,and rails to the injectors
The fuel and water separator removesboth water and impurities from the fuel.The engine-mounted filter filters finerimpurities from the diesel fuel. Theengine-mounted fuel filter and theframe-mounted fuel filter should bechanged at the recommended serviceinterval or when indicated by theinformation display LOW FUEL PRESSUREmessage. See Scheduled Maintenance(page 325).
The fuel and water separator should bedrained at regular intervals (recommendedat every oil change) or when indicated bythe information display and water in fuelindicator light. See Fuel Quality (page108).
Proper fuel filter maintenance and promptwater draining when the water in fuel lightilluminates is essential to prevent injectionequipment damage. Ignoring the water infuel light or the information displaymessage WATER IN FUEL DRAIN FILTERcan cause your vehicle to go into a reducedpower mode.
A frame-mounted electric fuel pumplocated inside the fuel and water separatordraws fuel from the fuel tank to providepressurized fuel to the engine. The fuelpump contains a pressure relief valve foroverpressure protection in the event ofrestricted flow.
The fuel injection system is controlledthrough the powertrain control module.
Engine Protection Mode
Ford diesel engines are equipped withengine protection and emission controlsystems. These systems monitor criticaltemperatures and pressures, and modifyengine operation accordingly. Thesemodified engine performancecharacteristics are normal.
8
2024 F-650/750 (TBC) , enUSA, Edition date: 202210, First-PrintingIntroductionE154903
Page 13 of 386

If these modified engine performancecharacteristics persist for an extendedperiod and either the service engine soonor powertrain malfunction, reduced power,electronic throttle control light isilluminated, have the system checked byan authorized dealer.
Service engine soon
Powertrain malfunction, reducedpower, electronic throttle control
Diesel Lubrication System
It is important to change the engine oil atthe recommended service intervals orwhen indicated by the information displayto maintain oil viscosity. Extending the oiland filter change interval beyond therecommended interval can negativelyaffect engine performance, fuel economyand engine life. See Engine Oil Check(page 227).
Engine and secondary cooling system
The cooling system contains a primarycooling loop to cool the engine and asecondary cooling loop to cool thetransmission, charge air, and fuel. Thecoolant serves three primary purposes: toprovide heat transfer, freeze pointprotection, and corrosion protection usingadditives.
Vehicles with diesel engines typically areused to carry heavy loads and accumulatemileage rapidly. These two factors maycause the additives in the coolant to wearout in a shorter time. You can find moreinformation about coolant additives andcoolant change intervals in the coolantchapter. See General MaintenanceInformation (page 325). Operating theengine with insufficient coolant or coolantadditive can cause severe engine damage.
Selective catalytic reduction system
Your vehicle is equipped with a selectivecatalytic reduction system designed toreduce emission levels of nitrogen oxidesfrom the exhaust of your diesel engine. Thissystem relies on the use of Diesel ExhaustFluid (DEF) that you must replenish atcertain intervals. Failure to maintain properDEF levels or if the DEF becomescontaminated will result in vehicle speedlimitations or result in your vehicle enteringan idle-only mode. See SelectiveCatalytic Reductant System (page 120).
Minor Troubleshooting Guide
If the engine won’t crank
WARNING: Battery posts,terminals and related accessoriescontain lead and lead compounds. Washhands after handling.
Turn on the headlights. If the lights are dim,do not go on at all or when the ignition isturned to the start position, the lightsbecome dim or go out, the batteryconnections may be loose or corroded, orthe battery may be discharged. If there isa clicking or stuttering sound coming fromthe engine compartment when you turnthe key to the start position, this may alsoindicate a loose or corroded batteryconnection.
Check the battery connections at thebattery posts, cable connection to theengine grounding point and at the starterconnection.
If you suspect a discharged battery, haveit checked and corrected.
9
2024 F-650/750 (TBC) , enUSA, Edition date: 202210, First-PrintingIntroductionE67028
Page 114 of 386

Biodiesel fuel is a chemically convertedproduct from renewable fuel sources, suchas vegetable oils, animal fats and wastecooking greases.
To help achieve acceptable engineperformance and durability when usingbiodiesel in your vehicle:
•Confirm the biodiesel content of thefuel to be B20 (20% biodiesel) or less
•Only use biodiesel fuel of good qualitythat complies with industry standards
•Follow the recommended servicemaintenance intervals. SeeScheduled Maintenance (page 325).
•Do not store biodiesel fuel in the fueltank for more than 1 month
•Consider changing brands or reducingbiodiesel content if you have coldtemperature fuel gelling issues or afrequent LOW FUEL PRESSUREmessage appearing
•Do NOT use raw oils, fats or wastecooking greases
Use of biodiesel in concentrations greaterthan 20% may cause damage to yourvehicle, including engine and/or exhaustafter-treatment hardware (exhaustcatalyst and particulate filter) failures.Concentrations greater than 20% can alsocause fuel filter restrictions that may resultin a lack of power or damage to fuelsystem components, including fuel pumpand fuel injector failures.
SAE 5W-40 or SAE 15W-40 oil isrecommended for fuels with greater than5% biodiesel (B5). Refer to the Specialoperating conditions section under theSchedule Maintenance chapter for moreinformation about oil change intervals andother maintenance when operating onbiodiesel.
Look for a label on the fuel pump toconfirm the amount of biodiesel containedin a diesel fuel. Biodiesel content is oftenindicated with the letter B followed by thepercent of biodiesel in the fuel. Forexample, B20 indicates a fuel containing20% biodiesel. Ask the service stationattendant to confirm the biodiesel contentof a diesel fuel if you do not see a label onthe fuel pump.
Biodiesel fuels degrade more easily thandiesel fuels not containing biodiesel andshould not be stored in the fuel tank formore than 1 month. If you plan to park orstore your vehicle for more than 1 month,then you should empty your vehicle fueltank of biodiesel fuel. You should fill thetank with a pure petroleum-based dieselfuel and run your vehicle for a minimum of30 minutes.
Note:Degraded or oxidized biodiesel candamage fuel system seals and plastics andcorrode steel parts.
During cold weather, if you have problemsoperating on biodiesel, you may need touse a diesel fuel with lower biodieselcontent, try another brand, or discontinuethe use of biodiesel.
Diesel Fuel Additives
It should not be necessary to add anyaftermarket additives to your fuel if youuse a high quality diesel fuel that conformsto ASTM industry specifications.Aftermarket additives can damage the fuelinjector system or engine.
Use Motorcraft® cetane booster or anequivalent cetane booster additive if yoususpect fuel has low cetane. UseMotorcraft® anti-gel & performanceimprover or an equivalent additive if thereis fuel gelling.
110
2024 F-650/750 (TBC) , enUSA, Edition date: 202210, First-PrintingFuel and Refueling
Page 149 of 386

Only qualified service technicians shouldperform air brake inspection andadjustment or repairs.
Cam Brakes - Automatic SlackAdjusters - Drum Brakes
WARNING: Do not manually adjustthe automatic slack adjusters to correctexcessive push rod stroke as it may resultin reduced brake effectiveness and avehicle crash. Excessive push rod strokeindicates that a problem exists with theautomatic adjuster, with the installationof the adjuster, or with foundation brakecomponents that manual adjustmentdoes not remedy. Seek service from aqualified facility for excessive push rodstroke.
Standard air brakes (cam) are equippedwith automatic brake adjusters. Automaticadjustment occurs during brakeapplications. Inspect brakes for properadjustment at the specified intervals. SeeScheduled Maintenance (page 325).
Emergency Air Brake
WARNING: Do not continue tooperate the vehicle with a failure of oneof the brake systems. Take the vehicleto your dealer for service immediately.
Brake Wear Indicator - Disc Brakes
Inspect the brake wear indicator every timebefore starting the vehicle. The wearindicator length through the hole continuesto reduce depending on the brake padwear. Replace the brake pads immediatelyif the lining material thickness is 0.0787 in(2 mm) or less on either of the brake pads.
EXHAUST BRAKE (IF EQUIPPED)
WARNING: Do not use tow/haulwhen the road surface is slippery. Failureto follow this instruction could result inthe loss of control of your vehicle.
WARNING: Do not use dieselengine exhaust braking when the roadsurface is slippery. Failure to follow thisinstruction could result in the loss ofcontrol of your vehicle.
145
2024 F-650/750 (TBC) , enUSA, Edition date: 202210, First-PrintingBrakesE210337 E392040
Page 232 of 386

Do not use supplemental engine oiladditives because they are unnecessaryand could lead to engine damage that thevehicle warranty may not cover.
1.Clean the area surrounding the engineoil filler cap before you remove it.
2.Remove the engine oil filler cap.
3.Add engine oil that meets ourspecifications. See Capacities andSpecifications (page 291).
4.Reinstall the engine oil filler cap. Turnit clockwise until you feel a strongresistance.
Note: Do not add oil further than themaximum mark. Oil levels above themaximum mark may cause engine damage.
Note:Immediately soak up any oil spillagewith an absorbent cloth.
Engine Oil Pressure Warning Lamp
WARNING: If it illuminates whenyou are driving do not continue yourjourney, even if the oil level is correct.Have your vehicle checked.
It illuminates when you switchthe ignition on.
If it illuminates when the engineis running this indicates a malfunction.Stop your vehicle as soon as it is safe todo so and switch the engine off. Check theengine oil level. If the oil level is sufficient,this indicates a system malfunction. Haveyour vehicle checked as soon as possible.
CHANGING THE ENGINE OIL
AND OIL FILTER
WARNING: Do not add engine oilwhen the engine is hot. Failure to followthis instruction could result in personalinjury.
Your vehicle has an Intelligent Oil LifeMonitor™ that calculates the proper oilchange service interval. When theinformation display indicates: OIL CHANGEREQUIRED, change the engine oil and oilfilter. See Information Displays (page71).
The engine oil filter protects your engineby filtering harmful, abrasive or sludgeparticles and particles significantly smallerthan most available will-fit filters. SeeMotorcraft Parts (page 293).
1.Unscrew the oil filter and oil pan drainplug and wait for the oil to drain.
2.Replace the filter.
3.Reinstall the oil pan drain plug.
4.Refill the engine with new oil. SeeEngine Oil Capacity andSpecification (page 299).
5.Reset the Intelligent Oil Life Monitor™.See Information Displays (page 71).
Engine Lubrication for SevereService Operation
The following conditions define severeoperation:
•Frequent or extended idling such asover 10 minutes per hour of normaldriving.
•Low-speed operation or stationary use.
•If the vehicle is operated in sustained,ambient temperatures below -9°F(-23°C) or above 100°F (38°C).
228
2024 F-650/750 (TBC) , enUSA, Edition date: 202210, First-PrintingMaintenanceE67022
Page 239 of 386

3.Rotate the drain counterclockwise untilthe O-ring is visible. Allow the dieselfuel conditioner module to drain forapproximately 25 seconds or untilclean fuel is observed. Rotate the drainclockwise to tighten it. If no liquiddrains, there may be a clog in the drain.Have the conditioner module servicedby an authorized dealer.
4.Make sure that you fully tighten thedrain valve and then remove thecontainer from under your vehicle.
5.Restart the engine. If the Water in FuelDrain Filter message and lightcontinues to illuminate, have the fuelsystem checked and repaired.
ENGINE COOLANT CHECK -
6.7L DIESEL
WARNING: Do not remove thecoolant reservoir cap when the engine ison or the cooling system is hot. Wait 10minutes for the cooling system to cooldown. Cover the coolant reservoir capwith a thick cloth to prevent thepossibility of scalding and slowly removethe cap. Failure to follow this instructioncould result in personal injury.
WARNING: To reduce the risk ofpersonal injury, make sure the engine iscool before unscrewing the coolantpressure relief cap. The cooling systemis under pressure. Steam and hot liquidcan come out forcefully when you loosenthe cap slightly.
When the engine is cold, check theconcentration and level of the coolant atthe intervals listed in the scheduledmaintenance information. See ScheduledMaintenance (page 325).
Note:Make sure that the coolant level isbetween the MIN and the MAX marks onthe coolant reservoir.
Note: Coolant expands when it is hot. Thelevel may extend beyond the MAX mark.
Maintain coolant concentration within48% to 50%, which equates to a freezepoint between -30°F (-34°C) and -34°F(-37°C). Coolant concentration should bechecked using a refractometer. We do notrecommend the use of hydrometers orcoolant test strips for measuring coolantconcentration.
Adding Coolant
WARNING: Do not put coolant inthe windshield washer reservoir. Ifsprayed on the windshield, coolant couldmake it difficult to see through thewindshield.
WARNING: Do not add coolantfurther than the MAX mark.
WARNING: Do not add coolantwhen the vehicle is on or the coolingsystem is hot. Failure to follow thisinstruction could result in personal injury.
WARNING: Do not remove thecoolant reservoir cap when the engine ison or the cooling system is hot. Wait 10minutes for the cooling system to cooldown. Cover the coolant reservoir capwith a thick cloth to prevent thepossibility of scalding and slowly removethe cap. Failure to follow this instructioncould result in personal injury.
Note: Automotive fluids are notinterchangeable. Do not use coolant orwindshield washer fluid outside of itsspecified function and vehicle location.
235
2024 F-650/750 (TBC) , enUSA, Edition date: 202210, First-PrintingMaintenance
Page 247 of 386

At this time, you may notice the coolanttemperature gauge moves toward the redzone and a message may appear in theinformation display.
You may notice a reduction in vehiclespeed caused by reduced engine power inorder to manage the engine coolanttemperature. Your vehicle may enter thismode if certain high-temperature andhigh-load conditions take place. Theamount of speed reduction depends onvehicle loading, grade and ambienttemperature. If this occurs, there is noneed to pull off the road. You can continueto drive your vehicle.
The air conditioning may turn on and offduring severe operating conditions toprotect the engine from overheating. Whenthe coolant temperature decreases to thenormal operating temperature, the airconditioning turns on.
If the coolant temperature gauge movesfully into the red zone, or if the coolanttemperature warning or service enginesoon messages appear in your informationdisplay, do the following:
1.Pull off the road as soon as safelypossible and shift the transmission intopark (P).
2.Leave the engine running until thecoolant temperature gauge needlereturns to the normal position. Afterseveral minutes, if the temperaturedoes not drop, follow the remainingsteps.
3.Switch the engine off and wait for it tocool. Check the coolant level.
4.If the coolant level is at or below theminimum mark, add prediluted coolantimmediately.
5.If the coolant level is normal, restartthe engine and continue.
AUTOMATIC TRANSMISSION
FLUID CHECK
The transmission does not consume fluid.However, check the fluid level if thetransmission is not working properly, forexample if the transmission slips, shiftsslowly or if there are signs of fluid loss.
Replace the transmission fluid and filteron your vehicle at the specified serviceinterval. See Scheduled Maintenance(page 325).
Automatic transmission fluid expandswhen warmed. To check the fluid levelconsistently and accurately, do thefollowing:
1.Drive the vehicle until it reaches normaloperating temperature. This may takeup to 20 mi (30 km). Make sure thatthe transmission fluid temperaturegauge on the instrument cluster iswithin normal operating temperature196–215°F (91–102°C) beforechecking.
2.Make sure that your vehicle is on levelground.
3.With the engine running, parking brakeengaged and your foot on the brakepedal, move the gearshift lever throughall of the gear ranges. Allow sufficienttime for each gear to engage.
4.Make sure the parking brake is on. Makesure the transmission is in park (P) orneutral (N) and leave the enginerunning.
5.Open the hood. See Opening andClosing the Hood (page 223).
6.Remove the dipstick and wipe it witha clean, lint-free cloth. See UnderHood Overview (page 225).
7.Replace the dipstick and remove itagain to check the fluid level.
243
2024 F-650/750 (TBC) , enUSA, Edition date: 202210, First-PrintingMaintenance
Page 249 of 386

BRAKE FLUID CHECK
WARNING: Do not use any fluidother than the recommended brake fluidas this will reduce brake efficiency. Useof incorrect fluid could result in the lossof vehicle control, serious personal injuryor death.
WARNING: Only use brake fluidfrom a sealed container. Contaminationwith dirt, water, petroleum products orother materials may result in brakesystem damage or failure. Failure toadhere to this warning could result in theloss of vehicle control, serious personalinjury or death.
WARNING: Do not allow the fluidto touch your skin or eyes. If thishappens, rinse the affected areasimmediately with plenty of water andcontact your physician.
WARNING: The brake systemcould be affected if the brake fluid levelis below the MIN mark or above the MAXmark on the brake fluid reservoir.
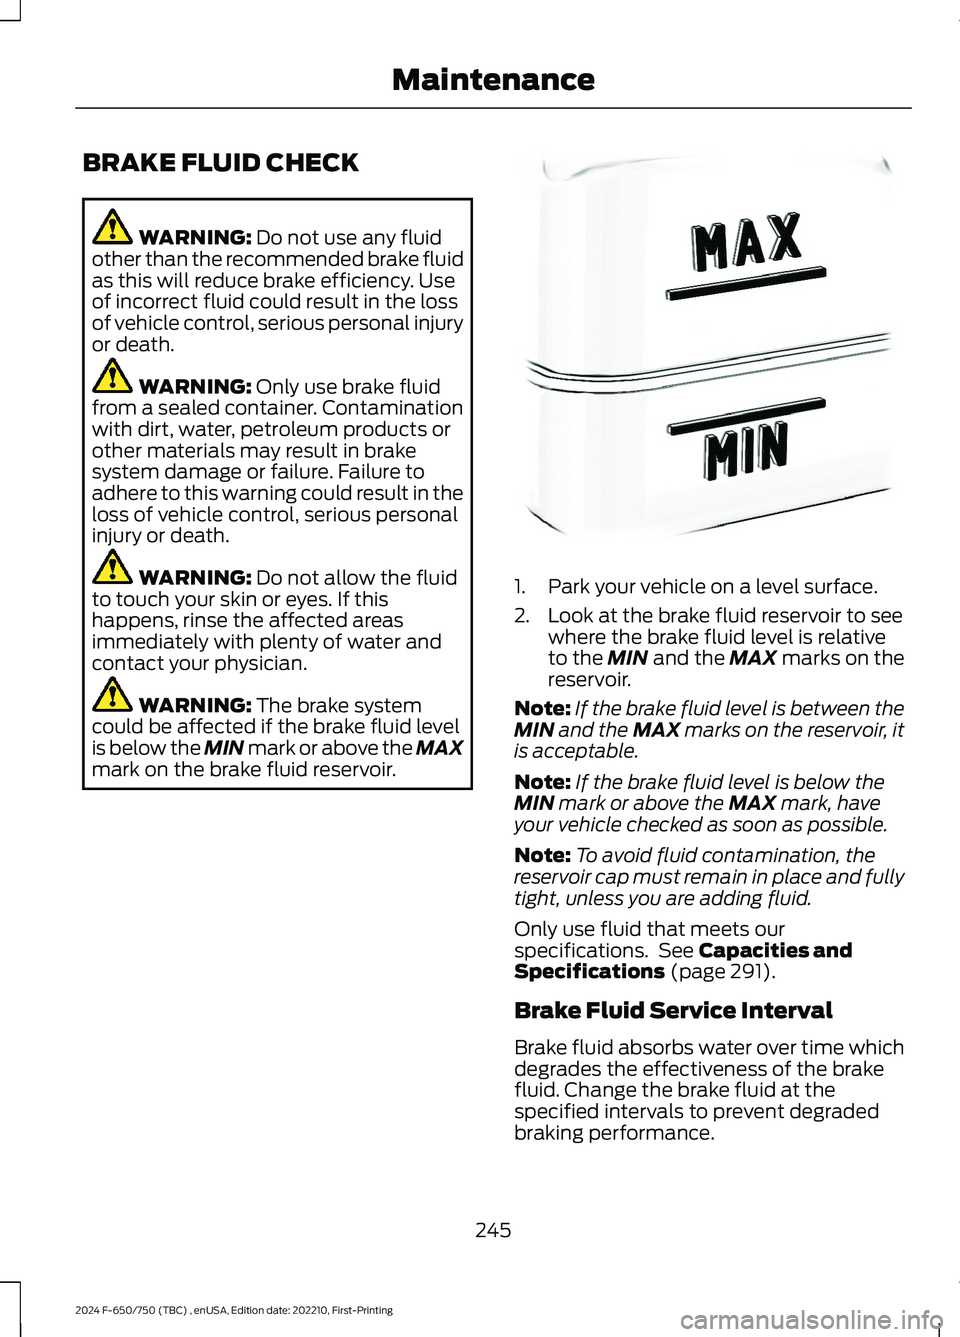
1.Park your vehicle on a level surface.
2.Look at the brake fluid reservoir to seewhere the brake fluid level is relativeto the MIN and the MAX marks on thereservoir.
Note:If the brake fluid level is between theMIN and the MAX marks on the reservoir, itis acceptable.
Note:If the brake fluid level is below theMIN mark or above the MAX mark, haveyour vehicle checked as soon as possible.
Note:To avoid fluid contamination, thereservoir cap must remain in place and fullytight, unless you are adding fluid.
Only use fluid that meets ourspecifications. See Capacities andSpecifications (page 291).
Brake Fluid Service Interval
Brake fluid absorbs water over time whichdegrades the effectiveness of the brakefluid. Change the brake fluid at thespecified intervals to prevent degradedbraking performance.
245
2024 F-650/750 (TBC) , enUSA, Edition date: 202210, First-PrintingMaintenanceE170684