2022 TOYOTA TUNDRA HYBRID light
[x] Cancel search: lightPage 94 of 618
942-1. Instrument cluster
Owners Manual_USA_M0C031_en
■Pop-up display
In some situations the following
will be temporarily displayed:
Distance until next engine oil
change
Displays the distan ce until the next
engine oil change. This display will
be displayed in the following situa-
tions:
When the power switch is
turned to ON.
When a warning message
indicating that oil mainte-
nance should be performed
soon or is required is dis-
played.
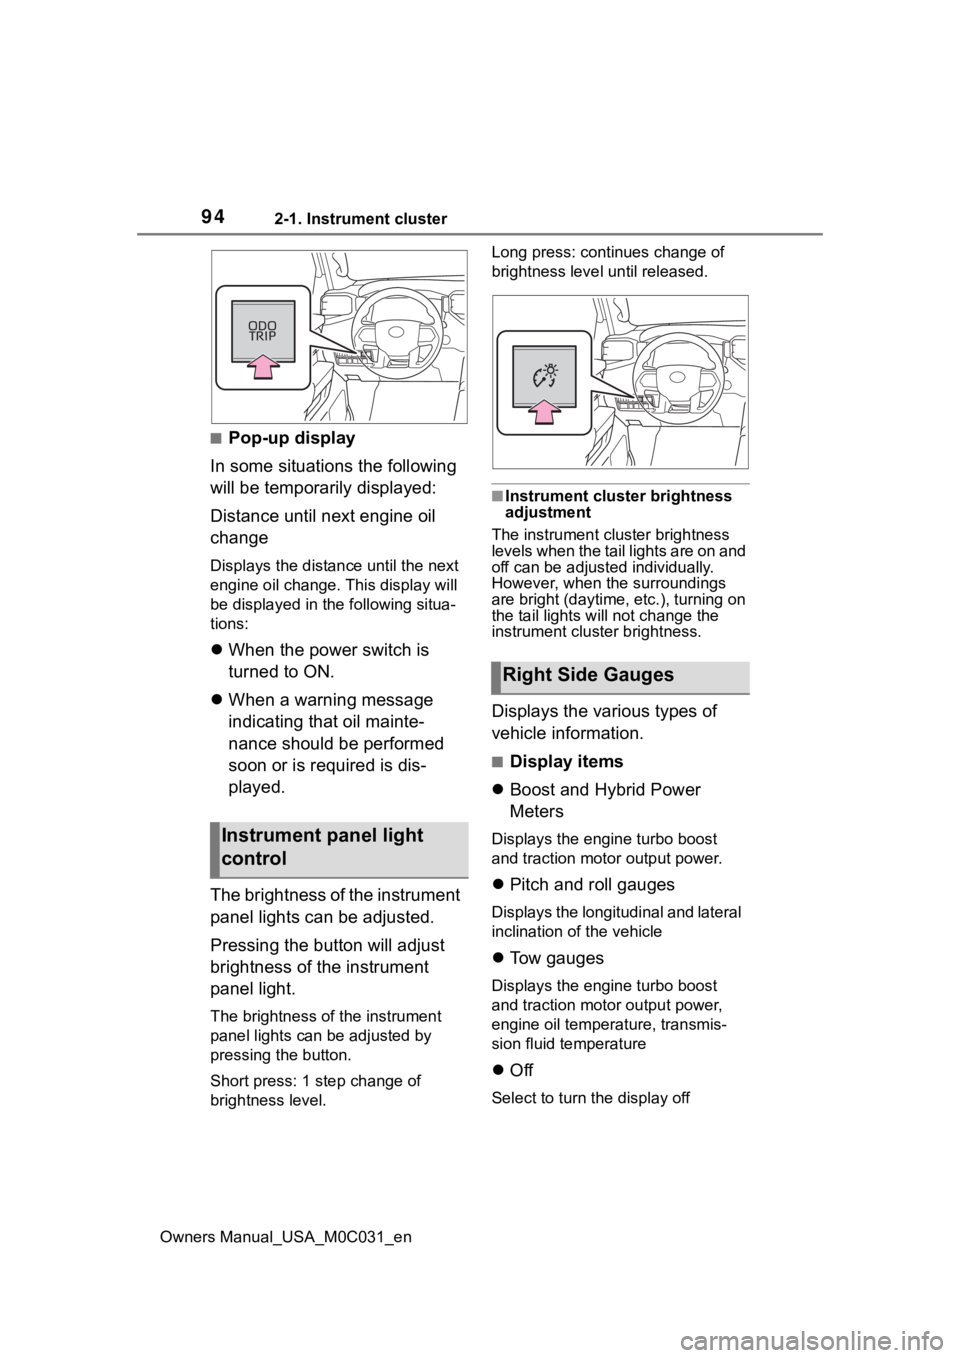
The brightness of the instrument
panel lights can be adjusted.
Pressing the button will adjust
brightness of the instrument
panel light.
The brightness of the instrument
panel lights can be adjusted by
pressing the button.
Short press: 1 s tep change of
brightness level. Long press: continues change of
brightness level until released.
■Instrument cluster brightness
adjustment
The instrument cluster brightness
levels when the tail lights are on and
off can be adjusted individually.
However, when the surroundings
are bright (daytime, etc.), turning on
the tail lights will not change the
instrument cluster brightness.
Displays the various types of
vehicle information.
■Display items
Boost and Hybrid Power
Meters
Displays the engine turbo boost
and traction motor output power.
Pitch and roll gauges
Displays the longitudinal and lateral
inclination of the vehicle
Tow gauges
Displays the engine turbo boost
and traction motor output power,
engine oil temperature, transmis-
sion fluid temperature
Off
Select to turn the display off
Instrument panel light
control
Right Side Gauges
Page 96 of 618
962-1. Instrument cluster
Owners Manual_USA_M0C031_en• Dynamic radar cruise control with
full-speed range ( P.255)
• RSA (Road Sign Assist) (if equipped) ( P.252)
■Menu icons
The menu icons will be dis-
played by pressing the or
meter control switch.
■Liquid crystal display
Small spots or light spots may
appear on the display. This phenom-
enon is characteristi c of liquid crys-
tal displays, and there is no problem
continuing to use the display.
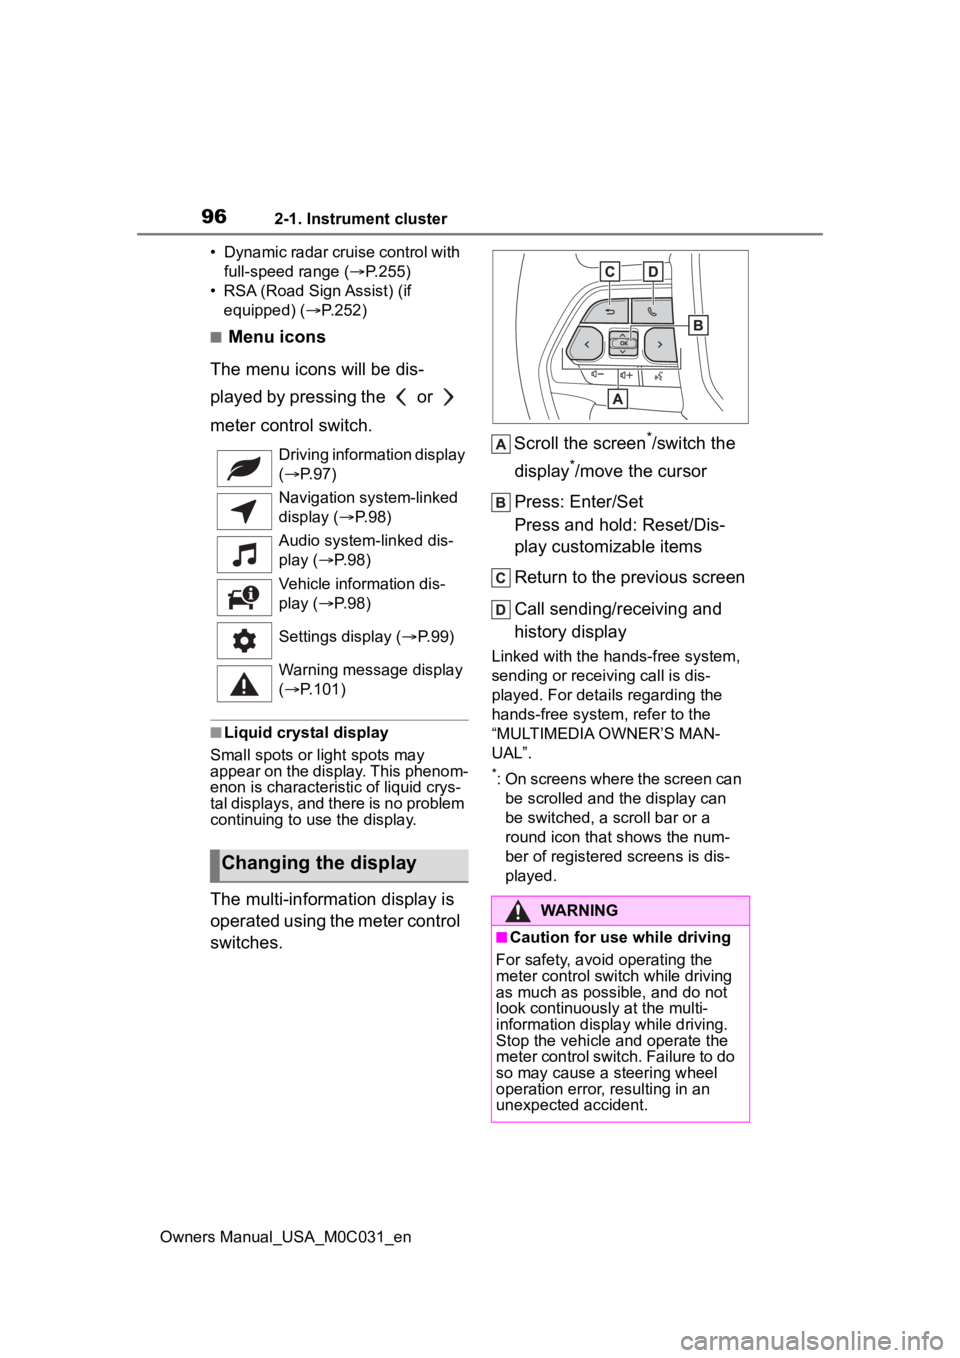
The multi-information display is
operated using the meter control
switches. Scroll the screen
*/switch the
display
*/move the cursor
Press: Enter/Set
Press and hold: Reset/Dis-
play customizable items
Return to the previous screen
Call sending/receiving and
history display
Linked with the hands-free system,
sending or receiving call is dis-
played. For details regarding the
hands-free system, refer to the
“MULTIMEDIA OWNER’S MAN-
UAL”.
*: On screens where the screen can be scrolled and the display can
be switched, a scroll bar or a
round icon that shows the num-
ber of registered screens is dis-
played.
Driving information display
(
P. 9 7 )
Navigation system-linked
display ( P. 9 8 )
Audio system-linked dis-
play ( P. 9 8 )
Vehicle information dis-
play ( P. 9 8 )
Settings display ( P. 9 9 )
Warning message display
( P.101)
Changing the display
WARNING
■Caution for use while driving
For safety, avoid operating the
meter control switch while driving
as much as possible, and do not
look continuously at the multi-
information display while driving.
Stop the vehicle and operate the
meter control switch. Failure to do
so may cause a steering wheel
operation error, resulting in an
unexpected accident.
Page 107 of 618
1072-1. Instrument cluster
Owners Manual_USA_M0C031_en
2
Vehicle status information and indicators
Elapsed time since the hybrid
system was started.
Fuel consumption in the past
15 minutes
Current fuel consumption
Resetting the consumption
data
Use the displayed average fuel
consumption as a reference. The
image is an example only, and may
vary slightly from actual conditions.
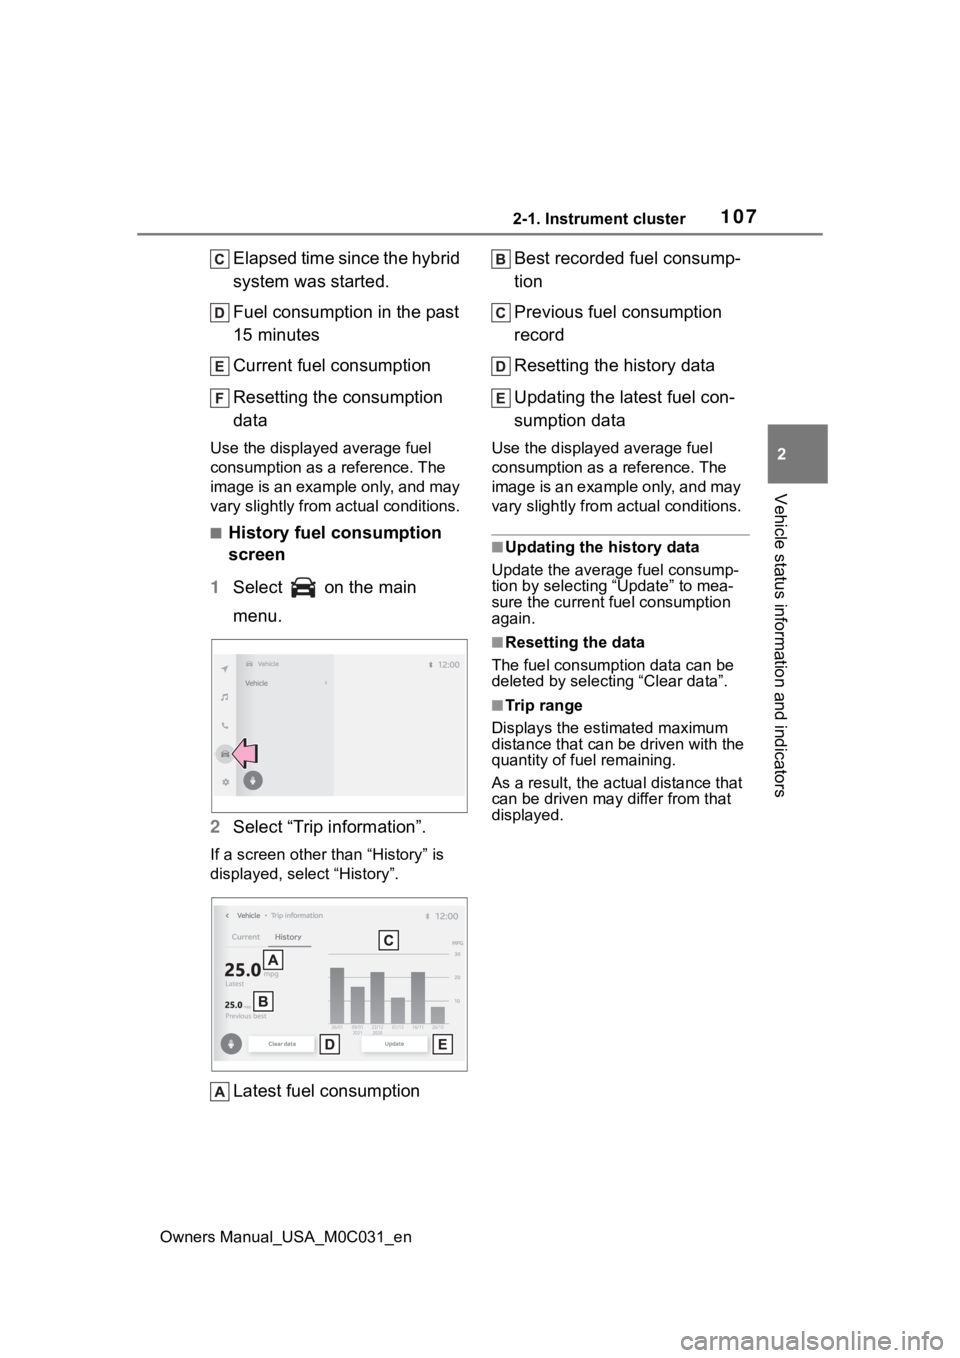
■History fuel consumption
screen
1 Select on the main
menu.
2 Select “Trip information”.
If a screen other than “History” is
displayed, select “History”.
Latest fuel consumption Best recorded fuel consump-
tion
Previous fuel consumption
record
Resetting the history data
Updating the latest fuel con-
sumption data
Use the displayed average fuel
consumption as a reference. The
image is an example only, and may
vary slightly from actual conditions.
■Updating the history data
Update the average fuel consump-
tion by selecting “Update” to mea-
sure the current fuel consumption
again.
■Resetting the data
The fuel consumption data can be
deleted by selecting “Clear data”.
■Trip range
Displays the estimated maximum
distance that can be driven with the
quantity of fuel remaining.
As a result, the actual distance that
can be driven may differ from that
displayed.
Page 112 of 618
1123-1. Key information
Owners Manual_USA_M0C031_en
■Theft deterrent panic mode
When is pressed for longer
than about one second, an alarm
will sound intermittently and the
vehicle lights will f lash to deter any
person from trying to break into or
damage your vehicle.
To stop the alarm, press any button
on the electronic key.
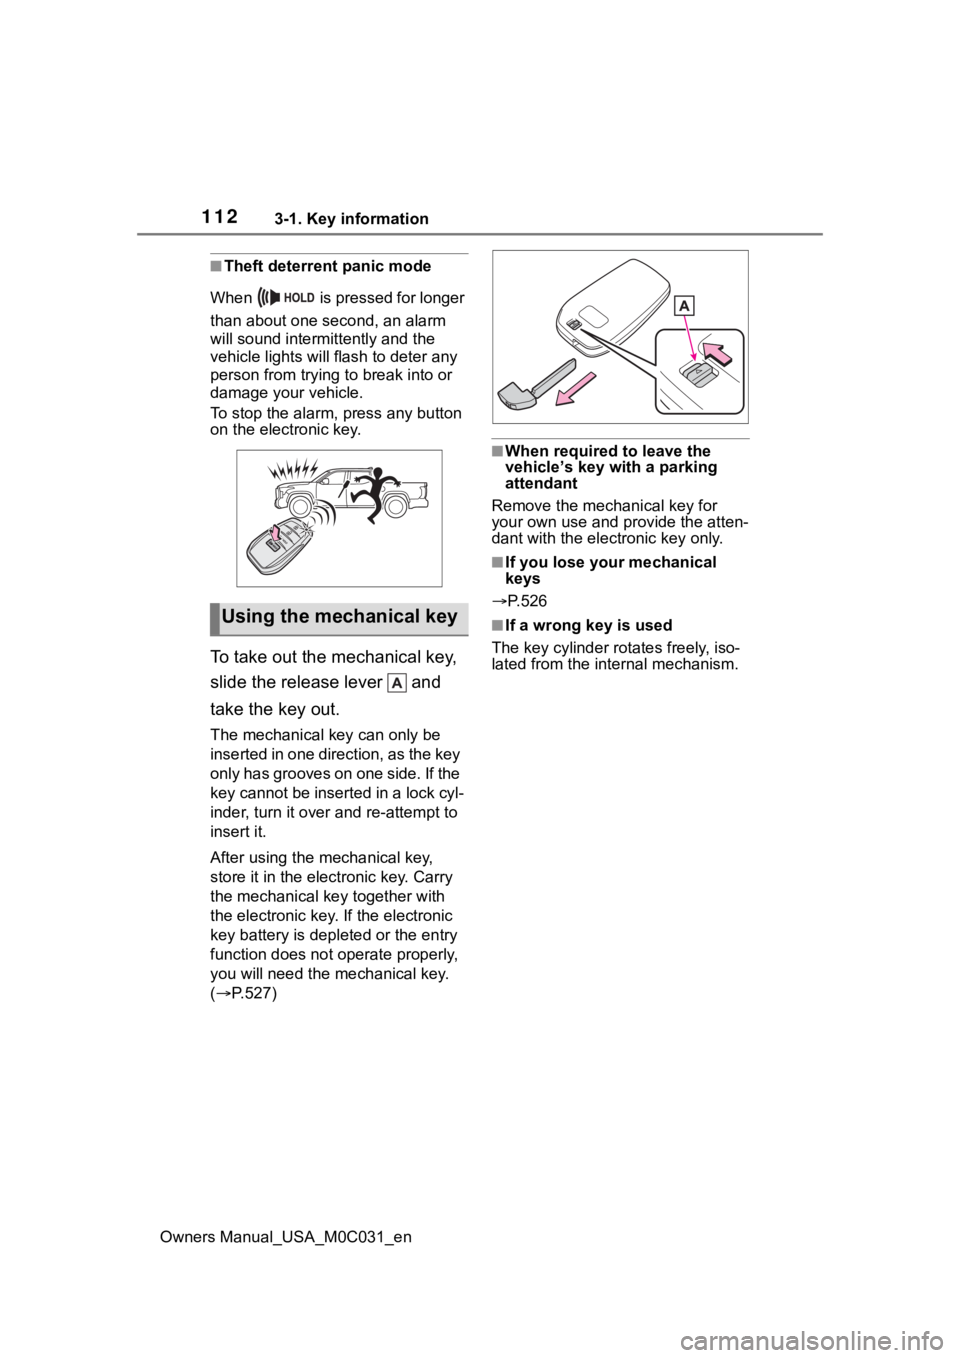
To take out the mechanical key,
slide the release lever and
take the key out.
The mechanical key can only be
inserted in one direction, as the key
only has grooves on one side. If the
key cannot be inserted in a lock cyl-
inder, turn it over and re-attempt to
insert it.
After using the mechanical key,
store it in the electronic key. Carry
the mechanical k ey together with
the electronic key. If the electronic
key battery is dep leted or the entry
function does not operate properly,
you will need the m echanical key.
( P.527)
■When required to leave the
vehicle’s key wi th a parking
attendant
Remove the mechanical key for
your own use and p rovide the atten-
dant with the elec tronic key only.
■If you lose your mechanical
keys
P.526
■If a wrong key is used
The key cylinder rotates freely, iso-
lated from the internal mechanism.Using the mechanical key
Page 113 of 618

1133-2. Opening, closing and locking the doors and tailgate
Owners Manual_USA_M0C031_en
3
Before driving
3-2.Opening, closing and locking the doors and tailgate
■Smart key system (entry
function)
Carry the electronic key to
enable this function.
1 Grip the driver’s door handle
to unlock the door. Holding
the driver’s door handle for
approximately 2 seconds
unlocks all the doors. Grip
front passenger door handle
to unlock all the doors.
*
Make sure to touch the sensor on
the back of the handle.
The doors cannot be unlocked for 3
seconds after the doors are locked.
2Touch the lock sensor (inden-
tation on the upper part or
lower part of the handle) to
lock all the doors.
Check that the door is securely
locked.
*: The door unlock settings can be
changed.
■Wireless remote control
1 Locks all the doors and the
tailgate
Check that the doo rs and the tail-
gate are securely locked.
2 Unlocks all the doors and the
tailgate
Pressing the button unlocks the
driver’s door. Pressing the button
again within 5 seconds unlocks the
other door.
Press and hold to open the win-
dows
*1 and the panoramic moon
roof
*1, 2
*1
: This setting must be customized at your Toyota dealer.
*2: If equipped
■Switching the door unlock func-
tion
It is possible to set which doors the
entry function unlocks using the
wireless remote control.
1 Turn the power switch off.
2 When the indicator light on the
key surface is not on, press and
hold , or for
approximately 5 seconds while
pressing and holding .
The setting changes each time an
operation is per formed, as shown
below. (When changing the setting
Side doors
Unlocking and locking the
doors from the outside
Page 131 of 618

1313-2. Opening, closing and locking the doors and tailgate
Owners Manual_USA_M0C031_en
3
Before driving
doors are not opened and closed.)
●If the wireless remote control is
used to lock the doors when the
electronic key is near the vehicle,
there is a possib ility that the door
may not be unlocke d by the entry
function. (Use the wireless remote
control to unloc k the doors.)
●Touching the door lock sensor
while wearing gloves may delay or
prevent lock operation.
●When the lock op eration is per-
formed using the lock sensor, rec-
ognition signals will be shown up
to two consecutive times. After
this, no recogniti on signals will be
given.
●If the door handle becomes wet
while the electronic key is within
the effective ran ge, the door may
lock and unlock repeatedly. In this
case, follow the fo llowing correc-
tion procedures to wash the vehi-
cle:
• Place the electronic key in a loca- tion 6 ft. (2 m) or more away from
the vehicle. (Take care to ensure
that the key is not stolen.)
• Set the electronic key to battery-
saving mode to disable the smart
key system. ( P.129)
●If the electronic key is inside the
vehicle and a door handle
becomes wet during a car wash, a
message may be shown on the
multi-informatio n display and a
buzzer will sound outside the vehi-
cle. To turn off the alarm, lock all
the doors.
●The lock sensor may not work
properly if it com es into contact
with ice, snow, mud, etc. Clean
the lock sensor and attempt to
operate it again.
●A sudden approach to the effec-
tive range or door handle may pre-
vent the doors from being
unlocked. In this case, return the
door handle to the original position
and check that the doors unlock
before pulling the door handle again.
●If there is another electronic key in
the detection area, it may take
slightly longer to unlock the doors
after the door handle is gripped.
■When the vehicle is not driven
for extended periods
●To prevent theft of
the vehicle, do
not leave the electronic key within
6 ft. (2 m) of the vehicle.
●The smart key system can be
deactivated in advance.
●Setting the electronic key to bat-
tery-saving mode helps to reduce
key battery depletion. ( P.129)
■To operate the system properly
●Make sure to carry the electronic
key when operating the system.
Do not get the electronic key too
close to the vehicle when operat-
ing the system from the outside of
the vehicle.
Depending on the position and hold-
ing condition of the electronic key,
the key may not be detected cor-
rectly and the system may not oper-
ate properly. (The alarm may go off
accidentally, or the door lock pre-
vention function m ay not operate.)
■If the smart key system does
not operate properly
●Locking and unlocking the doors
and tailgate: P. 5 2 7
●Starting the hybrid system:
P. 5 2 8
■Customization
Some functions can be customized.
( P.561)
■If the smart key system has
been deactivated in a custom-
ized setting
●Locking and unlocking the doors
and opening the tailgate:
Use the wireless remote control or
mechanical key. ( P.113, 121,
527)
Page 135 of 618
1353-3. Adjusting the seats
Owners Manual_USA_M0C031_en
3
Before driving
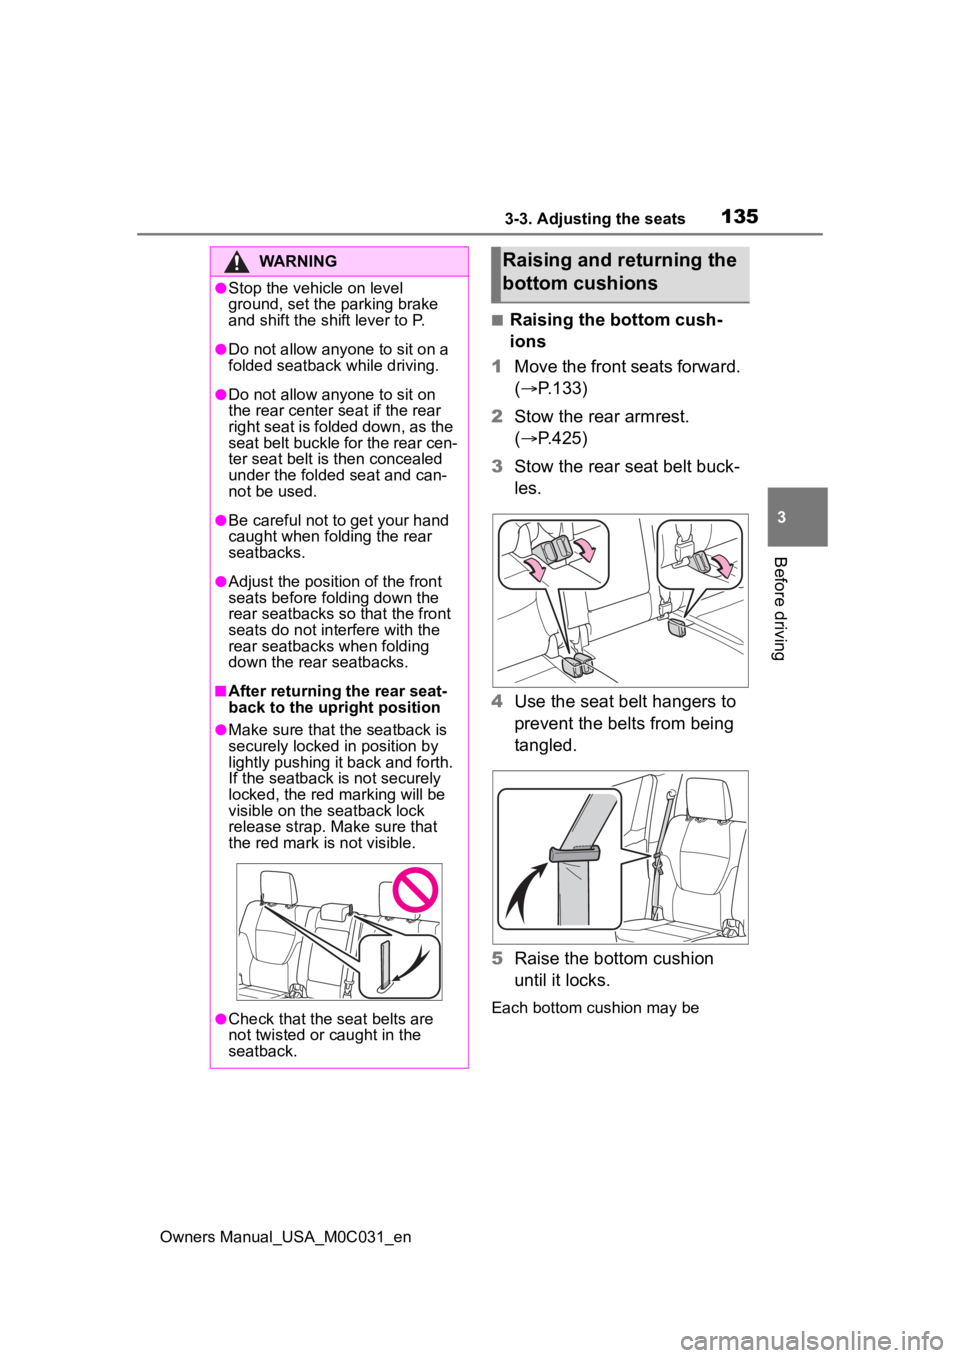
■Raising the bottom cush-
ions
1 Move the front seats forward.
( P.133)
2 Stow the rear armrest.
( P.425)
3 Stow the rear seat belt buck-
les.
4 Use the seat belt hangers to
prevent the belts from being
tangled.
5 Raise the bottom cushion
until it locks.
Each bottom cushion may be
WARNING
●Stop the vehicle on level
ground, set the parking brake
and shift the shift lever to P.
●Do not allow anyo ne to sit on a
folded seatback while driving.
●Do not allow any one to sit on
the rear center seat if the rear
right seat is folded down, as the
seat belt buckle for the rear cen-
ter seat belt is then concealed
under the folded seat and can-
not be used.
●Be careful not to get your hand
caught when folding the rear
seatbacks.
●Adjust the position of the front
seats before folding down the
rear seatbacks so that the front
seats do not interfere with the
rear seatbacks when folding
down the rear seatbacks.
■After returning the rear seat-
back to the upright position
●Make sure that the seatback is
securely locked in position by
lightly pushing it back and forth.
If the seatback is not securely
locked, the red marking will be
visible on the seatback lock
release strap. Make sure that
the red mark is not visible.
●Check that the seat belts are
not twisted or caught in the
seatback.
Raising and returning the
bottom cushions
Page 138 of 618
1383-3. Adjusting the seats
Owners Manual_USA_M0C031_en
view mirrors to the desired
positions.
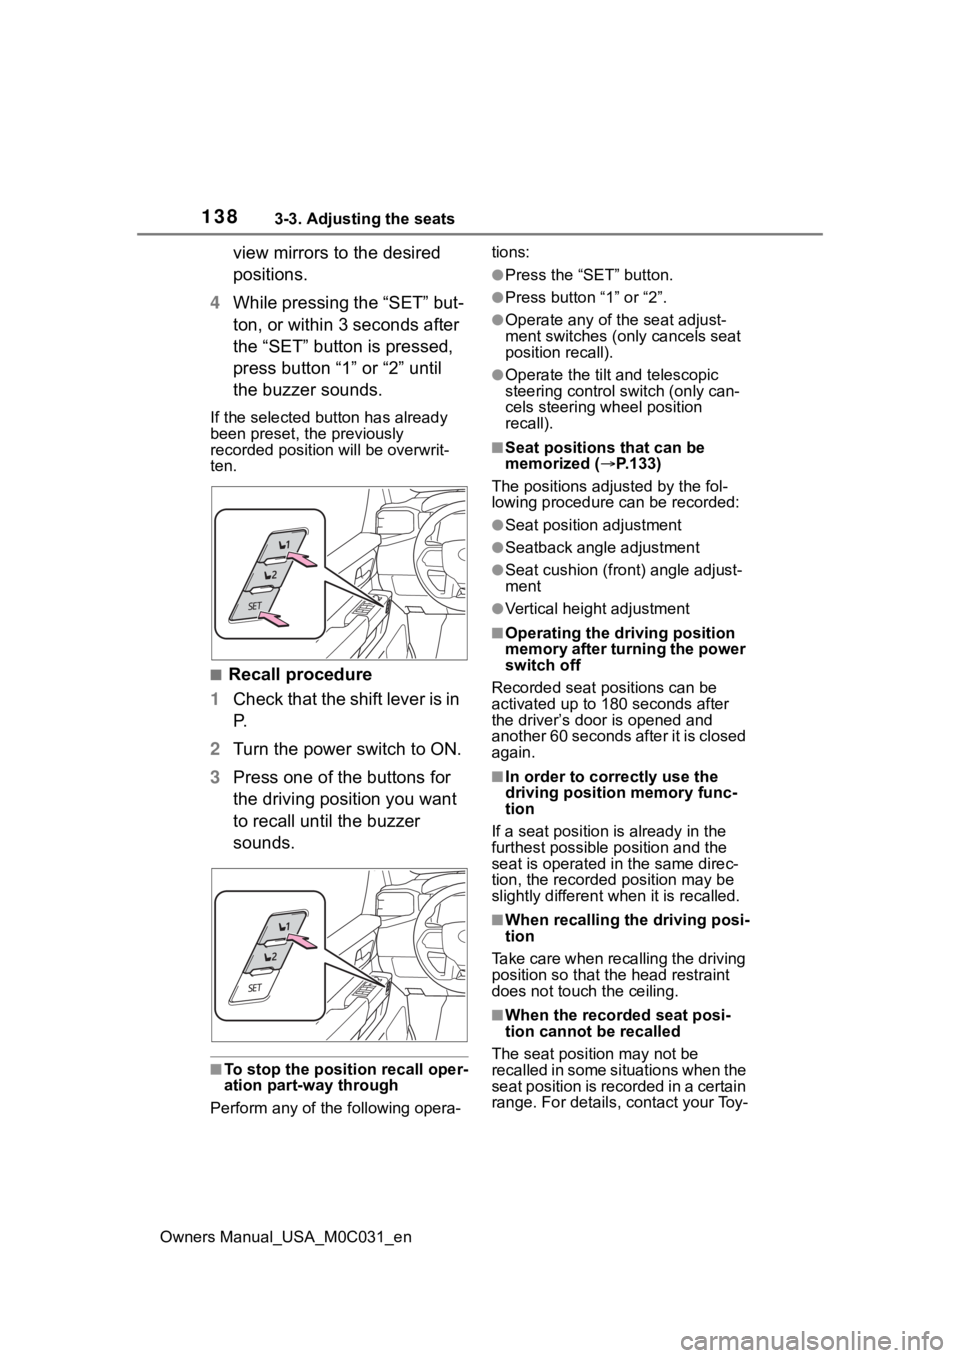
4 While pressing the “SET” but-
ton, or within 3 seconds after
the “SET” button is pressed,
press button “1” or “2” until
the buzzer sounds.
If the selected button has already
been preset, the previously
recorded position will be overwrit-
ten.
■Recall procedure
1 Check that the shift lever is in
P.
2 Turn the power switch to ON.
3 Press one of the buttons for
the driving position you want
to recall until the buzzer
sounds.
■To stop the position recall oper-
ation part-way through
Perform any of the following opera- tions:
●Press the “SET” button.
●Press button “1” or “2”.
●Operate any of t
he seat adjust-
ment switches (only cancels seat
position recall).
●Operate the tilt and telescopic
steering control switch (only can-
cels steering wheel position
recall).
■Seat positions that can be
memorized ( P.133)
The positions adjusted by the fol-
lowing procedure can be recorded:
●Seat position adjustment
●Seatback angle adjustment
●Seat cushion (front) angle adjust-
ment
●Vertical height adjustment
■Operating the driving position
memory after turning the power
switch off
Recorded seat positions can be
activated up to 180 seconds after
the driver’s door is opened and
another 60 seconds after it is closed
again.
■In order to corre ctly use the
driving position memory func-
tion
If a seat position is already in the
furthest possible position and the
seat is operated in the same direc-
tion, the recorded position may be
slightly different w hen it is recalled.
■When recalling the driving posi-
tion
Take care when recalling the driving
position so that the head restraint
does not touch the ceiling.
■When the recorded seat posi-
tion cannot be recalled
The seat positi on may not be
recalled in some situations when the
seat position is recorded in a certain
range. For details, contact your Toy-