Page 321 of 364
Care of vehicle and cleaning
CO
rN
IV
rN
•-i
00
- It is much easier to remove dead insects if
the car has been waxed recently.
- Regular waxing can help protect against
surface rust.
Taking the vehicle out of
service
If
you
wish to
take
your vehicle
out
of service for
a long period of time, contact
a
qualified work
shop.
Here you will receive advice on necessary
measures, for example regarding corrosion pro
tection,
servicing and storage. In addition, please
observe the general notes on the vehicle battery
^>page
302.
317
Page 322 of 364

Mobility
Mobility
General notes
•
If your vehicle experiences technical problems,
stop the car well away from moving traffic. If
you have a flat tyre, you should park the car on
a level surface. Be particularly careful if you are
on a slope.
•
Apply the parking brake.
•
Switch the hazard warning lights on.
•
Put on a high-visibility vest if one is available.
•
Place the warning triangle in a visible location
tapage
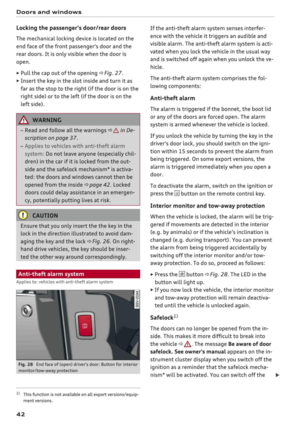
318.
•
Instruct all passengers to leave the car when it
is safe to do so. They should wait in a safe place
(for instance behind the roadside crash barrier).
A
WARNING
You should note the procedure described
above for your own safety and that of other
road users.
Equipment
Warning triangle
Applies to: vehicles with warning triangle
w®
Fig.
254 Open boot lid: Warning triangle
The factory-supplied warning triangle is attached
to the inside of the boot lid.
• To open the cover, turn the catch
©
and swivel
the cover downwards (5).
• Pull
the warning triangle out of the retainer.
The retainer on the boot lid is specifically de
signed to hold the warning triangle supplied as
an Audi Genuine Accessory.
First-aid kit
Applies to: vehicles with first-aid kit
V
Fig.
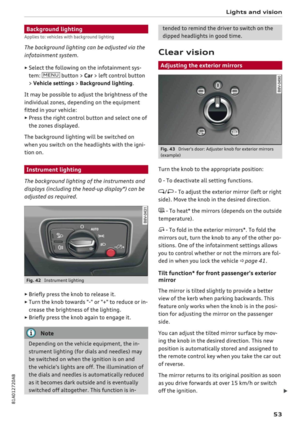
255 Right rear door: Stowing the first-aid kit (exam
Make sure that you know where the first-aid kit is
stowed before beginning your journey.
Fire extinguisher
Applies to: vehicles with fire extinguisher
The factory-fitted fire extinguisher is located in
the footwell on the driver's or front passenger's
side (secured in a holder).
•
Open the straps to remove the fire extinguish
er.
•
To secure the fire extinguisher, put it in the
holder and fasten the straps.
Check how the fire extinguisher works before you
need to use it. The instructions for use are shown
on the fire extinguisher.
A WARNING
If the fire extinguisher is not secured properly
it could be catapulted through the vehicle
during driving and braking manoeuvres or in
the event of an accident. This poses a risk of
injury to occupants.
© Note
- The fire extinguisher must be replaced with
a new one after use or once it has reached
its expiry date.
- The fire extinguisher must comply with le
gal requirements.
318
Page 323 of 364

Mobility
Tool kit/tyre repair kit/compressor Using the tyre repair kit
Applies to: vehicles with tool kit/tyre repair kit/compressor Applies to: vehicles with tyre repair kit
CO
rN
IV
rN
•-i
00
Fig.
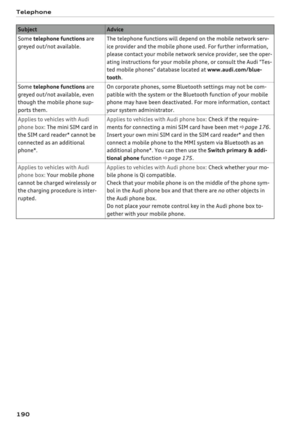
256 Luggage compartment (example): Floor panel
folded up
The tools, tyre repair kit* and compressor* are
stored under the floor in the luggage compart
ment.
•
Lift up the floor panel until it is fixed in position
behind the retaining tabs
©
on the two side
sections.
•
Replace the floor panel before closing the boot
lid.
(T)
Note
The jack* in your vehicle is maintenance-free.
Tyre repair kit
Preparations
Applies to: vehicles with tyre repair kit
•
Please refer to the important safety notes on
•=>
page 318.
•
Apply the parking brake.
•
Manual gearbox: Engage first gear.
• Automatic gearbox: Move the selector lever to
position P.
•
Check whether
a
repair is possible using the
tyre repair kit
^page
319.
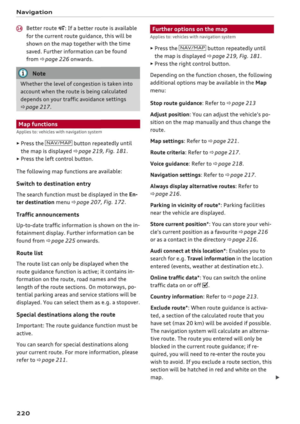
Fig.
257 Tyres: Irreparable tyre damage
Repaired tyres are only suitable for temporary
use.
Replace the damaged tyre as quickly as pos
sible
°=>A-
If the tyre was damaged by an object, such as a
nail,
do not remove it from the tyre.
The tyre repair kit can be used at outside temper
atures down to - 20 °C.
The tyre repair kit must NOT be used:
- On cuts and punctures larger than 4 mm
©
^Fig.
257.
- If the wheel rim has been damaged ©.
- If
you
have been driving with very low pressure
or a
completely flat
tyre(|).
In these cases, you should seek professional as
sistance.
A
WARNING
- Please note that the tyre repair kit is not
suitable for use in every situation and
should only be used as a temporary meas
ure.
- Do not allow the sealant to come into
con
tact with your eyes, skin or clothing.
- If
you
do come into contact with the sealant
immediately rinse the eyes or skin affected
with clean water.
- Make sure you do not breathe in the fumes.
- If
you
accidentally swallow tyre sealant, im
mediately rinse your mouth thoroughly and
drink
a
large amount of water. Do not in
duce vomiting. Immediately contact
a
doc
tor.
319
Page 324 of 364

Mobility
- Change clothing immediately if it becomes
soiled with the tyre sealant.
- If any allergic reactions should occur get
medical help immediately.
- Keep the sealant away from children.
©
Note
- If sealant should leak out, leave it to dry.
When it has dried, you can pull it off like a
piece of
foil.
- Observe the expiry date stated on the
seal
ing compound can. Have the sealing com
pound exchanged by
a
qualified workshop.
- Interference to the radio reception may oc
cur when using the compressor*.
- Please observe the relevant regulations.
Tyre repairs
Applies to: vehicles with tyre repair kit
*
a
Fig.
258 Tyres: Filling the tyre
Important: The tyre repair kit must be at hand
and ready for use
•=>page
319.
Filling the tyre
•
Shake the tyre sealant can
well.
•
Screw the enclosed filling hose onto the sealant
can as far as it will go. This will automatically
pierce the foil sealing the can.
• Take the valve cap off the tyre valve and use the
enclosed valve insert tool to unscrew the valve
insert
^F/'g.
258.
• Place the valve insert onto a clean surface.
• Remove the sealing plug from the filling hose
and insert the hose into the tyre valve.
• Hold the tyre sealant can upside down and fill
the complete contents into the tyre.
• Then disconnect the filling hose and screw the
valve insert firmly back into the tyre valve.
Inflating the tyre
• Screw the compressor hose (from the tyre re
pair kit) onto the tyre valve and plug the
con
nector into an electrical socket in the vehicle.
• Pump the tyre up to 2.0 to 2.5 bar and monitor
the pressure shown on the pressure gauge.
• If the tyre pressure remains lower than the
val
ue specified above, remove the hose and drive
10 metres forwards or backwards at
a
low
speed so that the sealant can spread evenly in
the tyre. Now pump the tyre up again
o
A.
A WARNING
- Please observe the manufacturers' safety
notes on the compressor and the instruc
tions supplied with the tyre sealant can.
- If it was not possible to build up a tyre pres
sure of 2.0 bar within six minutes this
means that the tyre is too badly damaged.
Do not drive on.
- Seek professional assistance if the repair of
a tyre puncture is not possible with the
seal
ing compound.
© Note
Do not use the compressor for longer than
6 minutes at
a
time, as it could overheat.
When the compressor has cooled down, you
can use it again.
After repairing a tyre
Applies to: vehicles with tyre repair kit
• Affix the sticker "max. 80
km/h",
which is
inclu
ded in the tyre repair kit, to the dashboard
where the driver will see it.
• After about 10 minutes, stop to check the tyre
pressure.
• If tyre pressure is less than 1.3 bar, the tyre is
too badly damaged. Do not drive on.
A WARNING
After repairing a tyre please note the follow-
ng points:
320
Page 325 of 364

Mobility
CO
rN
IV
rN
•-i
00
- Do not drive faster than 80 km/h.
- Avoid heavy acceleration, hard braking and
fast cornering.
-Vehicle handling could be impaired.
- If the tyre is too badly damaged, you should
seek professional assistance.
Removing the hubcap/wheel bolt caps
(#) For
the sake of the environment
A used can of sealing compound can be re
turned to your qualified workshop for dispos
al.
Note ©
After repairing a tyre, remember to buy
a
new
tyre sealant can at
a
qualified workshop.
Changing a wheel
Preparations
Certain preparations must be made before you
change the wheel.
• Please refer to the important safety notes on
^page
318.
• Apply the parking brake.
• Manual gearbox: Engage first gear.
• Automatic gearbox: Move the selector Lever to
position P.
• If
you
are towing a trailer, unhitch
it
from your
vehicle.
• Take out the tools
^>page
319 and spare
wheel*
^>page
324.
A WARNING
If
you
have to use the jack* on a gradient or
off-road track, block the wheel diagonally op
posite the wheel being changed by placing
suitable objects underneath both the front
and rear of the wheel to prevent the vehicle
from rolling away.
0
Fig.
259 Wheel: Wheel bolts with caps
Applies to: vehicles with wheel bolt caps
• Slide the plastic clip (provided in the vehicle's
tool kit) onto the wheel bolt cap until it engag
es
^F/'g.
259.
• Pull off the cap using the plastic clip.
Applies to: vehicles with wheel covers
• Pull off the wheel cover by hand.
Anti-theft wheel bolts
T
0)
®
Fig.
260 Anti-theft wheel bolt with wheel bolt cap and
adapter
To release the anti-theft wheel bolts, you need a
special adapter (provided in the vehicle's tool
kit).
• Pull off the hubcap* or wheel bolt
cap*
@
^>
Fig.
260.
• Slide the adapter
©
all the way onto the
anti-
theft wheel bolt®.
• Fit the box spanner (provided in the vehicle's
tool kit) as far as it will go over the adapter ©.
• Loosen the wheel bolt
^>page
322.
321
Page 326 of 364

Mobility
\J Note
Note the code number of the anti-theft wheel
bolt and keep it in a safe place - not in your
vehicle. If
you
need a replacement adapter,
give the code number to your Audi dealer.
Loosening the wheel bolts
Raising the vehicle
Fig.
261 Wheel: Loosening the wheel bolts
•
Fit
the box spanner (provided in the vehicle's
tool kit) as far as it will go over the wheeL
bolt1'.
• Turn the wheel bolt approx. one turn
anti
clockwise -arrow-. To apply the necessary tor
que,
hold the box spanner
near
the end. If the
wheel bolt is very tight, you may be able to
loosen it by pushing down the end of the span
ner carefully with your foot. Hold on to the car
for support and take care not to slip.
WARNING
To avoid accidents, the wheel bolts should on
ly be loosened slightly (one turn) before rais
ing the vehicle with the jack*.
:v<
:
Fig.
262 Sills: markings (example)
Fig.
263 Door
sill:
Applying the jack under the door sill
• Always provide a firm base for the jack* on the
ground.
(The jack can be found in the vehicle's
tool kit). If necessary use a large, strong board
or similar support. On a
hard,
slippery surface
(such as tiles) use a rubber mat or similar to
prevent
the
jack from slipping
^> /\.
• Locate the marking (recess or rib) on the door
sill closest to the wheel being changed
^>Fig.
262. The jacking point is located behind
the marking under the door
sill.
• Wind up
the
jack* under
the
jacking point until
the claw
(A)
•=>
Fig.
263 of the jack is directly
be
low the jacking point.
• Align
the
jack* so
that
the
claw
(A)
grips the
jacking point under the door sill and the mova
ble base plate of the jack
(B)
is flat on the
ground.
The base plate
(B)
must be positioned
vertically underneath
the
jacking point®.
• Raise the vehicle until the defective wheel is
clear of the ground.
11
An adapter is required to unscrew or tighten the anti-theft
wheel bolts
opage
321.
322
Page 327 of 364

Mobility
A WARNING
CO
rN
IV
rN
•-i
00
- Make sure the jack* is stable. If the ground
underneath the jack* is slippery or soft, the
jack can slip or sink in - risk of injury!
- Use only the jack* supplied with your vehicle
to raise the vehicle. If
you
use
a
jack from a
different vehicle, your vehicle may slip off
the
jack - risk of injury!
- Apply the jack* only at the jacking points lo
cated behind the markings on the door sill
and align it properly. Otherwise there is a
risk of injury since
the
jack* can slip off
sud
denly if it is not properly engaged.
-The height of the parked vehicle can change
as a result of variations in loading.
- Never start the engine when the vehicle is
on the jack - risk of accident!
- If work has to be done under the vehicle, en
sure that it is
safely
supported on suitable
stands - risk of injury!
© CAUTION
The vehicle must not be lifted up on its sills.
Only apply the jack*
at
the jacking points loca
ted behind the markings on the door
sill.
Oth
erwise your vehicle could be damaged.
Taking off / putting on the wheel
Fig.
264 Wheel: Hexagonal socket for turning wheel bolts
Fig.
265 Wheel: Mounting pin in wheel bolt hole nearest
to the top
Taking off the wheel
• Using the hexagonal socket in the screwdriver
handle (provided in the vehicle's tool kit), un
screw the top wheel bolt and place it on a clean
surface
<=>Fig.
264.
• Screw in the mounting pin (provided in the ve
hicle's tool kit) by hand in place of the wheel
boit*Fig.
265.
• Then unscrew the other wheel bolts.
• Take off the wheel
*(£).
The mounting pin
stays where it is.
Putting on the wheel
When putting on a tyre with directional tread
pattern,
refer to
*page
324.
• Put on the wheel, using the mounting pin to
guide it into place
<=>([).
• Screw in the wheel bolts and tighten them
lightly using the hexagonal socket.
• Then unscrew the mounting pin and tighten the
remaining wheel bolt lightly.
• Carefully lower the car with the jack*.
• Tighten the wheel bolts in diagonal sequence
with the box spanner.
The wheel bolts should be clean and turn easily.
Before putting on the wheel, inspect the condi
tion of the wheel and hub mounting surfaces.
These surfaces must be clean before mounting
the wheel.
A WARNING
Do not use the hexagonal socket in the screw
driver handle to tighten the wheel bolts. It is
323
Page 328 of 364

Mobility
not possible to tighten the bolts to the re
quired torque using the hexagonal socket
risk
of accident!
© CAUTION
When removing/fitting the wheel the rim
may hit and damage the brake disc. For this
reason,
please take care and get
a
second per
son to assist you.
(T) Note
The wheel bolts are easier to remove from the
wheel rim if
you
use the hexagonal socket in
the screwdriver handle. The reversible screw
driver blade should be removed as a precau
tionary measure when the tool is used for this
purpose.
Tyres with directional tread pattern
A directional tread pattern can be identified by
arrows on the sidewall that point in the direction
of rotation. Always note the direction of rotation
indicated when mounting the wheel. This is im
portant so that these tyres can give maximum
grip and avoid excessive noise, tread wear and
aquaplaning.
If
you
ever have a puncture and need to fit the
spare wheel* in the wrong direction, please drive
with extra care because the tyre will not give op
timum performance in this situation. Bear this in
mind particularly when driving on wet roads.
To benefit from the advantages of tyres with this
type of tread pattern, the defective tyre should
be replaced and refitted as soon as possible so
that all tyres again rotate in the correct direction.
After changing a wheel
• Fit the hubcap or wheel bolt caps back on, as
required.
• Put the tools and jack back in the luggage com
partment.
• If the replaced wheel will not fit into the spare
wheel
well,
stow it safely in the luggage com
partment
*page
272.
• Check the tyre pressure of the fitted wheel as
soon as possible.
• On vehicles with tyre pressure loss indicator,
adjust the tyre pressures and store them via the
infotainment system
opage
311.
• The wheel bolts should be tightened to 140
Nm.
Have this checked as soon as possibLe with
a torque wrench. Until
then,
drive with caution.
• Have the flat tyre replaced as quickly as possi
ble.
Spare wheel
General notes
Applies to: vehicles with compact temporary spare wheel
Fig.
266 Luggage compartment: Floor panel folded up
Fig.
267 Compact temporary spare wheel (example)
The compact temporary spare wheel
*Fig.
267 is
only intended for temporary use over short dis
tances. Have the damaged wheel checked as soon
as possible by
a
qualified workshop and, if neces
sary, replaced.
PLease note the following restrictions when using
the compact temporary spare wheel. The com
pact temporary spare wheel is designed specifi
cally for this model. For this reason, do not use a
spare wheel from a different type of
vehicle.
•
324