2018 Peugeot 308 light
[x] Cancel search: lightPage 80 of 324
78
The system may suffer inter ference or not
work correctly:
-
u
nder poor visibility conditions (snow,
heavy rain, etc.),
-
i
f the windscreen is dirty, misted or
obscured (by a sticker, etc.) in front of
the camera,
-
i
f the vehicle is facing highly reflective
signs.
When the system detects thick fog, it
temporarily deactivates the function.
The system is not able to detect:
-
r
oad users that do not have their own
lighting, such as pedestrians,
-
v
ehicles whose lighting is obscured
(for example: vehicles running behind a
safety barrier on a motor way),
-
v
ehicles at the top or bottom of a
steep slope, on winding roads, on
crossroads. Clean the windscreen regularly,
particularly the area in front of the camera.
The internal sur face of the windscreen can
also become misted around the camera.
In humid and cold weather, demist the
windscreen regularly.
Do not allow snow to accumulate on the
bonnet or roof of the vehicle as this could
conceal the detection camera.
Guide-me-home lighting
Manual
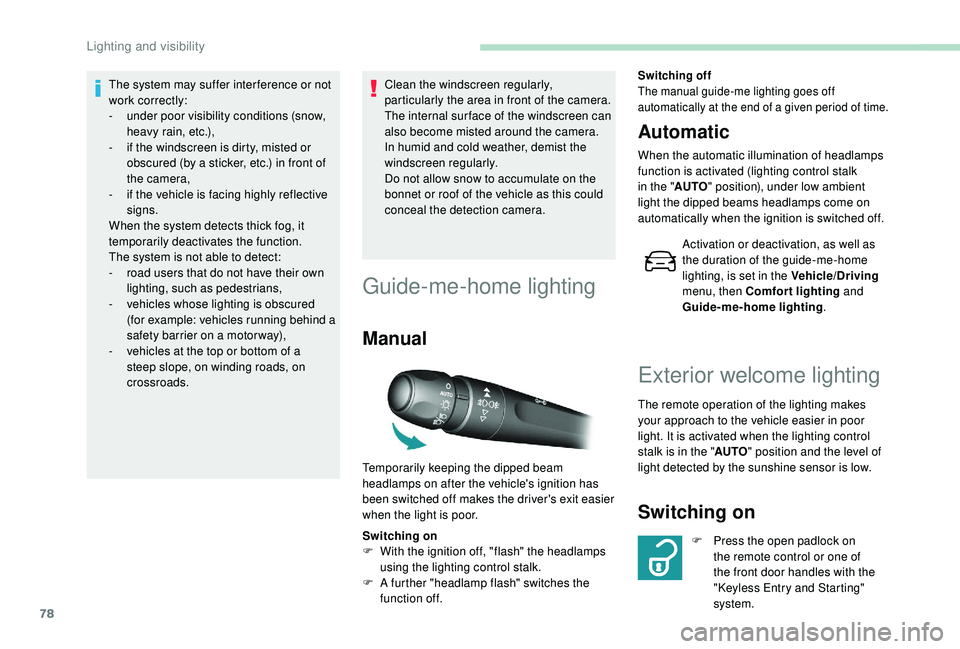
Switching on
F
W ith the ignition off, "flash" the headlamps
using the lighting control stalk.
F
A f
urther "headlamp flash" switches the
function off.
Switching off
The manual guide-me lighting goes off
automatically at the end of a given period of time.
Automatic
When the automatic illumination of headlamps
function is activated (lighting control stalk
in the " AUTO" position), under low ambient
light the dipped beams headlamps come on
automatically when the ignition is switched off.
Activation or deactivation, as well as
the duration of the guide-me-home
lighting, is set in the Vehicle/Driving
menu, then Comfort lighting and
Guide-me-home lighting .
Temporarily keeping the dipped beam
headlamps on after the vehicle's ignition has
been switched off makes the driver's exit easier
when the light is poor.
Exterior welcome lighting
The remote operation of the lighting makes
your approach to the vehicle easier in poor
light. It is activated when the lighting control
stalk is in the " AUTO" position and the level of
light detected by the sunshine sensor is low.
Switching on
F Press the open padlock on the remote control or one of
the front door handles with the
"Keyless Entry and Starting"
system.
Lighting and visibility
Page 81 of 324
79
Switching off
The exterior welcome lighting switches off
automatically after a set time, when the ignition
is switched on or on locking the vehicle.
Programming
The activation, deactivation and
choice of welcome lighting duration
are done in the Vehicle/Driving menu,
then Guide-me-home lighting and
Welcome lighting .
The dipped beam headlamps and the
sidelamps come on; your vehicle is also
unlocked.
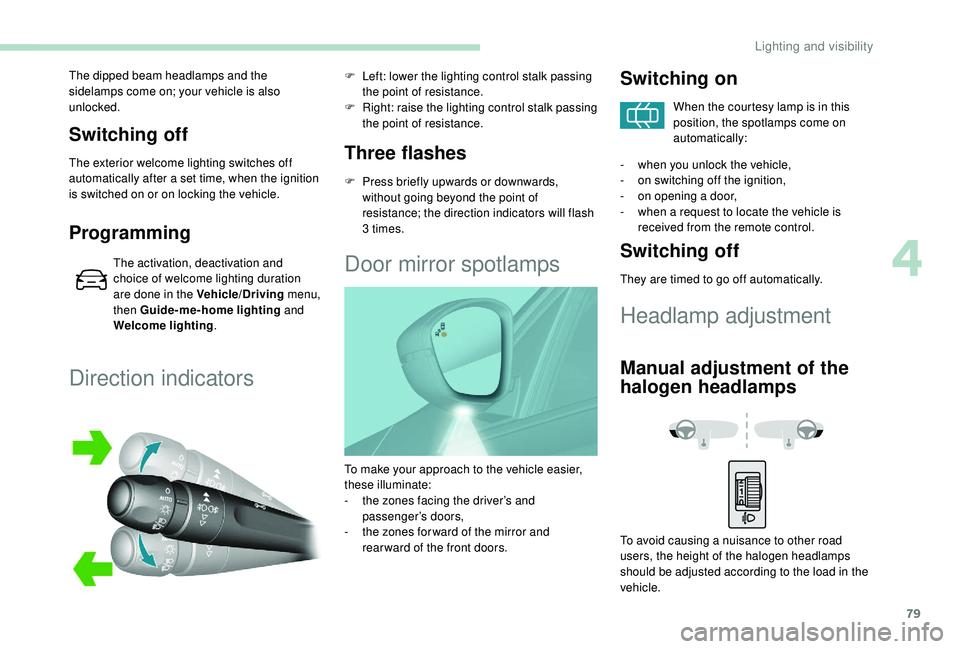
Direction indicators
Three flashes
F Press briefly upwards or downwards,
without going beyond the point of
resistance; the direction indicators will flash
3 times.
F
L
eft: lower the lighting control stalk passing
the point of resistance.
F
R
ight: raise the lighting control stalk passing
the point of resistance.
Door mirror spotlamps
Switching on
When the courtesy lamp is in this
position, the spotlamps come on
automatically:
-
w
hen you unlock the vehicle,
-
o
n switching off the ignition,
-
o
n opening a door,
-
w
hen a request to locate the vehicle is
received from the remote control.
Switching off
They are timed to go off automatically.
Headlamp adjustment
Manual adjustment of the
halogen headlamps
To avoid causing a nuisance to other road
users, the height of the halogen headlamps
should be adjusted according to the load in the
vehicle.
To make your approach to the vehicle easier,
these illuminate:
-
t
he zones facing the driver’s and
passenger’s doors,
-
t
he zones for ward of the mirror and
rear ward of the front doors.
4
Lighting and visibility
Page 82 of 324
80
Automatic adjustment of
"Full LED" technology
headlamps
This system automatically adjusts the height
of the beams from this type of headlamp,
according to the load in the vehicle, to avoid
causing a nuisance to other road users.If a fault occurs, this warning lamp
comes on in the instrument panel,
accompanied by a message and an
audible signal.
Do not touch the "Full LED" technology
headlamps. Risk of electrocution!
The system then places the headlamp beams
in the lowest position.
Have the system checked by a PEUGEOT
dealer or a qualified workshop.
Wiper control stalk
Programming
Your vehicle may also include some functions
that can be configured:
-
a
utomatic windscreen wipers,
-
r
ear wiping on engaging reverse gear.
In wintry conditions, remove snow, ice or
frost present on the windscreen, around
the wiper arms and blades and the
windscreen seal, before operating the
wipers.
Do not operate the wipers on a dry
windscreen. Under extremely hot or cold
conditions, ensure that the wiper blades
are not stuck to the windscreen before
operating the wipers.
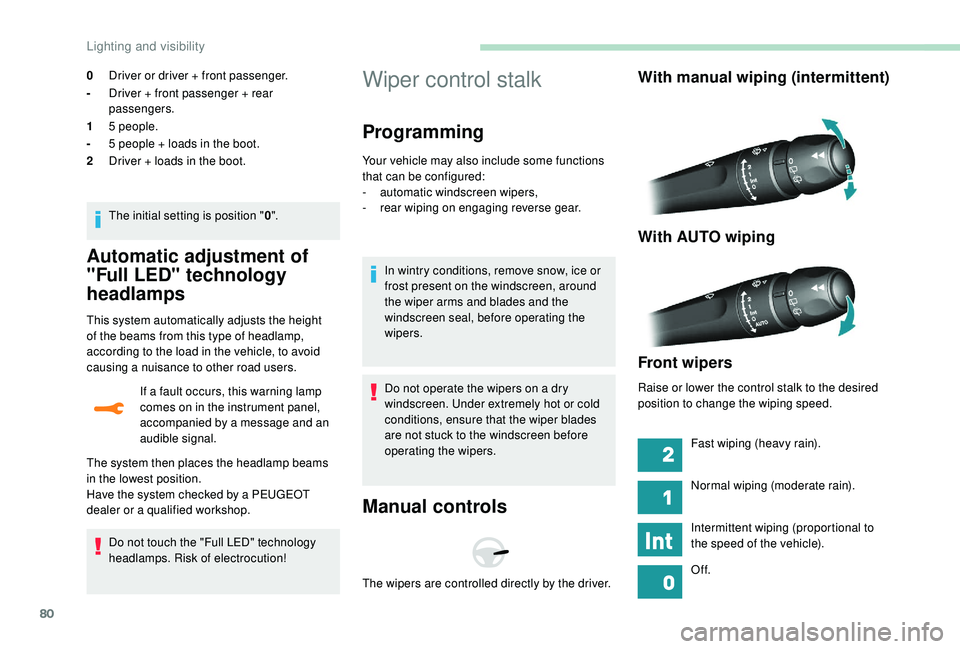
Manual controls
With manual wiping (intermittent)
With AUTO wiping
Front wipers
Raise or lower the control stalk to the desired
position to change the wiping speed.
The wipers are controlled directly by the driver. Fast wiping (heavy rain).
Normal wiping (moderate rain).
Intermittent wiping (proportional to
the speed of the vehicle).
Of f.
0
Driver or driver + front passenger.
- Driver + front passenger + rear
passengers.
1 5 people.
- 5 people + loads in the boot.
2 Driver + loads in the boot.
The initial setting is position " 0".
Lighting and visibility
Page 83 of 324
81
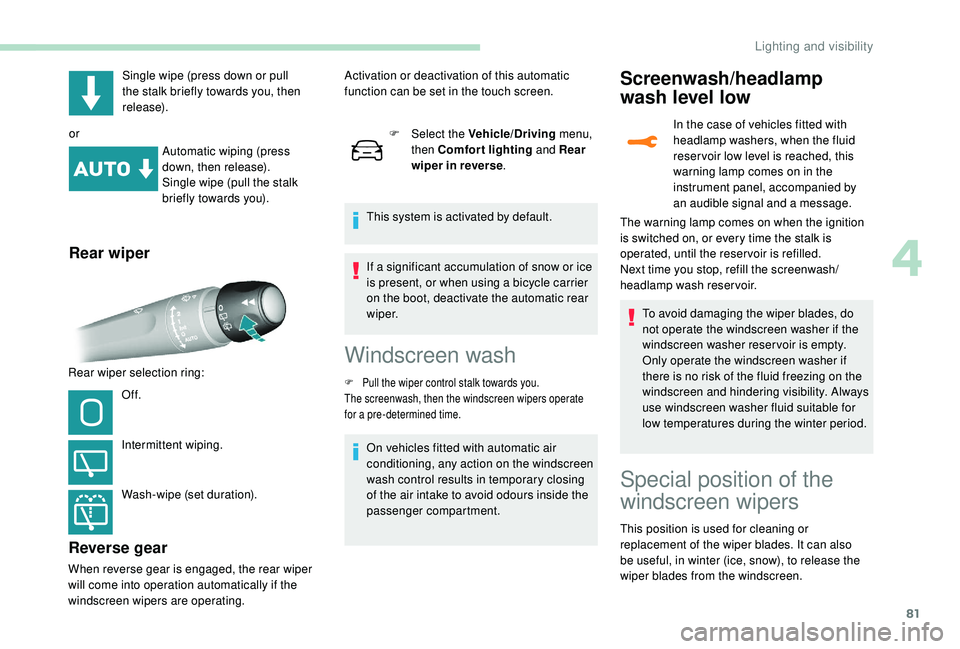
Single wipe (press down or pull
the stalk briefly towards you, then
release).
or Automatic wiping (press
down, then release).
Single wipe (pull the stalk
briefly towards you).
Rear wiper
Rear wiper selection ring:
Of f.
Intermittent wiping.
Wash-wipe (set duration).
Reverse gear
When reverse gear is engaged, the rear wiper
will come into operation automatically if the
windscreen wipers are operating. F
Sel
ect the Vehicle/Driving
menu,
then Comfort lighting and Rear
wiper in reverse .
This system is activated by default.
Activation or deactivation of this automatic
function can be set in the touch screen.
If a significant accumulation of snow or ice
is present, or when using a bicycle carrier
on the boot, deactivate the automatic rear
w i p e r.
Windscreen wash
F Pull the wiper control stalk towards you.
The screenwash, then the windscreen wipers operate
for a pre-determined time.
On vehicles fitted with automatic air
conditioning, any action on the windscreen
wash control results in temporary closing
of the air intake to avoid odours inside the
passenger compartment.
Screenwash/headlamp
wash level low
In the case of vehicles fitted with
headlamp washers, when the fluid
reser voir low level is reached, this
warning lamp comes on in the
instrument panel, accompanied by
an audible signal and a message.
To avoid damaging the wiper blades, do
not operate the windscreen washer if the
windscreen washer reservoir is empty.
Only operate the windscreen washer if
there is no risk of the fluid freezing on the
windscreen and hindering visibility. Always
use windscreen washer fluid suitable for
low temperatures during the winter period.
The warning lamp comes on when the ignition
is switched on, or every time the stalk is
operated, until the reser voir is refilled.
Next time you stop, refill the screenwash/
headlamp wash reservoir.
Special position of the
windscreen wipers
This position is used for cleaning or
replacement of the wiper blades. It can also
be useful, in winter (ice, snow), to release the
wiper blades from the windscreen.
4
Lighting and visibility
Page 84 of 324
82
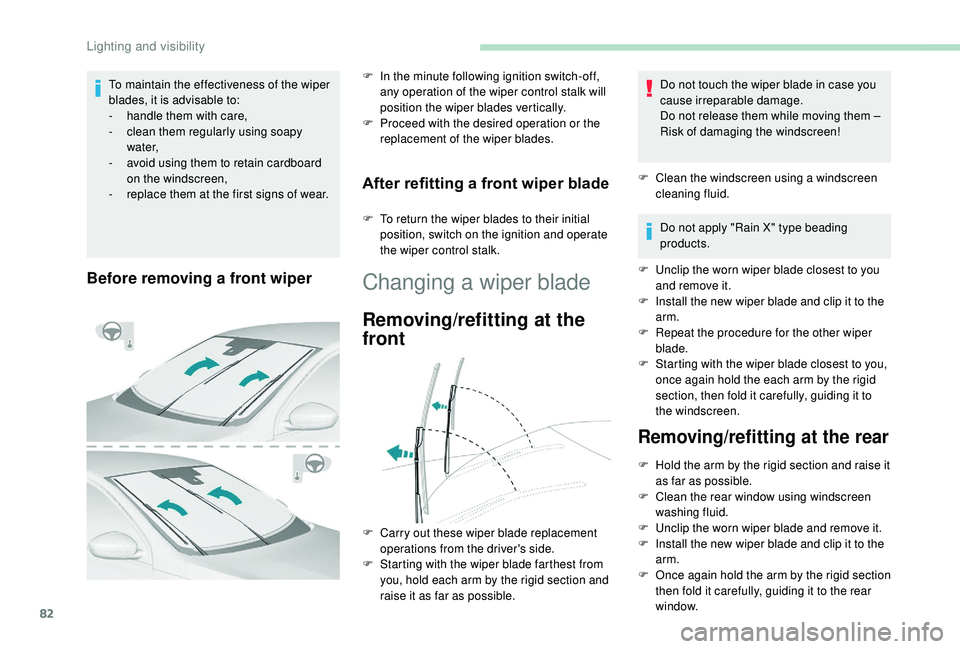
Before removing a front wiper
F In the minute following ignition switch-off, any operation of the wiper control stalk will
position the wiper blades vertically.
F
P
roceed with the desired operation or the
replacement of the wiper blades.
After refitting a front wiper blade
F To return the wiper blades to their initial position, switch on the ignition and operate
the wiper control stalk.
Changing a wiper blade
Removing/refitting at the
front
Do not touch the wiper blade in case you
cause irreparable damage.
Do not release them while moving them –
Risk of damaging the windscreen!
F
C
lean the windscreen using a windscreen
cleaning fluid.
Do not apply "Rain X" type beading
products.
F
U
nclip the worn wiper blade closest to you
and remove it.
F
I
nstall the new wiper blade and clip it to the
arm.
F
R
epeat the procedure for the other wiper
blade.
F
S
tarting with the wiper blade closest to you,
once again hold the each arm by the rigid
section, then fold it carefully, guiding it to
the windscreen.
F
C
arry out these wiper blade replacement
operations from the driver's side.
F
S
tarting with the wiper blade farthest from
you, hold each arm by the rigid section and
raise it as far as possible.
Removing/refitting at the rear
F Hold the arm by the rigid section and raise it as far as possible.
F
C
lean the rear window using windscreen
washing fluid.
F
U
nclip the worn wiper blade and remove it.
F
I
nstall the new wiper blade and clip it to the
arm.
F
O
nce again hold the arm by the rigid section
then fold it carefully, guiding it to the rear
window.
To maintain the effectiveness of the wiper
blades, it is advisable to:
-
h
andle them with care,
-
c
lean them regularly using soapy
water,
-
a
void using them to retain cardboard
on the windscreen,
-
r
eplace them at the first signs of wear.
Lighting and visibility
Page 85 of 324
83
Automatic windscreen
wipers
The windscreen wipers operate automatically
once rain is detected (sensor behind the
rear view mirror), adapting their speed to the
intensity of the rain without any action on the
part of the driver.
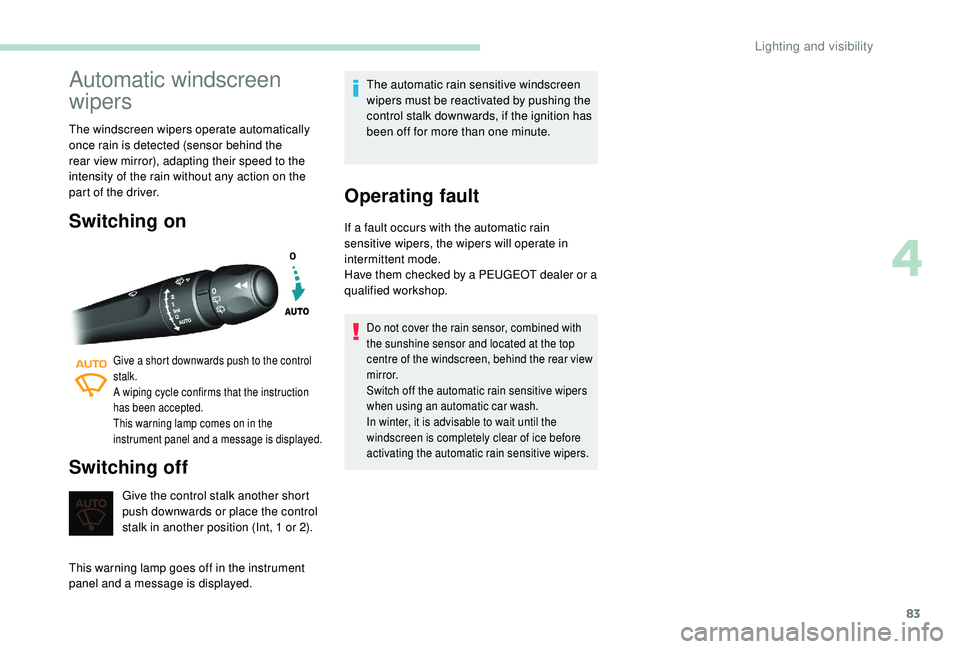
Switching on
Give a short downwards push to the control
stalk.
A wiping cycle confirms that the instruction
has been accepted.
This warning lamp comes on in the
instrument panel and a message is displayed.
Switching off
Give the control stalk another short
push downwards or place the control
stalk in another position (Int, 1 or 2).
This warning lamp goes off in the instrument
panel and a message is displayed. The automatic rain sensitive windscreen
wipers must be reactivated by pushing the
control stalk downwards, if the ignition has
been off for more than one minute.
Operating fault
If a fault occurs with the automatic rain
sensitive wipers, the wipers will operate in
intermittent mode.
Have them checked by a PEUGEOT dealer or a
qualified workshop.
Do not cover the rain sensor, combined with
the sunshine sensor and located at the top
centre of the windscreen, behind the rear view
m i r r o r.
Switch off the automatic rain sensitive wipers
when using an automatic car wash.
In winter, it is advisable to wait until the
windscreen is completely clear of ice before
activating the automatic rain sensitive wipers.
4
Lighting and visibility
Page 87 of 324
85
Automatic operation of
hazard warning lamps
When braking in an emergency, depending on
the rate of deceleration, as well as when the
ABS function is invoked or in the event of an
impact, the hazard warning lamps come on
automatically.
They switch off automatically once you
accelerate.
F
Y
ou can also switch them off by pressing
the button.
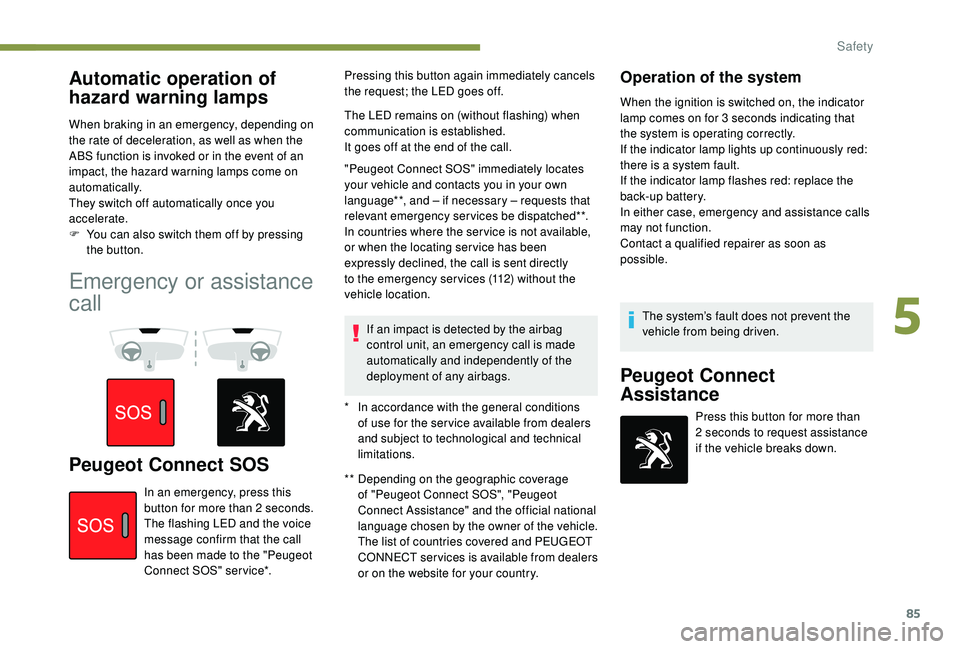
Emergency or assistance
call
Peugeot Connect SOS** Depending on the geographic coverage of "Peugeot Connect SOS", "Peugeot
Connect Assistance" and the official national
language chosen by the owner of the vehicle.
The list of countries covered and PEUGEOT
CONNECT services is available from dealers
or on the website for your country.
In an emergency, press this
button for more than 2
seconds.
The flashing LED and the voice
message confirm that the call
has been made to the "Peugeot
Connect SOS" ser vice*. Pressing this button again immediately cancels
the request; the LED goes off.
The LED remains on (without flashing) when
communication is established.
It goes off at the end of the call.
"Peugeot Connect SOS" immediately locates
your vehicle and contacts you in your own
language**, and – if necessary – requests that
relevant emergency services be dispatched**.
In countries where the ser vice is not available,
or when the locating ser vice has been
expressly declined, the call is sent directly
to the emergency services (112) without the
vehicle location.
If an impact is detected by the airbag
control unit, an emergency call is made
automatically and independently of the
deployment of any airbags.
Operation of the system
When the ignition is switched on, the indicator
lamp comes on for 3 seconds indicating that
the system is operating correctly.
If the indicator lamp lights up continuously red:
there is a system fault.
If the indicator lamp flashes red: replace the
back-up battery.
In either case, emergency and assistance calls
may not function.
Contact a qualified repairer as soon as
possible.
*
I
n accordance with the general conditions
of use for the ser vice available from dealers
and subject to technological and technical
limitations. The system’s fault does not prevent the
vehicle from being driven.
Peugeot Connect
Assistance
Press this button for more than
2
seconds to request assistance
if the vehicle breaks down.
5
Safety
Page 90 of 324

88
When changing wheels (tyres and rims),
ensure that these are approved for your
vehicle.
Normal operation of the ABS may make
itself felt by slight vibration of the brake
pedal.
If you need to brake in an emergency,
press the brake pedal ver y firmly and
keep the pressure applied.
After an impact, have these systems
checked by a PEUGEOT dealer or a
qualified workshop.
Dynamic stability control (DSC)/
Anti-slip regulation (ASR)
These systems are activated automatically
every time the vehicle is started.
As soon as they detect a problem of grip or
trajectory, these systems act on the operation
of the engine and brakes.This is indicated by this warning
lamp flashing in the instrument
panel.
Deactivation/reactivation
In exceptional conditions (starting a vehicle
which is bogged down, stuck in snow, on soft
ground, etc.), it may be advisable to deactivate
these systems, so that the wheels can move
freely and regain grip.
With audio system and GT/GTi versions
F
P
ress this button to deactivate
the DSC and ASR.
With touch screen, except GT/GTi versions F
Sel
ect "Traction control" in the
Driving functions menu of the
touch screen to deactivate the
ASR.
Malfunction
Illumination of this warning lamp,
accompanied by the display of a
message and an audible signal,
indicates a fault with the system.
Contact a PEUGEOT dealer or a qualified
workshop to have the systems checked.
Deactivation is confirmed by the illumination
of this warning lamp in the instrument panel,
the display of a message as well as the
illumination of the indicator lamp in the button.
Reactivate the system(s) when grip conditions
allow.
The system(s) reactivate(s) automatically each
time the ignition is switched back on or from
31
mph (50 km/h) (except GT and GTi versions).
Below 31
mph (50 km/h), you can reactivate it /
them manually.
With audio system and GT/GTi versions
F
P
ress this button again to
reactivate the DSC and ASR.
With touch screen, except GT/GTi versions F
Sel
ect "Traction control" again
in the Driving functions menu
of the touch screen to reactivate
the function.
Safety