2018 Peugeot 308 light
[x] Cancel search: lightPage 61 of 324
59
2.12 V accessory socket (120 W)
O bser ve the maximum power rating to avoid
damaging your accessory.
3.USB port
4.Cup holder/can holder (depending on
ve r s i o n)
5.Storage (depending on version)
6.Storage – Removable cup holder/can holder
Turn the carrier over for access to the cup
holder/can holder.
7.Front armrest
8.220 V socket (120 W) or USB port
( depending on version)
Obser ve the maximum power rating to avoid
damaging your accessory.
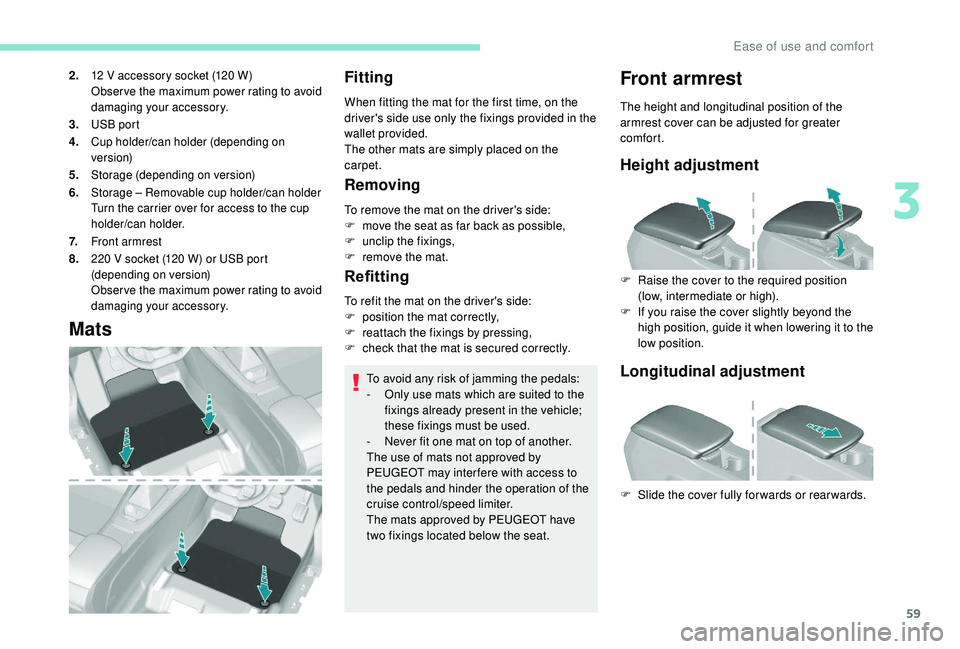
Mats
Fitting
When fitting the mat for the first time, on the
driver's side use only the fixings provided in the
wallet provided.
The other mats are simply placed on the
carpet.
Removing
To remove the mat on the driver's side:
F m ove the seat as far back as possible,
F
un
clip the fixings,
F
r
emove the mat.
Refitting
To avoid any risk of jamming the pedals:
- O nly use mats which are suited to the
fixings already present in the vehicle;
these fixings must be used.
-
N
ever fit one mat on top of another.
The use of mats not approved by
PEUGEOT may inter fere with access to
the pedals and hinder the operation of the
cruise control/speed limiter.
The mats approved by PEUGEOT have
two fixings located below the seat.
Front armrest
The height and longitudinal position of the
armrest cover can be adjusted for greater
comfort.
Height adjustment
F Raise the cover to the required position (low, intermediate or high).
F
I
f you raise the cover slightly beyond the
high position, guide it when lowering it to the
low position.
To refit the mat on the driver's side:
F
p
osition the mat correctly,
F
r
eattach the fixings by pressing,
F
c
heck that the mat is secured correctly.
Longitudinal adjustment
F Slide the cover fully for wards or rear wards.
3
Ease of use and comfort
Page 68 of 324
66
Stop & Star t
The heating and air conditioning systems
only work when the engine is running.
Temporarily deactivate the Stop &
Start system to maintain a comfortable
temperature in the passenger
compartment.
For more information on Stop & Star t,
refer to the corresponding section.
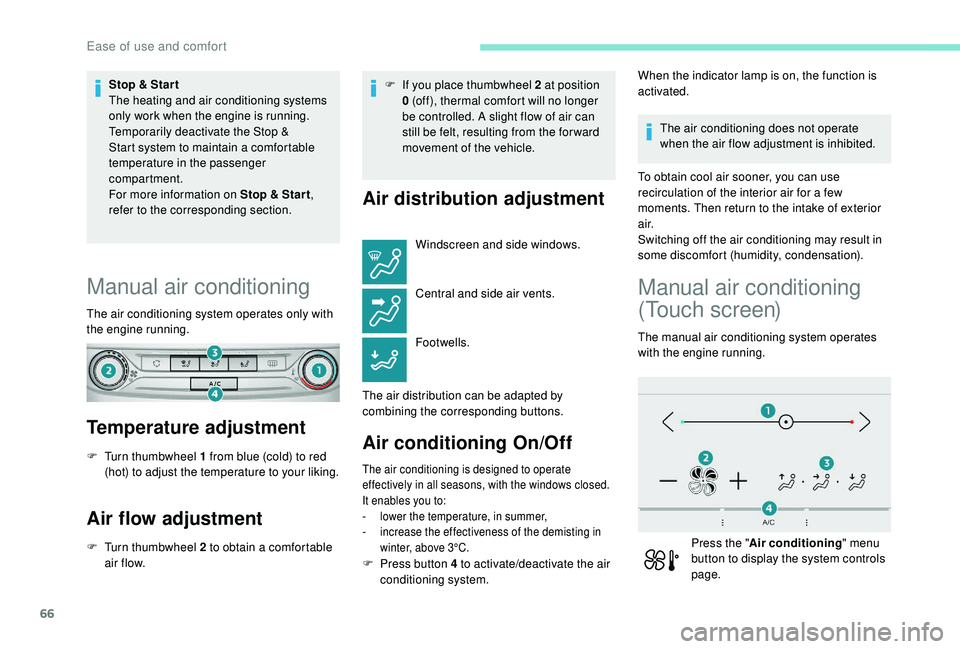
Manual air conditioning
The air conditioning system operates only with
the engine running.
Temperature adjustment
F Turn thumbwheel 1 from blue (cold) to red (hot) to adjust the temperature to your liking.
Air flow adjustment
F Turn thumbwheel 2 to obtain a comfortable air f low. F
I
f you place thumbwheel 2 at position
0 (off), thermal comfort will no longer
be controlled. A slight flow of air can
still be felt, resulting from the for ward
movement of the vehicle.
Air distribution adjustment
Windscreen and side windows.
Central and side air vents.
Footwells.
The air distribution can be adapted by
combining the corresponding buttons.
Air conditioning On/Off
The air conditioning is designed to operate
effectively in all seasons, with the windows closed.
It enables you to:
-
l
ower the temperature, in summer,
-
i
ncrease the effectiveness of the demisting in
winter, above 3°C.
When the indicator lamp is on, the function is
activated.
The air conditioning does not operate
when the air flow adjustment is inhibited.
To obtain cool air sooner, you can use
recirculation of the interior air for a few
moments. Then return to the intake of exterior
a i r.
Switching off the air conditioning may result in
some discomfort (humidity, condensation).
Manual air conditioning
(Touch screen)
The manual air conditioning system operates
with the engine running.
Press the " Air conditioning " menu
button to display the system controls
page.
F
P
ress button 4 to activate/deactivate the air
conditioning system.
Ease of use and comfort
Page 74 of 324

72
Courtesy lamps
1.Front courtesy lamp
2. Front map reading lamps
3. Rear courtesy lamp
4. Rear map reading lamps
Front – rear courtesy lamps
In this position, the courtesy lamp
comes on gradually:
-
w
hen you unlock the vehicle,
-
w
hen the electronic key is removed from the
reader,
-
o
n opening a door,
-
w
hen the remote control locking button is
activated, in order to locate your vehicle.
It switches off gradually:
-
w
hen the vehicle is locked,
-
w
hen the ignition is switched on,
-
3
0
seconds after the last door is closed. Permanently off.
Permanent lighting.
Depending on version, you can also
switch the courtesy lamp on or off by
pressing this button.
Front – rear map reading
lamps
F With the ignition on, operate the corresponding switch.
Take care not to put anything in contact
with the courtesy lamps.
In "permanent lighting" mode, the lighting
time varies according to the circumstances:
-
w
hen the ignition is off, approximately
ten minutes,
-
i
n energy saving mode, approximately
thirty seconds,
-
w
ith the engine running, unlimited.
Ease of use and comfort
Page 75 of 324
73
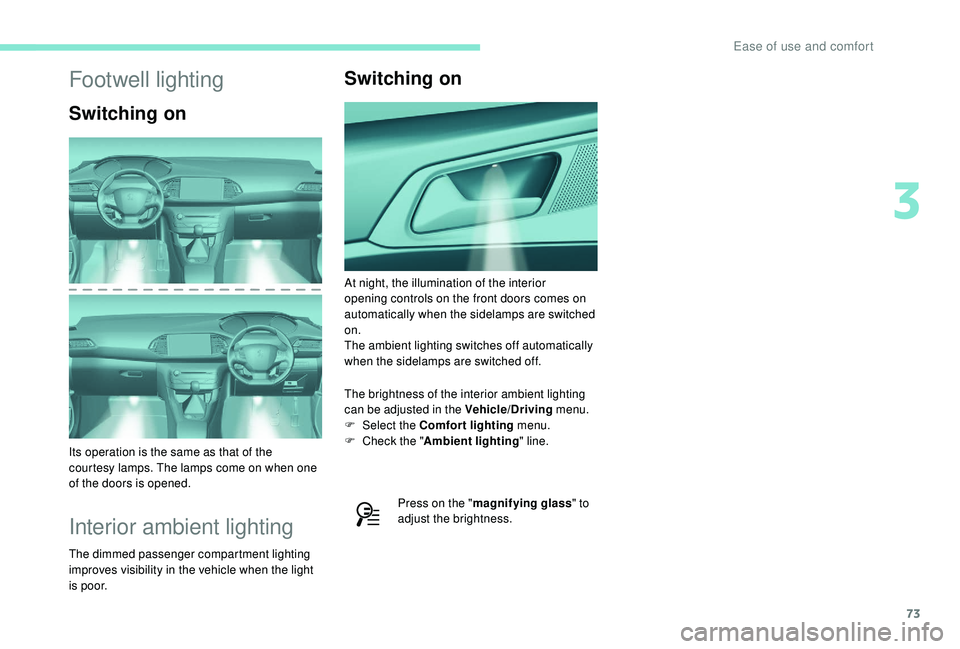
Footwell lighting
Switching on
Its operation is the same as that of the
courtesy lamps. The lamps come on when one
of the doors is opened.
Interior ambient lighting
The dimmed passenger compartment lighting
improves visibility in the vehicle when the light
i s p o o r.
Switching on
At night, the illumination of the interior
opening controls on the front doors comes on
automatically when the sidelamps are switched
on.
The ambient lighting switches off automatically
when the sidelamps are switched off.
The brightness of the interior ambient lighting
can be adjusted in the Vehicle/Driving menu.
F
Sel
ect the Comfort lighting menu.
F
C
heck the " Ambient lighting " line.
Press on the " magnifying glass " to
adjust the brightness.
3
Ease of use and comfort
Page 76 of 324

74
Exterior lighting control
stalk
Main lighting
Selection of main lighting mode
Without AUTO lighting
With AUTO lighting
Lighting off (ignition off)/Front daytime
running lamps (engine running).
Sidelamps only. Automatic illumination of headlamps.
Dipping the headlamps
Pull the lever to switch the lighting between
dipped and main beam headlamps.
In Lighting off or Sidelamps only modes, the
driver can switch on the main beam headlamps
directly by keeping the lever pulled.
Display
Illumination of the corresponding indicator
lamp in the instrument panel confirms that the
lighting selected is on.
Foglamps
In good or rainy weather, by both day
and night, the front foglamps and the
rear foglamps are prohibited. In these
situations, the power of their beams may
dazzle other drivers. They should only be
used in fog or falling snow.
In these weather conditions, it is your
responsibility to switch on the foglamps
and dipped headlamps manually as the
sunshine sensor may detect sufficient
light.
Switch off the front and rear foglamps
when they are no longer necessary.
Rear foglamp only
Turn the ring to align the desired symbol with
the marking.
Dipped or main beam headlamps.
The main or dipped beam headlamps must be
on.
F
T
o switch it on, turn the ring for wards.
Lighting and visibility
Page 77 of 324
75
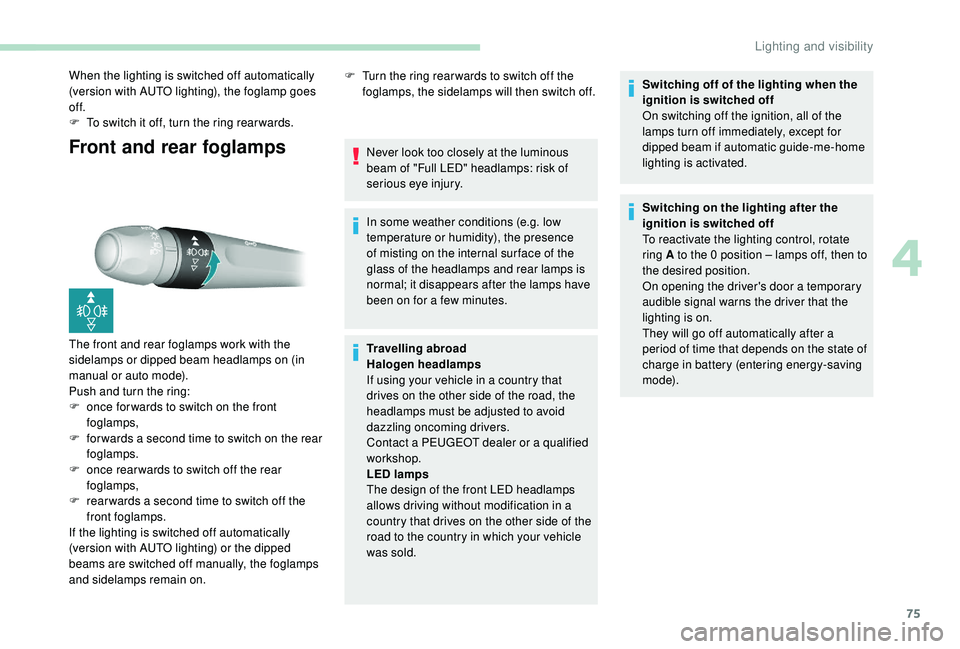
Front and rear foglamps
When the lighting is switched off automatically
(version with AUTO lighting), the foglamp goes
of f.
F
T
o switch it off, turn the ring rear wards.
The front and rear foglamps work with the
sidelamps or dipped beam headlamps on (in
manual or auto mode).
Push and turn the ring:
F
o
nce for wards to switch on the front
foglamps,
F
f
or wards a second time to switch on the rear
foglamps.
F
o
nce rear wards to switch off the rear
foglamps,
F
r
ear wards a second time to switch off the
front foglamps.
If the lighting is switched off automatically
(version with AUTO lighting) or the dipped
beams are switched off manually, the foglamps
and sidelamps remain on. F
T urn the ring rear wards to switch off the
foglamps, the sidelamps will then switch off.
Never look too closely at the luminous
beam of "Full LED" headlamps: risk of
serious eye injury.
In some weather conditions (e.g. low
temperature or humidity), the presence
of misting on the internal sur face of the
glass of the headlamps and rear lamps is
normal; it disappears after the lamps have
been on for a few minutes.
Travelling abroad
Halogen headlamps
If using your vehicle in a country that
drives on the other side of the road, the
headlamps must be adjusted to avoid
dazzling oncoming drivers.
Contact a PEUGEOT dealer or a qualified
workshop.
LED lamps
The design of the front LED headlamps
allows driving without modification in a
country that drives on the other side of the
road to the country in which your vehicle
was sold. Switching off of the lighting when the
ignition is switched off
On switching off the ignition, all of the
lamps turn off immediately, except for
dipped beam if automatic guide-me-home
lighting is activated.
Switching on the lighting after the
ignition is switched off
To reactivate the lighting control, rotate
ring A to the 0 position – lamps off, then to
the desired position.
On opening the driver's door a temporary
audible signal warns the driver that the
lighting is on.
They will go off automatically after a
period of time that depends on the state of
charge in battery (entering energy-saving
m o d e).
4
Lighting and visibility
Page 78 of 324

76
Daytime running lamps/
Sidelamps
These lamps light up automatically when the
engine starts.
Automatic illumination of
headlamps
When a low level of ambient light is detected
by the sunshine sensor, the number plate
lamps,
sidelamps and dipped beam headlamps
are switched on automatically, without any
action on the part of the driver. They may also
Switching on
Switching off
F Turn the ring to another position. Deactivation of the function is accompanied
by the display of a message.
Operating fault
In the event of a malfunction of the
sunshine sensor, the lighting comes
on, this warning lamp is displayed in
the instrument panel, accompanied
by an audible signal and/or a
message.
Contact a PEUGEOT dealer or a qualified
workshop. In fog or snow, the sunshine sensor may
detect sufficient light. In this case, the
lighting will not come on automatically.
Do not cover the sunshine sensor,
integrated with the rain sensor and located
at the top of the windscreen behind the
rear view mirror; the associated functions
would no longer be controlled.
They provide the following functions:
-
D
aytime running lamps (lighting control
stalk at position " 0" or " AUTO " with
adequate light level).
-
S
idelamps (lighting control stalk at position
" AUTO " with low light levels or "Sidelamps
only" or "Dipped/main beam headlamps"). F
T
urn the ring to the AUTO position.
Activation of the function is accompanied by
the display of a message.
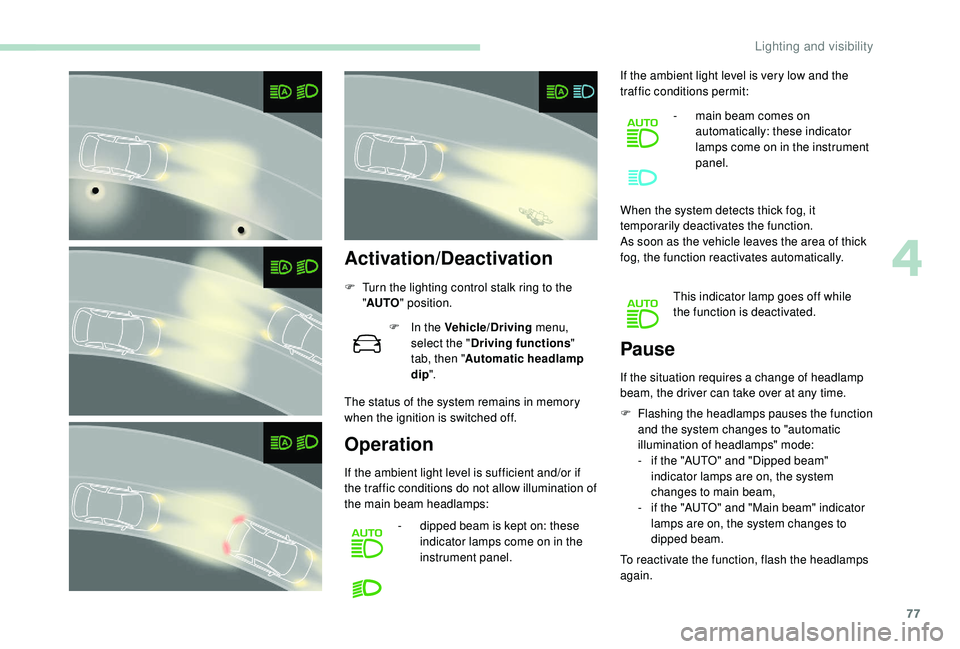
Automatic headlamp
dipping
System which automatically changes between
dipped and main beam according to the
exterior light level and the driving conditions,
using a camera located at the top of the
windscreen.
This system is a driving aid.
The driver remains responsible for the
vehicle's lighting, its correct use for the
prevailing conditions of light, visibility,
traffic and obser vation of driving and
vehicle regulations.
The system will be operational as soon as
you exceed 16
mph (25 km/h).
If the speed drops below 9
mph (15 km/h),
the system no longer operates.
come on if rain is detected, at the same time as
automatic operation of the windscreen wipers.
As soon as the light returns to a sufficient level
or after the windscreen wipers are switched off,
the lamps are switched off automatically.
Lighting and visibility
Page 79 of 324
77
Activation/Deactivation
F Turn the lighting control stalk ring to the "AUTO " position.
F
I
n the Vehicle/Driving menu,
select the " Driving functions "
tab, then " Automatic headlamp
dip ".
The status of the system remains in memory
when the ignition is switched off.
Operation
If the ambient light level is sufficient and/or if
the traffic conditions do not allow illumination of
the main beam headlamps: -
d
ipped beam is kept on: these
indicator lamps come on in the
instrument panel. If the ambient light level is very low and the
traffic conditions permit:
-
m
ain beam comes on
automatically: these indicator
lamps come on in the instrument
panel.
When the system detects thick fog, it
temporarily deactivates the function.
As soon as the vehicle leaves the area of thick
fog, the function reactivates automatically. This indicator lamp goes off while
the function is deactivated.
F
F
lashing the headlamps pauses the function
and the system changes to "automatic
illumination of headlamps" mode:
- i f the "AUTO" and "Dipped beam"
indicator lamps are on, the system
changes to main beam,
-
i
f the "AUTO" and "Main beam" indicator
lamps are on, the system changes to
dipped beam.
To reactivate the function, flash the headlamps
again.
Pause
If the situation requires a change of headlamp
beam, the driver can take over at any time.
4
Lighting and visibility