2018 PEUGEOT 108 ignition
[x] Cancel search: ignitionPage 31 of 180
29
Quarter windows
On the 5 -door versions, device for providing
ventilation to the rear seats while limiting the
partial opening of the window.
Opening
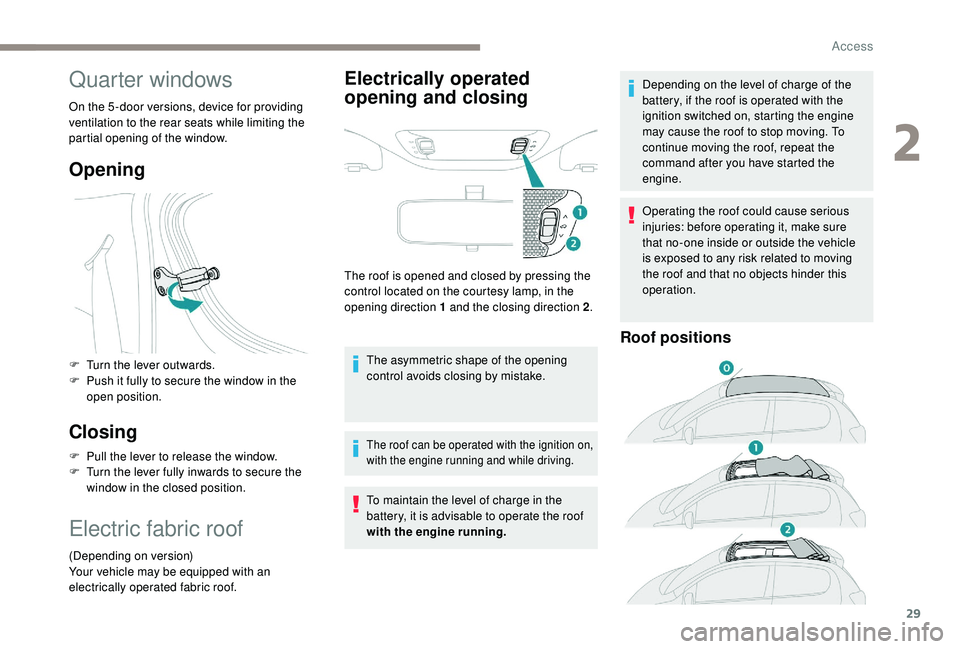
F Turn the lever outwards.
F P ush it fully to secure the window in the
open position.
Closing
F Pull the lever to release the window.
F T urn the lever fully inwards to secure the
window in the closed position.
Electric fabric roof
(Depending on version)
Your vehicle may be equipped with an
electrically operated fabric roof.
Electrically operated
opening and closing
The roof is opened and closed by pressing the
control located on the courtesy lamp, in the
opening direction 1
and the closing direction 2.
The asymmetric shape of the opening
control avoids closing by mistake.
The roof can be operated with the ignition on,
with the engine running and while driving.
To maintain the level of charge in the
battery, it is advisable to operate the roof
with the engine running. Depending on the level of charge of the
battery, if the roof is operated with the
ignition switched on, starting the engine
may cause the roof to stop moving. To
continue moving the roof, repeat the
command after you have started the
engine.
Operating the roof could cause serious
injuries: before operating it, make sure
that no-one inside or outside the vehicle
is exposed to any risk related to moving
the roof and that no objects hinder this
operation.
Roof positions
2
Access
Page 32 of 180
30
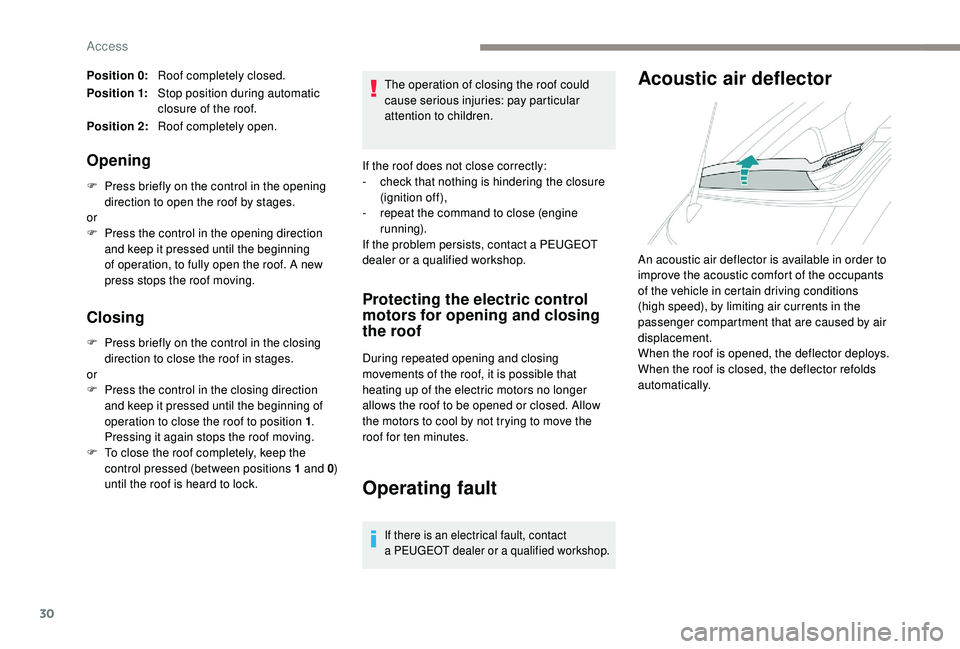
Position 0:Roof completely closed.
Position 1: Stop position during automatic
closure of the roof.
Position 2: Roof completely open.
Opening
F Press briefly on the control in the opening
direction to open the roof by stages.
or
F
P
ress the control in the opening direction
and keep it pressed until the beginning
of operation, to fully open the roof. A new
press stops the roof moving.
Closing
F Press briefly on the control in the closing direction to close the roof in stages.
or
F
P
ress the control in the closing direction
and keep it pressed until the beginning of
operation to close the roof to position 1 .
Pressing it again stops the roof moving.
F
T
o close the roof completely, keep the
control pressed (between positions 1
and 0)
until the roof is heard to lock. The operation of closing the roof could
cause serious injuries: pay particular
attention to children.
If the roof does not close correctly:
-
c
heck that nothing is hindering the closure
(ignition off),
-
r
epeat the command to close (engine
running).
If the problem persists, contact a PEUGEOT
dealer or a qualified workshop.
Protecting the electric control
motors for opening and closing
the roof
During repeated opening and closing
movements of the roof, it is possible that
heating up of the electric motors no longer
allows the roof to be opened or closed. Allow
the motors to cool by not trying to move the
roof for ten minutes.
Operating fault
If there is an electrical fault, contact
a
PEUGEOT dealer or a qualified workshop.
Acoustic air deflector
An acoustic air deflector is available in order to
improve the acoustic comfort of the occupants
of the vehicle in certain driving conditions
(high speed), by limiting air currents in the
passenger compartment that are caused by air
displacement.
When the roof is opened, the deflector deploys.
When the roof is closed, the deflector refolds
automatically.
Access
Page 33 of 180
31
Precautions in use
Never put objects on the open or closed
roof.
Do not sit or place anything on the
crossbar of the roof when it is open.
To avoid damaging the roof, do not open it
if there is snow or ice present.
Never use sharp tools to remove snow or
ice that has built up on the roof.
To prevent creases appearing in the
canvas, it is recommended not to leave
the roof open for long periods.
It is not recommended to operate the
vehicle's air conditioning system when the
roof is open.
If the vehicle is to be parked outside for
a long period, it is advisable to protect the
roof using a
tarpaulin.
It is advisable to close the roof when you
park the vehicle.
Even if the roof is closed, it is safer not to
leave any valuables inside the vehicle.
When you leave the vehicle, turn off
the ignition and remove the key (or take
the electronic key with you) to prevent
unintentional operation of the roof.
Advice on care
General recommendations on the care and
maintenance of your vehicle are given in the
warranty and maintenance record.
Fabric roof
Before washing the fabric, remove as
much dirt as possible using a soft brush or
a
vacuum cleaner.
To avoid damaging the roof:
-
n
ever use a high-pressure washer,
-
n
ever clean your vehicle in an
automatic roller-brush car wash.
Allow the vehicle to dry in the shade and
avoid exposing it to direct sunlight.
To remove stains, dab them (never rub
them) with a
sponge and some soapy
water, then immediately rinse the fabric
with clean water.
Immediately remove bird droppings or
plant resins, their caustic nature could
damage the fabric. For regular care of the fabric and to keep
its original appearance, we recommend
using the environmentally friendly product
"Insect removal" product" from the
"TECHNATURE" range. To obtain this
product, visit a
PEUGEOT dealer.
Never use chemical products, detergents,
stain removers, solvents, alcohol, petrol,…
to clean the fabric.
To waterproof the fabric, use only
waterproofing products specifically for
fabric hoods.
Acoustic air deflector
We recommend that you clean the
acoustic air deflector with care , using
a
soft brush.
2
Access
Page 35 of 180
33
With the engine running, the front seats can be
heated separately.
F
P
ress the switch. The indicator lamp comes
on.
F
P
ressing a
second time stops operation.
The temperature is controlled automatically.
The heated seat function is deactivated
approximately two minutes after the ignition is
switched off. To reactivate the function, switch
on the ignition and press the control again.
Switch off the heated seats as soon as
you consider it necessary, as reducing
the consumption of electrical current
reduces fuel consumption.
Do not use the function when the seat is
not occupied.
Reduce the intensity of the heating as
soon as possible.
When the seat and passenger
compartment have reached an
adequate temperature, you can stop
the function; reducing the consumption
of electrical current reduces fuel
consumption. Prolonged use at the highest setting is
not recommended for those with sensitive
skin.
There is a
risk of burns for people whose
perception of heat is impaired (illness,
taking medication, for example).
There is a
risk of overheating the system if
material with insulating properties is used,
such as cushions or seat covers.
Do not use the function:
-
i
f wearing damp clothing,
-
i
f child seats are fitted.
To avoid breaking the heating element in
the seat:
-
d
o not place heavy objects on the seat,
-
d
o not kneel or stand on the seat,
-
d
o not place sharp objects on the seat,
-
d
o not spill liquids onto the seat.
To avoid the risk of short-circuit:
-
d
o not use liquid products for cleaning
the seat,
-
n
ever use the heating function when
the seat is damp.Access to rear seats
(3-door)
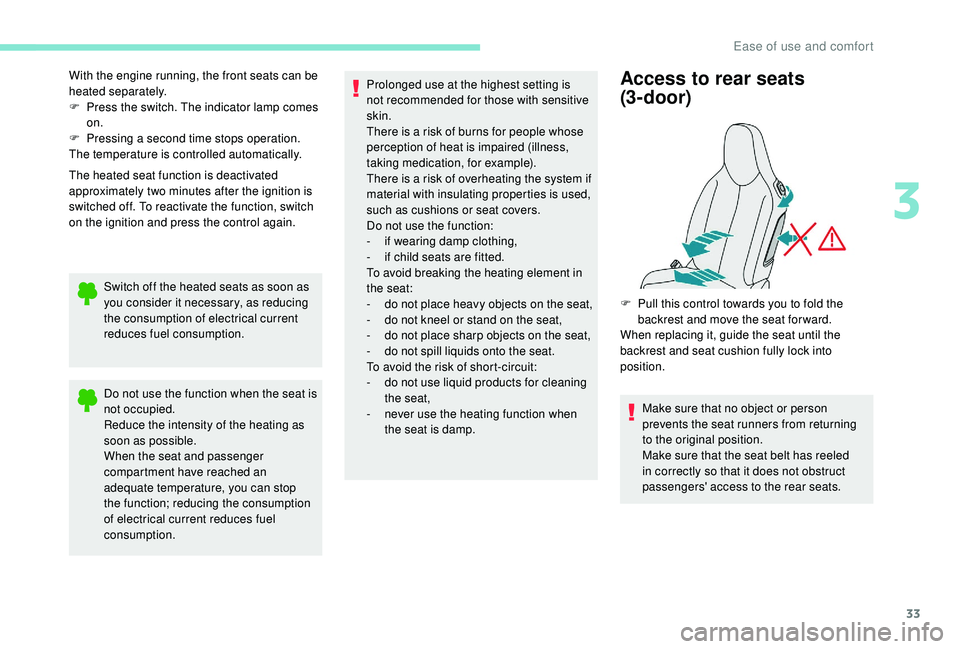
F Pull this control towards you to fold the backrest and move the seat for ward.
When replacing it, guide the seat until the
backrest and seat cushion fully lock into
position.
Make sure that no object or person
prevents the seat runners from returning
to the original position.
Make sure that the seat belt has reeled
in correctly so that it does not obstruct
passengers' access to the rear seats.
3
Ease of use and comfort
Page 49 of 180

47
In the lighting off and sidelamps modes, the
driver can switch on the main beam headlamps
temporarily ("headlamp flash"), for as long as
the stalk is kept pulled.
Displays
Illumination of the corresponding indicator
lamp in the instrument panel confirms that the
lighting selected is switched on.
Selection ring for the
foglamps
Front foglamps and rear
foglamp
With the dipped beams on, push the control
for wards to switch on the main beams. Pull the
control towards you to return to dipped beams.
The foglamps operate when the dipped or main
beams are on. Turn and release the ring:
F
f
or wards once to switch on the rear
foglamp,
F
f
or wards a
second time to switch on the
front foglamps,
F
b
ackwards once to switch off the front
foglamps,
F
b
ackwards a
second time to switch off the
rear foglamp.
If the lighting is switched off automatically
(version with AUTO lighting) or the dipped
beams are switched off manually, the foglamps
and sidelamps remain on.
F
T
urn the ring backwards and release it to
turn off all the lamps. In good or rainy weather, both day and
night, using the front foglamps and the
rear foglamp is prohibited. In these
situations, the power of their beams may
dazzle other drivers. They should only be
used in fog or falling snow.
In these weather conditions, it is your
responsibility to switch on the foglamps
and dipped headlamps manually as the
sunshine sensor may detect sufficient
light.
Do not forget to turn off the front foglamps
and the rear foglamp as soon as they are
no longer necessary.
Switching off the lamps when the
ignition is switched off
When switching off the ignition, all of the
lamps turn off immediately, except for
dipped beam if guide-me-home lighting is
activated.
Switching on the lighting after the
ignition is switched off
To reactivate the lighting control, rotate
the ring to the 0
position – lamps off, then
to the desired position.
On opening the driver's door a
temporary
audible signal warns the driver that the
lighting is on.
4
Lighting and visibility
Page 50 of 180

48
Automatic headlamp
illumination
Switching on
F Turn the ring to the "AUTO" position.
Switching off
F Turn the ring to another position.
In fog or snow, the sunshine sensor may
detect sufficient light. The lamps will not
come on automatically.
Do not cover the light sensor, the
associated functions would no longer be
controlled.
Manual guide-me-home
lighting
Switching on
F Set the lighting control stalk to the "Lights off " or "Auto" position.
F
W
ith the ignition off, flash the headlamps
using the lighting stalk.
The headlamps come on for a
duration of about
30
seconds.
Switching off
The manual guide-me-home lighting stops
immediately if:
-
y
ou "flash the headlamps" again,
When a
low level of ambient light is detected by
a
light sensor, the sidelamps and dipped beam
headlamps are switched on automatically,
without any action on the part of the driver.
As soon as the level of light becomes sufficient
again, the lamps are switched off automatically.
The sensor is located at the bottom of the
windscreen. (Depending on version)
Temporarily keeps the dipped beam
headlamps on after the vehicle's ignition has
been switched off, making exit easier for the
occupants when the light is poor.
Direction indicators
Three flashes
F Press briefly upwards or downwards,
without going beyond the point of
resistance; the direction indicators will flash
3
times.
-
y
ou put the lighting control in another
position,
-
y
ou switch on the ignition.
F
L
eft: lower the lighting stalk passing the
point of resistance.
F
R
ight: raise the lighting stalk passing the
point of resistance.
Lighting and visibility
Page 54 of 180

52
Hazard warning lamps
F When you press this red button, all four direction indicators flash.
It can operate with the ignition off. F
P
ress the central part of the steering wheel.
Electronic stability control
(ESC)
The ESC programme incorporates the following
systems:
-
a
nti-lock braking system (ABS) and
electronic brake force distribution (EBFD),
Definitions
Anti-lock braking system (ABS)
and electronic brake force
distribution (EBFD)
These systems improve the stability and
manoeuvrability of your vehicle when braking
and contribute towards improved control on
corners, in particular on poor or slippery road
surfaces.
ABS prevents the wheels from locking during
emergency braking.
EBFD ensures total management of the braking
pressure, wheel by wheel.
Emergency braking assistance
(EBA)
In an emergency, this system permits the
optimum braking pressure to be reached
more quickly, therefore reducing the stopping
distance.
It triggers according to the speed at which
the brake pedal is pressed. This is felt by
a
reduction in the resistance of the pedal and
an increase in the effectiveness of the braking.
Traction control (TRC)
This system optimises traction in order to limit
wheel slip by acting on the brakes of the driving
wheels and on the engine. It also improves
the directional stability of the vehicle on
acceleration.
-
em
ergency braking assistance (EBA),
-
t
raction control (TRC),
- d
ynamic stability control (DSC).
Dynamic stability control (DSC)
If there is a difference between the path
f ollowed by the vehicle and that required by the
driver, this system monitors each wheel and
automatically acts on the brake of one or more
wheels and on the engine to return the vehicle
to the required path, within the limits of the laws
of physics.
Operation
Anti-lock braking system (ABS)
and electronic brake force
distribution (EBD)
If this warning lamp comes on,
accompanied by an audible
signal, it indicates an ABS system
malfunction that could cause control
of the vehicle to be lost during
braking.
Drive carefully at a
moderate speed and
contact a
PEUGEOT dealer or a qualified
workshop.
Safety
Page 56 of 180
54
Drive carefully at a moderate speed and
c ontact a PEUGEOT dealer or a qualified
workshop for verification of the system.
The TRC and DSC systems offer
exceptional safety in normal driving, but
this should not encourage the driver to
take extra risks or drive at high speed.
The correct operation of the systems
depends on observing the manufacturer's
recommendations regarding wheels (tyres
and rims), braking system components,
electronic components as well as
assembly and repair procedures used by
the PEUGEOT dealer network.
After an impact, have the systems
checked by a
PEUGEOT dealer or
a
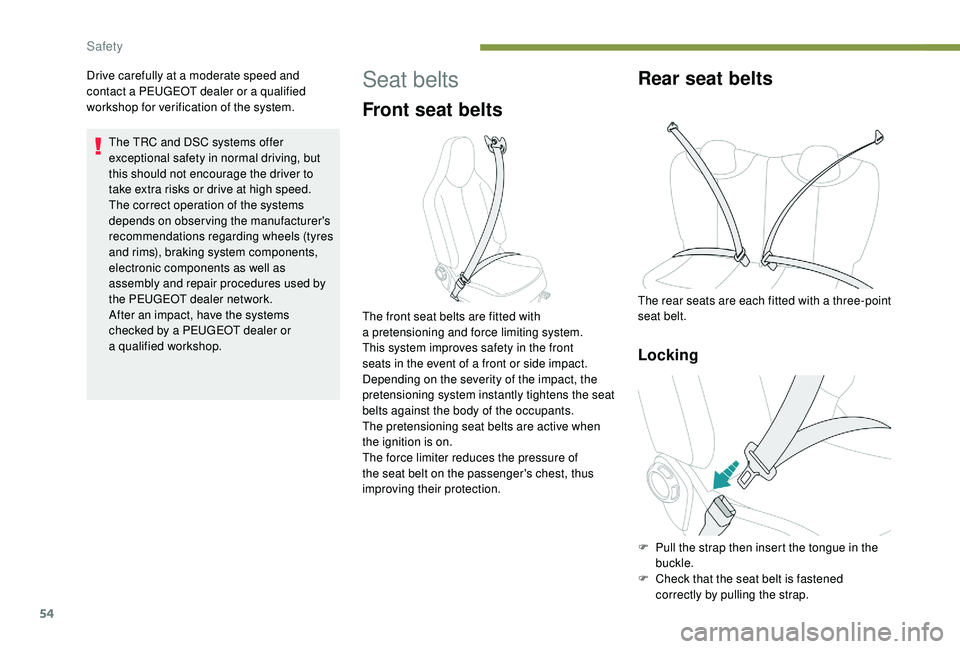
qualified workshop.Seat belts
Front seat belts
The front seat belts are fitted with
a pretensioning and force limiting system.
This system improves safety in the front
seats in the event of a
front or side impact.
Depending on the severity of the impact, the
pretensioning system instantly tightens the seat
belts against the body of the occupants.
The pretensioning seat belts are active when
the ignition is on.
The force limiter reduces the pressure of
the seat belt on the passenger's chest, thus
improving their protection.
Rear seat belts
The rear seats are each fitted with a three-point
sea t belt.
Locking
F Pull the strap then insert the tongue in the buckle.
F
C
heck that the seat belt is fastened
correctly by pulling the strap.
Safety