2018 PEUGEOT 108 reset
[x] Cancel search: resetPage 20 of 180

18
Indicators
Total/trip distance recorder
When the ignition is switched on, the distance
recorder that was selected when the engine
was last switched off is displayed.-
t
rip recorder with TRIP displayed.
To reset the trip recorder to zero, while it is
displayed, press one of the two buttons 1 .
Fuel level indicator
Low fuel level
When the fuel in the tank reaches
a
low level, this warning lamp
comes on in the instrument panel,
accompanied by an audible warning.
You must add at least 5
litres of fuel after
running out of fuel.
Trip computer
System that gives you information on the
current journey (range, fuel consumption…).
Data displays
* depending on version. F
P
ress the steering mounted control to
display the various trip computer tabs in
succession.
-
T
otal distance travelled.
- Trip
A.
- Trip
B.
-
T
he partial Stop & Start time counter*.
-
T
he total Stop & Start* time counter.
-
T
he outside temperature*.
-
C
urrent fuel consumption.
-
A
verage fuel consumption.
-
Range.
-
A
verage speed.
-
L
ighting dimmer.
Pressing button 1
allows you to alternate the
distance display:
-
t
otal with ODO (odometer) displayed, Shows the quantity of fuel available:
-
1/
1
and six bars, the tank is full.
-
R
and one bar, the fuel in the tank is at the
reser ve level.
You have about 5
litres of fuel left.
Instruments
Page 21 of 180

19
Outside temperature
In some situations, it may happen that the
outside temperature is displayed after a delay
or not at all, including:
-
w
hen stationary or moving at a slow speed
(less than about 16
mph (25 km/h),
-
i
n the case of a change that is too high
(entering or leaving a
garage, tunnel, etc.),
-
d
uring very short journeys (less than about
2
minutes).
Lighting dimmer control
When driving at night, this function allows
certain instrument panel displays to be
switched off so as to reduce visual fatigue for
the driver.
It operates only while the sidelamps are on.
F
A
s soon as the "Lighting dimmer" menu is
displayed, keep one of the DISP buttons
pressed to access the settings.
F
T
hen press one of the two DISP buttons
successively to increase or decrease the
brightness. The display flashes to show you
the brightness chosen.
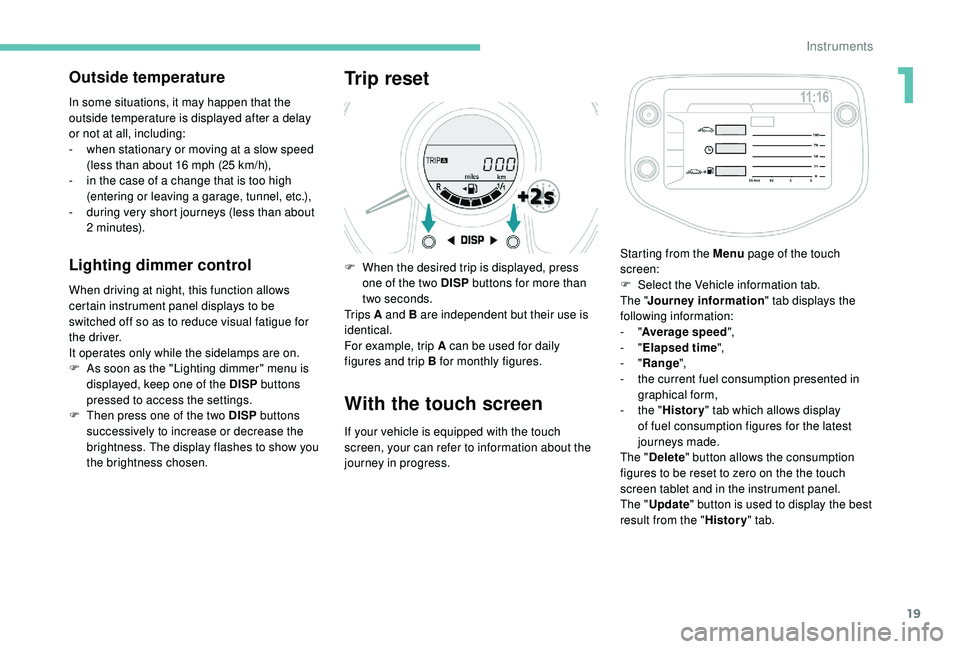
Trip reset
F When the desired trip is displayed, press one of the two DISP buttons for more than
two seconds.
Tr i p s A and B are independent but their use is
identical.
For example, trip A can be used for daily
figures and trip B for monthly figures.
With the touch screen
If your vehicle is equipped with the touch
screen, your can refer to information about the
journey in progress. Starting from the Menu
page of the touch
screen:
F
S
elect the Vehicle information tab.
The " Journey information " tab displays the
following information:
- "
Average speed ",
- "
Elapsed time ",
- "
Range ",
-
t
he current fuel consumption presented in
graphical form,
-
t
he "
History " tab which allows display
of fuel consumption figures for the latest
journeys made.
The " Delete " button allows the consumption
figures to be reset to zero on the the touch
screen tablet and in the instrument panel.
The " Update " button is used to display the best
result from the " History" tab.
1
Instruments
Page 22 of 180

20
Trip computer, some
definitions
Range
(miles or km)
The distance which can still be travelled with
the fuel remaining in the tank (at the average
fuel consumption seen over the last few miles
(kilometres) travelled).This value may fluctuate if a
change
of driving style or terrain results in
a
significant change in the current fuel
consumption.
When the level of fuel is low, the message "Lo
FUEL" is displayed.
While the level of the fuel is low, the range
cannot be recalculated.
Current fuel consumption
(mpg or l/100 km or km/l)
C alculated over the last few seconds.
Average fuel consumption
(mpg or l/100 km or km/l)
C alculated since the last time the trip recorder
was reset to zero.
Average speed
(mph or km/h)
Calculated since the last time the trip recorder
was reset to zero.
Stop & Start time counter
(minutes/seconds or hours/minutes)
If your vehicle is fitted with the Stop & Start, a
time counter adds up the time spent in STOP
mode during a
journey.
It resets to zero every time the ignition is
switched on.
Adjusting the time
Radio
The time is adjusted using the " MENU" dial:
- p ress the dial to access the menus and to
confirm a
selection,
-
t
urn the dial to select a function, an item in
a
list.
At any time you can return to the previous step
using the " Back" button.
F
P
ress the dial to access the menus.
F
T
urn the dial to select " CLOCK".
F
P
ress the dial to confirm. The hours digits
flash.
F
T
urn the dial to adjust the hours.
F
P
ress the dial to confirm. The minutes digits
flash.
F
T
urn the dial to adjust the minutes.
F
P
ress the dial to confirm and leave the
menu.
Instruments
Page 51 of 180

49
Headlamp adjustment
To avoid causing a nuisance to other road
u sers, the height of the headlamp beams
should be adjusted according to the load in the
vehicle.
0. Driver only.
0.5. Driver + front passenger.
1.5. 4
people.
3. 4
people + maximum authorised load.
3.5. Driver + maximum authorised load.
The initial setting is position 0.
Wiper control stalk
In wintry conditions, remove snow, ice or
frost present on the windscreen, around
the wiper arms and blades and the
windscreen seal, before operating the
wipers.
Do not operate the wipers on a
dry
windscreen. Under extremely hot or cold
conditions, ensure that the wiper blades
are not stuck to the windscreen before
operating the wipers.
Manual controls
Front wipers
Wiping speed control stalk: raise or lower the
stalk to the desired position. Single wipe.
For a single wipe of the windscreen, raise the
control then release it.
Of f.
Intermittent wipe.
Normal wiping (moderate rain).
Fast wiping (heavy rain).
Front screenwash
Pull the wiper control stalk towards you. The
screenwash and then the wipers operate for
a
preset time.
4
Lighting and visibility
Page 83 of 180

81
Operation
Going into engine STOP mode
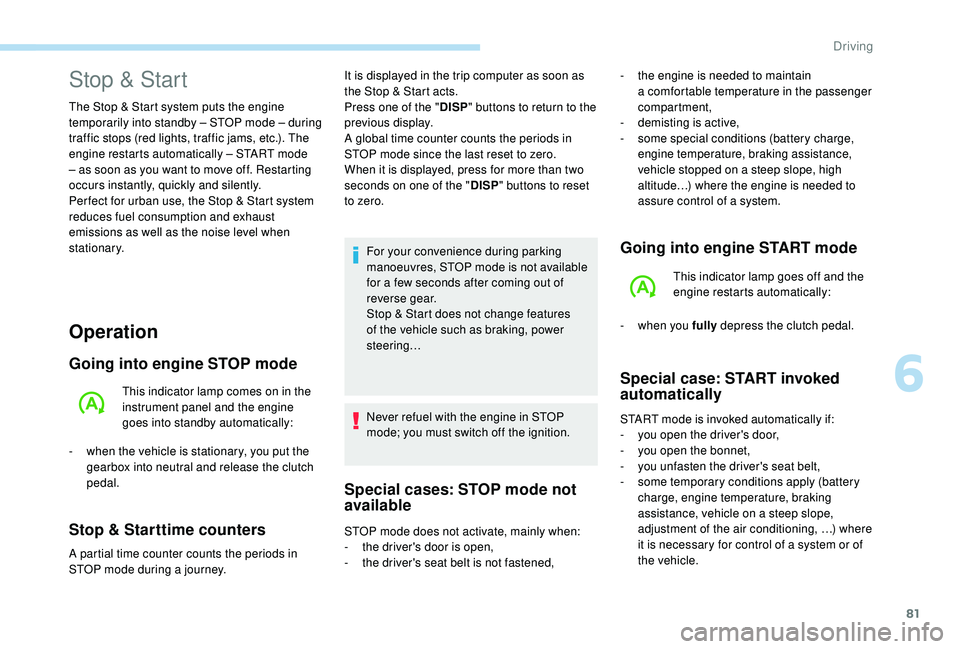
This indicator lamp comes on in the
instrument panel and the engine
goes into standby automatically:
-
w
hen the vehicle is stationary, you put the
gearbox into neutral and release the clutch
pedal.
Stop & Starttime counters
A partial time counter counts the periods in
STOP mode during a journey. For your convenience during parking
manoeuvres, STOP mode is not available
for a
few seconds after coming out of
reverse gear.
Stop & Start does not change features
of the vehicle such as braking, power
steering…
Never refuel with the engine in STOP
mode; you must switch off the ignition.
Special cases: STOP mode not
available
Stop & Start
The Stop & Start system puts the engine
temporarily into standby – STOP mode – during
traffic stops (red lights, traffic jams, etc.). The
engine restarts automatically – START mode
– as soon as you want to move off. Restarting
occurs instantly, quickly and silently.
Per fect for urban use, the Stop & Start system
reduces fuel consumption and exhaust
emissions as well as the noise level when
stationary. -
t
he engine is needed to maintain
a comfortable temperature in the passenger
compartment,
-
d
emisting is active,
-
s
ome special conditions (battery charge,
engine temperature, braking assistance,
vehicle stopped on a
steep slope, high
altitude…) where the engine is needed to
assure control of a
system.
Going into engine START mode
This indicator lamp goes off and the
engine restarts automatically:
-
w
hen you fully depress the clutch pedal.
Special case: START invoked
automatically
START mode is invoked automatically if:
- y
ou open the driver's door,
-
y
ou open the bonnet,
-
y
ou unfasten the driver's seat belt,
-
s
ome temporary conditions apply (battery
charge, engine temperature, braking
assistance, vehicle on a
steep slope,
adjustment of the air conditioning, …) where
it is necessary for control of a
system or of
the vehicle.
It is displayed in the trip computer as soon as
the Stop & Start acts.
Press one of the "
DISP" buttons to return to the
previous display.
A global time counter counts the periods in
STOP mode since the last reset to zero.
When it is displayed, press for more than two
seconds on one of the " DISP" buttons to reset
to zero.
STOP mode does not activate, mainly when:
-
t
he driver's door is open,
-
t
he driver's seat belt is not fastened,
6
Driving
Page 85 of 180

83
The units for the speed limits (mph or
km/h) depend on the country you are
driving in.
It should be taken into account so that you
obser ve the speed limit.
For the system to operate correctly when
you change country, the units for speed in
the instrument panel must be those for the
country you are driving in.
The automatic reading of road signs is
a driving assistance system and does not
always display speed limits correctly.
The speed limit signs present on the road
always take priority over the display by the
system.
The system cannot in any circumstances
replace the need for vigilance on the part
of the driver.
The driver must observe the driving
regulations and must adapt the speed of
the vehicle to suit the weather and traffic.
It is possible for the system to not display
the speed limit if it does not detect a
speed
limit sign within a
preset period.
The system is designed to detect signs
that conform to the Vienna Convention on
road signs. To maintain correct operation of the
system: regularly clean the area in front of
the camera.
The internal sur face of the windscreen can
also become misted around the camera.
In humid and cold weather, demist the
windscreen regularly.
Activation/deactivation
F In the touch screen, select
the " Configuration " menu
then " General " and activate
" Configuration of traffic signs
recognition ".
Activation is taken into account after about
1
second.
Set the associated alerts ( no aler t, visual
alerts or visual and sound alerts ):
F
I
n " Speeding alert ", set "Notification
alert " then " Level of notification ".
F
I
n " Overtaking alert ", set "Notification
alert ".
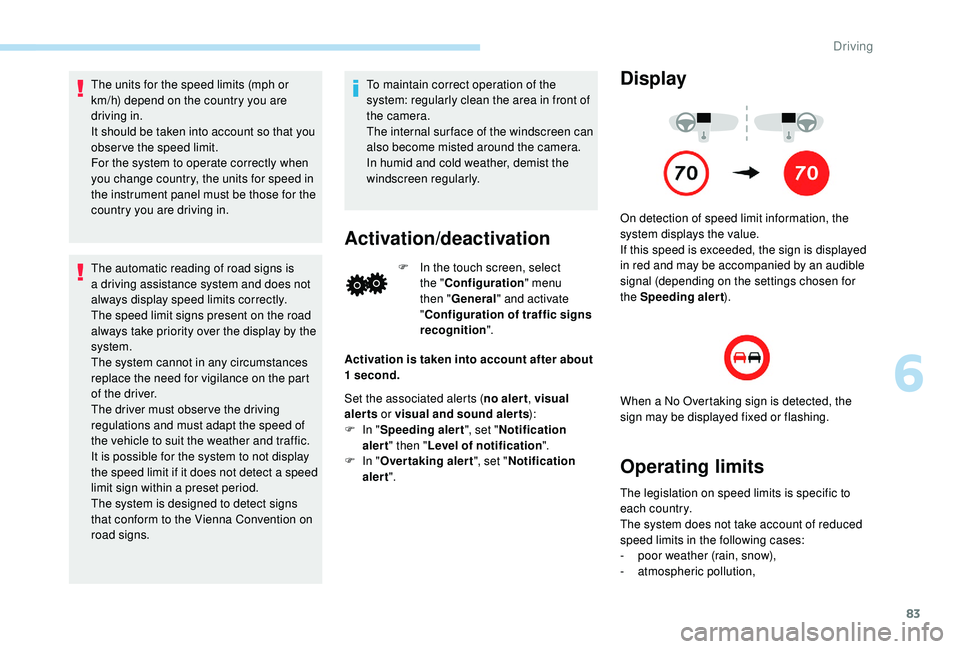
Display
On detection of speed limit information, the
system displays the value.
If this speed is exceeded, the sign is displayed
in red and may be accompanied by an audible
signal (depending on the settings chosen for
the Speeding alert ).
When a
No Overtaking sign is detected, the
sign may be displayed fixed or flashing.
Operating limits
The legislation on speed limits is specific to
each country.
The system does not take account of reduced
speed limits in the following cases:
-
p
oor weather (rain, snow),
-
a
tmospheric pollution,
6
Driving
Page 95 of 180

93
F If you have a compressor (for example the
one provided in the temporary puncture
repair kit), check the pressure of all four
tyres. If it is not possible to do this check
immediately, drive carefully at reduced
speed.
or
F
I
n the event of a puncture, use the
temporary puncture repair kit or the spare
wheel (depending on equipment).
The alert is kept active until the system is
reinitialised.
Reinitialisation
Before reinitialising the system, ensure
that the pressures of the four tyres
are correct for the conditions of use
of the vehicle and conform to the
recommendations on the tyre pressure
label.
The under-inflation alert can only be relied
on if the reinitialisation of the system has
been done with the pressures in the four
tyres correctly adjusted.
The under-inflation detection system
does not give a
warning if a pressure is
incorrect at the time of reinitialisation. The system must be reset with the ignition on
(switch in the " ON" position or " ON" mode) and
the vehicle stationary.
F
O
pen the glove box.
F
P
ress the reinitialisation button.F
W
hen the indicator flashes
3
times in the instrument panel,
the reinitialisation is complete.
F
W
ait a few minutes before switching off
the ignition (switch to " ACC" or " LOCK "
position, or " OFF" m o d e).
The new pressure parameters saved are
treated as reference values by the system.
Snow chains
The system does not have to be
reinitialised after fitting or removing snow
chains.
The under-inflation alert can only be relied
on if the reinitialisation of the system has
been done with the pressures in the four
tyres correctly adjusted.
The system must be reinitialised after any
adjustment to the pressures of one or more
tyres, and after changing one or more wheels.
A label on the driver's side centre pillar reminds
you of this.
6
Driving
Page 109 of 180

107
If a pressure of 2 bars is not reached after
7 minutes, this indicates that the tyre is not
repairable; contact a
PEUGEOT dealer or
a
qualified workshop for assistance.
F
O
nce the correct pressure is reached, put
the switch to the " O" position.
F
R
emove the kit then stow it. Do not drive more than 120
mph
(200 km/h) with the repaired tyre; see
a PEUGEOT dealer or a qualified
workshop to change the tyre.
Tyre under-inflation detection After a tyre repair, the warning
lamp will remain on until the
system is reset.
For more information on Tyre under-
inflation detection , refer to the
corresponding section.
Should the pressure of one or more tyres
be adjusted, it is necessary to reinitialise
the under-inflation detection system.
For more information on Tyre under-
inflation detection , refer to the
corresponding section.
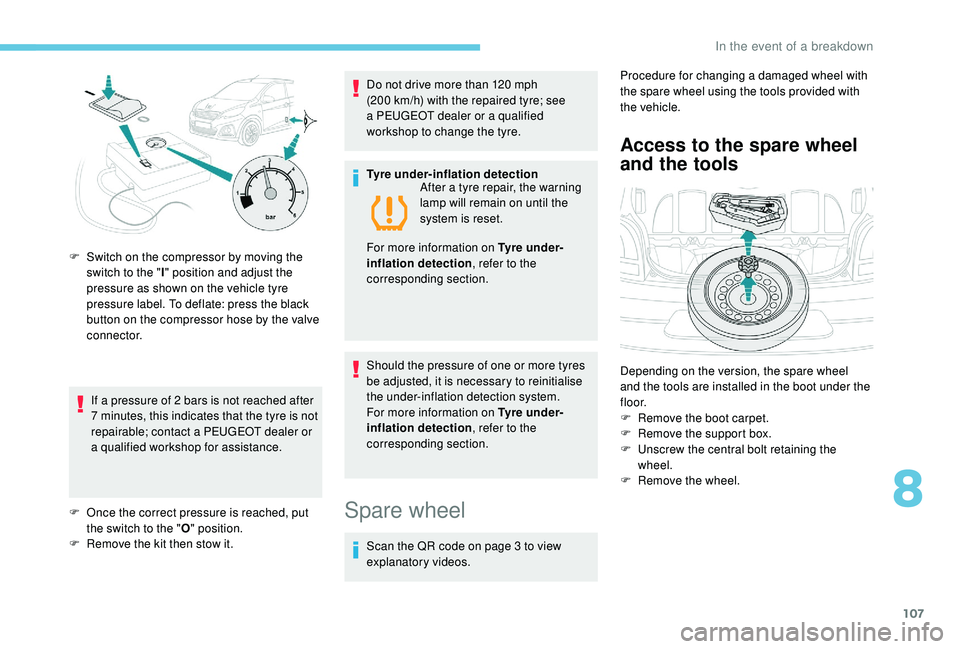
F
S
witch on the compressor by moving the
switch to the " I" position and adjust the
pressure as shown on the vehicle tyre
pressure label. To deflate: press the black
button on the compressor hose by the valve
connector.
Spare wheel
Scan the QR code on page 3 to view
e xplanatory videos. Procedure for changing a
damaged wheel with
the spare wheel using the tools provided with
the vehicle.
Access to the spare wheel
and the tools
Depending on the version, the spare wheel
and the tools are installed in the boot under the
f l o o r.
F
R
emove the boot carpet.
F
R
emove the support box.
F
U
nscrew the central bolt retaining the
wheel.
F
R
emove the wheel.
8
In the event of a breakdown