Page 225 of 298

Ashtray
XTo open :push th elower section of cover :.
The cover opens.
XTo remove th einsert: lift insert =up; and
out .
XTo re-install th einsert: press insert =into
th eh older until it engages.
Cigarette lighter
GWARNIN G
You can burn yourself if you touch th ehot
heating elemen torthesocke tofthecigarette
lighter.
In addition ,flammabl ematerials can ignit eif:
Rtheh ot cigarette lighte rfall s
Rac hild hold sthe hot cigarette lighte rto
objects ,for exampl e
There is ariskoff irea nd injury.
Always hold th ecigarette lighte rbytheknob.
Always mak esuret hatthe cigarette lighte ris
out of reac hofchildren .Never leav echildren
unsupervised in th evehicle.
Your attention mus talways be focused on th e
traffic conditions. Only use th ecigarette lighte r
when road and traffic condition spermit .
XTurn th eSmartKey to position 2in th eigni-
tion loc k(Ypage 116).
XTo open :push th elower section of cover :.
The ashtray opens.
XPress in cigarette lighte r;.
Cigarette lighte r; will pop out automatically
when th eheating elemen tisred-hot .
12Vsocke ts
Gene raln otes
XTurn th eSmartKey to position 1in th eigni-
tion loc k(Ypage 116).
The sockets can be used for accessories wit ha
maximum draw of 18 0W(15 A) .Acces sorie s
include suc hitems as chargers for mobile
phones.
If you use th esockets for lon gperiods when th e
engin eisswitched off ,the battery may dis-
charge .
iAn emergenc ycut-out ensures that th eon-
boar dvoltag edoes no tdropt oo low. If th eon-
boar dvoltag eistoolow, th epowe rtot he
sockets is automatically cut .This ensures
that there is sufficien tpowe rtos tart th e
engine.
Socket in th efront center console
XTo open :push th elower section of cover :.
The stowage compartmen topens.
XLiftupt hecover of socke t;.
Features223
Stowage and features
Z
Page 226 of 298

mbrace
General notes
Yo um usth aveal icens eagreemen ttoactivate
the mbrac eservice. Make sure tha tyou rsystem
is activate dand operational .Tologin, press the
ï MB Info call button. If any of the steps
mentioned ar enot carried out, the syste mmay
not be activated.
If yo uhaveq uest ions abou tthe activation, con-
tac tone of the following telephone hotlines:
RUSA: Mercedes-Benz Customer Assistance
Center at 1-800-FOR-MERCedes
(1-800-367-6372) or 1-866-990-9007
RCanada: Customer Service at
1-888-923-8367
Shortlya fter successfull yregistering with the
service, auserIDa nd password will be sent to
yo ubyp ost.
USA only: yo ucan uset hisp assword to lo gonto
the mbrac eareau nder "Owners Online "at
http://www.mbusa.com .
Th es ystemisa vailable if:
Rit hasbeena ctivate dand is operational
Rthe corresponding mobil ephone network is
availabl efor transmitting data to the Cus-
tome rCenter
Ras ervice subscription is available
Rthe starterb atter yiss ufficiently charged
iDetermining the locatio nofthe vehicl eona
mapiso nlyp ossibl eif:
RGP Sreceptio nisa vailable.
Rthe vehicl eposit ionc an be forwarde dto
the Customer Assistanc eCenter.
The mbrac esystem
To adjus tthe volum edurin gac all,procee das
follows:
XPress the WorX button on the multi-
function steering wheel.
or
XUse the volum econtrolle rofthe audi osys-
tem/COMAND.
Th es ystemo ffers variou sservices ,e.g.:
RAutomatic and manua lemergency call
RRoadside Assistanc ecall
RMB Info call USA only: yo
ucan find information and a
description of al lavailable features under "Own-
ers Online "athttp://www.mbusa.com.
System self-test
Aftery ouhave switched on the ignition, the sys-
tem carries ou taself-diagnosis.
Am alfunctio nint he syste mhasbeen detected
if one of the following occurs:
RTh eindicator lamp in the SOS button does not
com eond uringthe syste mself-test.
RTheindicator lamp in the FRoadside
Assistanc ebutton does not ligh tupd urin g
self-diagnosis of the system.
RTh eindicator lamp in the ïMB Info call
button does not ligh tupd urin gself- diagnosis
of the system.
RTh eindicator lamp in one or mor eofthe fol-
lowing buttons continue stolightup red after
the syste mself-diagnosis:
-SOS button
-F Roadside Assistanc ecallb utton
-ï MB Info call button
RAftert he syste mself-diagnosis ,the Inoper‐ativeorServiceNotActivatedmessage
appear sinthe multifunction display.
If am alfunctio nisindicated as outlined above,
the syste mmaynot operate as expected. In the
event of an emergency,h elpw illh avetob e
summoned by other means.
Have the syste mchecked at the neares tauthor-
ize dM ercedes-Benz Center or contact the fol-
lowing service hotlines:
RUSA: Mercedes-Benz Customer Assistance
Center at 1-800-FOR-MERCedes
(1-800-367-6372) or 1-866-990-9007
RCanada: Customer Service at
1-888-923-8367
224Features
Stowag eand featur es
Page 227 of 298

Emergency call
Important safety notes
GWARNING
It can be dangerous to remain in th evehicle,
even if you have pressed th eSOS button in an
emergency if:
Ryou see smoke inside or outside of th evehi-
cle ,e.g.ift here is afirea fter an accident
Rthev ehicle is on adangerous sectio nof
road
Rth ev ehicle is no tvisible or canno teasily be
seen by other road users, particularly when
dark or in poor visibilityc onditions
Thereisar isk of an accidenta nd injury.
Leavet hevehicle immediately in this or simi-
lar situations as soon as it is safe to do so.
Movetoas afe locationalongw ith other vehi-
cle occupants. In suchs ituations,secure the
vehicle in accordanc ewith national regula-
tions ,e.g.w ith aw arning triangle.
You must have alicens eagreementtoa ctivate
th em brace service. Makes ure that your system
is activated and operational. To register, press
the ï MB Info call button.Ifa ny of thesteps
mentioned are no tcarried out,t hesystem may
no tbea ctivated.
If you have questionsa bout theactivation,c on-
tac tone of th efollowingt elephone hotlines:
RUSA: Mercedes-Ben zCustomerA ssistance
Center at 1-800-FOR-MERCedes
(1-800-367-6372 )or1 -866-990-9007
RCanada: Customer Service at
1-888-923-8367
General notes
An emergencyc all is dialed automatically if an
air bag or Emergency TensioningD evice is trig-
gered.
iYou cannot end an automatically triggered
emergency
c all yourself.
An emergencyc all can also be initiated man-
ually.
As soon as the emergencyc all has been initi-
ated, the indicator lamp in the SOS button
flashes. The multifunction display shows the
Connecting Call
message. The audio output is muted.
Once the connection has been made, the
Call
Connectedmessage appears in the multifunc-
tion display.
All important information on the emergencyi s
transmitted, for example:
Rcurrent location of the vehicle (as determined
by the GPS system)
Rvehicle identification number
Rinformation on the severity of the accident
Shortly after the emergencyc all has been initi-
ated, avoice connection is automatically estab-
lished between the Customer Assistance Center
and the vehicle occupants.
RIf the vehicle occupantsr espond, the
Mercedes-Benz Customer Assistance Center
attempt stoget more information on the
emergency.
RIf there is no response from the vehicle occu-
pants, an ambulance is immediately sent to
the vehicle.
If no voice connection can be established to the
Mercedes-Benz Customer Assistance Center,
the system has been unable to initiate an emer-
gency call.
This can occur, for example, if the relevant
mobile phone network is not available. The indi-
cator lamp in the SOS button flashes continu-
ously.
The Call Failed
message appears in the mul-
tifunction display and must be confirmed.
In this case, summon assistance by other
means.
Making an emergency call
Features225
Stowage and features
Z
Page 228 of 298

XTo initiate an emergencycallm anually:
press cover :briefl ytoo pen.
XPress SOS button ;briefly.
The indicator lamp in SOS button ;flashes
unti lthe emergency cal lisconcluded.
XWait for avoice connectio ntothe Mercedes-
Benz Customer Assistance Center.
XAfter the emergency call, close cover :.
iIf the mobilephone network is unavailable,
mbrace will not be able to make the emer-
genc ycall. If yo uleave the vehicl eimmedi-
ately afte rpressing the SOS button, yo uwill
not know whethe rmbrace place dthe emer-
genc ycall. In thisc ase, always summon assis-
tance by othe rmeans.
Breakdow nassistanc ebutton
XPress Roadside Assistance button :.
Thi sinitiates acalltot he Mercedes-Benz Cus-
tomerA ssistance Center.
The indicator lamp in Roadside Assistance
button :flashesw hilethe cal lisactive. The
multifunctio ndisplay shows the Connect‐
ing Callmessage. The audi ooutputi s
muted.
If ac onnectio ncan be made ,the CallC on‐
nectedmessage appears in the multifunction
display.
If am obilephone network and GP Sreception
are available ,the system transfers data to the
Mercedes-Benz Customer Assistance Center,
for example:
RCurrent location of the vehicle
RVehicl eide ntificatio nnumber
iThe display of the multimedia system indi-
cate sthatac allisa ctive. During the call, you
can change to the navigatio nmenu by press- ing the NAVI button on COMAND, for exam-
ple.
iVoice outputi
snot available.
Av oice connectio nise stablished between the
Mercedes-Benz Customer Assistance Center
and the vehicl eoccupants.
From the remote malfunctio ndiagn osis, the
Mercedes-Benz Customer Assistance Center
can ascertain the nature of the problem
(
Ypage 227).
The Mercedes-Benz Customer Assistance Cen-
ter either send saqualified Mercedes-Benz tech-
nician or makes arrangements for your vehicle
to be transported to the nearestM ercedes-Benz
Service Center.
Yo um aybe chargedf or servicessuchasr epair
work and/or towing.
Further details are available in your mbrace
manual.
iThe system hasn ot been able to initiate a
Roadside Assistance call, if:
Rthe indicator lamp for Roadside Assistance
cal lbutton :is flashing continuously.
Rno voice connectio ntothe Mercedes-Benz
Customer Assistance Center wa sestab-
lished.
Thi scan occurift he relevant mobil ephone
network is not available ,for example.
The CallF ailed
message appears in the
multifunctio ndisplay.
XTo en dacall:press the ~button on the
multifunctio nsteering wheel.
or
XPress the corresponding multimedia system
button for ending aphone call.
MB Info cal lbutton
226Features
Stowag eand featur es
Page 229 of 298

XPress MB Info call button:.
This initiates acall to the Mercedes-Benz Cus-
tomer Assistance Center.
The indicator lamp in MB Info call button :
flashes while the connection is being made.
The multifunction display shows the Con‐
nectingCallmessage. The audio system is
muted.
If ac onnection can be made, the Call Con‐
nectedmessage appears in the multifunction
display.
If am obile phone networ kand GPS reception
are available, the system transfers data to the
Mercedes-Benz Customer Assistance Center,
for example:
Rcurrentl ocation of the vehicle
Rvehicle identification number
iThe display of the multimedia system indi-
cates that acall is active. During the call, you
can change to the navigation menu by press-
ing the NAVI button on COMAND,f or exam-
ple.
Voice output is not available.
Av oice connection is established between the
Mercedes-Benz Customer Assistance Center
and the vehicle occupants.
You receive information about operating your
vehicle, about the nearest authorized
Mercedes-Benz Center and about other prod-
ucts and services from Mercedes-Benz.
USA only: you can find further information on
the mbrace system under "Owners Online" at
http://www.mbusa.com.
iThe system has not been able to initiate an
MB Info call, if:
Rthe indicator lamp in MB Info call button :
is flashing continuously.
Rno voice connection to the Mercedes-Benz
Customer Assistance Center was estab-
lished.
This can occur if the relevant mobile phone
networ kisnot available, for example.
The Call Failed
message appears in the
multifunction display.
XTo end acall: press the ~button on the
multifunction steerin gwheel.
or
XPress the corresponding multimedia system
button for ending aphone call.
Call priority
When service calls are active, e.g. Roadside
Assistance or MB Info calls, an emergencyc all
can still be initiated. In this case, an emergency
call will take priority and override all other active
calls.
The indicator lamp of the respective button
flashes until the call is ended.
An emergencyc all can only be terminated by the
Mercedes-Benz Customer Assistance Center.
All other calls can be ended by pressing:
Rthe ~ button on the multifunction steering
wheel
Rthe corresponding button on the audio sys-
tem or on COMAND for ending atelephone
call
iWhen acall is initiated, the audio system is
muted. The mobile phone is no longer con-
nected to COMAND.H owever, if you want to
use your mobile phone, do so only when the
vehicle is stationary and in asafe location.
Vehicle Health Check
With the Vehicle Health Check, the Customer
Assistance Center can provide improved sup-
port for problems with your vehicle. During an
existin gcall, vehicle data is transferred to the
Customer Assistance Center. The customer ser-
vice representative can use the received data to
decide what kind of assistanc eisrequired. You
are then ,for example, guided to the nearest
Mercedes-Benz ServiceC enter orarecovery
vehicle is called.
If vehicle data needs to be transferred during an
MB Info call or aRoadside Assistance call, this is
initiated by the Customer Assistance Center.
You will see the Roadside Assistance Con‐
nectedmessage in the COMAND display. If the
vehicle remotem alfunction diagnosis can be
started, the Request for vehicle diagno‐
sisreceived.Startvehiclediagnosis?message appears in the display.
XConfirm the message with Yes.
XWhen theVehicle diagnosis: Pleasestart ignitionmessage appears, turn the
SmartKey to position 2in the ignition lock
(
Ypage 116).
XWhen the Please follow the instruc‐tions received by phone and moveyour vehicle to asafe positionmes-
Features227
Stowage and features
Z
Page 230 of 298

sage appears, follow the customer service
representative's instructions.
The message in the displaydisappears.
If you select Cancel
the remote malfunction
diagnosis is canceled completely.
The vehicle operating state check begins. You
will see the Vehicle
diagnosisactivatedmessage.
When the diagnosis is completed, the Trans‐
fer vehicle diagnostics data (Voiceconnection may be interrupted duringdatatransfer)message appears. The vehicle
data can now be sent to the Customer Assis-
tance center.
XPress OKto confirm the message.
The voice connection with the Customer
Assistance Center is terminated.
You will see the Vehicle diagnosis:
Transferring data...message.
The vehicle data is sent to the Customer
Assistance Center.
Depending on what the customer service rep-
resentative agreed with you, the voice connec-
tion is re-established after the transfer is com-
plete. If necessary, you will be contacted at a
later time by another means, e.g. by e-mail or
phone.
Another function of the Vehicle Health Check is
the transfer of service data to the Customer
Assistance Center. If aservice is overdue, the
COMAND displays howsamessage about vari-
ous special offers at your workshop.
USA only: this information can also be called up
under "Owners Online" at http://
www.mbusa.com.
Information on the data stored in the vehicle
(
Ypage 28).
Information on Roadside Assistance
(
Ypage 25).
Garage door opener
General notes
The HomeLink®garage door opener integrated
in the rear-view mirror allowsy ou to operate up
to three different door and gate systems.
Use the integrated garage door opener only on
garage doors that:
Rhave safety stop and reverse features and
Rmeet current U.S. federal safety standards Once programed, the integrated garage door
opener in the rear-view mirror will assume the
function of the garage door system's remote
control. Please also read the operating instruc-
tions for the garage door system.
When programming
agarage door opener, park
the vehicle outside the garage. Do not run the
engine while programming.
Certain garage door drives are incompatible
with the integrated garage door opener. If you
have difficulty programing the integrated garage door opener, contact an authorized Mercedes-
Benz Center.
Alternatively, you can call the following tele-
phone assistance services:
RUSA: Mercedes-Benz Customer Assistance
Center at 1-800-FOR-MERCedes
RCanada: Customer Service at
1-800-387-0100
RHomeLink®hotline 1-800-355-3515 (free of
charge)
More information on HomeLink
®and/or com-
patible products is also available online at
http://www.homelink.com.
Notes on the declaration of conformity
(
Ypage 26).
USA: FCC ID: CB2HMIHL4
Canada:I C: 279B-HMIHL4
Important safety notes
GWARNING
When you operate or program the garage door
with the integrated garage door opener, per-
sons in the range of movement of the garage
door can become trapped or struck by the
garage door. There is arisk of injury.
When using the integrated garage door
opener, always make sure that nobody is
within the range of movement of the garage
door.
GWARNING
Combustion engines emit poisonous exhaust
gases such as carbon monoxide. Inhaling
these exhaust gases leads to poisoning. There
is ar isk of fatal injury. Therefore never leave
the engine running in enclosed spaces with-
out sufficient ventilation.
228Features
Stowage and features
Page 231 of 298
.
Garage door remote controlAis not included
with the integrated garage door opener.
XTurn the Smar")
Programming
Programming the buttons
Pay attention to the "Important safety notes"
(Ypage 228).
Garage door remote controlAis not included
with the integrated garage door opener.
XTurn the SmartKey to position 2in the igni-
tion lock (Ypage 116).
XSelect one of buttons ;to? to use to con-
trol the garage door drive.
XTo startp rogramming mode: press and
hold one of buttons ;to? on the integrated
garage door opener.
The garage door opener is now in program-
ming mode. After ashort time, indicator
lamp :lights up yellow.
Indicator lamp :lights up yellow as soon as
button ;,=or? is stored for the first time.
If the selected button has already been pro-
gramed, indicator lamp :will only light up
yellow after ten seconds have elapsed.
XRelease button ;,=or?.I ndicator
lamp :flashes yellow.
XTo programt he remote control: point
garage door remote control Atowards but-
tons ;to? on the rear-view mirror at adis-
tance of 2to8in(5to20c m).
XPress and hold button Bon remote control
A until indicator lamp :lights up green.
When indicator lamp :lights up green: pro-
gramming is finished.
When indicator lamp :flashes green: pro-
gramming was successful. The next step is to synchronize the rolling code (
Ypage 229).
XRelease button Bon remote control Afor
the garage door drive system.
If indicator lamp :lights up red: repeat the
programing procedure for the corresponding
button on the rear-view mirror. When doing so, vary the distance between remote control
A
and the rear-view mirror.
The required distance between remote con-
trol Aand the integrated garage door opener
depends on the garage door drive system.
Several attemptsm ight be necessary. You
should test every position for at least
25 seconds before trying another position.
Synchronizing the rolling code
Pay attention to the "Important safety notes"
(Ypage 228).
If the garage door system uses arolling code,
you will also have to synchronize the garage
door system with the integrated garage door
opener in the rear-view mirror. To do this you will
need to use the programming button on the door
drive control panel. The programming button
may be located in different places depending on
the manufact
urer. It is usually located on the
door drive unit on the garage ceiling.
Familiarize yourself with the garage door drive
operating instructions, e.g. under "Program-
ming additional remote controls", before carry-
ing out the following steps.
Your vehicle must be within reach of the garage
door or gate opener drive. Make sure that nei-
ther your vehicle nor any persons/objects are
present within the sweep of the door or gate.
XTurn the SmartKey to position 2in the igni-
tion lock (Ypage 116).
XGet out of the vehicle.
XPress the programming button on the door
drive unit.
Usually,y ou now have 30 seconds to initiate
the next step.
XGet into the vehicle.
XPress previously programed button ;,=
or ? on the integrated garage door opener
repeatedly until the door closes.
The rolling code synchronization is then com-
plete.
Notes on programming the remote con-
trol
Canadianr adio frequency laws require a"break"
(or interruption) of the transmission signals
after broadcasting for afew seconds. Therefore,
these signals may not last long enough for the
integrated garage door opener. The signal is not
recognized during programming. Comparable
Features229
Stowage and features
Z
Page 232 of 298

with Canadian law, some U.S.garage door open-
ers also feature a"break".
Proceed as follows:
Rif you live in Canada.
Rif you have difficulties programming the
garage door opener (regardless of where you live) when following th eprogramming steps.
XPressa nd hold one of buttons ;to? on the
integrated garage door opener.
After ashortt ime, indicator lamp :lightsu p
yellow.
XRelease th ebutton.
Indicator lamp :flashes yellow.
XPressb uttonBof garage door remote con-
trol Afor two seconds, then releaseitf or two
seconds.
XPressb uttonBagain for two seconds.
XRepeat this sequence on button Bof remote
control Auntil indicator lamp :lightsu p
green.
When indicator lamp :lightsupg reen: pro-
grammingisf inished.
When indicator lamp :flashes green: pro-
grammingw as successful. The nex tstepist o
synchronize th erollin gcode.
XRelease button Bof remote control Aof the
garage door drive.
When indicator lamp :lightsupr ed: repeat
th ep rogramming process for th ecorrespond-
ing button on th erear-view mirror. When
doings o, vary th edistanc ebetween remote
control Aand th erear-view mirror.
The required distanc ebetween remote con-
trol Aand th eintegrated garage door opener
depends on th egarage door drives ystem.
Several attemptsm ightbenecessary. You
should tes teveryp osition for at least
25 second sbefore trying another position.
Problems when programming
If you are experiencin gproblems programming
t
h ei ntegrated garage door opener on th erear-
view mirror, tak enoteoft hefollowing instruc-
tions:
RCheck th etransmitter frequenc yused by
garage door driver emote controlAand
whether it is supported .The transmitter fre-
quenc ycan usually be foundont heback of
remote control Afor th egarage door drive.
The integrated garage door opener is com-
patible with devices that have unit swhich operate in th
efrequenc yrange of 28 0to
433M Hz.
RReplace th ebatteries in garage door remote
control A.This increasest helikelihood that
garage door remote control Awill transmit a
stronga nd precise signal to th eintegrated
garage door opener.
RWhen programming, hold remote control A
at varyingd istances and angle sfromb ut-
tons ;to? which you are programming. Try
various angle satadistancebetween 2and
8i nches (5t o20cm) or at th esame angle but
at varyingd istances.
RIfaf urther remote control Ais available for
th es ame garage door drive, repeat th esame
programming steps with this remote control
A.B efore performing these steps, makes ure
that new batteries have been installed in
garage door driver emote controlA.
RNotethatsome remote controls only transmit
for alimited amountoft ime( thei ndicator
lamp on th eremote control goes out) .Press
button Bon remote control Aagain before
transmission ends.
RAlig nthe antenn acable of th egarage door
opener un
it .T his can improve signal recep-
tion/transmission.
Opening/closing th egarage door
After it has been programmed, th eintegrated
garage door opener perform sthe function of the
garage door system remote control. Please also
read th eoperatin ginstructions for th egarage
door system.
XTurn th eSmartKey to position 2in th eigni-
tio nlock (Ypage 116).
XPresse ither button ;,=or? which you
have programmed to operate th egarage
door.
Garage door system with afixed code: indi-
cator lamp :lightsupg reen.
Garage door system with arollin gcode: indi-
cator lamp :flashes green.
The transmitter will transmit asignal as long
as th ebutton is pressed. The transmission is
halted after amaximum of ten second sand
indicator lamp :lightsupy ellow.
XPressbutton;,=or? again if necessary.
230Features
Stowage and features
 1
1 2
2 3
3 4
4 5
5 6
6 7
7 8
8 9
9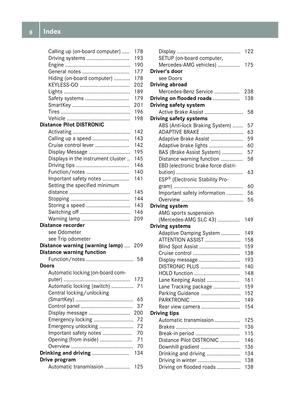 10
10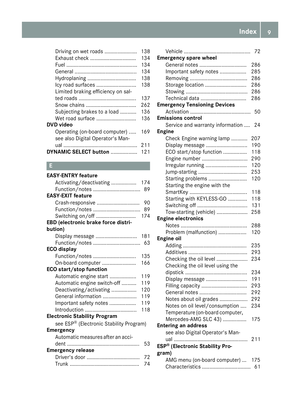 11
11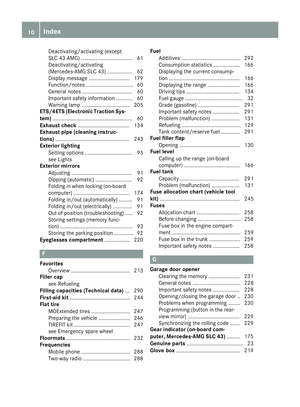 12
12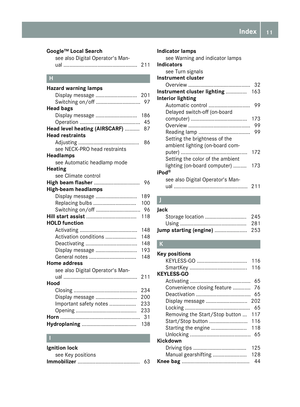 13
13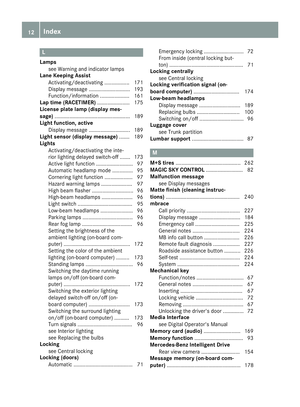 14
14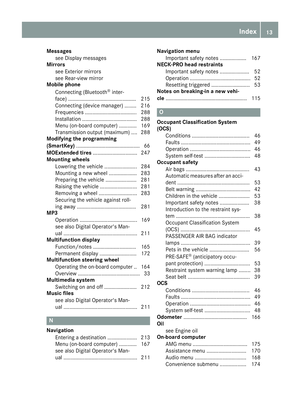 15
15 16
16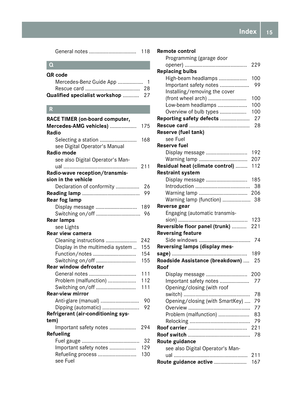 17
17 18
18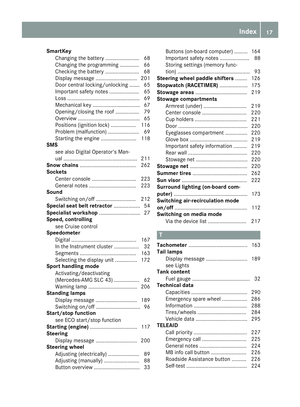 19
19 20
20 21
21 22
22 23
23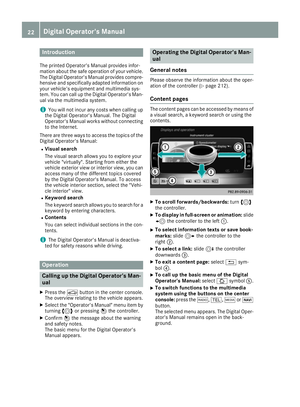 24
24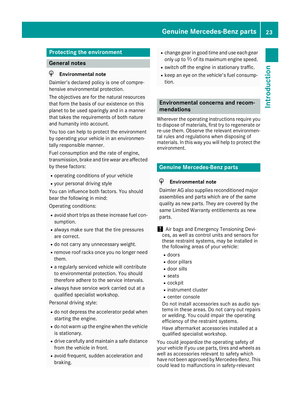 25
25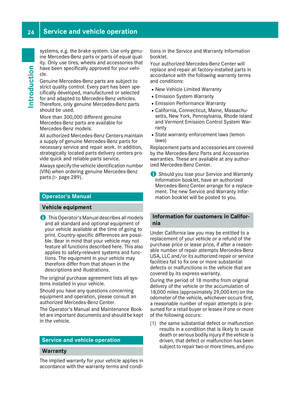 26
26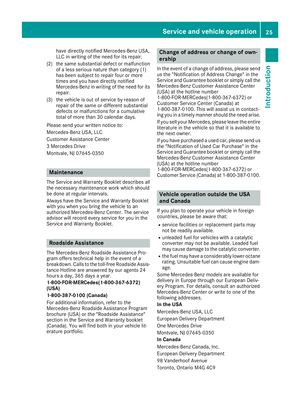 27
27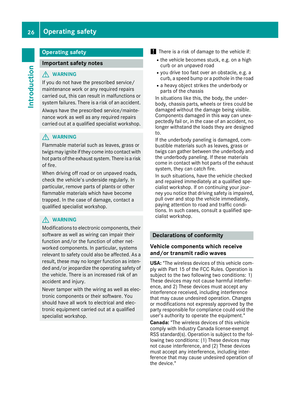 28
28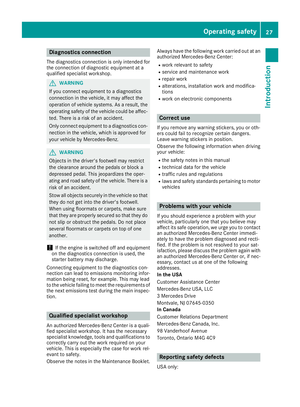 29
29 30
30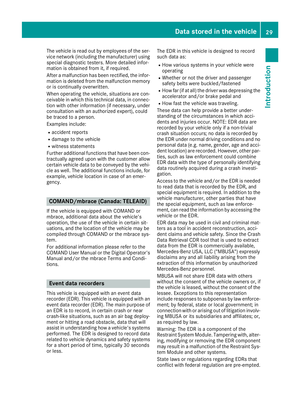 31
31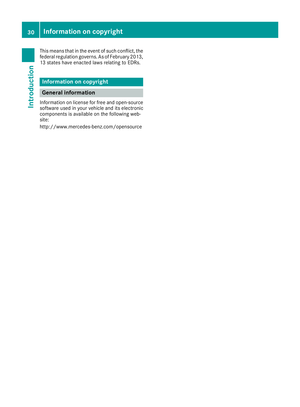 32
32 33
33 34
34 35
35 36
36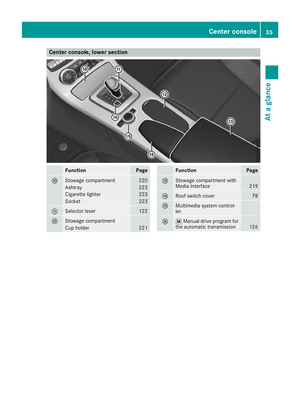 37
37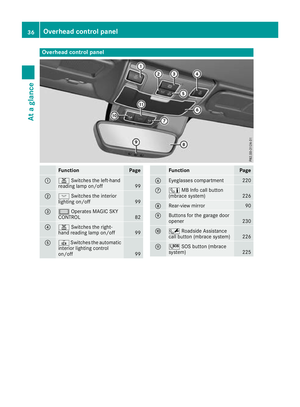 38
38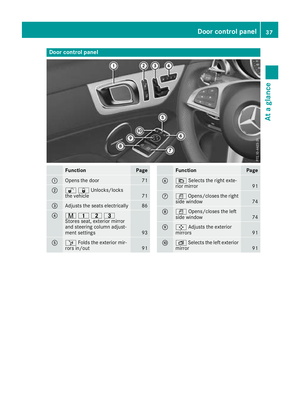 39
39 40
40 41
41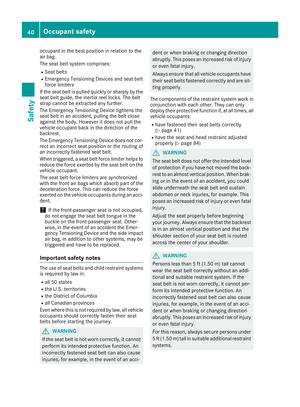 42
42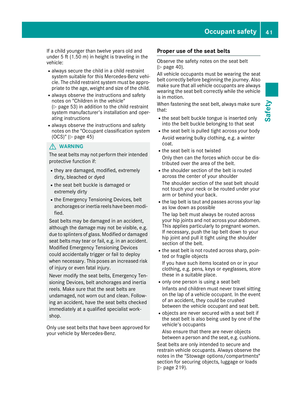 43
43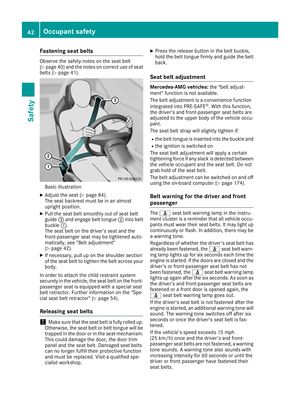 44
44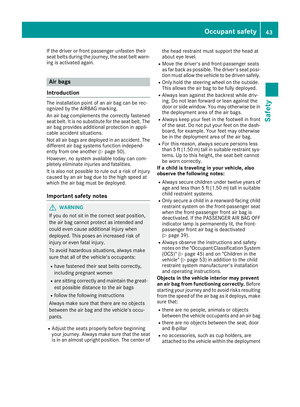 45
45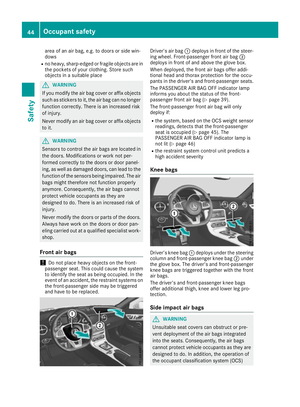 46
46 47
47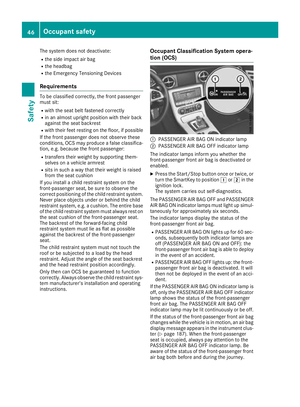 48
48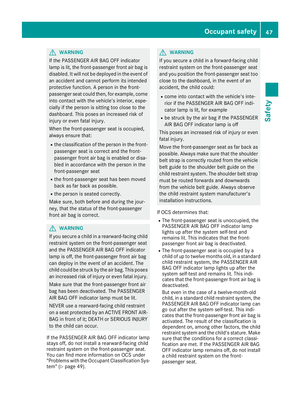 49
49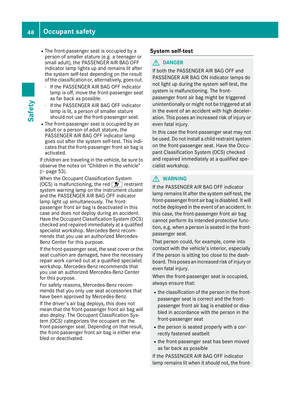 50
50 51
51 52
52 53
53 54
54 55
55 56
56 57
57 58
58 59
59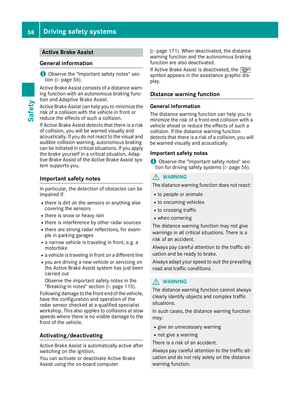 60
60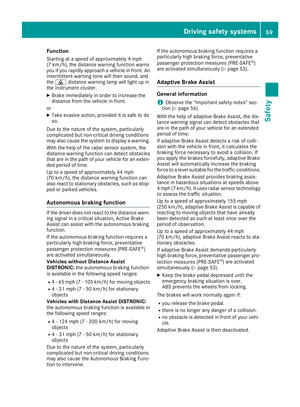 61
61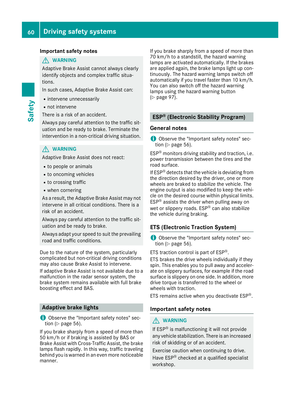 62
62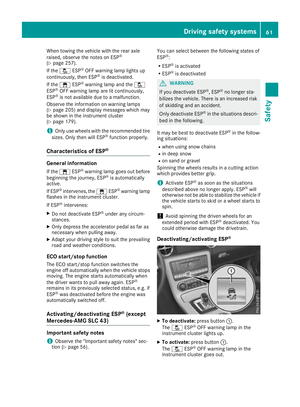 63
63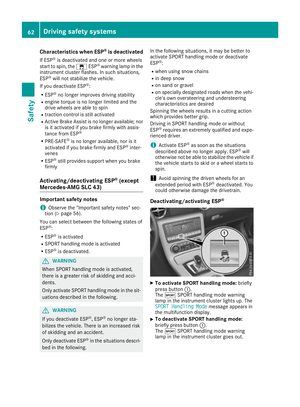 64
64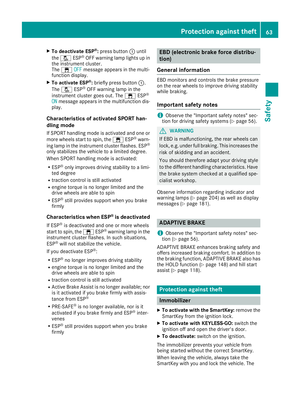 65
65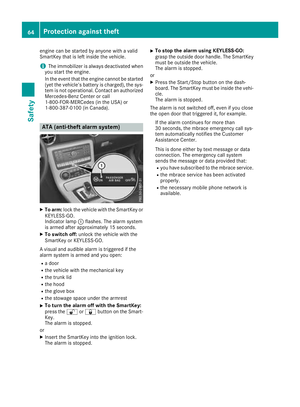 66
66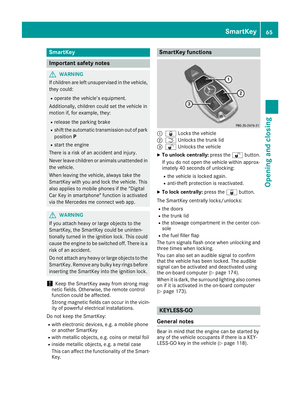 67
67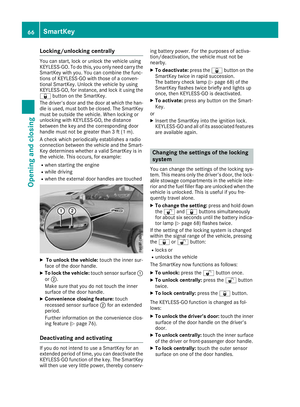 68
68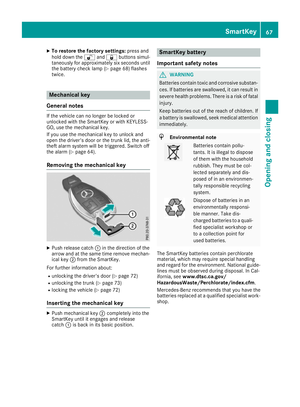 69
69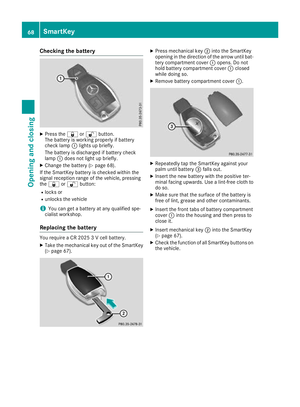 70
70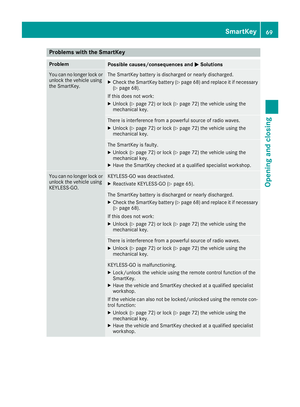 71
71 72
72 73
73 74
74 75
75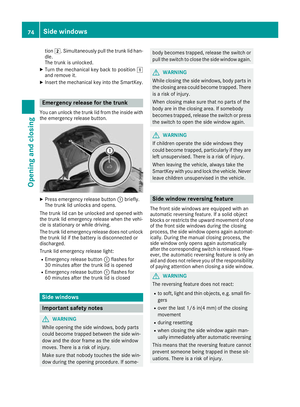 76
76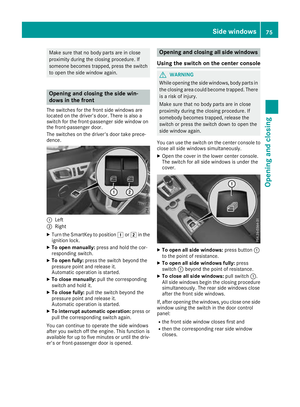 77
77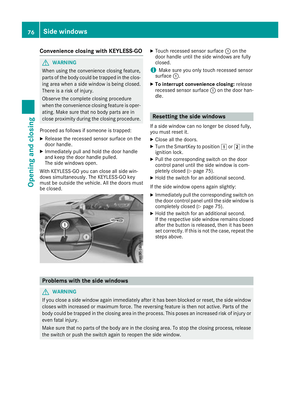 78
78 79
79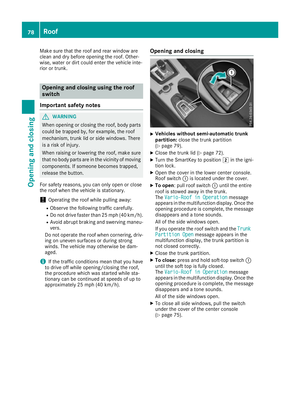 80
80 81
81 82
82 83
83 84
84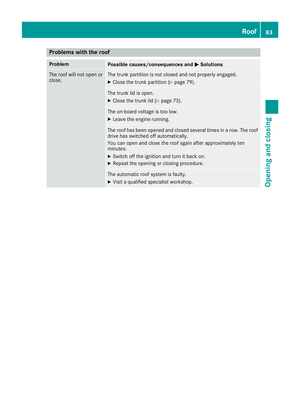 85
85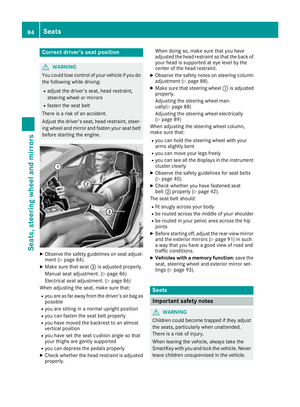 86
86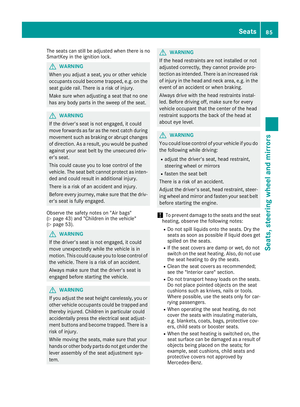 87
87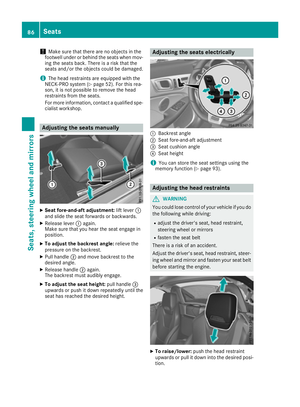 88
88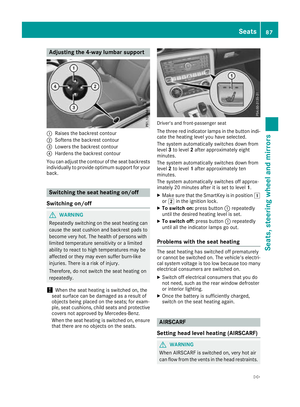 89
89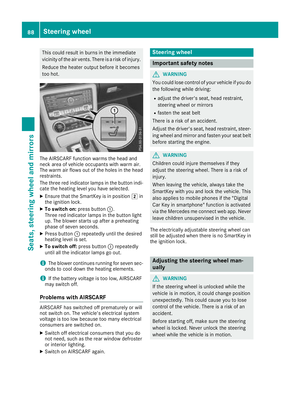 90
90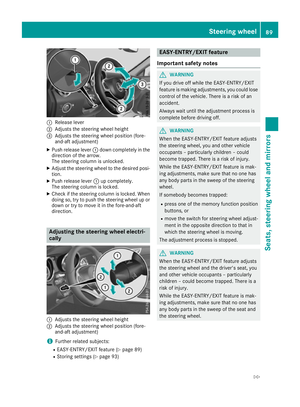 91
91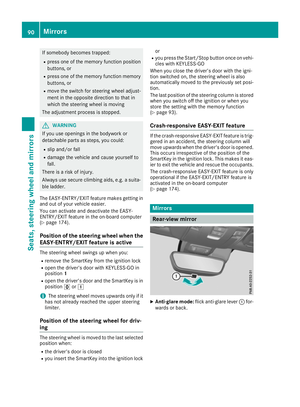 92
92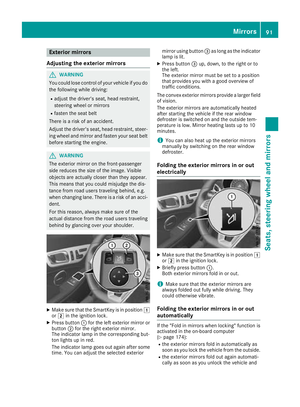 93
93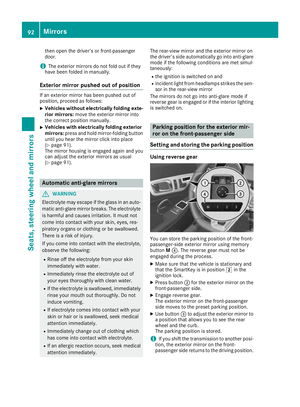 94
94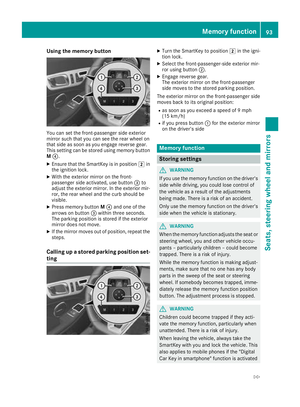 95
95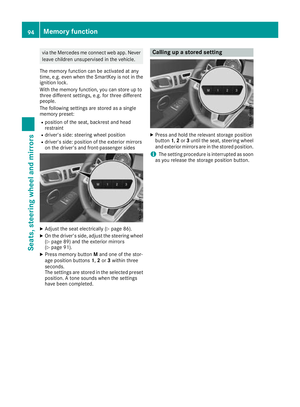 96
96 97
97 98
98 99
99 100
100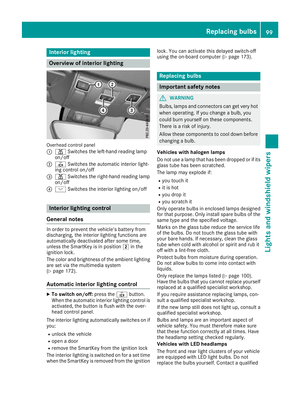 101
101 102
102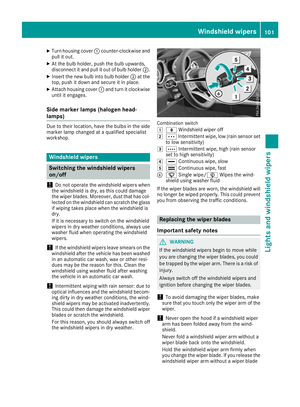 103
103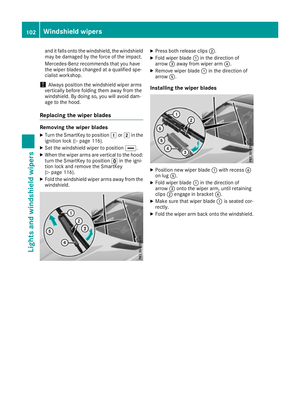 104
104 105
105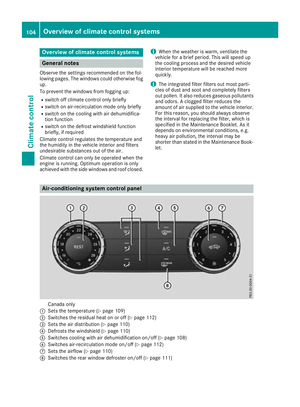 106
106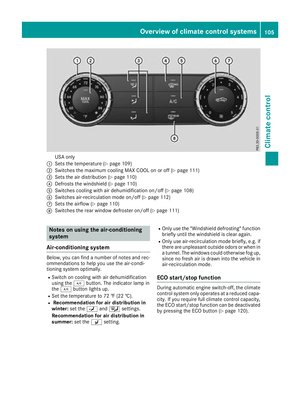 107
107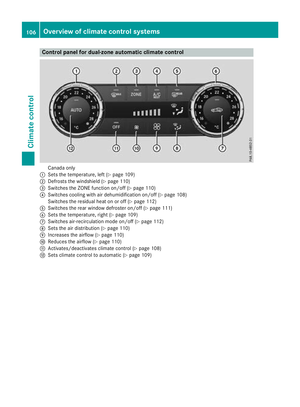 108
108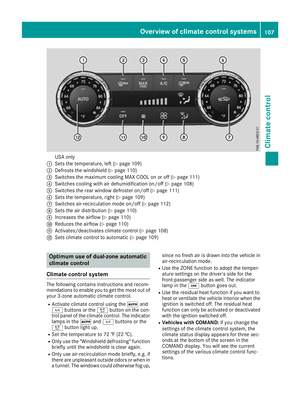 109
109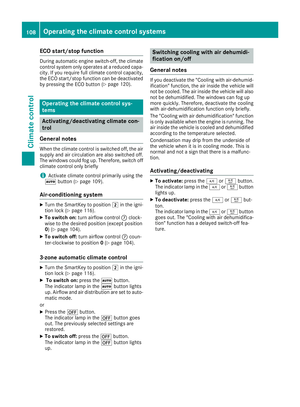 110
110 111
111 112
112 113
113 114
114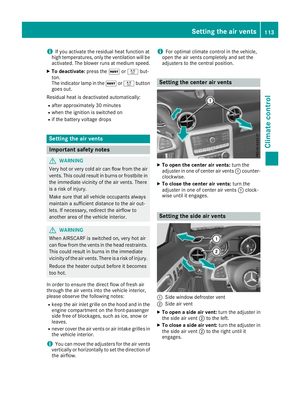 115
115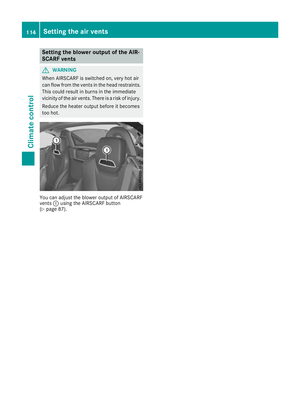 116
116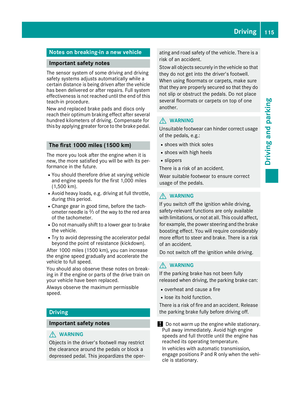 117
117 118
118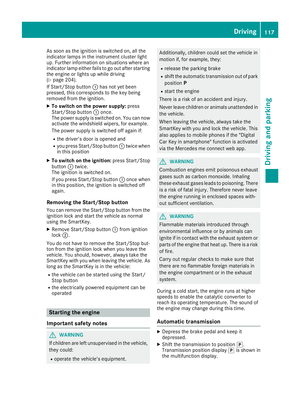 119
119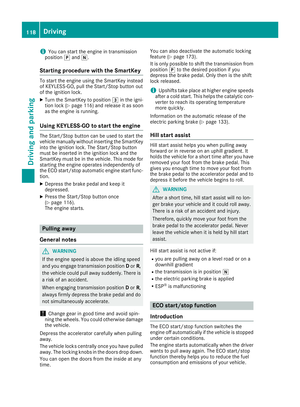 120
120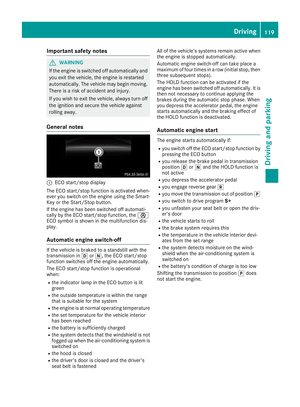 121
121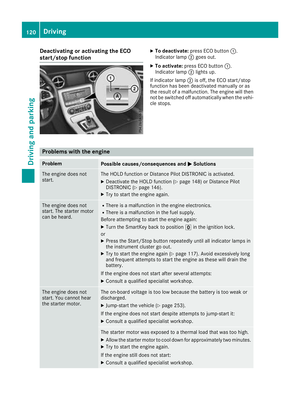 122
122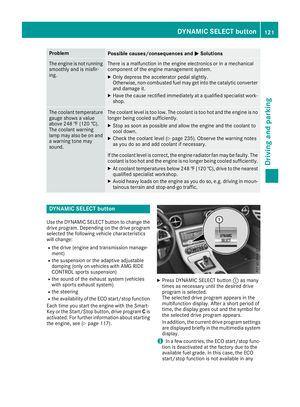 123
123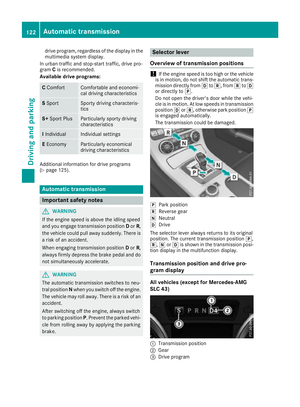 124
124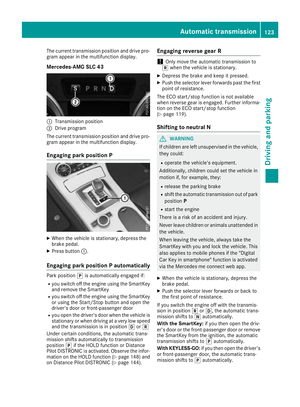 125
125 126
126 127
127 128
128 129
129 130
130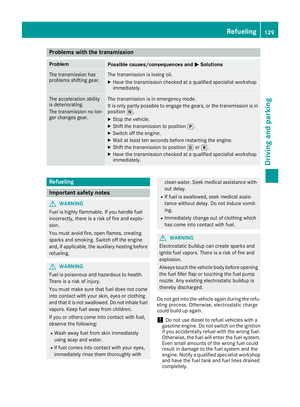 131
131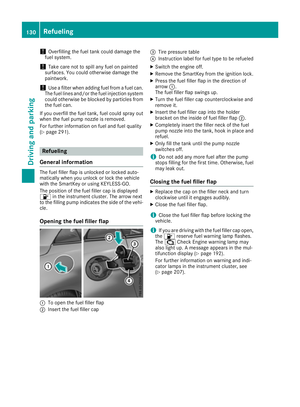 132
132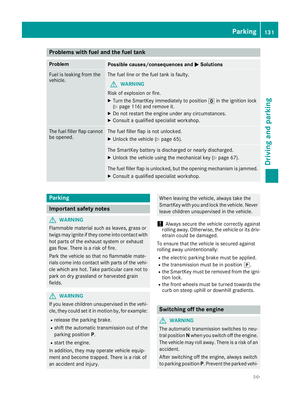 133
133 134
134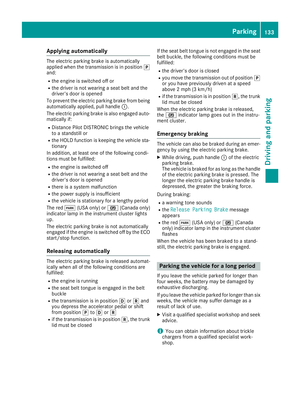 135
135 136
136 137
137 138
138 139
139 140
140 141
141 142
142 143
143 144
144 145
145 146
146 147
147 148
148 149
149 150
150 151
151 152
152 153
153 154
154 155
155 156
156 157
157 158
158 159
159 160
160 161
161 162
162 163
163 164
164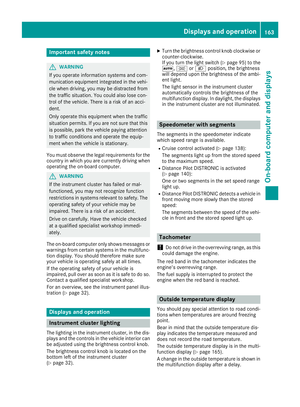 165
165 166
166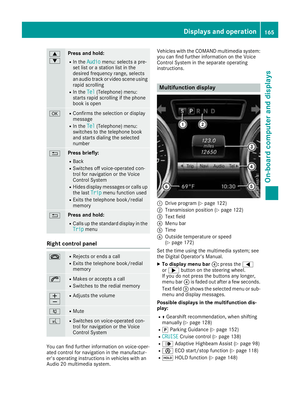 167
167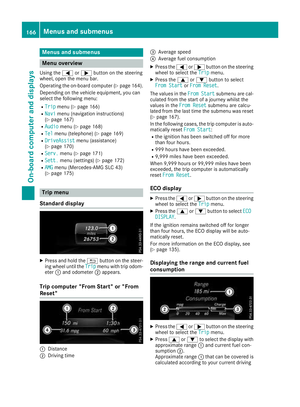 168
168 169
169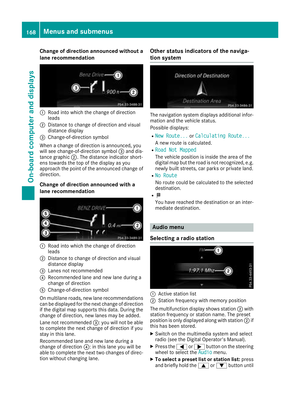 170
170 171
171 172
172 173
173 174
174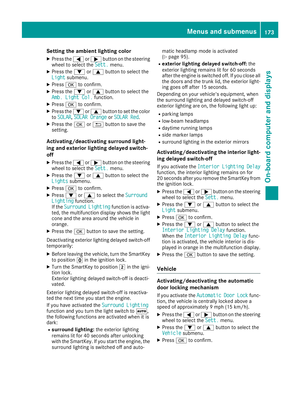 175
175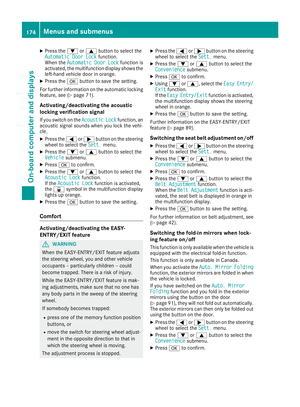 176
176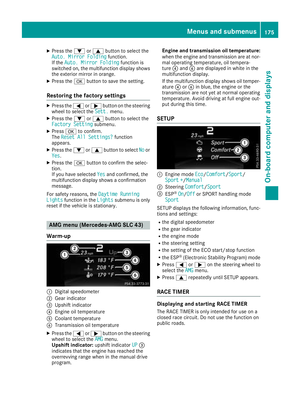 177
177 178
178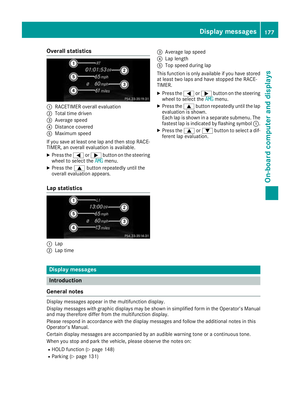 179
179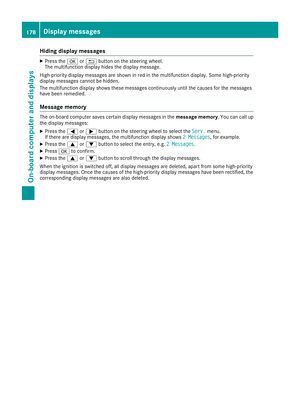 180
180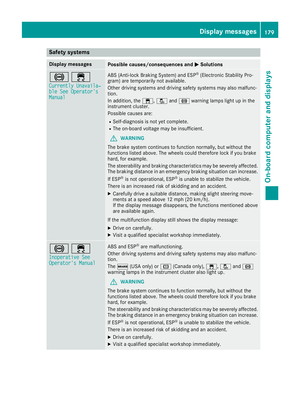 181
181 182
182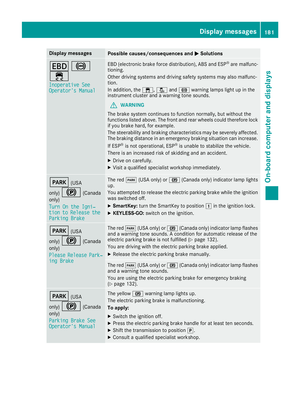 183
183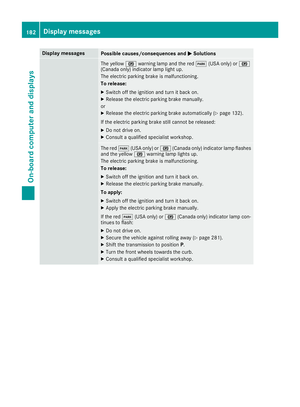 184
184 185
185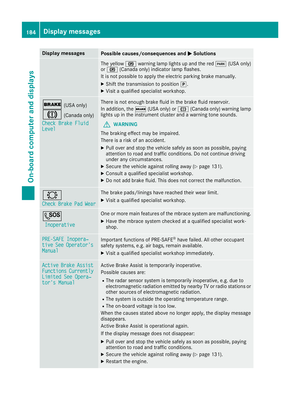 186
186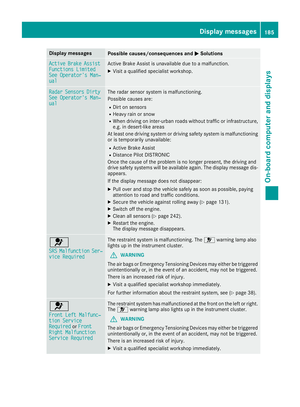 187
187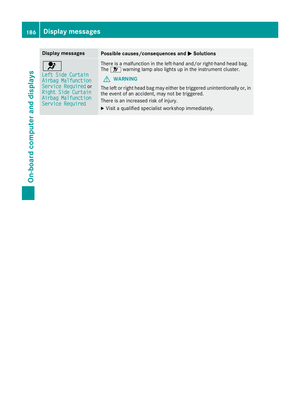 188
188 189
189 190
190 191
191 192
192 193
193 194
194 195
195 196
196 197
197 198
198 199
199 200
200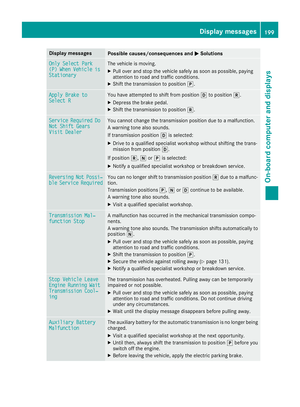 201
201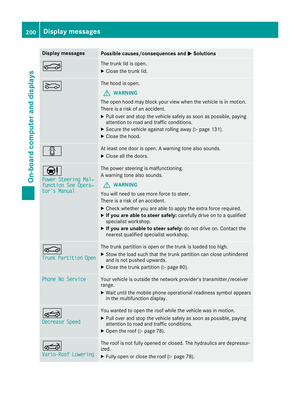 202
202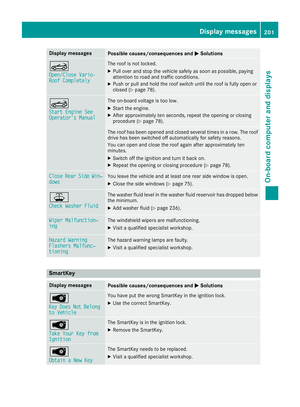 203
203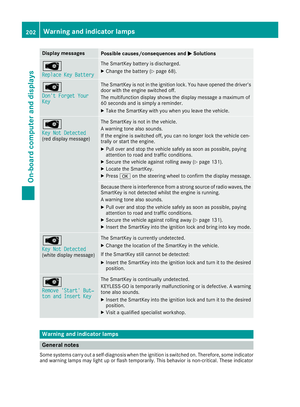 204
204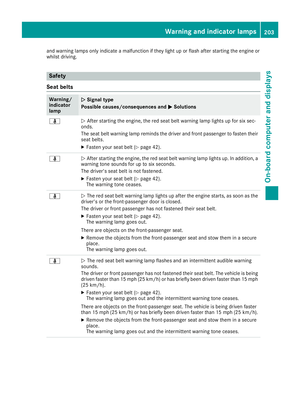 205
205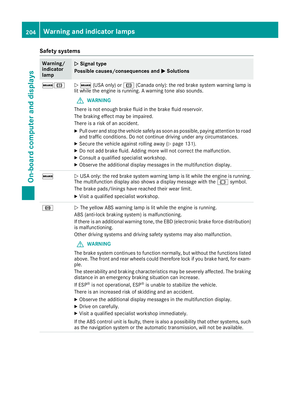 206
206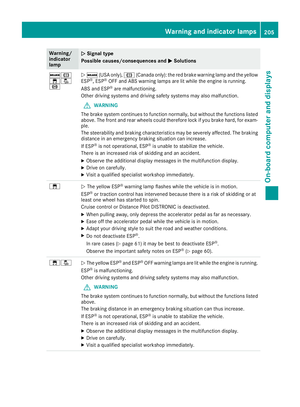 207
207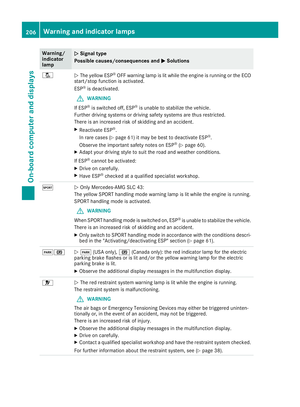 208
208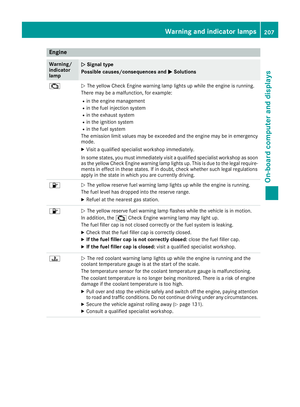 209
209 210
210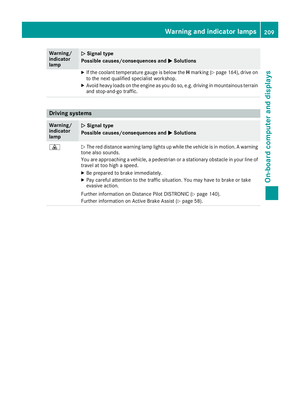 211
211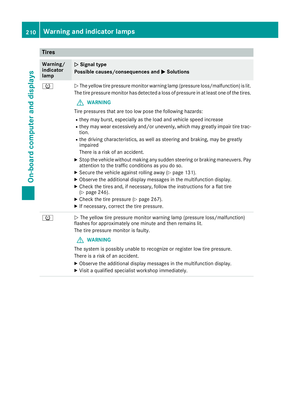 212
212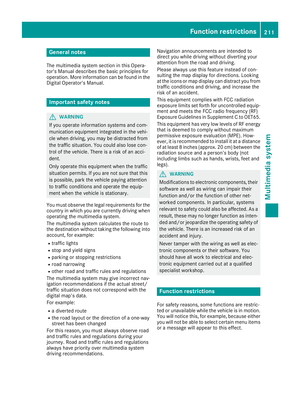 213
213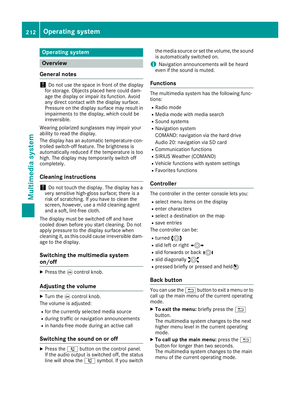 214
214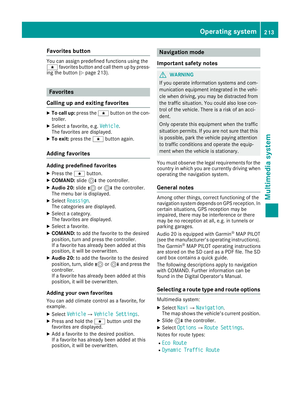 215
215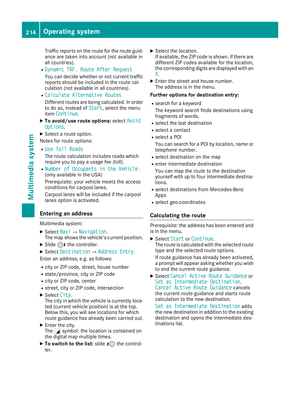 216
216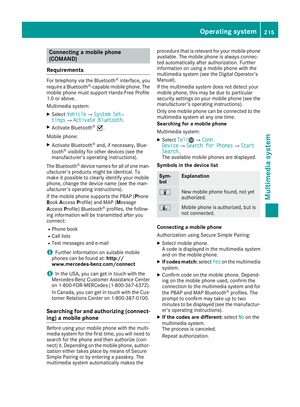 217
217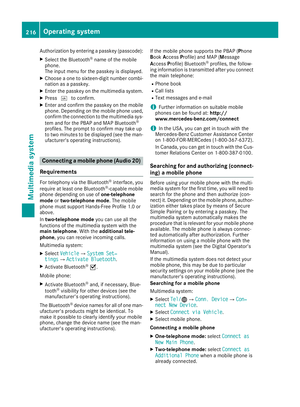 218
218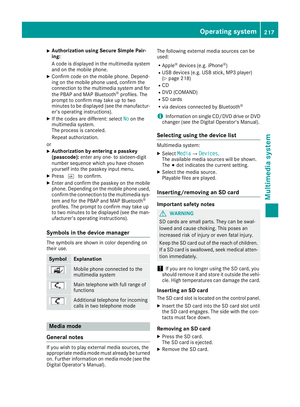 219
219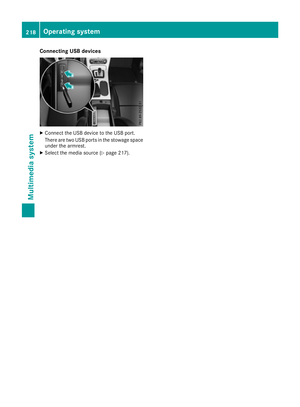 220
220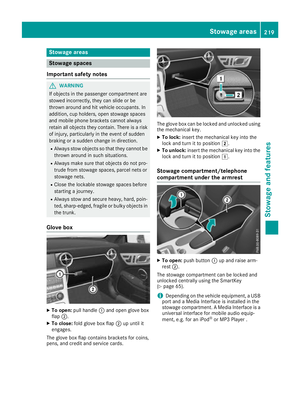 221
221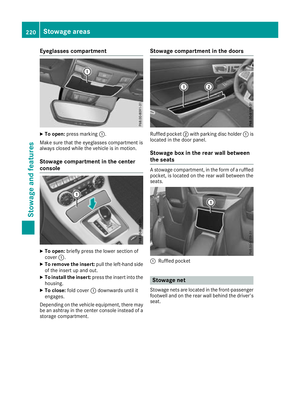 222
222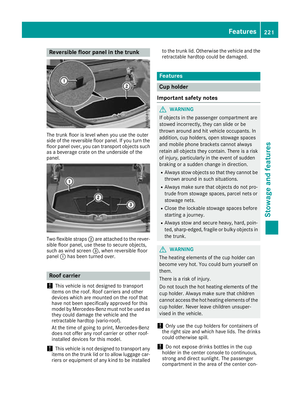 223
223 224
224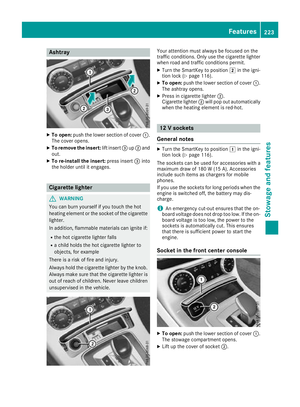 225
225 226
226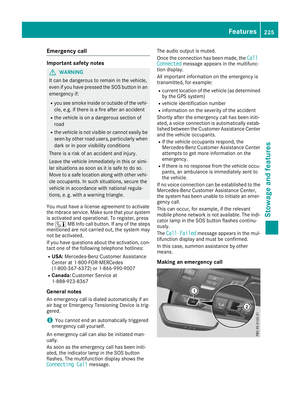 227
227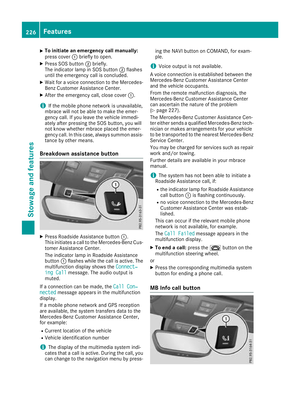 228
228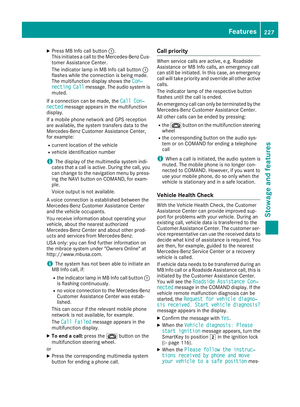 229
229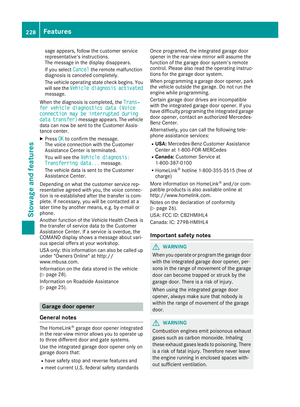 230
230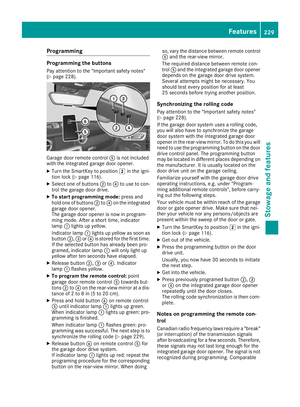 231
231 232
232 233
233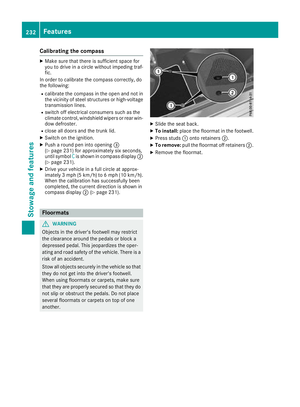 234
234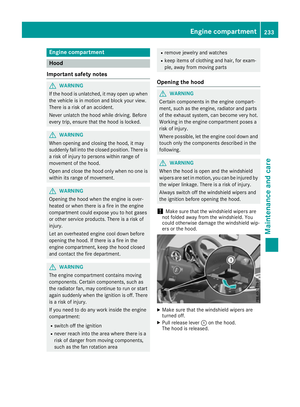 235
235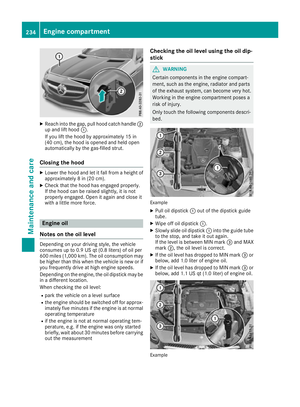 236
236 237
237 238
238 239
239 240
240 241
241 242
242 243
243 244
244 245
245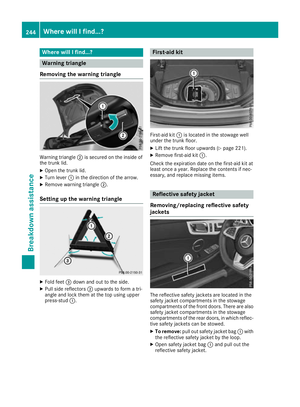 246
246 247
247 248
248 249
249 250
250 251
251 252
252 253
253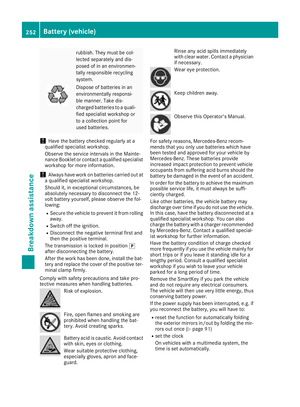 254
254 255
255 256
256 257
257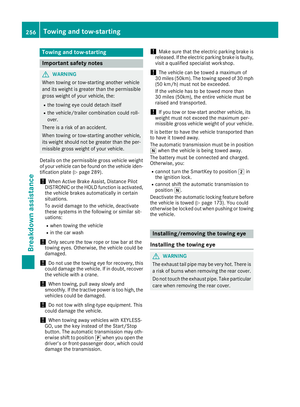 258
258 259
259 260
260 261
261 262
262 263
263 264
264 265
265 266
266 267
267 268
268 269
269 270
270 271
271 272
272 273
273 274
274 275
275 276
276 277
277 278
278 279
279 280
280 281
281 282
282 283
283 284
284 285
285 286
286 287
287 288
288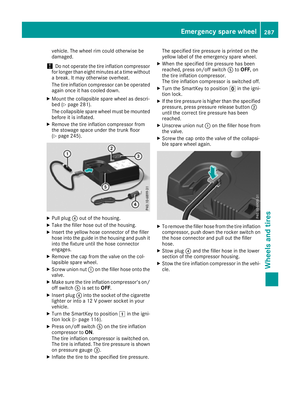 289
289 290
290 291
291 292
292 293
293 294
294 295
295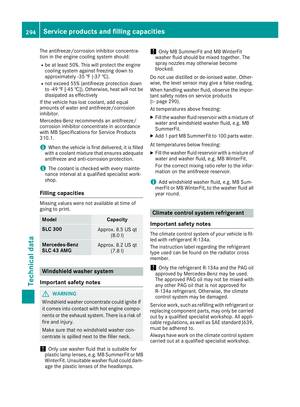 296
296 297
297