2018 MERCEDES-BENZ SLC ROADSTER transmission oil
[x] Cancel search: transmission oilPage 7 of 298
Assistance menu(on-boar dcom-
puter) .................................................. 170
ASSYSTP LUS
Dis playin gaservic emessage ........ 237
Hiding aservic emessage .............. 237
Resetting th eservic einterval dis-
play ................................................ 237
Se rvice message ............................ 237
Spe cial servic erequirements ........ .238
ATA (Anti-Theft Alarm system)
Activating/deactivating ................... 64
Function ...........................................6 4
Switching off the alarm .................... 64
ATTENTIO NASSIS T
Activating/deactivating ................. 171
Displa ymessage ............................ 193
Function/note s............................. 158
Audi omenu( on-board computer) .... 168
Audi osystem
see Digital Operator's Manual
Authorized Mercedes-Benz Center
see Qualifie dspecialist workshop
Authorized workshop
see Qualifie dspecialist workshop
AUTO lights
Displa ymessage ............................ 189
see Lights
Automatic car was h(care) ............... 238
Automatic engine start (ECO start/
stopf unction) .................................... 119
Automatic engine switch-off (ECO
start/stopf unction).......................... 119
Automatic headlamp mode ................ 95
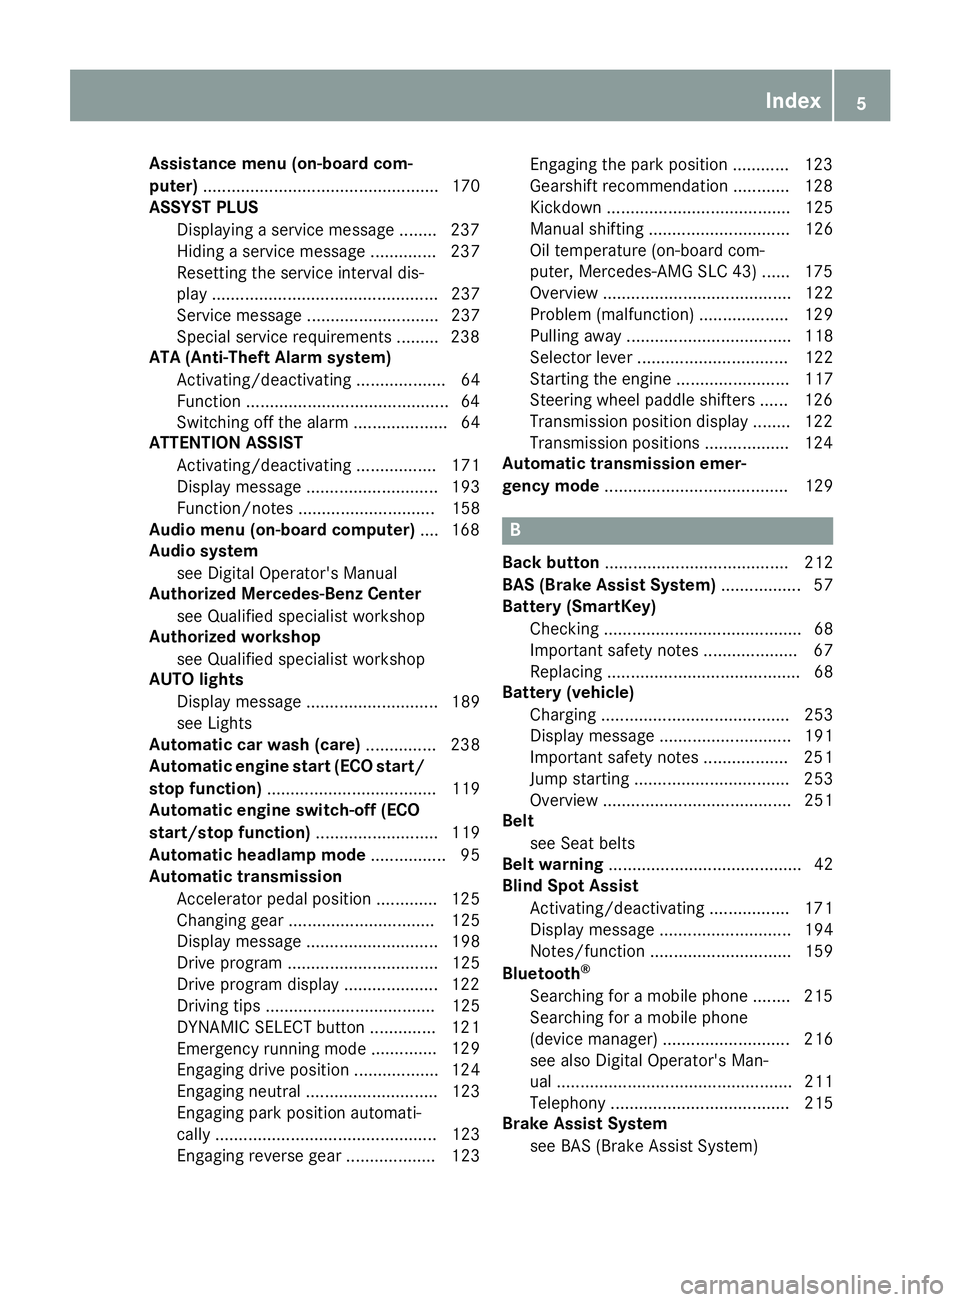
Automatic transmission
Accelerator peda lposition ............. 125
Changing gea r............................... 125
Displa ymessage ............................ 198
Drive program. ............................... 125
Drive programd isplay .................... 122
Driving tip s.................................... 125
DYNAMIC SELECT button .............. 121
Emergency running mode. ............. 129
Eng
aging drive position .................. 124
Engaging neutral ............................ 123
Engaging park position automati-
cally ............................................... 123
Engaging reverse gea r................... 123 Engaging the park position ............ 123
Gearshift recommendation ............ 128
Kickdown.
...................................... 125
Manua lshifting .............................. 126
Oil temperature (on-board com-
puter, Mercedes-AMGS LC 43) ...... 175
Overview ........................................ 122
Problem (malfunction) ................... 129
Pulling away ................................... 118
Selector lever ................................ 122
Starting the engine ........................ 117
Steering wheelp addleshifters ...... 126
Transmission position display ........ 122
Transmission positions .................. 124
Automatic transmissio nemer-
gencym ode....................................... 129
B
Back button ....................................... 212
BAS (Brake Assist System) ................. 57
Battery (SmartKey)
Checking .......................................... 68
Important safety notes .................... 67
Replacing ......................................... 68
Battery (vehicle)
Charging ........................................ 253
Displa ymessage ............................ 191
Important safety notes .................. 251
Jump starting ................................. 253
Overview ........................................ 251
Belt
see Seatb elts
Bel twarning ......................................... 42
Blind SpotA ssist
Activating/deactivating ................. 171
Displa ymessage ............................ 194
Notes/function .............................. 159
Bluetooth
®
Searching for amobilephone ........ 215
Searching for amobilephone
(device manager )........................... 216
see also Digital Operator's Man-
ua l.................................................. 211
Telephony ...................................... 215
Brake Assist System
see BAS (Brake Assist System)
Index5
Page 15 of 298
Messagessee Display messages
Mirrors
see Exterior mirrors
see Rear-view mirror
Mobile phone
Connecting (Bluetooth
®inter-
face) ..............................................2 15
Connecting (device manager) ........2 16
Frequencies ................................... 288
Installatio n..................................... 288
Menu (on-board computer) ............ 169
Transmissiono utput (maximum ).... 288
Modifying the programming
(SmartKey) ...........................................6 6
MOExtended tires .............................. 247
Mountingw heels
Lowering the vehicle. ..................... 284
Mounting anew wheel. .................. 283
Preparing the vehicle. ....................281
Raising the vehicle ......................... 281
Removing awheel .......................... 283
Securing the vehicle against roll-
ing away ........................................ 281
MP3
Operation ....................................... 169
see also Digita lOperator's Man-
ua l..................................................2 11
Multifunctio ndisplay
Function/notes .............................1 65
Permanent display. ........................ 172
Multifunctio nsteering wheel
Operating the on-board computer .. 164 Overview .......................................... 33
Multimedia system
Switching on and off ......................2 12
Music files
see also Digita lOperator's Man-
ua l.................................................. 211
N
Navigation
Entering adestination .................... 213
Menu (on-board computer) ............ 167
see also Digital Operator's Man-
ua l.................................................. 211 Navigation menu
Important safety notes .................. 167
NECK-PRO hea drestraints
Important safety notes .................... 52
Operation ......................................... 52
Resetting triggered .......................... 53
Note sonb reaking-i nanewvehi-
cle ....................................................... 115
O
Occupant Classification System
(OCS)
Conditions ....................................... 46
Faults ............................................... 49
Operation ......................................... 46
System self-test ............................... 48
Occupant safety
Air bags ........................................... 43
Automati cmeasures afte ranacci-
dent ................................................. 53
Bel twarning ..................................... 42
Childre ninthe vehicl e..................... 53
Important safety notes .................... 38
Introduction to the restraint sys-
tem .................................................. 38
Occupant Classification System
(OCS) ............................................... 45
PASSENGER AIR BAG indicator
lamps ............................................... 39
Pets in the vehicl e........................... 56
PRE-SAFE
®(anticipatory occu-
pant protection) ............................... 53
Restraint system warning lamp ........ 38
Seatb elt. ......................................... 39
OCS
Conditions ....................................... 46
Faults ............................................... 49
Operation ......................................... 46
System self-test ............................... 48
Odometer ........................................... 166
Oil
see Engine oil
On-board computer
AMG menu ..................................... 175
Assistance menu ........................... 170
Audio menu ................................... 168
Convenience submenu .................. 174
Index13
Page 20 of 298
System .......................................... 224
VehicleHealth Check .................... 227
Telephone
Accepting acall( multifunction
steering wheel ).............................. 170
Authorizing amobilephone (con-
necting )......................................... 215
Authorizing amobil ephone via the
device manager (connecting )......... 216
Connecting amobilephone
(device manager )........................... 216
Connecting amobilephone (gen-
erali nformation) ............................ 215
Displa ymessage ............................ 200
Menu (on-board computer) ............ 169
Numbe rfrom the phone boo k........ 170
Redialing ........................................ 170
Rejecting/ending acall. ................ 170
see also Digital Operator's Man-
ua l.................................................. 211
Temperature
Coolant .......................................... 164
Coolant (on-board computer,
Mercedes-AMGS LC 43) ................ 175
Engine oil( on-board computer,
Mercedes-AMGS LC 43) ................ 175
Outsid etemperature ...................... 163
Setting (climate control )................ 109
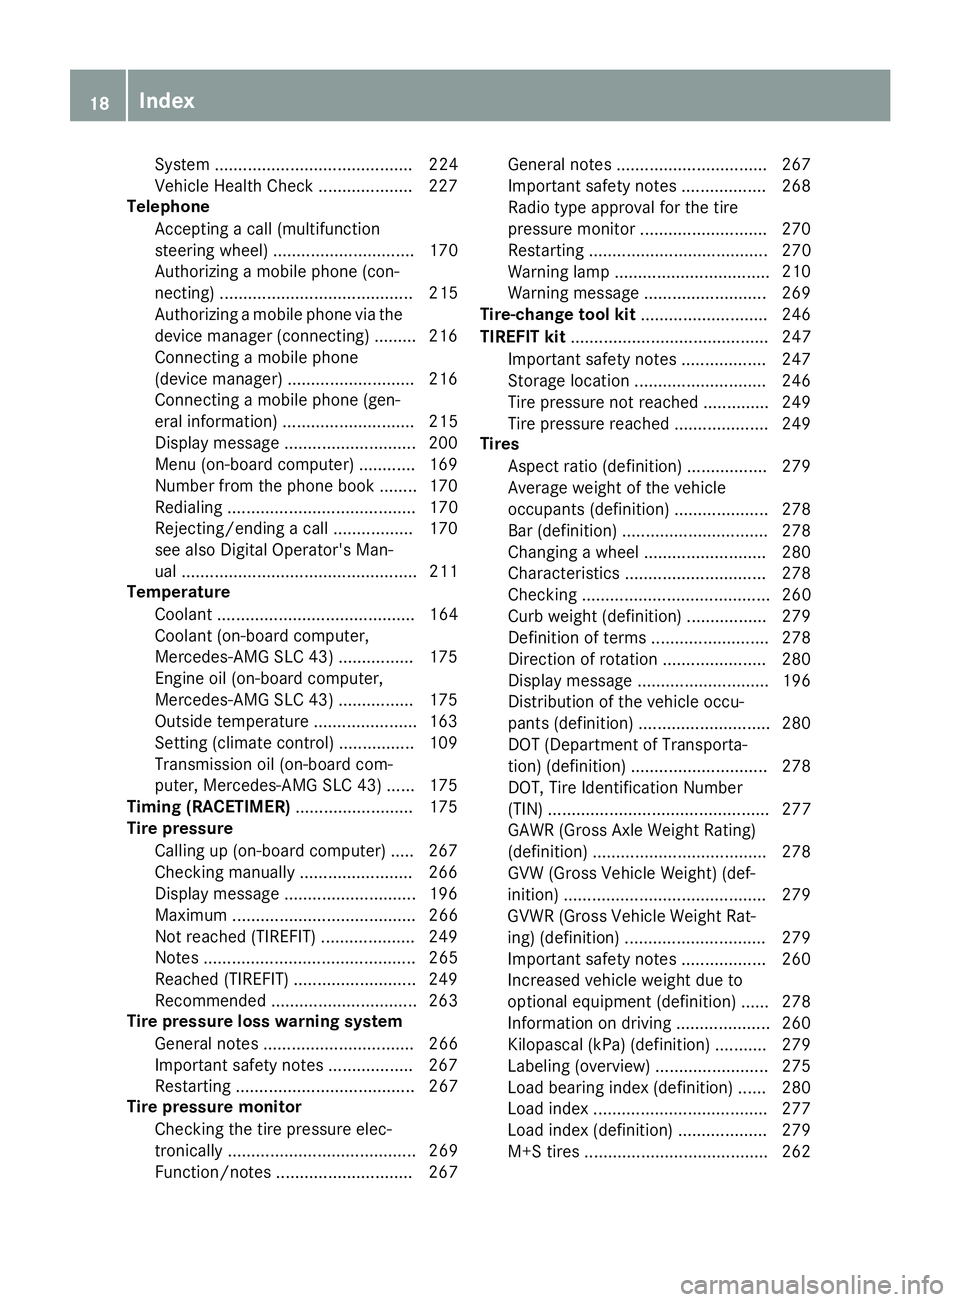
Transmission oil( on-board com-
puter, Mercedes-AMGS LC 43) ...... 175
Timing (RACETIMER) ......................... 175
Tire pressure
Calling up (on-board computer) ..... 267
Checking manually ........................ 266
Displa ymessage ............................ 196
Maximu m....................................... 266
Not reached (TIREFIT) .................... 249
Notes. ............................................ 265
Reached (TIREFIT) .......................... 249
Recommended ............................... 263
Tire pressure loss warnin gsystem
Generaln otes ................................ 266
Important safety notes .................. 267
Restarting ...................................... 267
Tire pressure monitor
Checking the tire pressure elec-
tronically ........................................ 269
Function/note s............................. 267 Generaln
otes ................................ 267
Important safety notes .................. 268
Radi otypea pproval for the tire
pressure monitor ........................... 270
Restarting ...................................... 270
Warning lamp ................................. 210
W
arning message .......................... 269
Tire-changet oolkit........................... 246
TIREFI Tkit.......................................... 247
Important safety notes .................. 247
Storage location ............................ 246
Tire pressure not reached .............. 249
Tire pressure reached .................... 249
Tires
Aspect rati o(definition) ................. 279
Average weight of the vehicle
occupants (definition) .................... 278
Bar (definition) ............................... 278
Changing awheel .......................... 280
Characteristics .............................. 278
Checking ........................................ 260
Curb weight (definition) ................. 279
Definition of terms ......................... 278
Directio nofrotation ...................... 280
Displa ymessage ............................ 196
Distribution of the vehicl eoccu-
pants (definition) ............................ 280
DOT (Department of Transporta-
tion) (definition) ............................. 278
DOT, Tire Identification Number
(TIN) ............................................... 277
GAW R(GrossA xle Weight Rating)
(definition) ..................................... 278
GV W( GrossV ehicleWeight) (def-
inition) ........................................... 279
GVWR (GrossV ehicleWeight Rat-
ing )(de finition) .............................. 279
Important safety notes .................. 260
Increased vehicl eweigh tdue to
optionale quipment (definition) ...... 278
Information on driving .................... 260
Kilopascal( kPa)(de finition) ........... 279
Labeling (overview) ........................ 275
Loadb earing index (definition) ...... 280
Loadi ndex ..................................... 277
Loadi ndex (definition) ................... 279
M+S tire s....................................... 262
18Index
Page 67 of 298
SmartKey
Important safety notes
GWARNING
If children are left unsupervised in the vehicle,
they could:
Roperate the vehicle's equipment.
Additionally, children could set the vehicle in
motion if, for example, they:
Rrelease the parking brake
Rshift the automatic transmission out of park
position P
Rstart the engine
There is arisk of an accident and injury.
Never leave children or animals unattended in
the vehicle.
When leaving the vehicle, always take the
SmartKey with you and lock the vehicle. This
also appliestom obile phones if the "Digital
Car Key in smartphone" function is activated
via the Mercedes me connect web app.
GWARNING
If you attach heavy or large object stothe
SmartKey, the SmartKey could be uninten-
tionally turned in the ignition lock. This could
cause the engine to be switched off. There is a risk of an accident.
Do not attach any heavy or large object stothe
SmartKey. Remove any bulky key rings before
insertingt he SmartKey into the ignition lock.
!Keep the SmartKey away from stron gmag-
netic fields. Otherwise, the remote control
function could be affected.
Strong magnetic fields can occur in the vicin-
ity of powerful electrical installations.
Do not keep the SmartKey:
Rwith electronic devices, e.g. amobile phone
or another SmartKey
Rwith metallic objects, e.g. coins or metal foil
Rinside metallic objects, e.g. ametal case
This can affect the functionality of the Smart- Key.
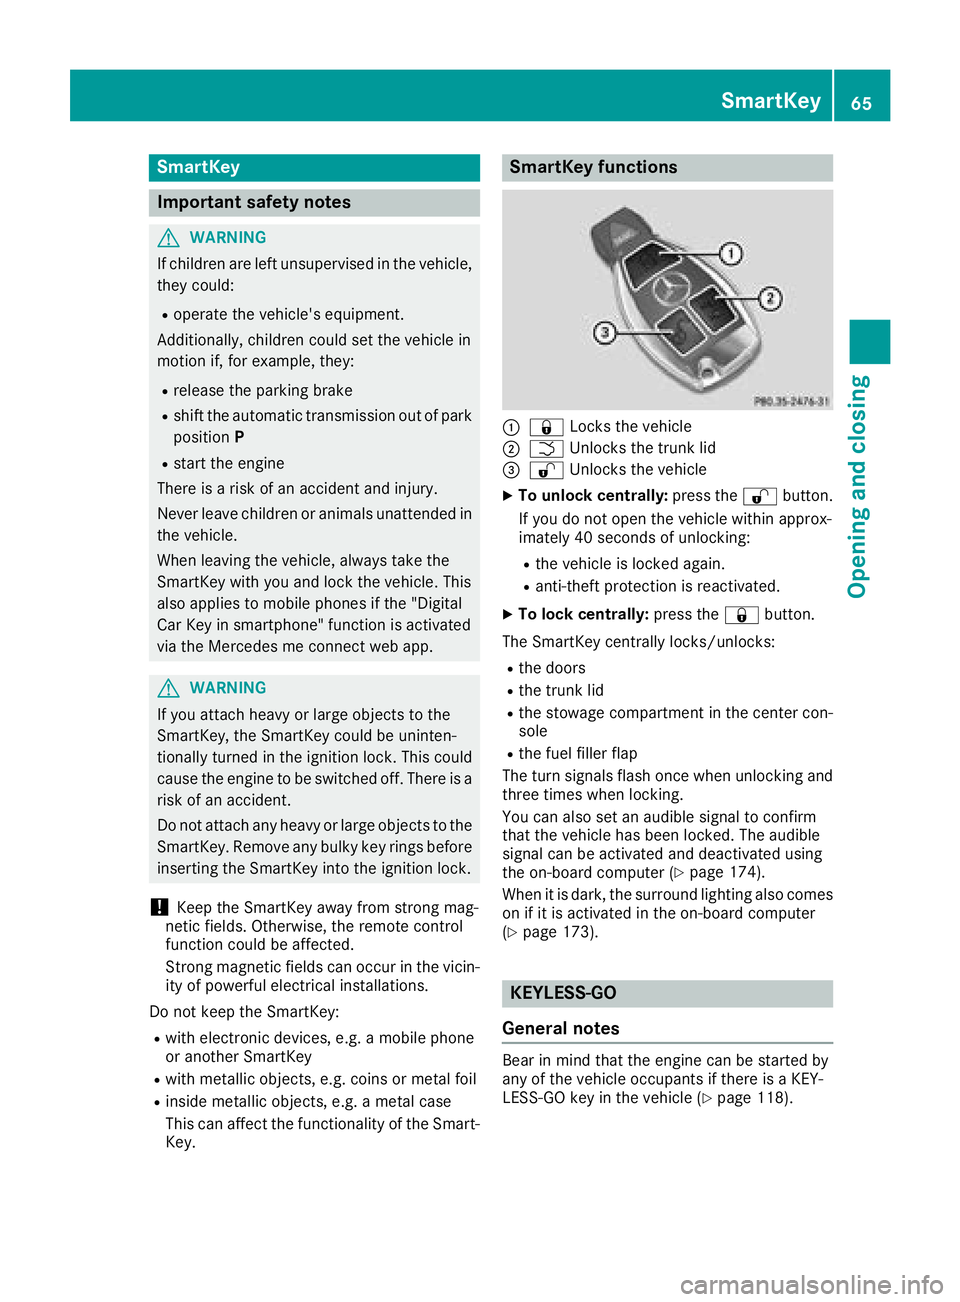
SmartKey functions
:& Locks the vehicle
;FUnlockst he trunk lid
=%Unlockst he vehicle
XTo unlock centrally: press the%button.
If you do not open the vehicle within approx-
imately 40 seconds of unlocking:
Rthe vehicle is locked again.
Ranti-theft protection is reactivated.
XTo lock centrally: press the&button.
The SmartKey centrally locks/unlocks:
Rthe doors
Rthe trunk lid
Rthe stowage compartmentint he center con-
sole
Rthe fuel filler flap
The turn signals flash once when unlocking and
three times when locking.
You can also set an audible signal to confirm
that the vehicle has been locked. The audible
signal can be activated and deactivated using
the on-board computer (
Ypage 174).
When it is dark, the surround lighting also comes
on if it is activated in the on-board computer
(
Ypage 173).
KEYLESS-GO
General notes
Bear in mind that the engine can be started by
any of the vehicle occupants if there is aKEY-
LESS-GO key in the vehicle (
Ypage 118).
SmartKey65
Opening and closing
Z
Page 131 of 298
Problems with the transmission
ProblemPossible causes/consequences andMSolutions
The transmission has
problems shifting gear.The transmission is losing oil.
XHave the transmission checked ataqualified specialist workshop
immediately.
The acceleration ability
is deteriorating.
The transmission no lon-
ger changes gear.The transmission is in emergency mode.
It is only partly possible to engage the gears, or the transmission is in
position i.
XStop the vehicle.
XShift the transmission to position j.
XSwitch off the engine.
XWait at least ten seconds before restarting the engine.
XShift the transmission to positionhork.
XHave the transmission checked at aqualified specialist workshop
immediately.
Refueling
Important safety notes
GWARNING
Fuel is highly flammable. If you handle fuel
incorrectly, there is arisk of fire and explo-
sion.
You must avoid fire, open flames, creating
sparks and smoking. Switch off the engine
and, if applicable, the auxiliary heating before refueling.
GWARNING
Fuel is poisonous and hazardous to health.
There is arisk of injury.
You must make sure that fuel does not come into contact with your skin, eyes or clothing
and that it is not swallowed. Do not inhale fuel
vapors. Keep fuel away from children.
If you or others come into contact with fuel,
observe the following:
RWash away fuel from skin immediately
using soap and water.
RIf fuel comes into contact with your eyes,
immediately rinse them thoroughly with
clean water. Seek medical assistance with-
out delay.
RIf fuel is swallowed, seek medical assis-
tance without delay.Don ot induce vomit-
ing.
RImmediately change out of clothing which
has come into contact with fuel.
GWARNING
Electrostatic buildupc an create sparks and
ignite fuel vapors. There is arisk of fire and
explosion.
Always touch the vehicle body before opening
the fuel filler flap or touching the fuel pump
nozzle. Any existing electrostatic buildupi s
thereby discharged.
Do not get into the vehicle again during the refu-
eling process. Otherwise, electrostatic charge
could build up again.
!Do not use diesel to refuel vehicles with a
gasoline engine. Do not switch on the ignition
if you accidentally refuel with the wrong fuel.
Otherwise, the fuel will enter the fuel system. Even small amounts of the wrong fuel could
result in damage to the fuel system and the
engine. Notify aqualified specialist workshop
and have the fuel tank and fuel lines drained
completely.
Refueling129
Driving and parking
Z
Page 177 of 298
XPress the:or9 button to select the
Auto. Mirror Foldingfunction.
If the Auto. Mirror Foldingfunction is
switched on, the multifunction display shows
the exterior mirror in orange.
XPress the abutton to save the setting.
Restoring the factor ysettings
XPress the =or; button on the steering
wheel to select the Sett.menu.
XPress the:or9 button to select the
Factory Settingsubmenu.
XPress ato confirm.
The Reset All Settings?function
appears.
XPress the :or9 button to select Noor
Yes.
XPress the abutton to confirm the selec-
tion.
If you have selected Yes
and confirmed, the
multifunction display shows aconfirmation
message.
For safety reasons, the Daytime Running
Lightsfunction in theLightssubmenu is only
reset if the vehicle is stationary.
AMG menu (Mercedes-AMG SLC 43)
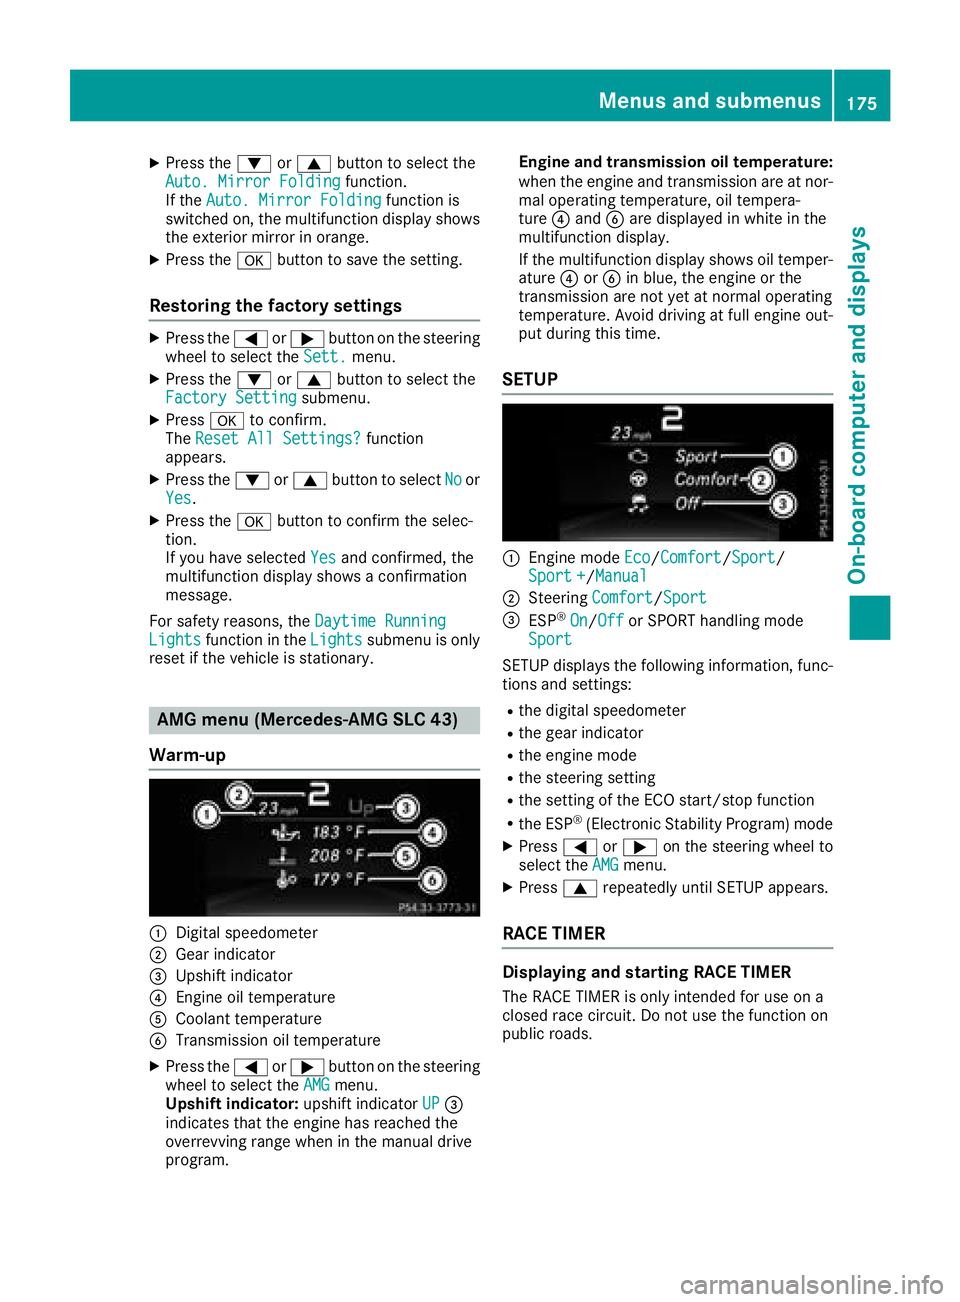
Warm-up
:Digital speedometer
;Gear indicator
=Upshift indicator
?Engine oil temperature
ACoolant temperature
BTransmission oil temperature
XPress the =or; button on the steering
wheel to select the AMGmenu.
Upshift indicator: upshift indicatorUP=
indicates that the engine has reached the
overrevving range when in the manual drive
program. Engine and transmission oil temperature:
when the engine and transmission are at nor-
mal operating temperature, oil tempera-
ture
?and Bare displayed in white in the
multifunction display.
If the multifunction display shows oil temper-
ature ?orB in blue, the engine or the
transmission are not yet at normal operating
temperature. Avoid driving at full engine out-
put during this time.
SETUP
:Engine mode Eco/Comfort/Sport/
Sport +/Manual
;Steering Comfort/Sport
=ESP®On/Offor SPORT handling mode
Sport
SETU Pdisplays the following information, func-
tions and settings:
Rthe digital speedometer
Rthe gear indicator
Rthe engine mode
Rthe steerin gsetting
Rthe setting of the ECO start/stop function
Rthe ESP®(Electronic Stability Program) mode
XPress =or; on the steerin gwheel to
select the AMGmenu.
XPress9repeatedly until SETU Pappears.
RACE TIMER
Displaying and starting RACE TIMER
The RACE TIMER is only intended for use on a
closed race circuit. Do not use the function on
public roads.
Menus and submenus175
On-board computer and displays
Z
Page 241 of 298
!Lock the car if you wash it in an automatic
car wash. Otherwise, the vehicle might be
damaged.
!Never clean your vehicle in aTouchless
Automatic Car Wash as these use special
cleaning agents. These cleaning agents can
damage the paintwork or plastic parts.
If you have your vehicle cleaned in ahigh-
pressure automatic car wash, small amounts
of water may enter the vehicle.
!Make sure that the automatic transmission
is in position Nwhen washing your vehicle in
at ow-through car wash. The vehicle could be
damagedift he transmission is in another
position.
!Make sure that:
Rthe side windows and the roof are com-
pletely closed
Rthe climate control blower is switched off
Rthe windshieldw iper switch is at position 0
The vehicle could otherwise be damaged.
You can clean the vehicle at an automatic car
wash from the very start.
Preferably clean the vehicle at automatic car
washes that use textile washing elements with-
out brushes. This prevents fine scratches from
forming on the paintwork and film.
If the vehicle is very dirty, pre-wash it before
cleaning it in an automatic car wash.
After using an automatic car wash, wipe off wax
from the windshielda nd the wiper blades. This
will prevent smears and reduce wiping noises
caused by residue on the windshield.
iVehicles with decorative film: select awash
program without hot wax at the automatic car
wash.
Washing by hand
In some countries, washing by hand is only
allowed at speciallye quipped washing bays.
Observe the legal requirements in each country.
XDo not use hot water and do not wash the
vehicle in direct sunlight.
XUse asoft sponge to clean.
XUse amild cleaning agent, such as acar
shampoo approved by Mercedes-Benz.
XThoroughly hose down the vehicle with agen-
tle jet of water.
XDo not point the water jet directly towards the
air inlet or the edges of decorative foils.
XUse plenty of water and rinse out the sponge
frequently.
XRinse the vehicle with clean water and dry
thoroughly with achamois.
XDo not let the cleaning agent dry on the paint-
work or the decorative foils.
Carefully remove all deposits of road salt as
soon as possible when driving in winter.
Powerw ashers
GWARNING
The water jet from acircular jet nozzle (dirt
blasters) can cause invisible exterior damage
to the tires or chassis components. Compo-
nentsd amagedint his way may fail unexpect-
edly.T here is arisk of an accident.
Do not use power washers with circular jet
nozzles to clean the vehicle. Have damaged
tires or chassis componentsr eplaced imme-
diately.
!Vehicles with decorative foil: parts of your
vehicle are covered with decorative foil. Main-
tain adistance of at least 27.5 in (70 cm)
between the foil-wrappedp arts of the vehicle
and the nozzle of the high pressure cleaner.
Information aboutt he correct distance is
available from the equipment manufacturer.
Move the power washer nozzle around when
cleaning your vehicle.
The water temperature of the high-pressure
cleaner must not exceed 140 °F (60 °C).
!Alwaysm aintainadistance of at least
11.8 in (30 cm) between the vehicle and the
power washer nozzle. Information aboutt he
correct distance is available from the equip-
ment manufacturer.
Move the power washer nozzle around when
cleaning your vehicle.
Do not aim directly at any of the following:
Rtires
Rdoor gaps, roof gaps, joints, etc.
Relectrical components
Rbattery
Rplug-type couplings
Rlights
Care239
Maintenance and care
Z
Page 283 of 298
An arrow on the sidewall of the tire indicates its
correct direction of rotation.
Storingwheels
Store wheels thata renot being used in acool,
dry and preferably dark place .Protect the tires
from oil, grease, gasoline and diesel.
Mounting awheel
Preparin gthe vehicle
XStop the vehicl eonsolid,non-slippery and
level ground.
XApply the electri cparking brake manually.
XBring the front wheels into the straight-ahead
position.
XShift the transmission to position j.
XSwitch off the engine.
XVehicles withoutKEYLESS -GO:remove the
SmartKeyf rom the ignition lock.
XVehicles with KEYLESS-GO: open the driv-
er' sd oor.
The vehicl eelectronics now have status 0.
Thi sist he same as the SmartKeyh aving been
removed.
XVehicles with KEYLESS-GO: remove the
Start/Stop button from the ignition lock
(
Ypage 116).
XIf included in the vehicl eequipment ,remove
the tire-change tool kit from the vehicle.
XSafeguar dthe vehicl eagain st rolling away.
iDue to difference sinvehicleequipment ,not
al lv ehicles ar eequippe dwithat ire-change
tool kit. For informatio nonwhich tool sare
required to performaw heelchange on your
vehicle, consult an authorize dMercedes-
Benz Center.
Necessary tire-changing tool scan include, for
example:
RJack
RWheel chock
RLugw rench
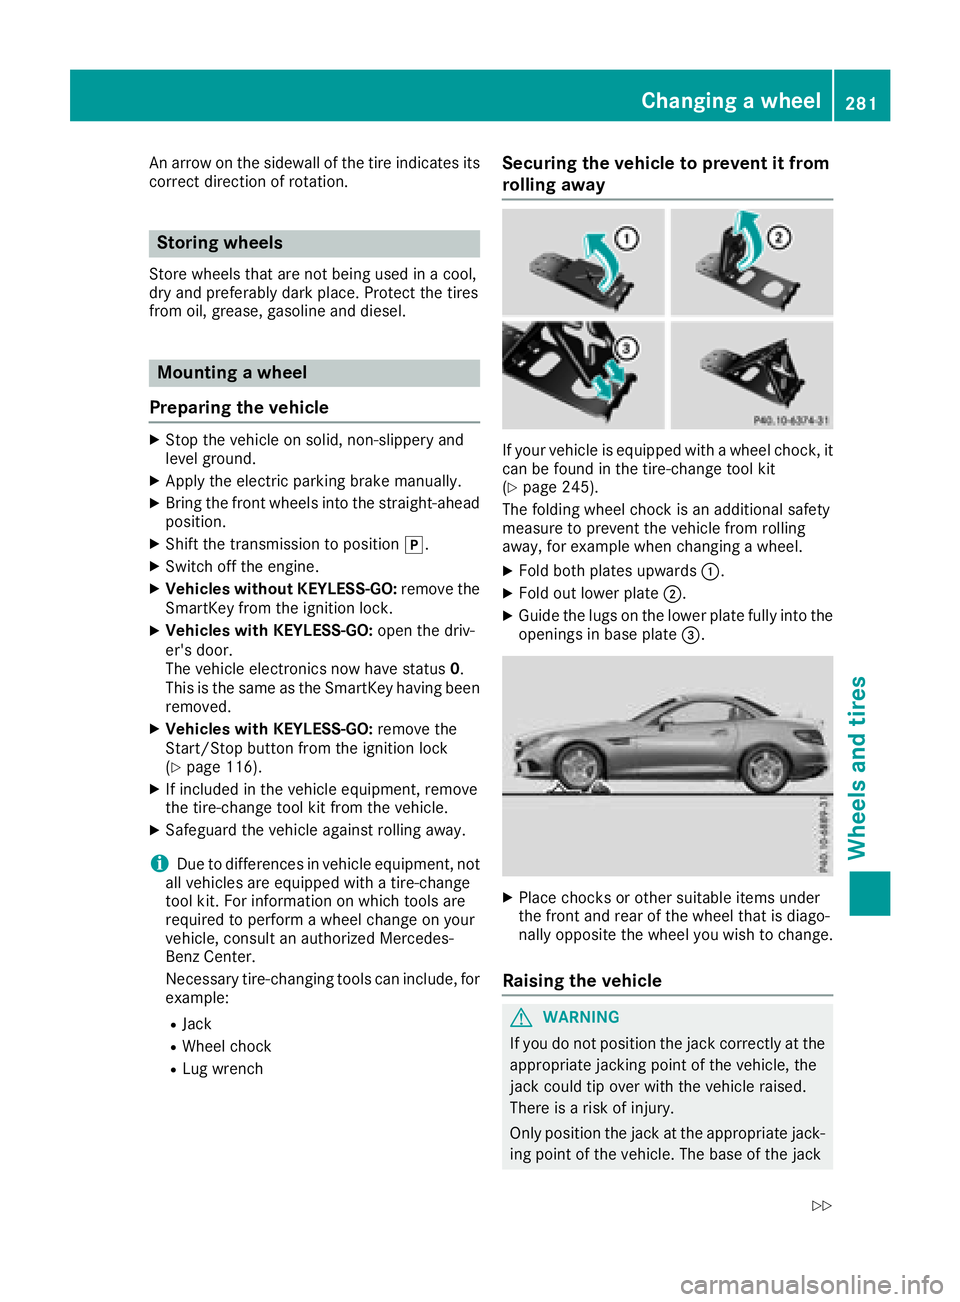
Securin gthe vehicle to preven titfrom
rolling away
If your vehicl eisequippe dwithaw heelchock, it
can be found in the tire-change tool kit
(
Ypage 245).
The folding whee lchoc kisana dditional safety
measure to prevent the vehicl efrom rolling
away ,for exampl ewhenc hanging awheel .
XFoldb othp late su pwar ds:.
XFoldo utlowe rplate ;.
XGuid ethe lugs on the lowe rplate full yinto the
openings in base plate =.
XPlace chocks or others uitabl eitems under
the front and rea rofthe whee lthati sdiago -
nally opposite the whee lyou wish to change.
Raisin gthe vehicle
GWARNING
If yo udon ot positio nthe jack correctl yatthe
appropriate jacking point of the vehicle, the
jack could tip overw itht he vehicl eraised.
There is ariskofi njury.
Onlyp ositiont he jack at the appropriate jack-
ing point of the vehicle. The base of the jack
Changin gawheel281
Wheel sand tires
Z