2017 PEUGEOT PARTNER TEPEE ELECTRIC ignition
[x] Cancel search: ignitionPage 188 of 252
150
Open the bonnet. To access the bulbs, reach
behind the headlamp unit.
Carry out the operations in reverse order to
refit each bulb and check that the bonnet is
closed securely.Halogen bulbs must be changed with the
headlamps off. Wait a few minutes (risk
of serious burns). Do not touch the bulb
directly with your fingers, use a lint-free
cloth.
It is normal for condensation to form inside
the headlamps. Regular use of the vehicle
eliminates this misting.
The bulbs must be changed with the
ignition off or the battery disconnected.
Wait approximately three minutes after
changing the bulb before reconnecting the
battery.
Check that the lamps are working properly
after each operation.
High-pressure jet wash
When using this type of washer on
stubborn dirt, do not persist on the
headlamps, the lamps and their edges to
avoid damaging their coating and seals.
Front lampsDipped beam headlamps/Main
beam headlamps
Ty p e C , H4 – 55W
F R emove the centre cover by pulling on the
flexible rubber tab.
F
D
isconnect the electrical connector.
F
R
elease the retaining tab.
F
C
hange the bulb taking care to align the
metal part with the grooves on the lamp.
F
R
eposition the retaining tab.
F
E
nsure that the cover is refitted correctly all
around to ensure correct sealing.
Sidelamps
Ty p e A , W5W – 5W
F
R
emove the cover by pulling on the flexible
rubber tab.
F
R
emove the pressure-mounted bulb holder
by pulling the connector.
F
C
hange the bulb.
F
E
nsure that the cover is refitted correctly all
around to ensure correct sealing.
Direction indicators
Ty p e B , PY21W – 21W (amber)
F
R
emove the cover by pulling on the flexible
rubber tab.
F
T
urn the bulb holder a quarter turn
anticlockwise.
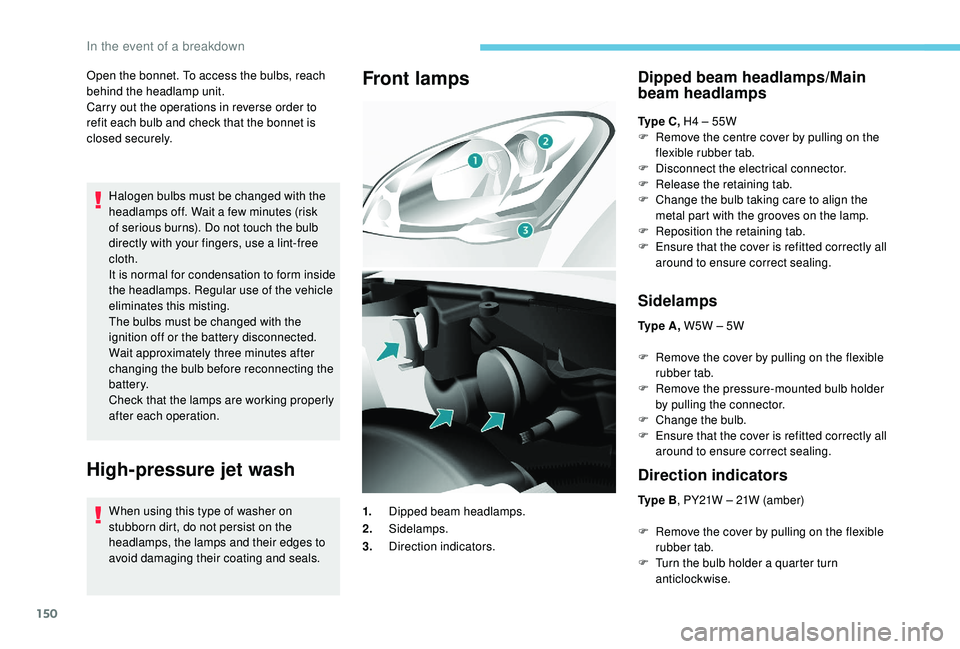
1.
Dipped beam headlamps.
2. Sidelamps.
3. Direction indicators.
In the event of a breakdown
Page 194 of 252
156
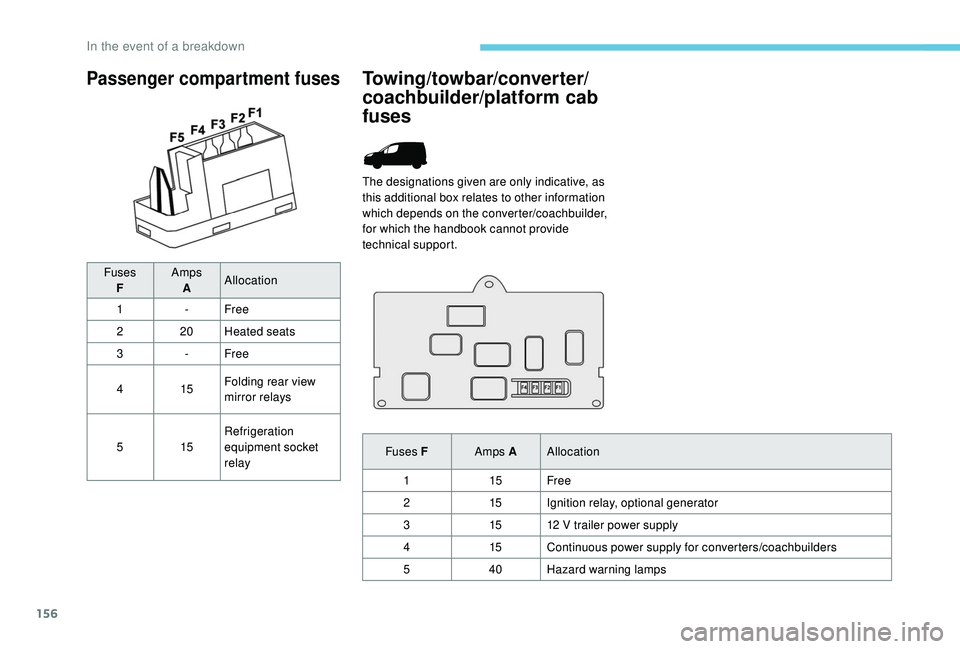
Passenger compartment fuses
FusesF Amps
A Allocation
1 -Free
2 20Heated seats
3 -Free
4 15Folding rear view
mirror relays
5 15Refrigeration
equipment socket
relay
Towing/towbar/converter/
coachbuilder/platform cab
fuses
The designations given are only indicative, as
this additional box relates to other information
which depends on the converter/coachbuilder,
for which the handbook cannot provide
technical support.
Fuses F Amps AAllocation
1 15Free
2 15Ignition relay, optional generator
3 1512
V trailer power supply
4 15Continuous power supply for converters/coachbuilders
5 40Hazard warning lamps
In the event of a breakdown
Page 196 of 252
158
Battery
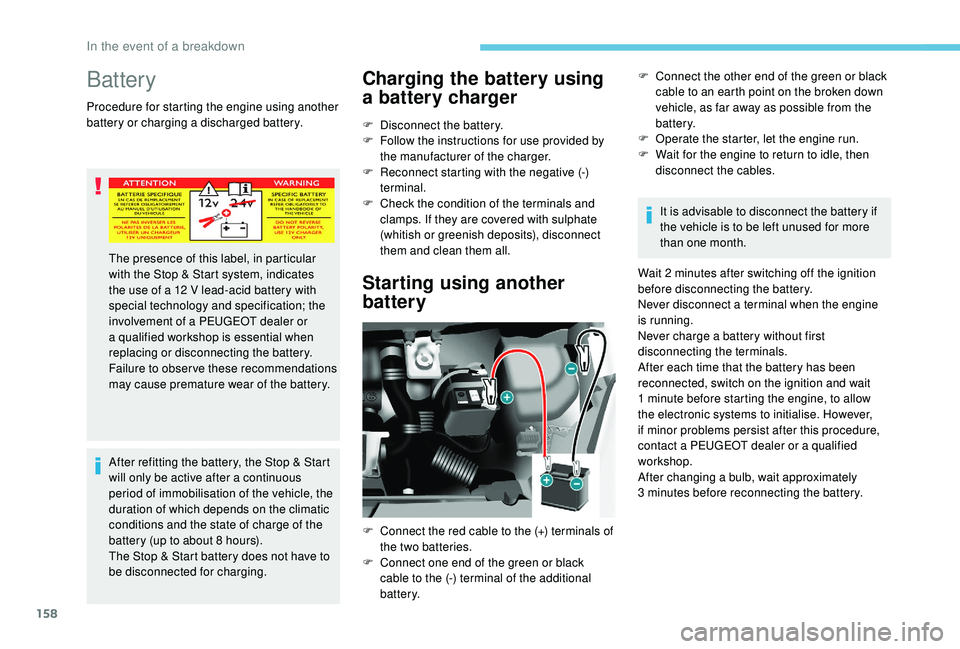
Procedure for starting the engine using another
battery or charging a discharged battery.After refitting the battery, the Stop & Start
will only be active after a continuous
period of immobilisation of the vehicle, the
duration of which depends on the climatic
conditions and the state of charge of the
battery (up to about 8
hours).
The Stop & Start battery does not have to
be disconnected for charging.
Charging the battery using
a battery charger
F Disconnect the battery.
F F ollow the instructions for use provided by
the manufacturer of the charger.
F
R
econnect starting with the negative (-)
terminal.
F
C
heck the condition of the terminals and
clamps. If they are covered with sulphate
(whitish or greenish deposits), disconnect
them and clean them all.
Starting using another
battery
F Connect the other end of the green or black cable to an earth point on the broken down
vehicle, as far away as possible from the
battery.
F
O
perate the starter, let the engine run.
F
W
ait for the engine to return to idle, then
disconnect the cables.
It is advisable to disconnect the battery if
the vehicle is to be left unused for more
than one month.
Wait 2
minutes after switching off the ignition
before disconnecting the battery.
Never disconnect a terminal when the engine
is running.
Never charge a battery without first
disconnecting the terminals.
After each time that the battery has been
reconnected, switch on the ignition and wait
1
minute before starting the engine, to allow
the electronic systems to initialise. However,
if minor problems persist after this procedure,
contact a PEUGEOT dealer or a qualified
workshop.
After changing a bulb, wait approximately
3
minutes before reconnecting the battery.
The presence of this label, in particular
with the Stop & Start system, indicates
the use of a 12
V lead-acid battery with
special technology and specification; the
involvement of a PEUGEOT dealer or
a qualified workshop is essential when
replacing or disconnecting the battery.
Failure to observe these recommendations
may cause premature wear of the battery.
F
C
onnect the red cable to the (+) terminals of
the two batteries.
F
C
onnect one end of the green or black
cable to the (-) terminal of the additional
battery.
In the event of a breakdown
Page 197 of 252
159
Economy mode
When the engine is switched off and the key is
left in the ignition on position, certain functions
(windscreen wipers, electric windows, courtesy
lamps, audio system, etc.) can be used for a
combined duration of no more than than thirty
minutes, so as not to discharge the battery.
After thirty minutes the active functions are
put on standby and the battery warning lamp
flashes with a message displayed in the screen.
In order to restore the use of these functions
immediately, start the engine and let it run for a
few minutes.
The time available to you will then be double
the period for which the engine is left running.
However, this period will always be between
five and thirty minutes.The engine will not start if the battery is
discharged.
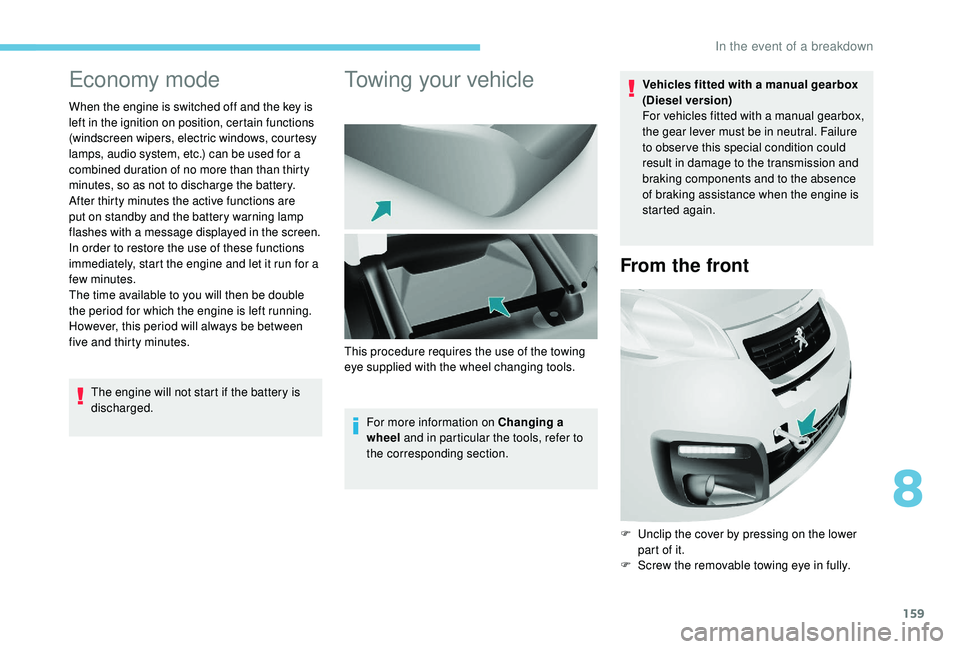
Towing your vehicle
For more information on Changing a
wheel and in particular the tools, refer to
the corresponding section. Vehicles fitted with a manual gearbox
(Diesel version)
For vehicles fitted with a manual gearbox,
the gear lever must be in neutral. Failure
to obser ve this special condition could
result in damage to the transmission and
braking components and to the absence
of braking assistance when the engine is
started again.
From the front
F Unclip the cover by pressing on the lower
part of it.
F
S
crew the removable towing eye in fully.
This procedure requires the use of the towing
eye supplied with the wheel changing tools.
8
In the event of a breakdown
Page 198 of 252
160
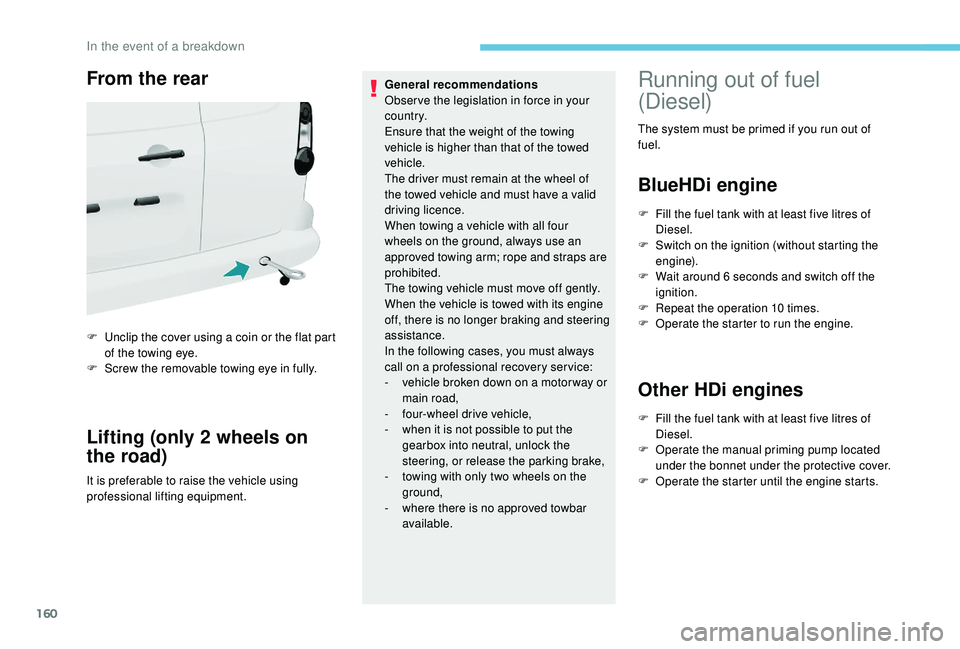
From the rear
F Unclip the cover using a coin or the flat part of the towing eye.
F
S
crew the removable towing eye in fully.
Lifting (only 2 wheels on
the road)
It is preferable to raise the vehicle using
professional lifting equipment. General recommendations
Obser ve the legislation in force in your
c o u nt r y.
Ensure that the weight of the towing
vehicle is higher than that of the towed
vehicle.
The driver must remain at the wheel of
the towed vehicle and must have a valid
driving licence.
When towing a vehicle with all four
wheels on the ground, always use an
approved towing arm; rope and straps are
prohibited.
The towing vehicle must move off gently.
When the vehicle is towed with its engine
off, there is no longer braking and steering
assistance.
In the following cases, you must always
call on a professional recovery ser vice:
-
v
ehicle broken down on a motor way or
main road,
-
f
our-wheel drive vehicle,
-
w
hen it is not possible to put the
gearbox into neutral, unlock the
steering, or release the parking brake,
- t owing with only two wheels on the
ground,
-
w
here there is no approved towbar
available.
Running out of fuel
(Diesel)
The system must be primed if you run out of
fuel.
BlueHDi engine
F Fill the fuel tank with at least five litres of Diesel.
F
S
witch on the ignition (without starting the
engine).
F
W
ait around 6 seconds and switch off the
ignition.
F
R
epeat the operation 10 times.
F
O
perate the starter to run the engine.
Other HDi engines
F Fill the fuel tank with at least five litres of Diesel.
F
O
perate the manual priming pump located
under the bonnet under the protective cover.
F
O
perate the starter until the engine starts.
In the event of a breakdown
Page 221 of 252
9
Select "List" in the primary page.
or
Select " Radio list " on the
secondary page.
Select a radio station from the list offered.
DAB/FM station tracking
"DAB" does not cover 100% of the
te r r i to r y.
When the digital radio signal is poor,
the "DAB/FM station tracking" allows
you to continue listening to the same
station, by automatically switching to the
corresponding FM analogue station (if
there is one). Press Radio Media to display the
primary page.
Press the secondary page. Select "Settings ".
Select " Radio".
Select " Digital/FM tracking " then "Confirm ". If "DAB/FM station tracking" is activated
there is a delay of a few seconds when the
system switches to analogue radio "FM",
sometimes with a change in volume.
Once the digital signal quality is restored,
the system automatically changes back
to " DA B ".
If the "DAB" station being listened to is
not available on "FM" ("
DAB/FM" option
greyed out), or "DAB/FM station tracking"
is not activated, the sound will cut out
while the digital signal is too weak.
Media
USB port
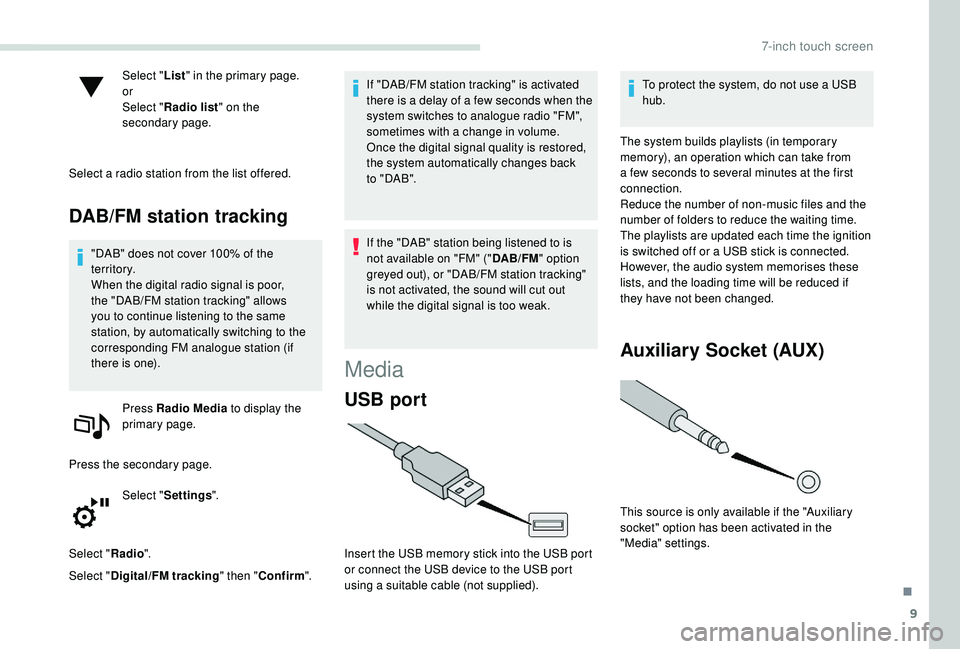
Insert the USB memory stick into the USB port
or connect the USB device to the USB port
using a suitable cable (not supplied). To protect the system, do not use a USB
hub.
The system builds playlists (in temporary
memory), an operation which can take from
a few seconds to several minutes at the first
connection.
Reduce the number of non-music files and the
number of folders to reduce the waiting time.
The playlists are updated each time the ignition
is switched off or a USB stick is connected.
However, the audio system memorises these
lists, and the loading time will be reduced if
they have not been changed.
Auxiliary Socket (AUX)
This source is only available if the "Auxiliary
socket" option has been activated in the
"Media" settings.
.
7-inch touch screen
Page 227 of 252
15
Procedure from the system
Activate the Bluetooth® function on the
telephone and ensure that it is "visible to all"
(telephone configuration).
Press Telephone to display the
primary page.
Press the secondary page. Select "Bluetooth
® connection®".
Select " Search for devices ".
The list of telephones detected is displayed.
If the pairing procedure fails, it is
recommended that you deactivate and
then reactivate the Bluetooth
® function in
your telephone.
Select the name of the chosen telephone in the
list and " Confirm ".
Enter a code of at least 4 figures for
the connection then " Confirm".
Enter this same code in the telephone then
accept the connection. The system offers to connect the telephone:
-
"
Telephone " (hands-free kit, telephone
only),
- "
Audio streaming " (streaming: wireless
playing of the audio files on the telephone),
- "
Internet " (internet browsing, only if your
telephone is compatible with the Bluetooth
®
DUN (Dial-Up Networking) standard).
Select one or more profiles and confirm.
The services available depend on
the network, the SIM card and the
compatibility of the Bluetooth
® devices
used. Check the instructions for your
telephone and with your service provider
for the ser vices to which you have access.
The ability of the system to connect to just
one profile depends on the telephone. All
three profiles may connect by default.
Visit www.peugeot.co.uk for more information
(compatibility, more help, etc.).
The recognised telephone appears in the list.
Depending on your telephone, you may be
asked to accept automatic connection every
time the ignition is switched on. Depending on the type of telephone, the
system will ask you to accept or decline
the transfer of your contacts.
On returning to the vehicle, if the last telephone
connected is present again, it is automatically
recognised and within about 30 seconds
of switching on the ignition, the pairing is
established without any action on your part
(Bluetooth
® activated).
To change the automatic connection profile,
select the telephone in the list then select the
desired profile.
Connecting a Bluetooth®
peripheral device
Automatic reconnection
On switching on the ignition, the telephone
connected when the ignition was last switched
off is automatically reconnected, if this
connection mode was activated during the
pairing procedure. If not, select "
Update".
The connection is confirmed by the display of a
message and the name of the telephone.
.
7-inch touch screen
Page 233 of 252
21
Settings
QUESTIONRESPONSESOLUTION
When changing the setting of treble and bass,
the ambience setting is deselected.
When changing the ambience, the treble and
bass settings are reset to zero. The selection of an ambience imposes the
treble and bass settings.
Changing one without the other is not possible.
Change the treble and bass or ambience
settings to obtain the desired musical ambience.
When changing the balance setting, distribution
is deselected.
When changing the distribution, the balance
setting is deselected. Choosing a distribution imposes a balance
setting.
Changing one without the other is not possible.
Change the balance setting or the distribution
setting to obtain the desired musical ambience.
When the "All passengers" mode is selected,
the distribution is not as expected. The choice of an "All passengers" distribution
can be programmed.Change the distribution using the cursor on the
touch screen.
There is a difference in sound quality between
the different audio sources. To allow for optimal listening quality, the audio
settings (Volume, Bass, Treble, Ambience,
Loudness) can be tailored to different
sound sources, which can generate audible
differences when changing source.Check that the audio settings (Volume, Bass,
Treble, Ambience, Loudness) are adapted to
the sources listened to. It is advisable to set
the audio functions (Bass, Treble, Balance) to
the middle position, select the "None" musical
ambience and set the loudness correction to the
"Inactive" position in radio mode.
When the engine is off, the system stops after
several minutes of use.
When the engine is switched off, the system's
operating time depends on the state of charge of
the battery.
The switch-off is normal: the system automatically
goes into energy economy mode and switches off
to maintain an adequate charge in the battery.Turn the ignition on to increase the charge of
the battery.
.
7-inch touch screen