2017 PEUGEOT PARTNER TEPEE ELECTRIC ESP
[x] Cancel search: ESPPage 16 of 252
14
Charging the traction
battery
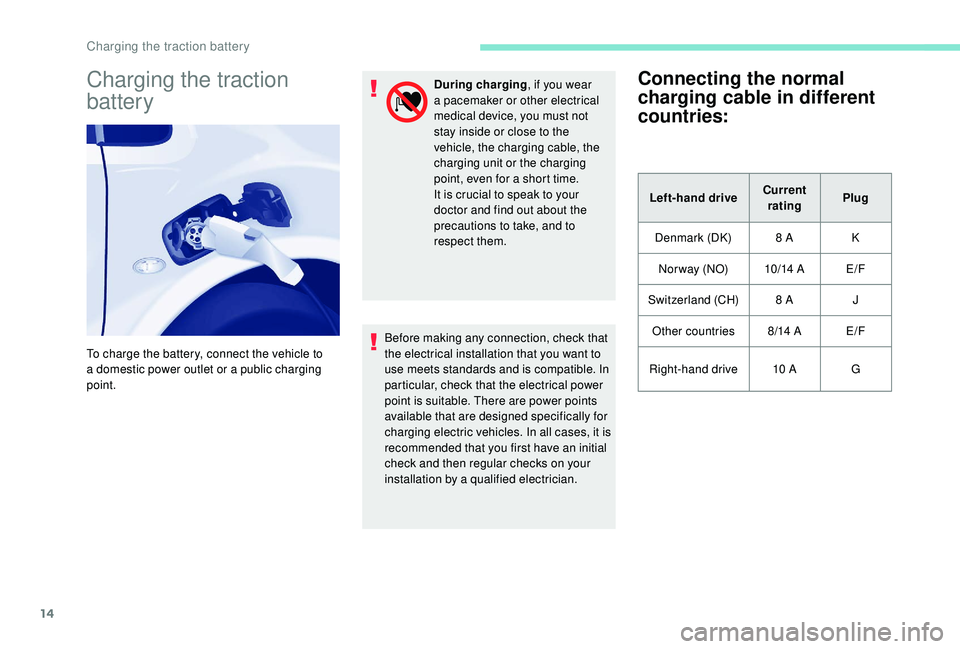
To charge the battery, connect the vehicle to
a domestic power outlet or a public charging
point.During charging
, if you wear
a pacemaker or other electrical
medical device, you must not
stay inside or close to the
vehicle, the charging cable, the
charging unit or the charging
point, even for a short time.
It is crucial to speak to your
doctor and find out about the
precautions to take, and to
respect them.
Before making any connection, check that
the electrical installation that you want to
use meets standards and is compatible. In
particular, check that the electrical power
point is suitable. There are power points
available that are designed specifically for
charging electric vehicles. In all cases, it is
recommended that you first have an initial
check and then regular checks on your
installation by a qualified electrician.
Connecting the normal
charging cable in different
countries:
Left-hand drive Current
rating Plug
Denmark (DK) 8
A K
Nor way (NO) 10/14
AE/F
Switzerland (CH) 8
AJ
Other countries 8/14
AE/F
Right-hand drive 10
AG
Charging the traction battery
Page 20 of 252
18
Do not touch the metal end of the normal
charging socket or of the charging
cable. Risk of electrocution and/or
malfunctions.
Never connect or disconnect the cable
or charging plug with wet hands (risk of
electrocution).
The charge may be interrupted at any time
by withdrawing the charging plug.
If, as an exception, you have to interrupt the
charge by disconnecting the charging cable
from the power point, it is essential to first
press the Manual Stop button on the control
unit.
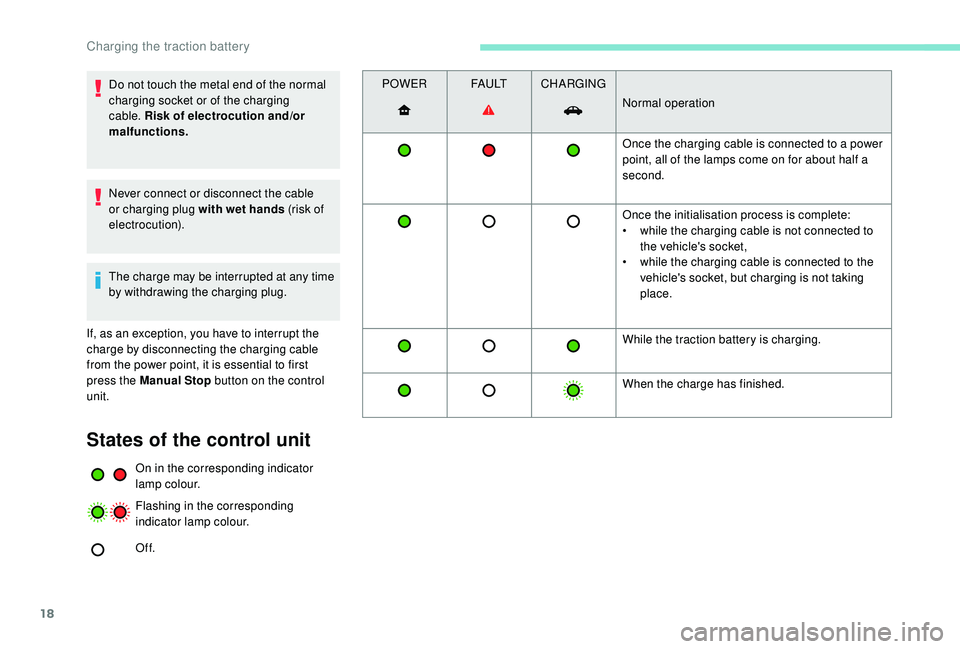
States of the control unit
On in the corresponding indicator
lamp colour.
Flashing in the corresponding
indicator lamp colour.
Of f. POWER
FA U LTCHARGING
Normal operation
Once the charging cable is connected to a power
point, all of the lamps come on for about half a
second.
Once the initialisation process is complete:
•
w
hile the charging cable is not connected to
the vehicle's socket,
•
w
hile the charging cable is connected to the
vehicle's socket, but charging is not taking
place.
While the traction battery is charging.
When the charge has finished.
Charging the traction battery
Page 30 of 252
28
Charging the battery using
a battery charger
Do not charge the battery without first
disconnecting the terminals and removing the
battery from the front compartment.
Do not disconnect the terminals
when this indicator lamp is on, nor
when the vehicle itself is on charge.Before disconnecting the battery
Wait 2
minutes after switching off the ignition
before disconnecting the battery.
After reconnecting the battery
Following reconnection of the battery, switch
on the ignition and wait 1 minute before
starting to permit initialisation of the electronic
systems. However, if some minor problems
remain after carrying out this operation, contact
a franchised dealer or a qualified workshop.
Remember to enter the radio pre-sets yourself,
referring to the corresponding section in the
handbook.
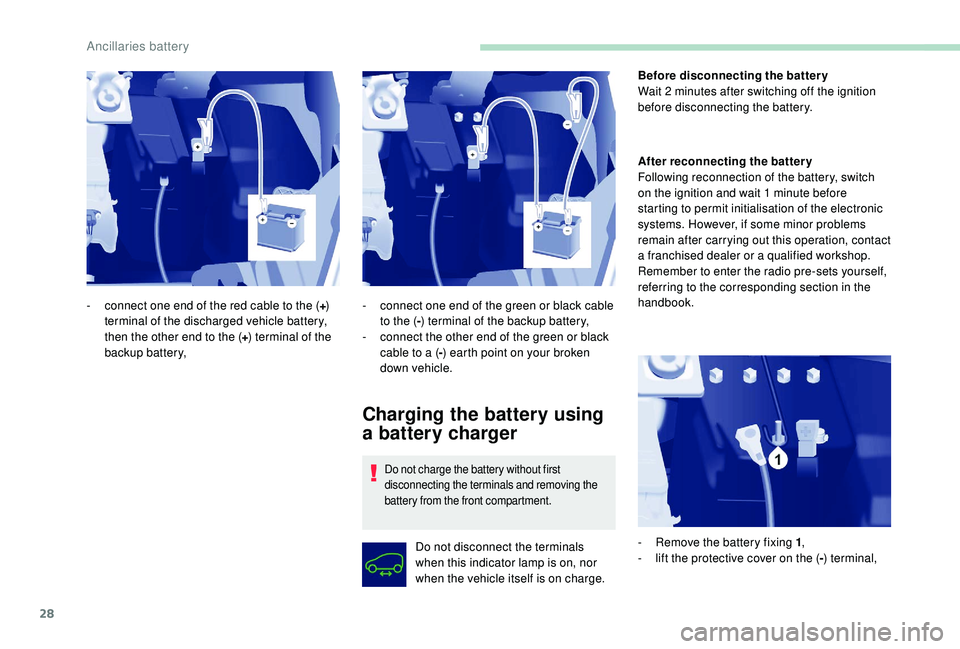
-
c
onnect one end of the red cable to the (
+)
terminal of the discharged vehicle battery,
then the other end to the ( +) terminal of the
backup battery, -
c
onnect one end of the green or black cable
to the ( -) terminal of the backup battery,
-
c
onnect the other end of the green or black
cable to a ( -) earth point on your broken
down vehicle.
- R emove the battery fixing 1
,
- l ift the protective cover on the (-) terminal,
Ancillaries battery
Page 46 of 252
8
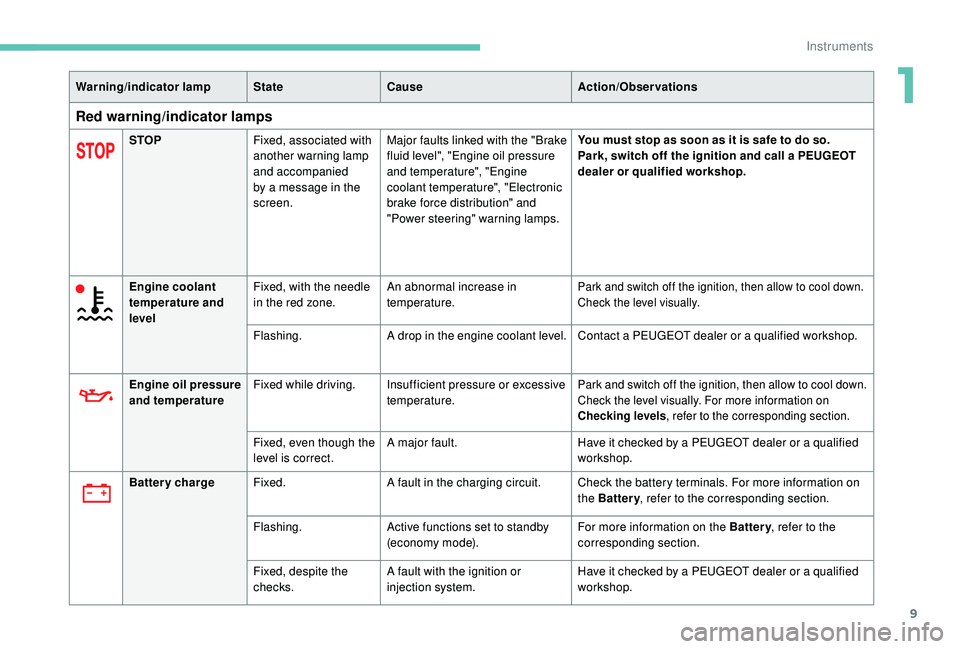
Warning and indicator lamps
Visual indicators informing the driver that
a system is in operation, switched off (on/
off indicator lamps) or has developed a fault
(warning lamps).
When the ignition is switched on
Certain warning lamps come on for a few
seconds when the vehicle's ignition is switched
on.
When the engine is started, these same
warning lamps should go off.
If they remain on, before driving refer to the
information on the warning lamp concerned.
Associated warnings
Certain lamps may come on in one of two
modes: fixed (continuous) or flashing.
Only by relating the type of lighting to the
operating status of the vehicle can it be
ascertained whether the situation is normal or
whether a fault has occurred.
In the event of a fault, the illumination of the
lamp may be accompanied by an audible signal
and/or a message.
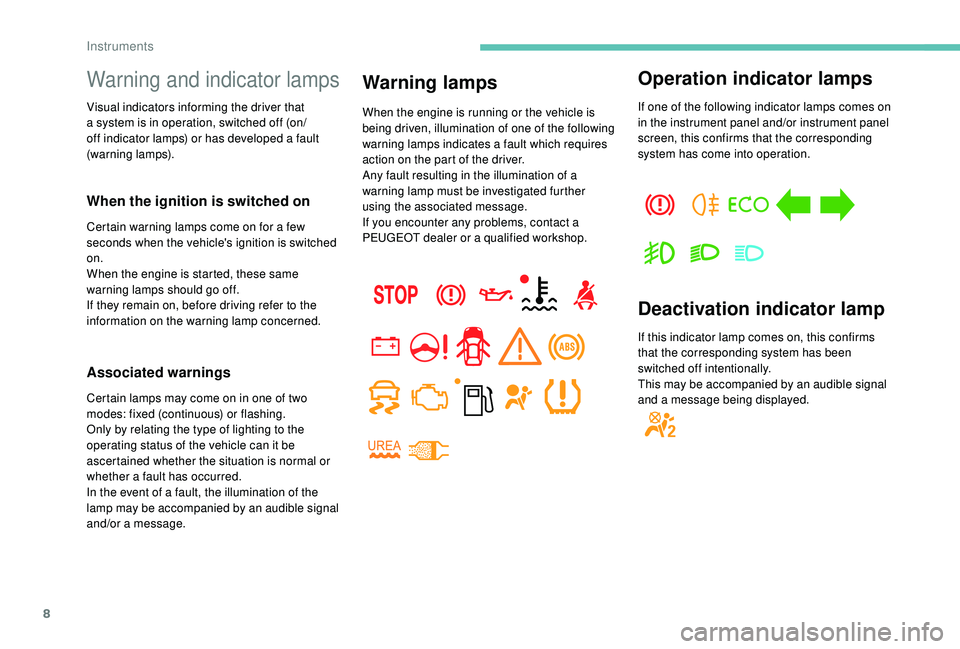
Warning lamps
When the engine is running or the vehicle is
being driven, illumination of one of the following
warning lamps indicates a fault which requires
action on the part of the driver.
Any fault resulting in the illumination of a
warning lamp must be investigated further
using the associated message.
If you encounter any problems, contact a
PEUGEOT dealer or a qualified workshop.
Operation indicator lamps
If one of the following indicator lamps comes on
in the instrument panel and/or instrument panel
screen, this confirms that the corresponding
system has come into operation.
Deactivation indicator lamp
If this indicator lamp comes on, this confirms
that the corresponding system has been
switched off intentionally.
This may be accompanied by an audible signal
and a message being displayed.
Instruments
Page 47 of 252
9
Warning/indicator lampStateCause Action/Observations
Red warning/indicator lamps
STOPFixed, associated with
another warning lamp
and accompanied
by a message in the
screen. Major faults linked with the "Brake
fluid level", "Engine oil pressure
and temperature", "Engine
coolant temperature", "Electronic
brake force distribution" and
"Power steering" warning lamps. You must stop as soon as it is safe to do so.
Park, switch off the ignition and call a PEUGEOT
dealer or qualified workshop.
Engine coolant
temperature and
level Fixed, with the needle
in the red zone.
An abnormal increase in
temperature.
Park and switch off the ignition, then allow to cool down.
Check the level visually.
Flashing.
A drop in the engine coolant level. Contact a PEUGEOT dealer or a qualified workshop.
Engine oil pressure
and temperature Fixed while driving. Insufficient pressure or excessive
temperature.
Park and switch off the ignition, then allow to cool down.
Check the level visually. For more information on
Checking levels, refer to the corresponding section.
Fixed, even though the
level is correct. A major fault.
Have it checked by a PEUGEOT dealer or a qualified
workshop.
Battery charge Fixed. A fault in the charging circuit. Check the battery terminals. For more information on
the Battery, refer to the corresponding section.
Flashing. Active functions set to standby
(economy mode). For more information on the Battery
, refer to the
corresponding section.
Fixed, despite the
checks. A fault with the ignition or
injection system. Have it checked by a PEUGEOT dealer or a qualified
workshop.
1
Instruments
Page 49 of 252

11
Warning/indicator lampStateCause Action/Observations
Orange warning/indicator lamps
ServiceFixed temporarily. Minor faults or warnings. Refer to the alert log on the display or screen.
For more information on the Trip computer , refer to
the corresponding section.
Contact a PEUGEOT dealer or a qualified workshop.
Fixed.
Major faults are present.
EOBD emissions
control system Flashing or fixed.
There is a fault with the system.
EOBD (European On Board
Diagnosis) is a diagnostics
system which complies with,
among others, the standards on
emissions limits of:
-
CO
(carbon monoxide),
-
H
C (unburnt hydrocarbons),
-
N
Ox (nitrogen oxides),
detected by oxygen sensors
placed downstream of the
catalytic converters,
-
particles.There is a risk of damage to the catalytic converter.
Have it checked as soon as possible by a PEUGEOT
dealer or a qualified workshop.
Low fuel level Fixed, with the needle
of the gauge in the
red zone. When it first comes on, around
8
litres of fuel remain in the tank,
according to your driving style
and your engine. You must refuel as soon as possible to avoid running
out. This warning lamp will come on every time the
ignition is switched on, until sufficient fuel is added.
Never continue to drive until you run out of fuel as
this could damage the emission control and injection
systems.
Flashing. The supply is cut off following a
serious collision. Re-establish the supply.
For more information on Fuel
, refer to the
corresponding section.
1
Instruments
Page 50 of 252

12
ABSFixed. The anti-lock braking system has
a fault. The vehicle retains conventional braking capabilities.
Drive carefully at reduced speed and contact a
PEUGEOT dealer or a qualified workshop without
d e l ay.
Warning/indicator lamp
StateCause Action/Observations
ESC Flashing. Triggering of the ASR or ESC
regulation. The system optimises traction and allows improved
directional stability of the vehicle.
Fixed. A fault with the ASR or ESC
regulation.
E.g. under-inflation of the tyres. E.g. check the pressure of the tyres.
Have it checked by a PEUGEOT dealer or by a
qualified workshop (wheel speed sensor, hydraulic
unit, etc.).
Under-inflation Fixed. One or more wheels have
insufficient pressure. Check the pressure of the tyres as soon as possible.
This check should preferably be carried out when the
tyres are cold.
+
Flashing then fixed,
accompanied by the
Service warning lamp,
and a message is
displayed, depending
on equipment fitted.The tyre pressure monitoring
system has a fault or no sensor
is detected on one of the wheels. Under-inflation detection is no longer assured.
Have the system checked by a PEUGEOT dealer or a
qualified workshop.
Front/lateral
airbag Flashing or fixed.
A fault with an airbag. Have it checked by a PEUGEOT dealer or a qualified
workshop.
For more information on the Airbags , refer to the
corresponding section.
Deactivation of the
passenger's front
airbag Fixed.
Voluntary deactivation of this
airbag when a rear ward facing
child seat is installed. For more information on the Airbags
, refer to the
corresponding section.
Instruments
Page 51 of 252
13
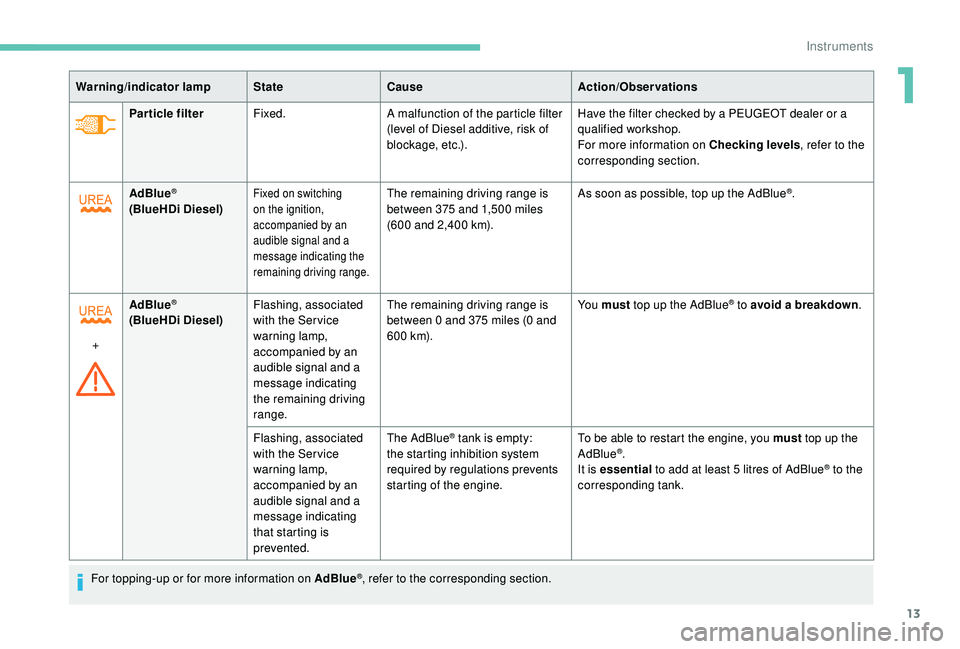
Particle filterFixed. A malfunction of the particle filter
(level of Diesel additive, risk of
blockage, etc.). Have the filter checked by a PEUGEOT dealer or a
qualified workshop.
For more information on Checking levels
, refer to the
corresponding section.
Warning/indicator lamp
StateCause Action/Observations
AdBlue
®
(BlueHDi Diesel)Fixed on switching
on the ignition,
accompanied by an
audible signal and a
message indicating the
remaining driving range.The remaining driving range is
between 375 and 1,500 miles
(600 and 2,400
km). As soon as possible, top up the AdBlue®.
+ AdBlue
®
(BlueHDi Diesel)
Flashing, associated
with the Ser vice
warning lamp,
accompanied by an
audible signal and a
message indicating
the remaining driving
range. The remaining driving range is
between 0 and 375 miles (0
and
6 0 0 k m).Yo u must
top up the AdBlue
® to avoid a breakdown .
Flashing, associated
with the Ser vice
warning lamp,
accompanied by an
audible signal and a
message indicating
that starting is
prevented. The AdBlue
® tank is empty:
the starting inhibition system
required by regulations prevents
starting of the engine. To be able to restart the engine, you must
top up the
AdBlue®.
It is essential to add at least 5
litres of AdBlue® to the
corresponding tank.
For topping-up or for more information on AdBlue
®, refer to the corresponding section.
1
Instruments