2017 PEUGEOT PARTNER TEPEE ELECTRIC door lock
[x] Cancel search: door lockPage 32 of 252

30
Fuses
The fusebox is placed in the lower dashboard (left-hand side).
The designations provided are for the fuses that can be replaced by the user. For any other work,
contact a franchised dealer or a qualified workshop.Fuse no. Rating Functions
1 15
ARear wiper.
3 5
AAirbags.
4 10
ADiagnostic socket, mirror control, headlamp beams.
5 30
AWindow controls.
6 30
ASide-hinged door lock.
7 5
A Rear courtesy lamp, roof, glove box.
8 20
A Audio system, screen, alarm and siren.
11 15
AAnti-theft.
12 15
AAir conditioning control panel, front and rear parking sensors.
13 5
AInstrument panel.
14 15
ARain and sunshine sensor, airbags.
15 5
AOther locks.
17 40
ARear screen / mirrors demisting.
Towing the vehicle
Front towing eye
The towing eye is stowed in the tool box under
the passenger's seat.
Towing the vehicle with the driving wheels on
the ground is prohibited.
When towing the vehicle with just two wheels
on the ground, use professional lifting
equipment.
Failure to do this may cause damage to the
braking components and the electric motor.
Supplement for electric mode
Page 40 of 252

2
.
.
Instrument panel 7
W arning and indicator lamps 8
I
ndic ators
18
Lighting dimmer
2
2
Trip computer
2
2
Date and time setting
2
3
Instruments and controls
4
K
ey
25
Remote control
2
5
Front doors
2
8
Sliding side door(s)
2
8
Operation in the event of a battery failure
2
9
Tailgate
29
Side-hinged rear doors
3
0
Rear roof flap
3
2
Central locking
3
3
Alarm
34
Rear windows
3
5
Electric windows
3
5Steering wheel adjustment
3
7
Mirrors
37
Surveillance mirror
3
8
Front seats
3
8
Individual passenger seat
4
0
Multi-Flex bench seat
4
0
Rear bench seat
4
2
Rear seats (5 seats) 4 3
Rear seats (7 seats) 4 6
Crew cab
5
0
Seat modularity and configurations
5
2
Front fittings
5
4
Seating area fittings
5
5
Zenith
56
Fragrance diffuser
5
7
Courtesy lamps
5
9
Rear fittings (5 seats)
6
0
Rear fittings (7 seats)
6
1
Load space layout
6
4
Heating/Manual air conditioning
6
6
Dual-zone automatic air conditioning
6
7
Recommendations for ventilation
and air conditioning
6
9
Demisting and defrosting
7
0Lighting control stalk
7
1
Automatic illumination of headlamps
7
2
LED daytime running lamps
7
2
Guide-me-home lighting
7
2
Cornering lighting
7
3
Direction indicators
7
3
Headlamp beam
7
3
Wiper control stalk 7 3
General safety recommendations
7
6
Hazard warning lamps
7
7
Horn
77
Emergency or assistance call
7
7
Anti-lock braking system (ABS/EBFD)
7
9
Emergency braking assistance (EBA)
7
9
Anti-slip regulation (ASR) and electronic
stability control (ESC)
7
9
Grip control
8
0
Seat belts
8
2
Airbags
85
Child seats
8
9
Deactivating the passenger's front airbag
9
0
Reactivating the passenger's front airbag
9
1
Recommended child seats
9
4
Locations for child seats secured using
a seat belt
9
5
ISOFIX mountings and child seats
9
8
Instructions for child seats
1
01
Child lock
1
02
Over view
Instruments
Access Ease of use and comfort
Safety
Lighting and visibility
Eco-driving
Contents
Page 42 of 252

4
Instruments and controls1.Lighting and direction indicator control
stalk.
2. Instrument panel with display.
3. Wiper/screenwash/trip computer control
stalk.
4. Ignition.
5. Audio system controls.
6. Driver's front airbag/horn.
7. Steering wheel height and reach
adjustment.
8. Cruise control/speed limiter controls.
9. Control panel: parking sensors, headlamp
beam adjustment, ESC, Stop & Start,
alarm (depending on country of sale).
10. Bonnet release.
11. Electric door mirror adjustment controls.
12 . Front window controls.
13. Switch panel: hazard warning lamps,
central locking, child lock (depending on
ve r s i o n).
14 . Cigarette lighter.
15. Heating/ventilation controls.
16. Electronic gearbox or Grip control
control.
17. Touch screen.
18. USB port (with electronic gearbox).
19. USB port (with manual gearbox).
Over view
Page 63 of 252
25
Key
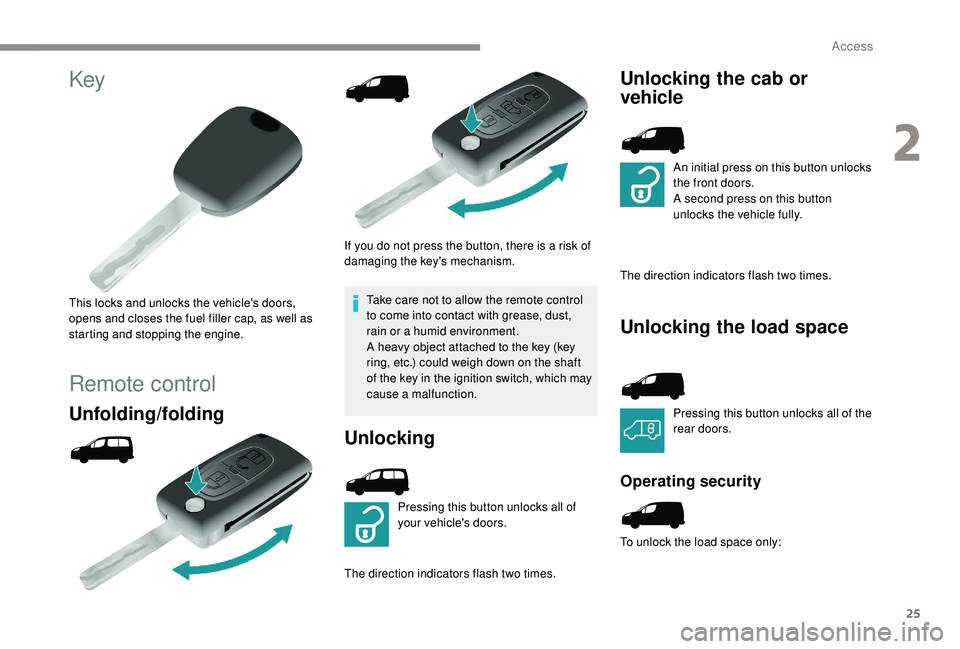
This locks and unlocks the vehicle's doors,
opens and closes the fuel filler cap, as well as
starting and stopping the engine.
Remote control
Unfolding/folding
If you do not press the button, there is a risk of
damaging the key's mechanism.Take care not to allow the remote control
to come into contact with grease, dust,
rain or a humid environment.
A heavy object attached to the key (key
ring, etc.) could weigh down on the shaft
of the key in the ignition switch, which may
cause a malfunction.
Unlocking
Pressing this button unlocks all of
your vehicle's doors.
The direction indicators flash two times.
Unlocking the cab or
vehicle
An initial press on this button unlocks
the front doors.
A second press on this button
unlocks the vehicle fully.
The direction indicators flash two times.
Unlocking the load space
Pressing this button unlocks all of the
rear doors.
Operating security
To unlock the load space only:
2
Access
Page 64 of 252
26
F Press this button to lock the vehicle fully.
F
P
ress this button to unlock the
load space. Only the front doors
remain locked.
Locking
Pressing this button locks all of your
vehicle's doors.
Deadlocking
A second press on the closed padlock on the
remote control within five seconds of locking
the doors changes the locking to deadlocking.
This is confirmed by fixed lighting of the
direction indicators for approximately two
seconds.
Deadlocking renders the exterior and interior
door handles inoperative. Therefore, never
leave anyone inside the vehicle when it is
deadlocked.
Changing the battery
The "battery flat" information is given by an
audible signal, accompanied by a message on
the screen.
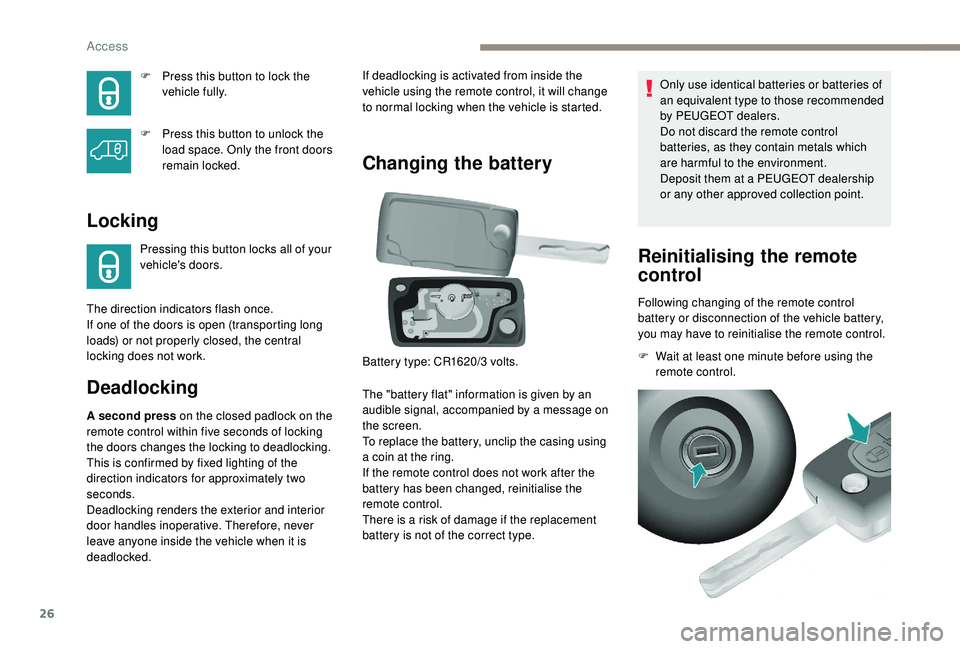
To replace the battery, unclip the casing using
a coin at the ring.
If the remote control does not work after the
battery has been changed, reinitialise the
remote control.
There is a risk of damage if the replacement
battery is not of the correct type. Only use identical batteries or batteries of
an equivalent type to those recommended
by PEUGEOT dealers.
Do not discard the remote control
batteries, as they contain metals which
are harmful to the environment.
Deposit them at a PEUGEOT dealership
or any other approved collection point.
Reinitialising the remote
control
Following changing of the remote control
battery or disconnection of the vehicle battery,
you may have to reinitialise the remote control.
F
W
ait at least one minute before using the
remote control.
The direction indicators flash once.
If one of the doors is open (transporting long
loads) or not properly closed, the central
locking does not work. If deadlocking is activated from inside the
vehicle using the remote control, it will change
to normal locking when the vehicle is started.
Battery type: CR1620/3 volts.
Access
Page 65 of 252
27
Lost keys, remote control
Go to a PEUGEOT dealer, taking with you the
vehicle's registration certificate, your personal
identification documents and if possible, the
label bearing the key code.
The PEUGEOT dealer will be able to retrieve
the key code and the transponder code
required to order a new key.
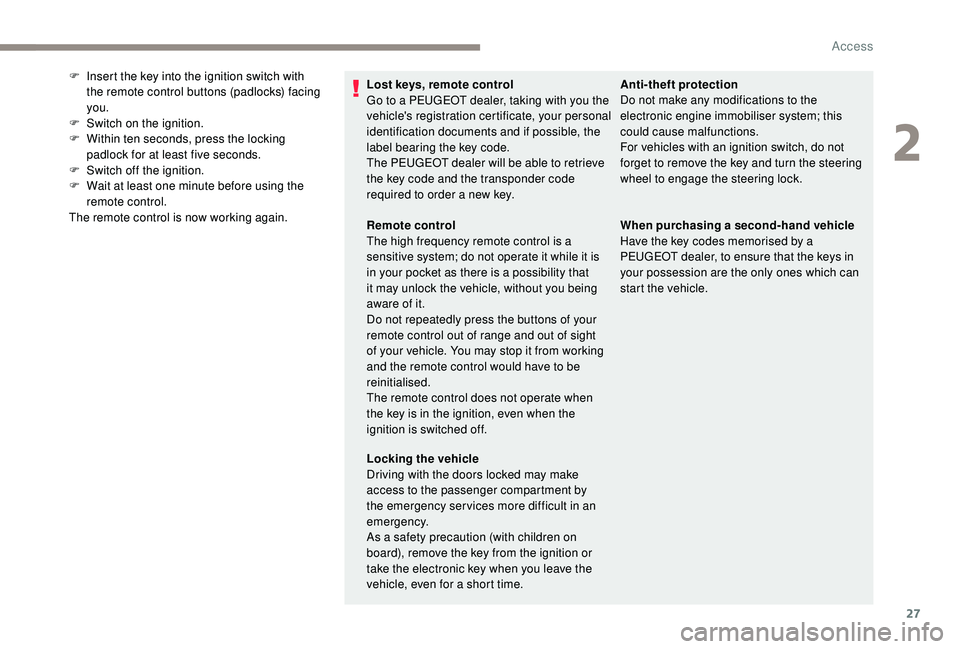
F
I
nsert the key into the ignition switch with
the remote control buttons (padlocks) facing
you.
F
S
witch on the ignition.
F
W
ithin ten seconds, press the locking
padlock for at least five seconds.
F
S
witch off the ignition.
F
W
ait at least one minute before using the
remote control.
The remote control is now working again. Anti-theft protection
Do not make any modifications to the
electronic engine immobiliser system; this
could cause malfunctions.
For vehicles with an ignition switch, do not
forget to remove the key and turn the steering
wheel to engage the steering lock.
Remote control
The high frequency remote control is a
sensitive system; do not operate it while it is
in your pocket as there is a possibility that
it may unlock the vehicle, without you being
aware of it.
Do not repeatedly press the buttons of your
remote control out of range and out of sight
of your vehicle. You may stop it from working
and the remote control would have to be
reinitialised.
The remote control does not operate when
the key is in the ignition, even when the
ignition is switched off.
Locking the vehicle
Driving with the doors locked may make
access to the passenger compartment by
the emergency ser vices more difficult in an
emergency.
As a safety precaution (with children on
board), remove the key from the ignition or
take the electronic key when you leave the
vehicle, even for a short time. When purchasing a second-hand vehicle
Have the key codes memorised by a
PEUGEOT dealer, to ensure that the keys in
your possession are the only ones which can
start the vehicle.
2
Access
Page 66 of 252
28
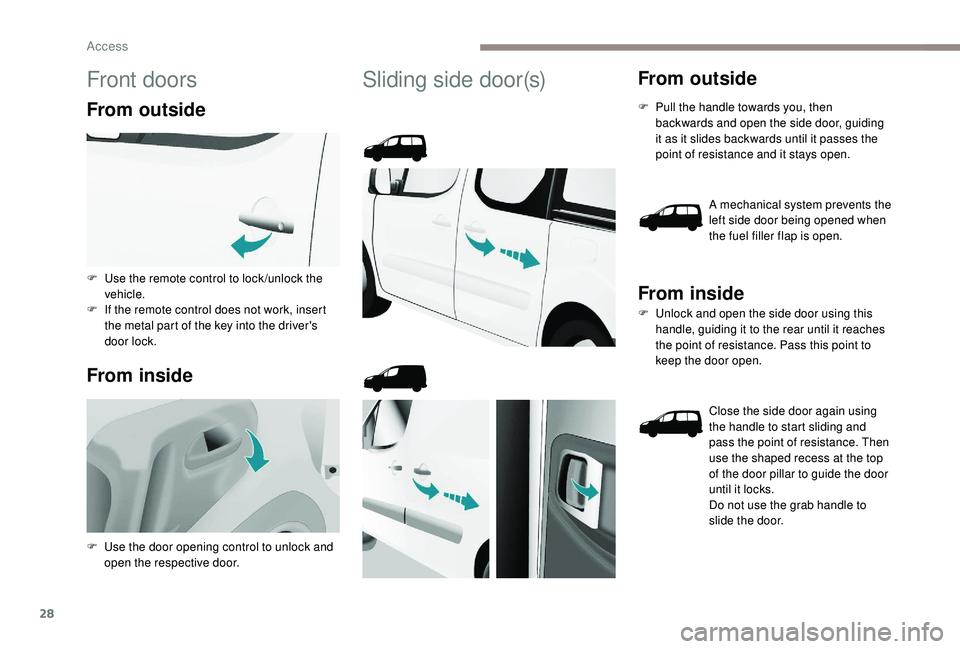
Front doors
From outside
From inside
Sliding side door(s)From outside
F Pull the handle towards you, then backwards and open the side door, guiding
it as it slides backwards until it passes the
point of resistance and it stays open.
A mechanical system prevents the
left side door being opened when
the fuel filler flap is open.
From inside
F Unlock and open the side door using this handle, guiding it to the rear until it reaches
the point of resistance. Pass this point to
keep the door open.
Close the side door again using
the handle to start sliding and
pass the point of resistance. Then
use the shaped recess at the top
of the door pillar to guide the door
until it locks.
Do not use the grab handle to
slide the door.
F
U
se the remote control to lock /unlock the
vehicle.
F
I
f the remote control does not work, insert
the metal part of the key into the driver's
door lock.
F
U
se the door opening control to unlock and
open the respective door.
Access
Page 67 of 252
29
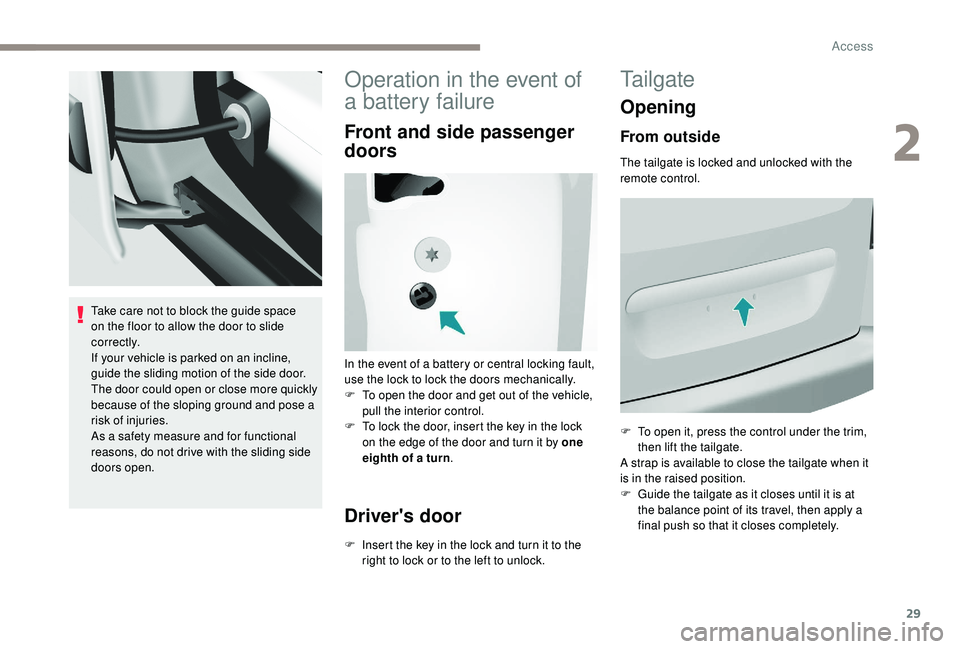
Take care not to block the guide space
on the floor to allow the door to slide
c o r r e c t l y.
If your vehicle is parked on an incline,
guide the sliding motion of the side door.
The door could open or close more quickly
because of the sloping ground and pose a
risk of injuries.
As a safety measure and for functional
reasons, do not drive with the sliding side
doors open.
Operation in the event of
a battery failure
Front and side passenger
doors
In the event of a battery or central locking fault,
use the lock to lock the doors mechanically.
F
T
o open the door and get out of the vehicle,
pull the interior control.
F
T
o lock the door, insert the key in the lock
on the edge of the door and turn it by one
eighth of a turn .
Driver's door
F Insert the key in the lock and turn it to the
right to lock or to the left to unlock.
Tailgate
Opening
From outside
The tailgate is locked and unlocked with the
remote control.
F
T
o open it, press the control under the trim,
then lift the tailgate.
A strap is available to close the tailgate when it
is in the raised position.
F
G
uide the tailgate as it closes until it is at
the balance point of its travel, then apply a
final push so that it closes completely.
2
Access