2017 PEUGEOT PARTNER TEPEE ELECTRIC stop start
[x] Cancel search: stop startPage 7 of 252
5
The remaining range is no longer
calculated. The power of the drive train is
progressively reduced.
The heating and air conditioning are
stopped (even if the needle that indicates
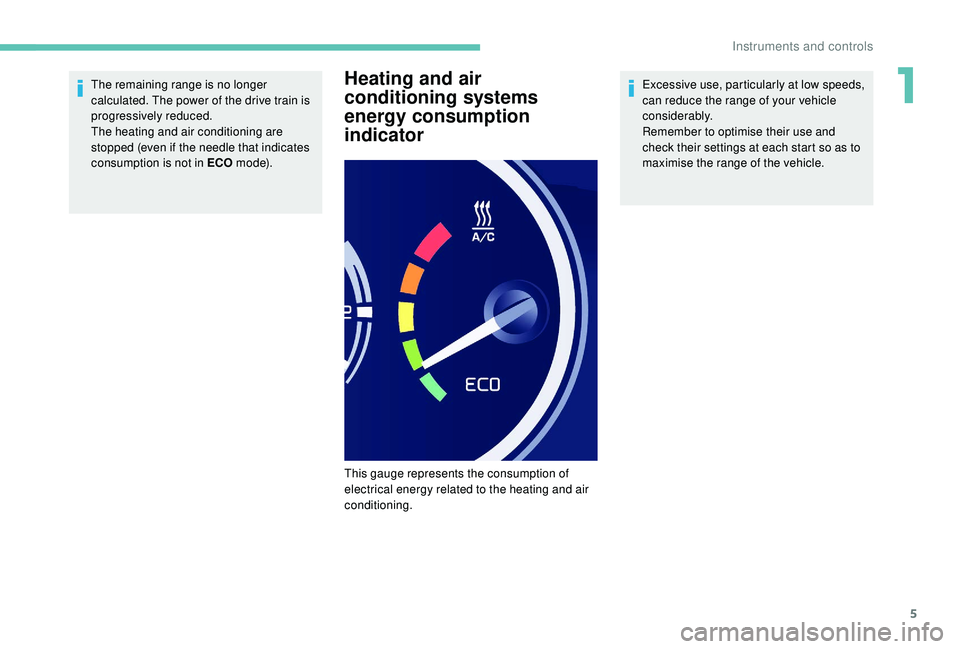
consumption is not in ECO m o d e).Heating and air
conditioning systems
energy consumption
indicatorExcessive use, particularly at low speeds,
can reduce the range of your vehicle
considerably.
Remember to optimise their use and
check their settings at each start so as to
maximise the range of the vehicle.
This gauge represents the consumption of
electrical energy related to the heating and air
conditioning.
1
Instruments and controls
Page 8 of 252
6
Warning and indicator lamps
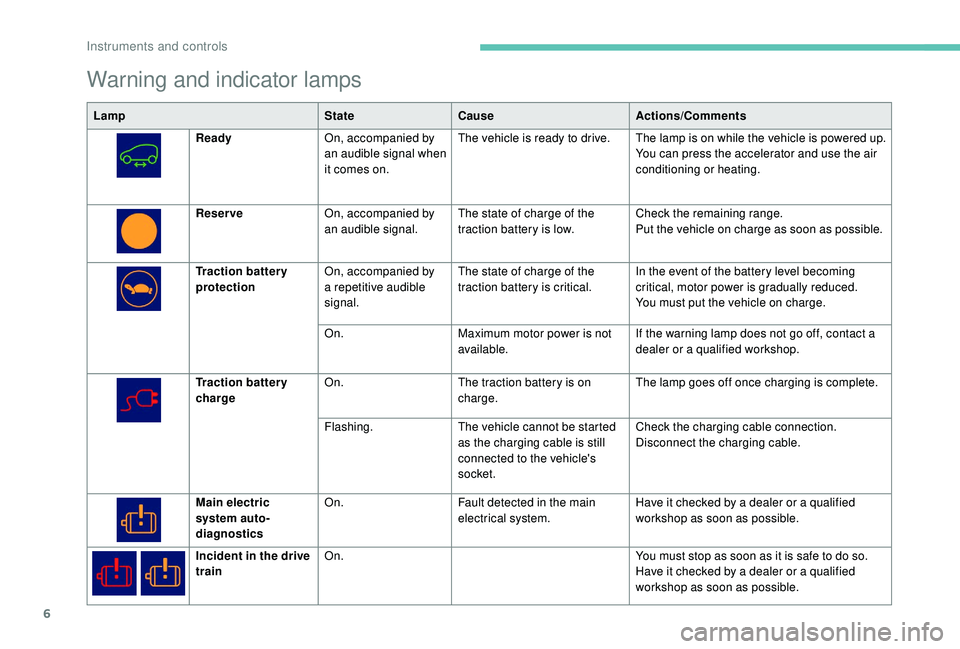
LampStateCause Actions/Comments
Ready On, accompanied by
an audible signal when
it comes on. The vehicle is ready to drive. The lamp is on while the vehicle is powered up.
You can press the accelerator and use the air
conditioning or heating.
Reser ve On, accompanied by
an audible signal. The state of charge of the
traction battery is low. Check the remaining range.
Put the vehicle on charge as soon as possible.
Traction battery
protection On, accompanied by
a repetitive audible
signal. The state of charge of the
traction battery is critical.
In the event of the battery level becoming
critical, motor power is gradually reduced.
You must put the vehicle on charge.
On. Maximum motor power is not
available. If the warning lamp does not go off, contact a
dealer or a qualified workshop.
Traction battery
charge On.
The traction battery is on
charge. The lamp goes off once charging is complete.
Flashing. The vehicle cannot be started
as the charging cable is still
connected to the vehicle's
socket. Check the charging cable connection.
Disconnect the charging cable.
Main electric
system auto-
diagnostics On.
Fault detected in the main
electrical system. Have it checked by a dealer or a qualified
workshop as soon as possible.
Incident in the drive
train On.
You must stop as soon as it is safe to do so.
Have it checked by a dealer or a qualified
workshop as soon as possible.
Instruments and controls
Page 11 of 252

9
Parking the vehicle
When leaving the vehicle, it is strongly
recommended that you apply the parking
brake, place the drive selector in position P,
then switch off the ignition.
There is an audible signal on opening the
driver's door if:
-
t
he ignition is still on (" Ready" lamp on),
-
t
he vehicle has not been correctly
immobilised (drive selector not in
position P ).
An alert message is displayed in the screen.
Drive selector
P (Park). Parking. Move the selector
to position P , an audible signal will
sound.
If the drive selector is not in position P and/or if
the brake pedal is not pressed, the vehicle will
not start. Repeat the procedure for starting the
vehicle.
Selecting position D or R on the selector
determines the driving direction. It is preferable
to be at a complete stop before changing the
drive direction. The selection appears in the current energy
consumption screen in the instrument panel.
The driver must be particularly vigilant
when driving the electric vehicle as it
makes very little noise when moving. N (Neutral). Neutral. Move the
selector to position N , an audible
signal will sound.
Do not select this position, even momentarily,
when the vehicle is moving.
The vehicle is free-wheeling. Select D to return
to for ward drive. D (Drive). For ward drive. Move the
selector to position D , an audible
signal will sound. It is recommended to keep the brake pedal
pressed down to select positions R or D
.
R (Reverse). Reverse. Move the
selector to position R , an audible
signal will sound.
Only engage reverse when the vehicle is
immobilised.
When moving from position R to position P , N is
displayed momentarily in the instrument panel.
There is an audible signal when changing
drive position with the selector.
The audible signal is deactivated if the user has
chosen to inhibit operation of the "Rear parking
sensors".
1
Instruments and controls
Page 13 of 252
11
Eco-comfort
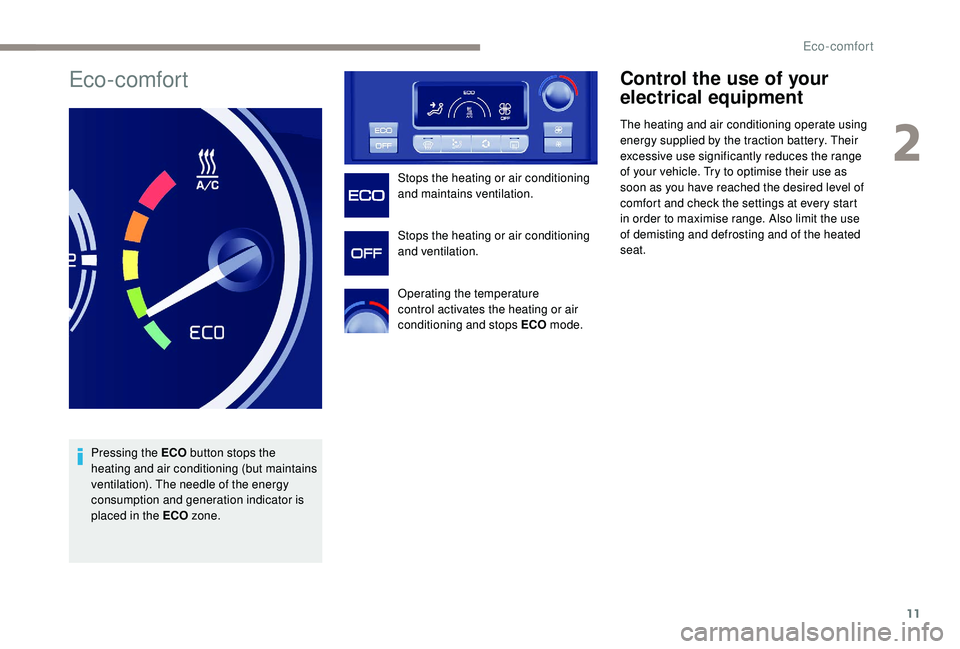
Pressing the ECO button stops the
heating and air conditioning (but maintains
ventilation). The needle of the energy
consumption and generation indicator is
placed in the ECO zone. Stops the heating or air conditioning
and maintains ventilation.
Stops the heating or air conditioning
and ventilation.
Operating the temperature
control activates the heating or air
conditioning and stops ECO mode.
Control the use of your
electrical equipment
The heating and air conditioning operate using
energy supplied by the traction battery. Their
excessive use significantly reduces the range
of your vehicle. Try to optimise their use as
soon as you have reached the desired level of
comfort and check the settings at every start
in order to maximise range. Also limit the use
of demisting and defrosting and of the heated
seat.
2
Eco-comfort
Page 23 of 252
21
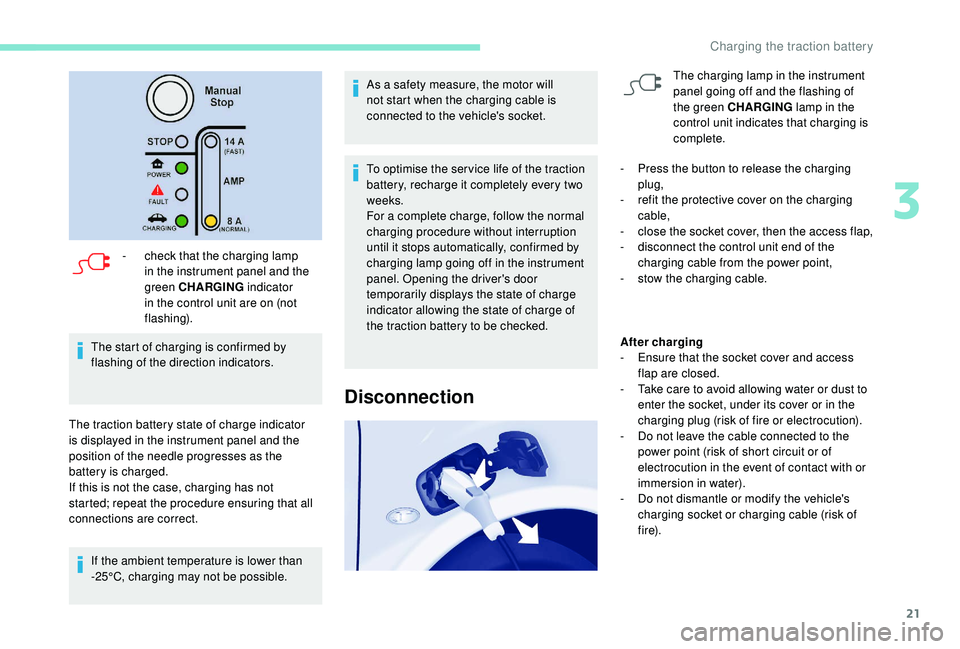
- check that the charging lamp in the instrument panel and the
green CHARGING indicator
in the control unit are on (not
flashing).
The start of charging is confirmed by
flashing of the direction indicators.
The traction battery state of charge indicator
is displayed in the instrument panel and the
position of the needle progresses as the
battery is charged.
If this is not the case, charging has not
started; repeat the procedure ensuring that all
connections are correct. If the ambient temperature is lower than
-25°C, charging may not be possible. As a safety measure, the motor will
not start when the charging cable is
connected to the vehicle's socket.
To optimise the ser vice life of the traction
battery, recharge it completely every two
weeks.
For a complete charge, follow the normal
charging procedure without interruption
until it stops automatically, confirmed by
charging lamp going off in the instrument
panel. Opening the driver's door
temporarily displays the state of charge
indicator allowing the state of charge of
the traction battery to be checked.
Disconnection
The charging lamp in the instrument
panel going off and the flashing of
the green CHARGING
lamp in the
control unit indicates that charging is
complete.
-
P
ress the button to release the charging
plug,
-
r
efit the protective cover on the charging
cable,
-
c
lose the socket cover, then the access flap,
-
d
isconnect the control unit end of the
charging cable from the power point,
-
s
tow the charging cable.
After charging
-
E
nsure that the socket cover and access
flap are closed.
-
T
ake care to avoid allowing water or dust to
enter the socket, under its cover or in the
charging plug (risk of fire or electrocution).
-
D
o not leave the cable connected to the
power point (risk of short circuit or of
electrocution in the event of contact with or
immersion in water).
-
D
o not dismantle or modify the vehicle's
charging socket or charging cable (risk of
f i r e).
3
Charging the traction battery
Page 25 of 252
23
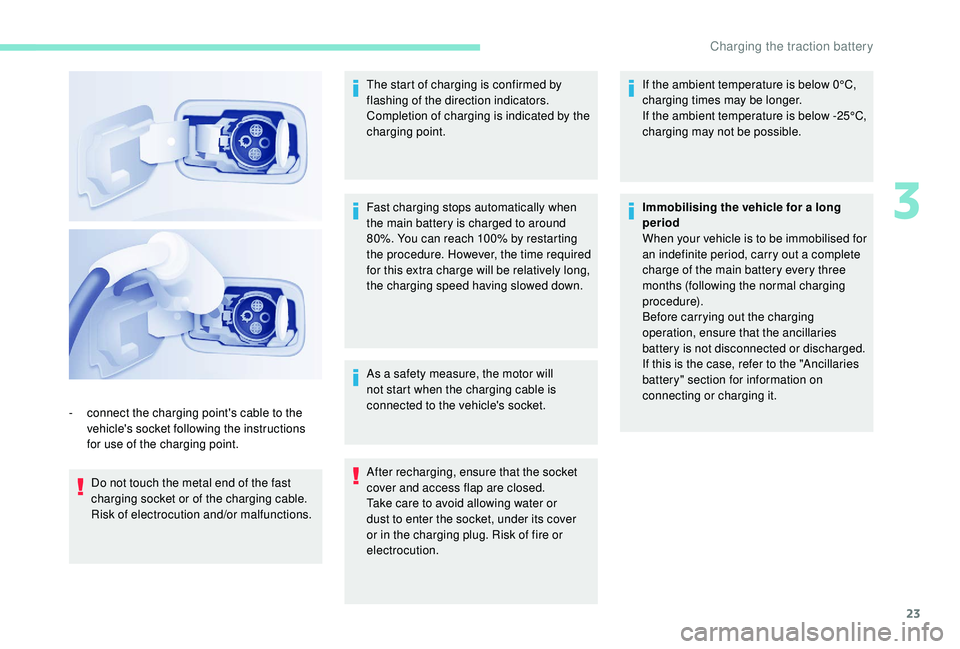
Do not touch the metal end of the fast
charging socket or of the charging cable.
Risk of electrocution and/or malfunctions.The start of charging is confirmed by
flashing of the direction indicators.
Completion of charging is indicated by the
charging point.
-
c
onnect the charging point's cable to the
vehicle's socket following the instructions
for use of the charging point. Fast charging stops automatically when
the main battery is charged to around
80%. You can reach 100% by restarting
the procedure. However, the time required
for this extra charge will be relatively long,
the charging speed having slowed down.
As a safety measure, the motor will
not start when the charging cable is
connected to the vehicle's socket.
After recharging, ensure that the socket
cover and access flap are closed.
Take care to avoid allowing water or
dust to enter the socket, under its cover
or in the charging plug. Risk of fire or
electrocution.If the ambient temperature is below 0°C,
charging times may be longer.
If the ambient temperature is below -25°C,
charging may not be possible.
Immobilising the vehicle for a long
period
When your vehicle is to be immobilised for
an indefinite period, carry out a complete
charge of the main battery every three
months (following the normal charging
procedure).
Before carrying out the charging
operation, ensure that the ancillaries
battery is not disconnected or discharged.
If this is the case, refer to the "Ancillaries
battery" section for information on
connecting or charging it.
3
Charging the traction battery
Page 41 of 252

3
.
.
Driving recommendations 103
Starting and stopping 1 04
Electronic engine immobiliser
1
05
Parking brake
1
05
Manual gearbox
1
05
6-speed electronic gearbox
1
06
Gear shift indicator
1
08
Stop & Start
1
08
Hill start assist
1
11
Tyre under-inflation detection
1
12
Tyre under-inflation detection with
reinitialisation
113
Speed limiter
1
15
Cruise control
1
17
Active City Brake
1
20
Parking sensors
1
22
Reversing camera
1
24Fuel 1
26
Fuel system cut-off 1 27
Compatibility of fuels
1
28
Snow chains
1
29
Removable snow shield
1
30
Changing a wiper blade
1
30
Towing device
1
31
Towbar with a swan neck towball
1
31
Roof bars
1
33
Zenith roof bars
1
33
Maximum weights on bars
1
34
Other accessories
1
34
Bonnet
13 5
Engines
1
36
Checking levels
1
36
Chec ks
13 8
AdBlue
® (BlueHDi engines) 1 40
Temporary puncture repair kit
1
43
Changing a wheel
1
43
Fitting the wheel trim on the rim
1
47
Changing a bulb
1
49
Changing a fuse
1
54
Battery
158
Economy mode
1
59
Towing your vehicle
1
59
Running out of fuel (Diesel)
1
60
Characteristics of engines and towed loads 1 61Petrol engines/weights 162
Diesel engines/weights 1 63
Dimensions
165
Identification markings
1
74
DrivingPractical information
In the event of a breakdown Technical data
Alphabetical index
Audio and Telematics
7-inch touch screen
Peugeot Connect Sound (RD5)
.
Contents
Page 42 of 252

4
Instruments and controls1.Lighting and direction indicator control
stalk.
2. Instrument panel with display.
3. Wiper/screenwash/trip computer control
stalk.
4. Ignition.
5. Audio system controls.
6. Driver's front airbag/horn.
7. Steering wheel height and reach
adjustment.
8. Cruise control/speed limiter controls.
9. Control panel: parking sensors, headlamp
beam adjustment, ESC, Stop & Start,
alarm (depending on country of sale).
10. Bonnet release.
11. Electric door mirror adjustment controls.
12 . Front window controls.
13. Switch panel: hazard warning lamps,
central locking, child lock (depending on
ve r s i o n).
14 . Cigarette lighter.
15. Heating/ventilation controls.
16. Electronic gearbox or Grip control
control.
17. Touch screen.
18. USB port (with electronic gearbox).
19. USB port (with manual gearbox).
Over view