2017 PEUGEOT PARTNER TEPEE ELECTRIC open bonnet
[x] Cancel search: open bonnetPage 72 of 252
34
When the vehicle moves off, as soon as you
reach approximately 6 mph (10 km/h), the
system locks the doors. The characteristic
central locking noise is heard. The LED in the
control switch on the dashboard central switch
panel comes on.
During the journey, opening a door results in
complete unlocking of the vehicle.
Activation/deactivation of the
system
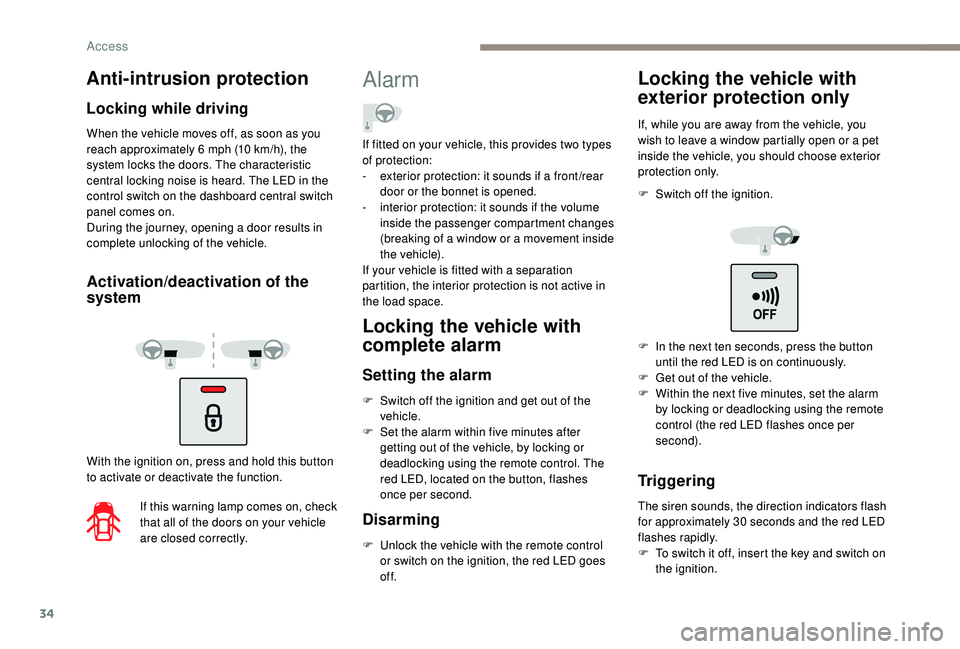
With the ignition on, press and hold this button
to activate or deactivate the function.
If this warning lamp comes on, check
that all of the doors on your vehicle
are closed correctly.
Alarm
Locking the vehicle with
complete alarm
Setting the alarm
F Switch off the ignition and get out of the vehicle.
F
S
et the alarm within five minutes after
getting out of the vehicle, by locking or
deadlocking using the remote control. The
red LED, located on the button, flashes
once per second.
Disarming
F Unlock the vehicle with the remote control or switch on the ignition, the red LED goes
of f.
Locking the vehicle with
exterior protection only
If, while you are away from the vehicle, you
wish to leave a window partially open or a pet
inside the vehicle, you should choose exterior
protection only.
F
S
witch off the ignition.
Triggering
The siren sounds, the direction indicators flash
for approximately 30 seconds and the red LED
flashes rapidly.
F
T
o switch it off, insert the key and switch on
the ignition.
Anti-intrusion protection
Locking while driving
If fitted on your vehicle, this provides two types
of protection:
-
e
xterior protection: it sounds if a front /rear
door or the bonnet is opened.
-
i
nterior protection: it sounds if the volume
inside the passenger compartment changes
(breaking of a window or a movement inside
the vehicle).
If your vehicle is fitted with a separation
partition, the interior protection is not active in
the load space.
F
I
n the next ten seconds, press the button
until the red LED is on continuously.
F
G
et out of the vehicle.
F
W
ithin the next five minutes, set the alarm
by locking or deadlocking using the remote
control (the red LED flashes once per
second).
Access
Page 148 of 252
110
Manual deactivation
In certain circumstances, such as the need
to maintain a comfortable temperature in the
passenger compartment, it may be preferable
to deactivate the Stop & Start system.
The system can be deactivated at any time,
once the ignition is switched on.
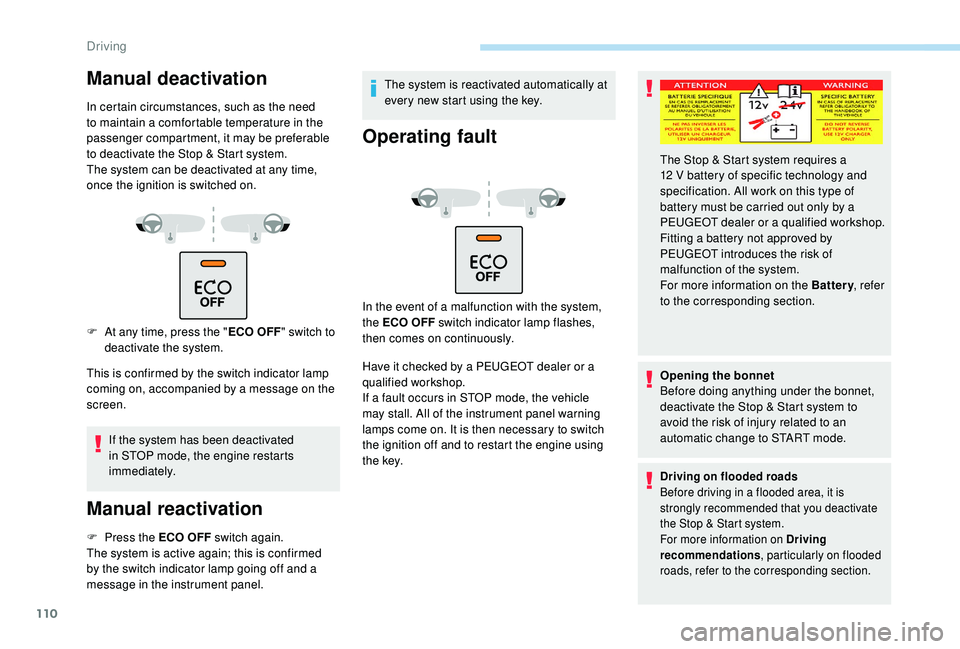
F
A
t any time, press the " ECO OFF"
switch to
deactivate the system.
This is confirmed by the switch indicator lamp
coming on, accompanied by a message on the
screen.
If the system has been deactivated
in STOP mode, the engine restarts
immediately.
Manual reactivation
F Press the ECO OFF switch again.
The system is active again; this is confirmed
by the switch indicator lamp going off and a
message in the instrument panel. The system is reactivated automatically at
every new start using the key.
Operating fault
In the event of a malfunction with the system,
the ECO OFF switch indicator lamp flashes,
then comes on continuously.
Have it checked by a PEUGEOT dealer or a
qualified workshop.
If a fault occurs in STOP mode, the vehicle
may stall. All of the instrument panel warning
lamps come on. It is then necessary to switch
the ignition off and to restart the engine using
t h e key.
Opening the bonnet
Before doing anything under the bonnet,
deactivate the Stop & Start system to
avoid the risk of injury related to an
automatic change to START mode.
Driving on flooded roads
Before driving in a flooded area, it is
strongly recommended that you deactivate
the Stop & Start system.
For more information on Driving
recommendations
, particularly on flooded
roads, refer to the corresponding section.
The Stop & Start system requires a
12 V battery of specific technology and
specification. All work on this type of
battery must be carried out only by a
PEUGEOT dealer or a qualified workshop.
Fitting a battery not approved by
PEUGEOT
introduces the risk of
malfunction of the system.
For more information on the Battery , refer
to the corresponding section.
Driving
Page 173 of 252
135
taking into account the device specifics and
their compatibility with the capacities of the
standard equipment of your vehicle. Please
check this with a PEUGEOT dealer in advance.
The spare parts department publishes a
catalogue of accessories offering various
equipment and fittings, such as:
Load stops (all types).
Loading roller.
Towbar, towing harness: trailer towbar, which
must be installed by a PEUGEOT dealer.
Partition walls and dividing grilles, smooth
wood interior protection with non-slip floor.
Protective grilles.
Professional equipment
range
Bonnet
Opening
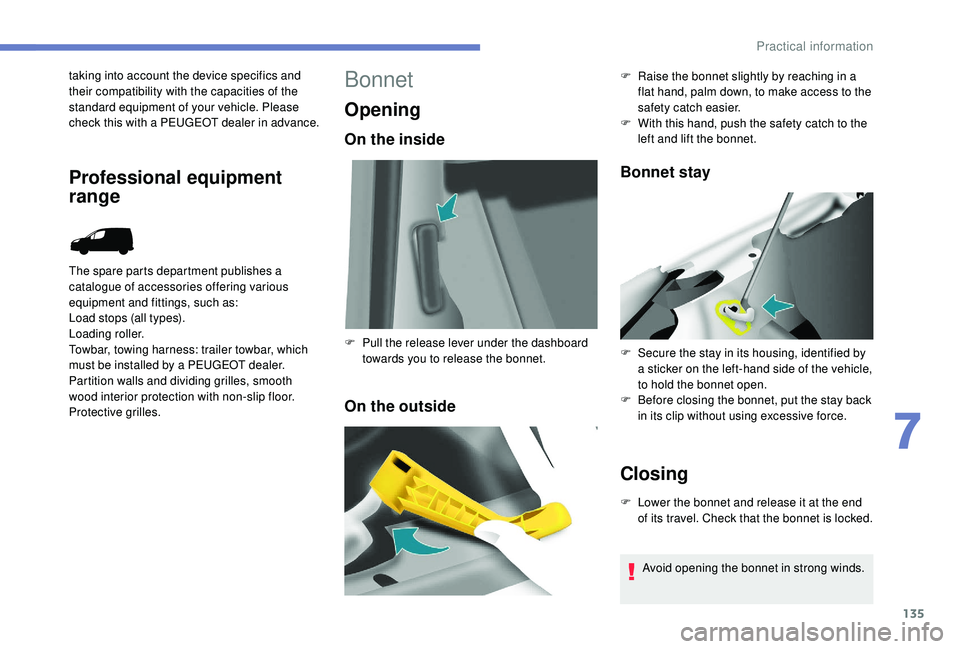
On the inside
On the outsideBonnet stay
Closing
F Lower the bonnet and release it at the end
of its travel. Check that the bonnet is locked.
F
P
ull the release lever under the dashboard
towards you to release the bonnet. F
R
aise the bonnet slightly by reaching in a
flat hand, palm down, to make access to the
safety catch easier.
F
W
ith this hand, push the safety catch to the
left and lift the bonnet.
F
S
ecure the stay in its housing, identified by
a sticker on the left-hand side of the vehicle,
to hold the bonnet open.
F
B
efore closing the bonnet, put the stay back
in its clip without using excessive force.
Avoid opening the bonnet in strong winds.
7
Practical information
Page 188 of 252
150
Open the bonnet. To access the bulbs, reach
behind the headlamp unit.
Carry out the operations in reverse order to
refit each bulb and check that the bonnet is
closed securely.Halogen bulbs must be changed with the
headlamps off. Wait a few minutes (risk
of serious burns). Do not touch the bulb
directly with your fingers, use a lint-free
cloth.
It is normal for condensation to form inside
the headlamps. Regular use of the vehicle
eliminates this misting.
The bulbs must be changed with the
ignition off or the battery disconnected.
Wait approximately three minutes after
changing the bulb before reconnecting the
battery.
Check that the lamps are working properly
after each operation.
High-pressure jet wash
When using this type of washer on
stubborn dirt, do not persist on the
headlamps, the lamps and their edges to
avoid damaging their coating and seals.
Front lampsDipped beam headlamps/Main
beam headlamps
Ty p e C , H4 – 55W
F R emove the centre cover by pulling on the
flexible rubber tab.
F
D
isconnect the electrical connector.
F
R
elease the retaining tab.
F
C
hange the bulb taking care to align the
metal part with the grooves on the lamp.
F
R
eposition the retaining tab.
F
E
nsure that the cover is refitted correctly all
around to ensure correct sealing.
Sidelamps
Ty p e A , W5W – 5W
F
R
emove the cover by pulling on the flexible
rubber tab.
F
R
emove the pressure-mounted bulb holder
by pulling the connector.
F
C
hange the bulb.
F
E
nsure that the cover is refitted correctly all
around to ensure correct sealing.
Direction indicators
Ty p e B , PY21W – 21W (amber)
F
R
emove the cover by pulling on the flexible
rubber tab.
F
T
urn the bulb holder a quarter turn
anticlockwise.
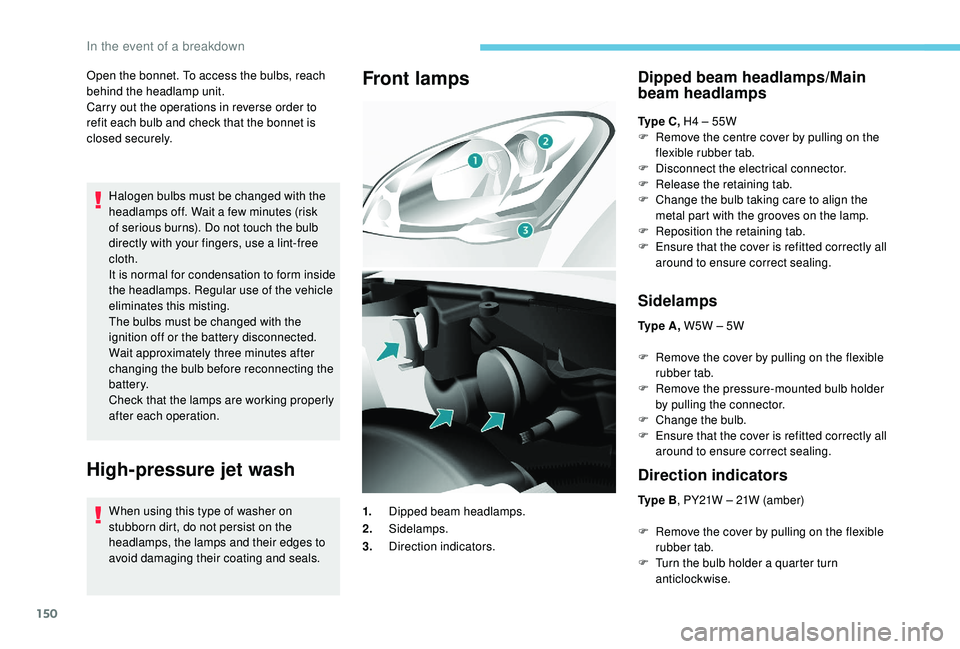
1.
Dipped beam headlamps.
2. Sidelamps.
3. Direction indicators.
In the event of a breakdown
Page 195 of 252
157
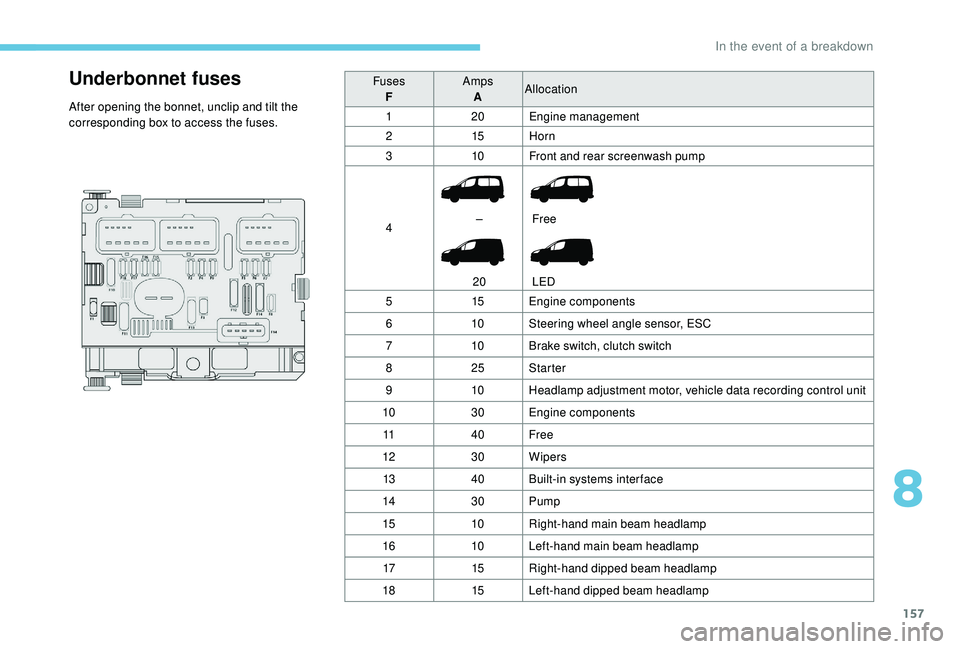
Underbonnet fuses
After opening the bonnet, unclip and tilt the
corresponding box to access the fuses.Fuses
F Amps
A Allocation
1 20Engine management
2 15Horn
3 10Front and rear screenwash pump
4 –
20 Free
LED
5 15Engine components
6 10Steering wheel angle sensor, ESC
7 10Brake switch, clutch switch
8 25Starter
9 10Headlamp adjustment motor, vehicle data recording control unit
10 30Engine components
11 40Free
12 30Wipers
13 40Built-in systems inter face
14 30Pump
15 10Right-hand main beam headlamp
16 10Left-hand main beam headlamp
17 15Right-hand dipped beam headlamp
18 15Left-hand dipped beam headlamp
8
In the event of a breakdown
Page 246 of 252
176
GGearbox, automatic ..............................108 -109
Gearbox, electronic .......................10 6 -107, 11 0
Gearbox, manual
...........105 -10 6 , 108 -110 , 140
Gearbox, manual (reverse gear) ...........105 -10 6
Gear lever, manual gearbox
.........................105
Gear shift indicator ~ Gear efficiency indicator
...............................16, 108
Glove box
........................................................ 55
Grip control
............................................... 80 - 81
HHeadlamps, dipped beam ...............................71
Headlamps, main beam ............................16, 71
Head restraints .......................................... 38-39
Hill start assist
............................................... 111
IIdentification.................................................. 174
Immobiliser, electronic ....................................27
Indicator lamps, operation
................................ 8
I
nstrument panel
............................................... 7
Instruments and controls
..................................4
JJack ............................... ....................................9
KKey .................................................................. 27
Kit, hands-free ................................... 1
4 -16, 6-8
Kit, temporary puncture repair
...................... 14
3
LLevels ............................................................ 13 6
Levels and checks .............................. ...13 6 -13 9
Lighting
............................................................ 71
Lighting, directional
......................................... 73
Locking
...............................
.............................27
Low fuel level
................................................ 12
6
MMenu, main .......................................................2
M irror, rear view .............................................. 38
Mirrors, door .................................................... 37
Mountings, ISOFIX
......................................... 98
MP3 CD
............................................................. 5
NNet ............................................................. 62- 63
OOil, engine ..................................................... 13 6
Opening the bonnet ...................................... 13 5
Overhead storage
........................................... 55
PPads, brake ........................................... 13 8, 140
Parcel shelf, rear ............................................. 60
Parking brake
.......................... 10, 105 , 13 8, 140
Plates, identification ...................................... 174
Player, Apple
® ............................................. 11, 6
Player, MP3 CD ............................... ..............5-6
Player, USB
................................................... 9, 4
Port, USB
...................................................... 9, 4
Pressures, tyres
............................................ 174
Pre-tensioning seat belts ................................84
Priming the fuel system ................................160
Protecting children
......................89-90, 99, 101
RRadio ................................................... 7- 8, 10 , 3
Radio, digital (Digital Audio Broadcasting - DAB)
...................................8
-9
Range, AdBlue
.......................................... 13, 21
RDS
................
................................................... 8
Reinitialisation of the under- inflation detection system
...........................114
Reinitialising the electric windows
.................. 36
R
emote control
.......................................... 25 -27
Replacing bulbs
..................................... 1
4 9 -15 0
Replacing the oil filter
................................... 13
9
Reversing camera
...............................
..........124
Risk areas (update)
........................................... 5
Roof bars
................................................13 3 -13 4
Running out of fuel (Diesel)
..........................160
SSafety, children ........................... 89-90, 99, 101
SCR (Selective Catalytic Reduction) ............140
Screen, monochrome
....................................... 2
Screenwash fluid
.......................................... 13 6
Seat, rear bench
....................................... 42- 43
Seat belts
............................................ 83-84, 94
Seats, front
...............................
.................3 8 - 41
Seats, front bench
..................................... 4 0 - 41
Seats, heated
.................................................. 39
Seats, rear
................................................. 43-50
Settings, system
.............................................. 12
Shield, snow
.................................................. 13
0
Sidelamps
....................................................... 71
S
now chains
.................................................. 12 9
Alphabetical index