Page 3 of 252
1
.
Instrument panel 3
I ndicators 3
Warning and indicator lamps
6
D
isplays
7
Starting procedure
8
E
co-driving
10
Eco-comfort
11
Manual air conditioning and heating
1
2Charging the traction battery
1
4
Normal charging procedure
2
0
Fast charging procedure
2
2
Other information
2
4
Ancillaries battery 2 7
Fuses
30
Towing the vehicle
3
0
Motor and traction battery
3
1
Identification markings
3
2
Presentation
Instruments and controls
Eco-comfort Charging the traction battery
Supplement for electric mode Ancillaries batteryThis supplement is specific to the electric
drive mode. For any other information, refer
to the vehicle's handbook and the warranty
and maintenance guide. You can also visit
the manufacturer's website for the latest
information.
The driver must be par ticularly vigilant
when driving the electric vehicle as it
makes ver y little noise when moving.
Key
Safety warning
Additional information
Warning of safety issues for people
and equipment.
For any work on your vehicle, go to a qualified
workshop that has the technical information,
competence and equipment required, which
the Manufacturer's dealer network is able to
provide.
Contents
.
Contents
Page 32 of 252

30
Fuses
The fusebox is placed in the lower dashboard (left-hand side).
The designations provided are for the fuses that can be replaced by the user. For any other work,
contact a franchised dealer or a qualified workshop.Fuse no. Rating Functions
1 15
ARear wiper.
3 5
AAirbags.
4 10
ADiagnostic socket, mirror control, headlamp beams.
5 30
AWindow controls.
6 30
ASide-hinged door lock.
7 5
A Rear courtesy lamp, roof, glove box.
8 20
A Audio system, screen, alarm and siren.
11 15
AAnti-theft.
12 15
AAir conditioning control panel, front and rear parking sensors.
13 5
AInstrument panel.
14 15
ARain and sunshine sensor, airbags.
15 5
AOther locks.
17 40
ARear screen / mirrors demisting.
Towing the vehicle
Front towing eye
The towing eye is stowed in the tool box under
the passenger's seat.
Towing the vehicle with the driving wheels on
the ground is prohibited.
When towing the vehicle with just two wheels
on the ground, use professional lifting
equipment.
Failure to do this may cause damage to the
braking components and the electric motor.
Supplement for electric mode
Page 33 of 252
31
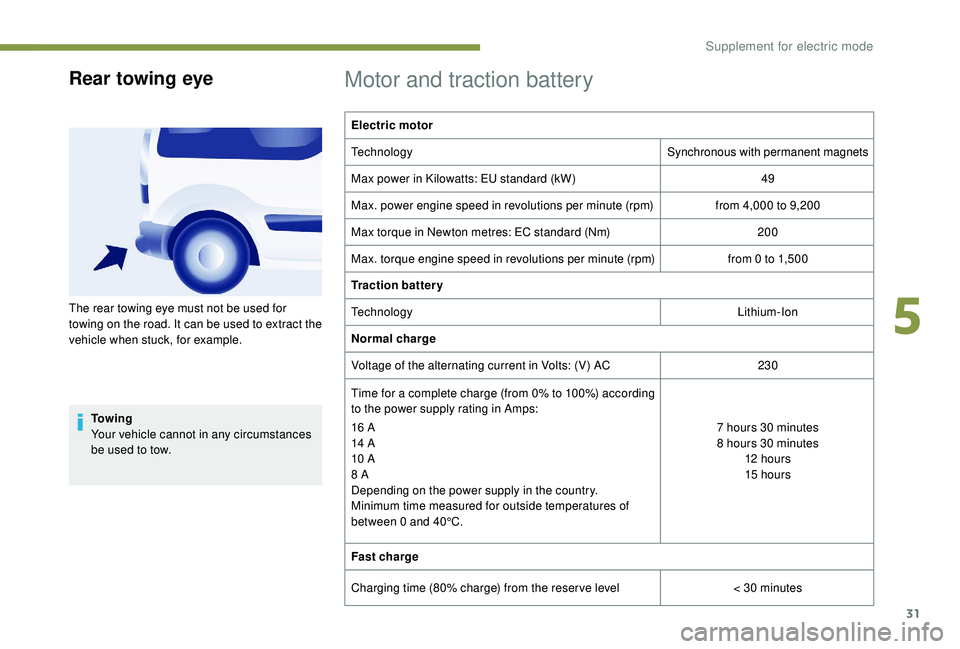
Rear towing eye
To w i n g
Your vehicle cannot in any circumstances
be used to tow.
Motor and traction battery
Electric motor
TechnologySynchronous with permanent magnets
Max power in Kilowatts: EU standard (kW) 49
Max. power engine speed in revolutions per minute (rpm) from 4,000
to 9,200
Max torque in Newton metres: EC standard (Nm) 200
Max. torque engine speed in revolutions per minute (rpm) from 0
to 1,500
Traction battery
Technology Lithium-Ion
Normal charge
Voltage of the alternating current in Volts: (V) AC 230
Time for a complete charge (from 0% to 100%) according
to the power supply rating in Amps:
16
A
14
A
10
A
8
A
Depending on the power supply in the country.
Minimum time measured for outside temperatures of
between 0
and 40°C. 7
hours 30 minutes
8
hours 30 minutes
12
hour s
15
hours
Fast charge
Charging time (80% charge) from the reser ve level < 30
minutes
The rear towing eye must not be used for
towing on the road. It can be used to extract the
vehicle when stuck, for example.
5
Supplement for electric mode
Page 41 of 252

3
.
.
Driving recommendations 103
Starting and stopping 1 04
Electronic engine immobiliser
1
05
Parking brake
1
05
Manual gearbox
1
05
6-speed electronic gearbox
1
06
Gear shift indicator
1
08
Stop & Start
1
08
Hill start assist
1
11
Tyre under-inflation detection
1
12
Tyre under-inflation detection with
reinitialisation
113
Speed limiter
1
15
Cruise control
1
17
Active City Brake
1
20
Parking sensors
1
22
Reversing camera
1
24Fuel 1
26
Fuel system cut-off 1 27
Compatibility of fuels
1
28
Snow chains
1
29
Removable snow shield
1
30
Changing a wiper blade
1
30
Towing device
1
31
Towbar with a swan neck towball
1
31
Roof bars
1
33
Zenith roof bars
1
33
Maximum weights on bars
1
34
Other accessories
1
34
Bonnet
13 5
Engines
1
36
Checking levels
1
36
Chec ks
13 8
AdBlue
® (BlueHDi engines) 1 40
Temporary puncture repair kit
1
43
Changing a wheel
1
43
Fitting the wheel trim on the rim
1
47
Changing a bulb
1
49
Changing a fuse
1
54
Battery
158
Economy mode
1
59
Towing your vehicle
1
59
Running out of fuel (Diesel)
1
60
Characteristics of engines and towed loads 1 61Petrol engines/weights 162
Diesel engines/weights 1 63
Dimensions
165
Identification markings
1
74
DrivingPractical information
In the event of a breakdown Technical data
Alphabetical index
Audio and Telematics
7-inch touch screen
Peugeot Connect Sound (RD5)
.
Contents
Page 69 of 252
31
From outside
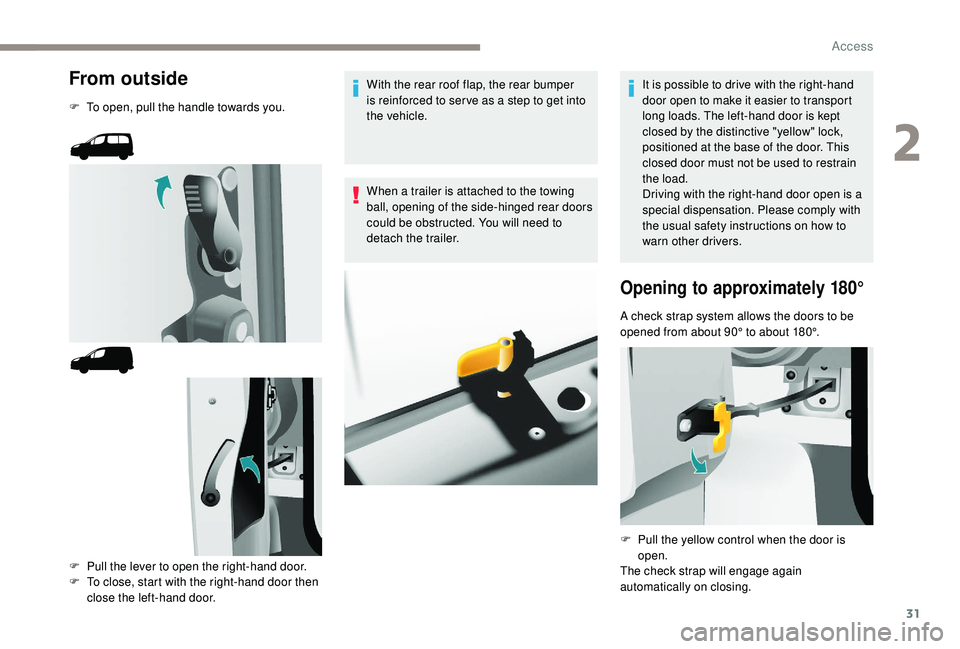
F To open, pull the handle towards you.F
P
ull the lever to open the right-hand door.
F
T
o close, start with the right-hand door then
close the left-hand door. With the rear roof flap, the rear bumper
is reinforced to ser ve as a step to get into
the vehicle.
When a trailer is attached to the towing
ball, opening of the side-hinged rear doors
could be obstructed. You will need to
detach the trailer.
It is possible to drive with the right-hand
door open to make it easier to transport
long loads. The left-hand door is kept
closed by the distinctive "yellow" lock,
positioned at the base of the door. This
closed door must not be used to restrain
the load.
Driving with the right-hand door open is a
special dispensation. Please comply with
the usual safety instructions on how to
warn other drivers.
Opening to approximately 180°
A check strap system allows the doors to be
opened from about 90° to about 180°.
F
P
ull the yellow control when the door is
open.
The check strap will engage again
automatically on closing.
2
Access
Page 88 of 252
50
Refitting the seat
The label on the seat indicates the position in
which it must be installed. F
L
ower the head restraint.
F
P
lace the seat in fully folded position.
F
T
ilt the assembly forwards.
F
T
ake hold of each side of the uprights of the
folded seat while tilting it gently for wards
and lift it.
F
P
lace the hooks of the front feet between
the two bars.
F
E
nsure that no object or feet are obstructing
the rear anchorage points and that the seat
belt is properly positioned and available.
F
F
old the seat backwards to fix its rear
anchorage feet.
F
O
perate the control to raise the backrest
into the initial position.
F
R
efit the head restraint. Do not place hard or heavy objects on
the backrests forming a table. They could
become dangerous projectiles in the event
of sharp braking or collision.
Following the various operations:
-
d
o not remove a head restraint without
stowing it; secure it inside the vehicle,
-
e
nsure that passengers can always
access the seat belts and fasten them
easily,
-
p
assengers must never take their seat
without adjusting and fastening their
seat belt.
-
a p
assenger seated in row 3 must
ensure that they do not obstruct the
row 2 seat anchorage points,
-
a p
assenger seated in row 3 must
not have the seat in front of them in
row 2 in the fully folded position; this
is in case the seat tips towards the
passenger unexpectedly, which could
cause injury.
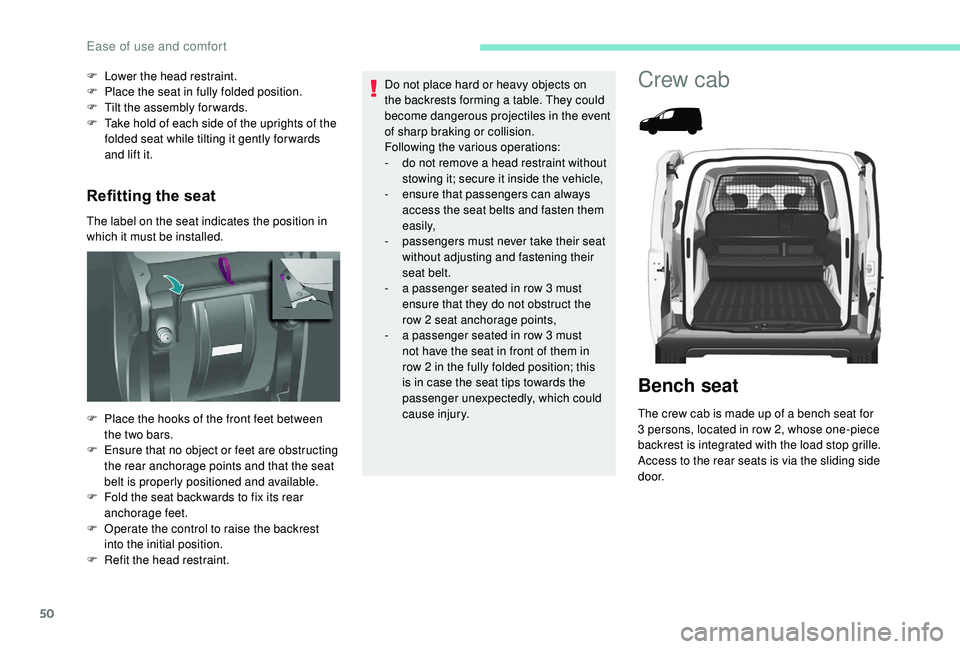
Crew cab
Bench seat
The crew cab is made up of a bench seat for
3 persons, located in row 2, whose one-piece
backrest is integrated with the load stop grille.
Access to the rear seats is via the sliding side
d o o r.
Ease of use and comfort
Page 90 of 252
52
Seat modularity and configurations
The various operations must be carried
out when stationary.
5-seat configuration
Head restraints and seat
belts
The three seats are equipped with seat belts
with inertia reels. The seat belts of the side
seats are secured on the panels, while the
seat belt of the central seat is secured on the
backrest of the bench seat.
Each seat has a head restraint, screwed to the
load stop grille, which can be removed.
Do not place a head restraint inside the
vehicle without stowing it or securing it to a
support.
Do not drive with rear passengers without
having the head restraints screwed in place.
There is no need to assist, guide or retain
it by the arm that remains free during the
tilting movement.
The rear seat belt fittings are not designed
to secure the load. Use only the stowing
rings on the floor.
The crew cab bench seat is not suitable
for the installation of a child seat.
Ease of use and comfort
Page 99 of 252
61
The connection of an electrical device
not approved by PEUGEOT, such as a
USB charger, may adversely affect the
operation of vehicle electrical systems,
causing faults such as poor radio
reception or inter ference with displays in
the screens.
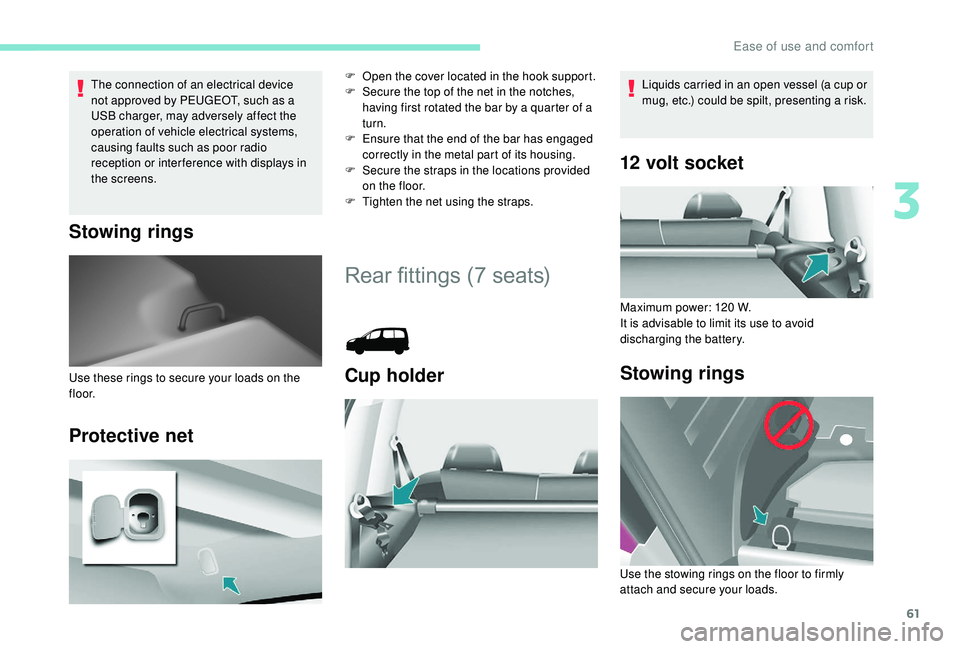
Stowing rings
Protective net
F Open the cover located in the hook support.
F S ecure the top of the net in the notches,
having first rotated the bar by a quarter of a
turn.
F
E
nsure that the end of the bar has engaged
correctly in the metal part of its housing.
F
S
ecure the straps in the locations provided
on the floor.
F
T
ighten the net using the straps.
Rear fittings (7 seats)
Cup holderUse these rings to secure your loads on the
f l o o r.
12 volt socket
Maximum power: 120 W.
I t is advisable to limit its use to avoid
discharging the battery.
Stowing rings
Liquids carried in an open vessel (a cup or
mug, etc.) could be spilt, presenting a risk.
Use the stowing rings on the floor to firmly
attach and secure your loads.
3
Ease of use and comfort