2017 PEUGEOT PARTNER TEPEE ELECTRIC fuses
[x] Cancel search: fusesPage 3 of 252
1
.
Instrument panel 3
I ndicators 3
Warning and indicator lamps
6
D
isplays
7
Starting procedure
8
E
co-driving
10
Eco-comfort
11
Manual air conditioning and heating
1
2Charging the traction battery
1
4
Normal charging procedure
2
0
Fast charging procedure
2
2
Other information
2
4
Ancillaries battery 2 7
Fuses
30
Towing the vehicle
3
0
Motor and traction battery
3
1
Identification markings
3
2
Presentation
Instruments and controls
Eco-comfort Charging the traction battery
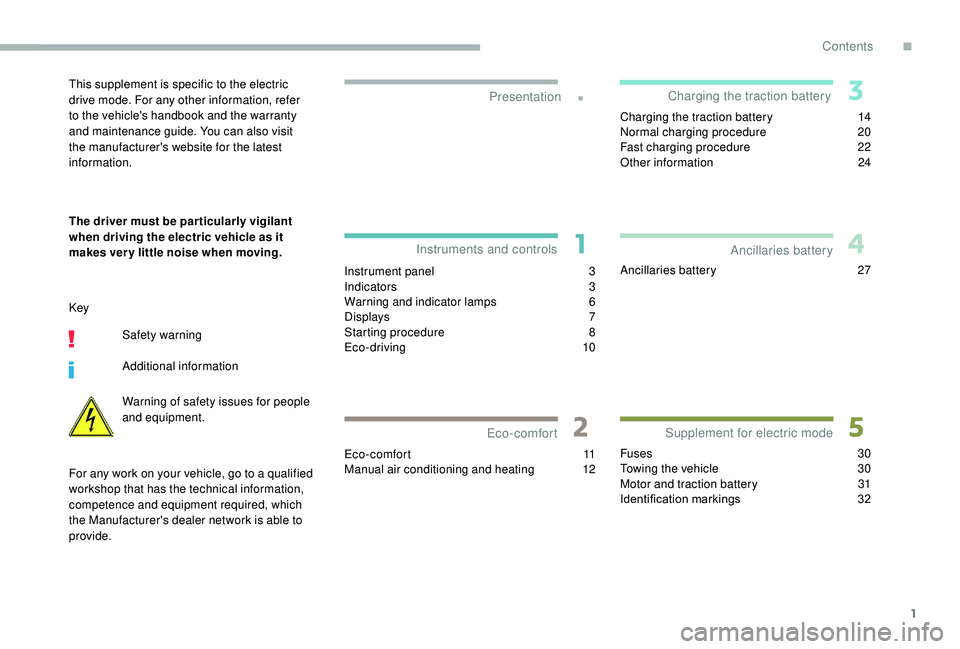
Supplement for electric mode Ancillaries batteryThis supplement is specific to the electric
drive mode. For any other information, refer
to the vehicle's handbook and the warranty
and maintenance guide. You can also visit
the manufacturer's website for the latest
information.
The driver must be par ticularly vigilant
when driving the electric vehicle as it
makes ver y little noise when moving.
Key
Safety warning
Additional information
Warning of safety issues for people
and equipment.
For any work on your vehicle, go to a qualified
workshop that has the technical information,
competence and equipment required, which
the Manufacturer's dealer network is able to
provide.
Contents
.
Contents
Page 32 of 252

30
Fuses
The fusebox is placed in the lower dashboard (left-hand side).
The designations provided are for the fuses that can be replaced by the user. For any other work,
contact a franchised dealer or a qualified workshop.Fuse no. Rating Functions
1 15
ARear wiper.
3 5
AAirbags.
4 10
ADiagnostic socket, mirror control, headlamp beams.
5 30
AWindow controls.
6 30
ASide-hinged door lock.
7 5
A Rear courtesy lamp, roof, glove box.
8 20
A Audio system, screen, alarm and siren.
11 15
AAnti-theft.
12 15
AAir conditioning control panel, front and rear parking sensors.
13 5
AInstrument panel.
14 15
ARain and sunshine sensor, airbags.
15 5
AOther locks.
17 40
ARear screen / mirrors demisting.
Towing the vehicle
Front towing eye
The towing eye is stowed in the tool box under
the passenger's seat.
Towing the vehicle with the driving wheels on
the ground is prohibited.
When towing the vehicle with just two wheels
on the ground, use professional lifting
equipment.
Failure to do this may cause damage to the
braking components and the electric motor.
Supplement for electric mode
Page 95 of 252
57
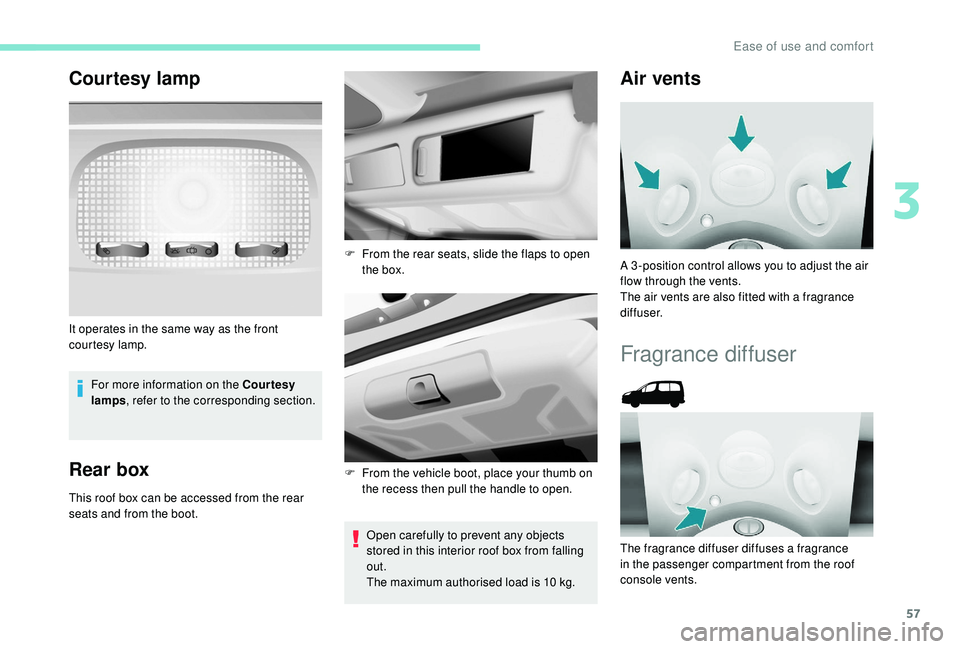
Courtesy lamp
For more information on the Courtesy
lamps, refer to the corresponding section.
Rear box
This roof box can be accessed from the rear
seats and from the boot.
Open carefully to prevent any objects
stored in this interior roof box from falling
out.
The maximum authorised load is 10
kg.
It operates in the same way as the front
courtesy lamp.
F
F
rom the rear seats, slide the flaps to open
the box.
F
F
rom the vehicle boot, place your thumb on
the recess then pull the handle to open.
Air vents
A 3 -position control allows you to adjust the air
flow through the vents.
The air vents are also fitted with a fragrance
diffuser.
Fragrance diffuser
The fragrance diffuser diffuses a fragrance
in the passenger compartment from the roof
console vents.
3
Ease of use and comfort
Page 106 of 252
68
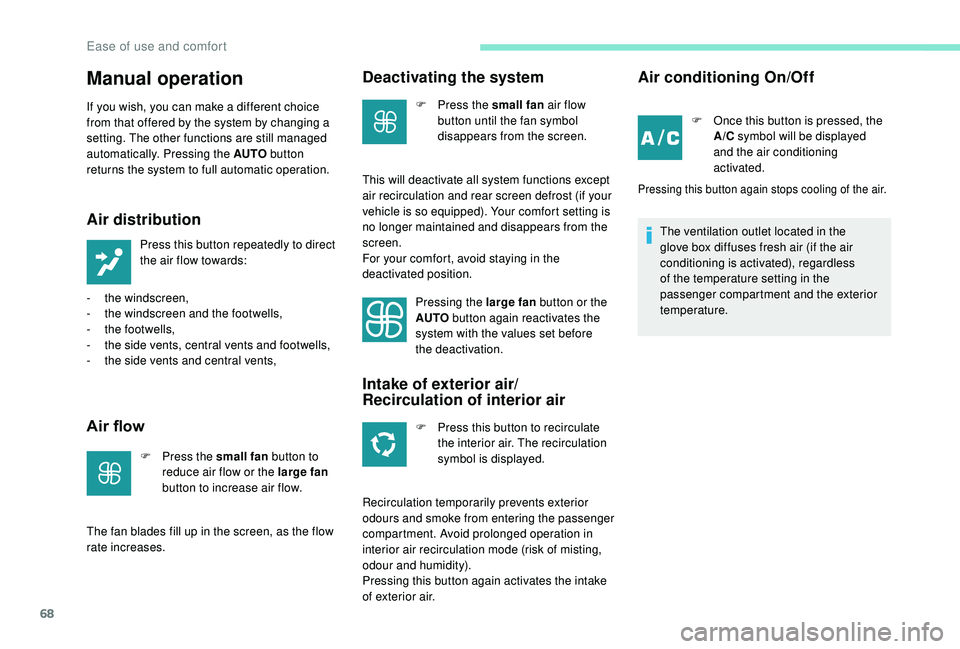
Manual operation
If you wish, you can make a different choice
from that offered by the system by changing a
setting. The other functions are still managed
automatically. Pressing the AUTO button
returns the system to full automatic operation.
Air distribution
Press this button repeatedly to direct
the air flow towards:
-
t
he windscreen,
-
t
he windscreen and the footwells,
-
t
he footwells,
-
t
he side vents, central vents and footwells,
-
t
he side vents and central vents,
Air flow
F Press the small fan button to
reduce air flow or the large fan
button to increase air flow.
The fan blades fill up in the screen, as the flow
rate increases.
Deactivating the system
F Press the small fan air flow
button until the fan symbol
disappears from the screen.
This will deactivate all system functions except
air recirculation and rear screen defrost (if your
vehicle is so equipped). Your comfort setting is
no longer maintained and disappears from the
screen.
For your comfort, avoid staying in the
deactivated position. Pressing the large fan button or the
AUTO button again reactivates the
system with the values set before
the deactivation.
Intake of exterior air/
Recirculation of interior air
F Press this button to recirculate the interior air. The recirculation
symbol is displayed.
Recirculation temporarily prevents exterior
odours and smoke from entering the passenger
compartment. Avoid prolonged operation in
interior air recirculation mode (risk of misting,
odour and humidity).
Pressing this button again activates the intake
of exterior air.
Air conditioning On/Off
F Once this button is pressed, the A/C symbol will be displayed
and the air conditioning
activated.
Pressing this button again stops cooling of the air.
The ventilation outlet located in the
glove box diffuses fresh air (if the air
conditioning is activated), regardless
of the temperature setting in the
passenger compartment and the exterior
temperature.
Ease of use and comfort
Page 114 of 252
76
General safety
recommendations
Labels are affixed in different locations on
your vehicle. They include safety warnings
and vehicle identification information. Do
not remove them: they are an integral part
of your vehicle.
For all work on your vehicle, use a
qualified workshop that has the technical
information, skills and equipment required,
all of which a PEUGEOT dealer is able to
provide.We draw your attention to the following
points:
-
T
he fitting of electrical equipment
or accessories not approved by
PEUGEOT may cause excessive
current consumption and faults and
failures with the electrical system of
your vehicle. Contact a PEUGEOT
dealer for information on the range of
recommended accessories.
-
A
s a safety measure, access to
the diagnostic socket, used for the
vehicle's electronic systems, is
reser ved strictly for PEUGEOT dealers
or qualified workshops, equipped
with the special tools required (risk
of malfunctions of the vehicle's
electronic systems that could cause
breakdowns or serious accidents).
The manufacturer cannot be held
responsible if this advice is not
followed.
-
A
ny modification or adaptation not
intended or authorised by PEUGEOT
or carried out without meeting the
technical requirements defined by
the manufacturer will result in the
suspension of the legal and contractual
warranties. Installation of accessory radio
communication transmitters
Before installing a radio communication
transmitter, you must contact a PEUGEOT
dealer for the specification of transmitters
which can be fitted (frequency, maximum
power, aerial position, specific installation
requirements), in line with the Vehicle
Electromagnetic Compatibility Directive
(2004/104/EC).
Depending on country regulations, some
safety equipment may be compulsory:
high visibility safety vests, warning
triangles, breathalysers, spare bulbs,
spare fuses, fire extinguisher, first aid kit,
mud flaps at the rear of the vehicle, etc.
Safety
Page 192 of 252

154
Third brake lamp
Ty p e A , W16W – 16W
F
U
nscrew the two nuts.
F
P
ush the pins.
F
I
f necessary, disconnect the connector to
remove the lamp.
F
C
hange the bulb.
Changing a fuse
The fuse boxes are located: Professional repairers: for complete
information on the fuses and relays,
consult the wiring information and
diagrams available through the dealer
network.
Removing and fitting a fuse
GoodFailed
PEUGEOT accepts no responsibility for
the cost incurred in repairing your vehicle
or for rectifying malfunctions resulting
from the installation of accessories
not supplied or not recommended by
PEUGEOT and not installed in accordance
with the specifications, in particular when
the combined power consumption of all
of the additional equipment connected
exceeds 10
milliamperes.
-
i
n the lower dashboard on the left-hand side
(behind the cover).
-
u
nder the bonnet (near the battery).
If fitted on your vehicle, an
additional fuse box is provided
for towing, the towbar and the
connections for body and platform
cab conversions. It is located on
the right-hand side behind the
load stop partition.
The information given concerns only those
fuses which can be changed by the user using
the tweezers located behind the dashboard
storage compartment on the right-hand side.
For any other work, visit a PEUGEOT dealer or
a qualified workshop. Before changing a fuse, the cause of the fault
must be found and rectified.
F
U
se the tweezers.
Always replace a faulty fuse with a fuse of
the same rating.
In the event of a breakdown
Page 193 of 252
155
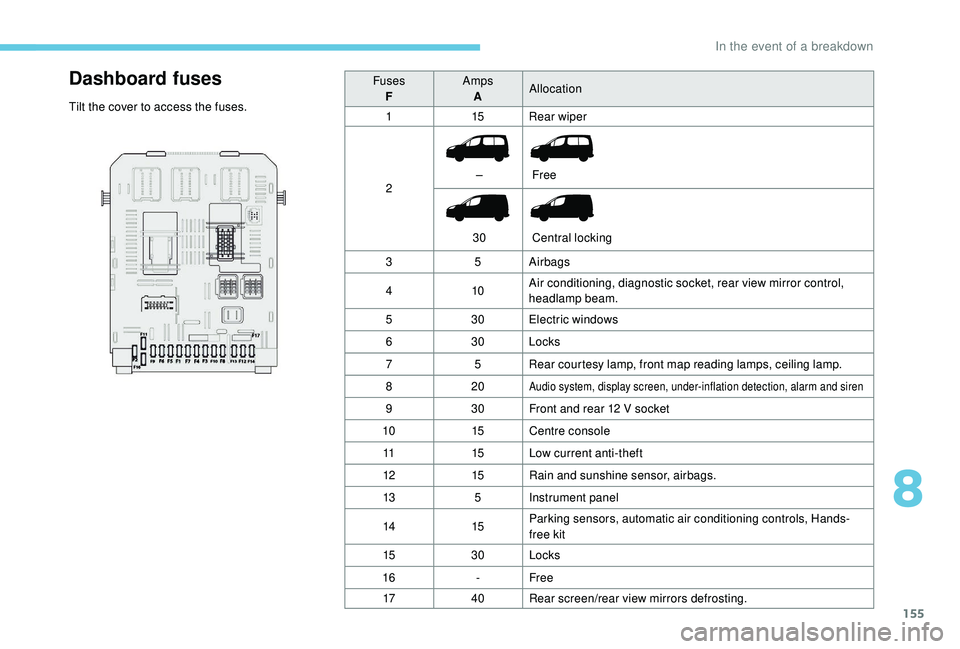
Dashboard fuses
Tilt the cover to access the fuses.Fuses
F Amps
A Allocation
1 15Rear wiper
2 –
30 Free
Central locking
3 5Airbags
4 10Air conditioning, diagnostic socket, rear view mirror control,
headlamp beam.
5 30Electric windows
6 30Locks
7 5Rear courtesy lamp, front map reading lamps, ceiling lamp.
8 20
Audio system, display screen, under-inflation detection, alarm and siren
930Front and rear 12 V socket
10 15Centre console
11 15Low current anti-theft
12 15Rain and sunshine sensor, airbags.
13 5Instrument panel
14 15Parking sensors, automatic air conditioning controls, Hands-
free kit
15 30Locks
16 -Free
17 40Rear screen/rear view mirrors defrosting.
8
In the event of a breakdown
Page 194 of 252
156
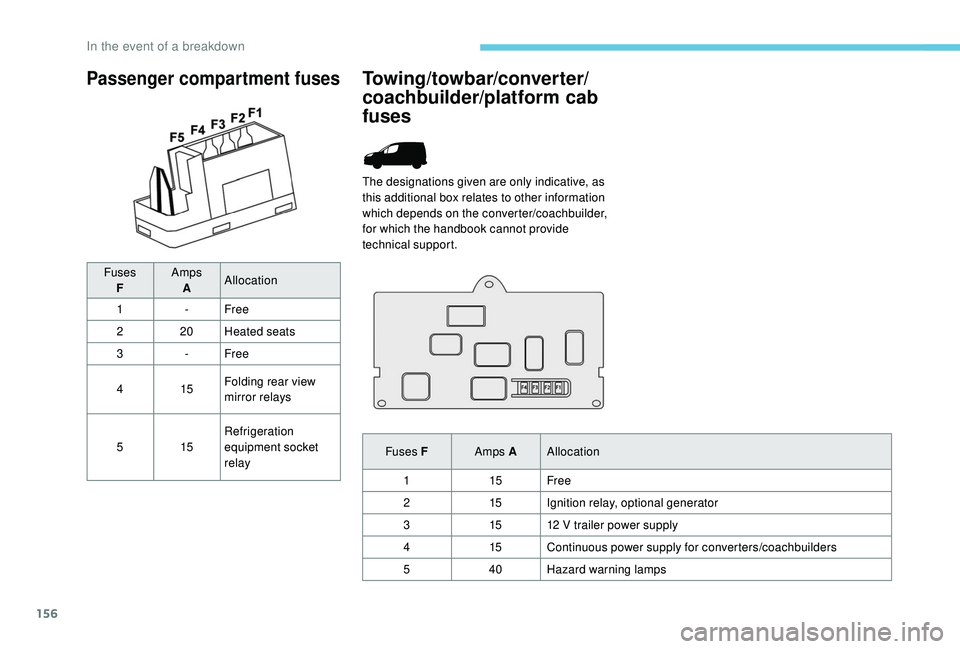
Passenger compartment fuses
FusesF Amps
A Allocation
1 -Free
2 20Heated seats
3 -Free
4 15Folding rear view
mirror relays
5 15Refrigeration
equipment socket
relay
Towing/towbar/converter/
coachbuilder/platform cab
fuses
The designations given are only indicative, as
this additional box relates to other information
which depends on the converter/coachbuilder,
for which the handbook cannot provide
technical support.
Fuses F Amps AAllocation
1 15Free
2 15Ignition relay, optional generator
3 1512
V trailer power supply
4 15Continuous power supply for converters/coachbuilders
5 40Hazard warning lamps
In the event of a breakdown