Page 105 of 164
![NISSAN PATHFINDER 2017 R52 / 4.G Navigation Manual www.nissan.ca/nissanconnect (English)
www.nissan.ca/nissanconnect/fr (French)
NissanConnect
SMServices support
line:
1-855-426-6628
1. Push <INFO>.
2. Touch [NissanConnect Services].
3. Touch [Connect](/manual-img/5/542/w960_542-104.png "NISSAN PATHFINDER 2017 R52 / 4.G Navigation Manual www.nissan.ca/nissanconnect (English)
www.nissan.ca/nissanconnect/fr (French)
NissanConnect
SMServices support
line:
1-855-426-6628
1. Push <INFO>.
2. Touch [NissanConnect Services].
3. Touch [Connect")
www.nissan.ca/nissanconnect (English)
www.nissan.ca/nissanconnect/fr (French)
NissanConnect
SMServices support
line:
1-855-426-6628
1. Push .
2. Touch [NissanConnect Services].
3. Touch [Connect to Voice Menu].
4. The system connects to the NissanCon- nect
SMServices Response Center and
menu options will be announced. Speak your
preferred option.
.Assisted Search
Set a destination using an Interactive
Voice Response (IVR) system.
.Roadside AssistanceConnect to the Roadside Response
Specialist.
.Valet AlertTurns on the Valet Alert function and
monitors the vehicle movement within a
certain range.
.Account Management
Connects to the NissanConnectSMSer-
vices Response Specialist.
INFO:
. You can also connect to a NissanConnect
SM
Services Interactive Voice Menu by touching
the IVR soft button
*1on the map.
. After selecting [Connect to Voice Menu], it
may take some time until the system initiates
connection, depending on the technical
environment and whether the TCU (Tele-
matics Control Unit) is being used by other
services.
. If your Bluetooth
�ŠHands-Free phone re-
ceives an incoming call while you are speak-
ing with an operator, a pop-up message
asking whether you would like to take the call
is displayed.
. To avoid disconnecting the line, do not turn
off the engine.
SETTING ROUTE TO A SEARCHED
DESTINATION
Use Connected Search to find destinations via
the Internet and set a route to them directly from
your navigation system.
1. Push .
2. Touch [NissanConnect Services].
3. Touch [Connected Search]. A keyboard is displayed.
4. Enter the keyword and touch [Search]. The system will connect to the Internet and the
search results will be displayed.
5. Touch a preferred destination from the list and touch [Start] to start the route guidance.
VIEWING INFORMATION FEEDS
Contents of the various NissanConnectSMSer-
vices information can be downloaded.
Viewing information feeds
Contents of the various NissanConnectSMSer-
vices information services can be downloaded.
1. Push .
2. Touch [NissanConnect Services].
3. Touch [Sync All Feeds]. A folder list is displayed.
7-19
7. Information and settings
Page 106 of 164

4. Touch a preferred folder. A list of informationfeeds is displayed.
5. Touch a preferred information feed. The content can be viewed on the touch screen
display if the vehicle is parked. While driving,
the system will read out the information.
INFO:
. Touch [Menu] during communication with the
NissanConnect
SMServices Data Center to
cancel the connection.
. A message is displayed when the commu-
nication is disconnected while downloading
information due to a poor communication
status. Select [Yes] to restart the download.
. Laws in some jurisdictions may restrict the
use of “Text-to-Speech.” Check local reg-
ulations before using this feature.
. Some terminology such as personal names,
place names, special terms, symbols, etc.
may not be announced correctly. This is not a
malfunction.
. The system will pause announcements when
interrupted by the voice guidance given by
the navigation system. When the voice
guidance finishes, the system will restart
the announcement. .
The volume can be adjusted when the
system announces the information.
“Volume settings” (page 7-28)
. The selected content is read out while the
vehicle is being driven, or if parked, you can
read the content on the display.
. Content settings can be made using the
NissanConnect
SMServices website. For
more details, refer to the NissanConnectSM
Services website or contact the NissanCon-
nectSMServices support line.
NissanConnectSMServices website:
For U.S.
www.nissanusa.com/connect
For Canada
www.nissan.ca/nissanconnect (English)
www.nissan.ca/nissanconnect/fr (French)
NissanConnect
SMServices support
line:
1-855-426-6628
Screen information:
When information feeds are downloaded from
the NissanConnect
SMServices Data Center, the
contents of the information are displayed while
the vehicle is stopped.
*1Menu:
Stop the announcement of the content
(Text-to-Speech) and display the operation
menu.
*2Contents:
The contents of the NissanConnectSM
Services feeds are displayed.
*3[]/[]:
Turns to the next or previous page if the
information has a number of content pages.
*4:
If the information contains map information,
the icon will be displayed. It can be set as
the destination.
*5:
If the information contains phone number
information, the icon is displayed. It is
possible to make a phone call to the facility.
7-20
7. Information and settings
Page 107 of 164
![NISSAN PATHFINDER 2017 R52 / 4.G Navigation Manual After parking the vehicle in a safe location and
touching [Menu], the operation menu is dis-
played on the right side of the screen.
INFO:
The availability of the operation menu items
differs dependin](/manual-img/5/542/w960_542-106.png "NISSAN PATHFINDER 2017 R52 / 4.G Navigation Manual After parking the vehicle in a safe location and
touching [Menu], the operation menu is dis-
played on the right side of the screen.
INFO:
The availability of the operation menu items
differs dependin")
After parking the vehicle in a safe location and
touching [Menu], the operation menu is dis-
played on the right side of the screen.
INFO:
The availability of the operation menu items
differs depending on the contents of the
selected information feeds.
Updating All Information Feeds
It is possible to synchronize with the list updated
NissanConnectSMportal website, such as “Des-
tination Send to Car” or “Journey Planner”, etc.
For more details, refer to the NissanConnect
SM
Services website or contact the NissanCon-
nectSMServices support line.
NissanConnectSMServices website:
For U.S.
www.nissanusa.com/connect For Canada
www.nissan.ca/nissanconnect (English)
www.nissan.ca/nissanconnect/fr (French)
NissanConnect
SMServices support line:
1-855-426-6628
1. Push .
2. Touch [NissanConnect Services].
3. Touch [Sync All Feeds].
4. The latest information is sent from the NissanConnect
SMServices Response Cen-
ter and an updated list is displayed.
Viewing information feeds history
The information feeds that were previously
referred to are displayed.
1. Push .
2. Touch [NissanConnect Services].
3. Touch [History].
4. Touch the preferred item.
5. A history list is displayed. Touch the pre- ferred information feed.
EMERGENCY SUPPORT
NissanConnectSMServices provides various
services to support an emergency response for
the registered vehicle and its occupants.
For example, in the event of an illness or serious
injury, you can seek support by pushing
(the SOS call switch located near the map light)
and connecting to the NissanConnect
SMSer-
vices Response Center. The NissanConnectSM
Services Response Center can pinpoint the
location of the vehicle via GPS (Global Position-
ing System) , and send the information to law
enforcement, ambulance services or other agen-
cies as needed.
NissanConnect
SMServices website:
For U.S.
www.nissanusa.com/connect
For Canada
www.nissan.ca/nissanconnect (English)
www.nissan.ca/nissanconnect/fr (French)
NissanConnect
SMServices support
line:
7-21
7. Information and settings
Page 108 of 164

1-855-426-6628
WARNING
.Please note that the Automatic Colli-
sion Notification service and Emer-
gency Call function cannot be used
under the following conditions:
— NissanConnect
SMServices sub-
scription has expired or was can-
celed.
— The vehicle is outside the area where the cellular network service
is receivable.
— The vehicle is in a location with poor signal reception such as a
tunnel, underground parking gar-
age, behind a building or in a
mountainous areas.
— The line is busy.
— The TCU (Telematics Control Unit) or other systems of your vehicle
are not working properly.
— The NissanConnect
SMServices
network system is disabled.
— It may not be possible to make an emergency call in the event of some accidents or emergencies,
or if you are in a location without
reception.
. Park the vehicle in a safe location
and set the parking brake before
operating .
. Only use this service in the event of
an emergency. There may be a pen-
alty for inappropriate use of the
service.
Making an emergency call
1. Push . An emergency call is sent to
the emergency call center. At the same time,
the vehicle information (location of the
vehicle, vehicle speed and the direction of
travel) is also transferred. 2. When the line is connected to the Nissan-
Connect
SMServices Response Center,
speak to the emergency support staff.
If you want to cancel the emergency call, push
and hold for a few seconds.
INFO:
. After is pushed, it may take some
time until the system initiates a connection,
depending on the technical environment and
whether the TCU (Telematics Control Unit) is
being used by other services.
. Emergency support is available when
indicator lamp is turned on. Emer-
gency support cannot be used when
indicator lamp is turned off. When
the emergency support is running the
indicator lamp will blink without display show
any error message after was
pushed.
. To avoid disconnecting the line, do not turn
off the engine.
7-22
7. Information and settings
Page 109 of 164

NISSANCONNECTSMSERVICES SETTINGS
You can delete NissanConnectSMServices history, return to the default settings, and display user information from the setting screen.
Step 1 Step 2 MenuAction
Push
G>. [Nissan-
Connect-
Services][Information Settings]
[Send Vehicle Information] When this item is turned on, the vehicle information
(the data regarding your driving information such as
vehicle location, driving history, fuel economy, etc.) can
be sent to the NissanConnect
SMServices center.
[Delete Vehicle Information] Delete all Vehicle Information.
[Delete Search History] [Delete Voice Menu History] Delete all Voice Menu history.
[Delete Connected Search History] Delete all Connected Search history.
[Delete NissanConnect Services History] Delete NissanConnect
SMServices histories.
[Reset All NissanConnect Services Settings] All NissanConnect
SMServices settings are returned to
the default settings.
[Unit ID Information] Display the Unit ID, TCU (Telematics Control Unit) ID,
SIM ID and VIN Information necessary for user
registration.
[Vehicle Data Transmission Setting] When [OK] is touched, data transmission to the
NissanConnect
SMServices Data Center is enabled.
Touch [Decline] to disable the NissanConnectSM
Services functions.
7-23
7. Information and settings
Page 110 of 164

SETTINGS SCREEN
The system can be customized to make it easier for you to use.
The displayed items vary depending on the equipped options.
The order of displayed items can be sorted.
StepMenu Item Result
Push
. [Bluetooth]
Set the Bluetooth�ŠAudio and Phone.Refer to the vehicle Owner’s Manual for details.
[Phone/Mail] Display the Phone/Mail setting screen. Refer to the vehicle Owner’s Manual for details.
[Navigation] Display the Navigation setting screen.
“Navigation settings” (page 7-30)
[Audio] Display the Audio setting screen.
Refer to the vehicle Owner’s Manual for details.
[Screen] Set the Screen display to the preferred settings.
“Screen Settings” (page 7-29)
[Volume Adjustment] Set the Volume Adjustment.
“Volume settings” (page 7-28)
[Clock] Set the Clock to your preferred settings.
“Clock settings” (page 7-26)
[NissanConnect Services] Set NissanConnectSMServices to your preferred settings.“NissanConnectSMServices” (page 7-14)
[Voice Recognition] Set Minimize Voice Feedback to on/off and the audio setting for voice recognition use.
[Camera/Sonar] Set the Camera/Sonar to your preferred settings. Refer to the vehicle Owner’s Manual for details.
7-24
7. Information and settings
Page 111 of 164
StepMenu Item Result
[Other] [Language] Set the Language to your preferred settings.
“Language setting” (page 7-27)
[Keyboard Type] Set the Keyboard Type to [ABC] or [QWERTY].
[Low on Fuel Alert] Set the fuel low notification to on/off.
[Software Information] Display the Software Information.
7-25
7. Information and settings
Page 112 of 164
CLOCK SETTINGS
This changes the clock settings.
StepMenu item Action
1.Push.
2.Touch [Clock].
[On-Screen Clock] Set the clock display on/off. When this item is on, the clock display appears.
[Daylight Savings Time] Select the setting for the daylight saving time from ON or OFF. Each time by touching
this item changes the setting.
[Clock Format (24h)] Select the clock format between 12-hour and 24-hour times. When the indicator light
illuminates, the clock is set to the 24-hour format.
[Time Zone] Select an appropriate time zone from the list. When selecting [AUTO], the system
selects the time zone automatically.
[Offset Adjustment] Adjust the offset value (hour and minutes).
7-26
7. Information and settings
 1
1 2
2 3
3 4
4 5
5 6
6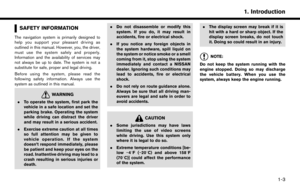 7
7 8
8 9
9 10
10 11
11 12
12 13
13 14
14 15
15 16
16 17
17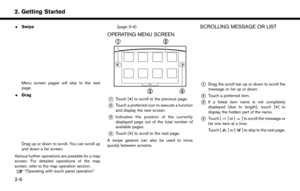 18
18 19
19 20
20 21
21 22
22 23
23 24
24 25
25 26
26 27
27 28
28 29
29 30
30 31
31 32
32 33
33 34
34 35
35 36
36 37
37 38
38 39
39 40
40 41
41 42
42 43
43 44
44 45
45 46
46 47
47 48
48 49
49 50
50 51
51 52
52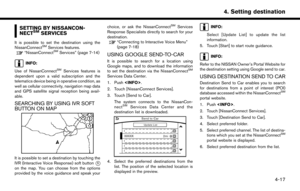 53
53 54
54 55
55 56
56 57
57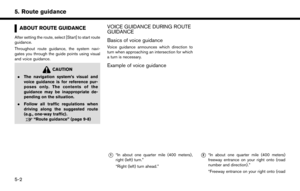 58
58 59
59 60
60 61
61 62
62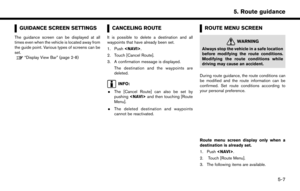 63
63 64
64 65
65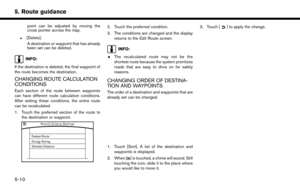 66
66 67
67 68
68 69
69 70
70 71
71 72
72 73
73 74
74 75
75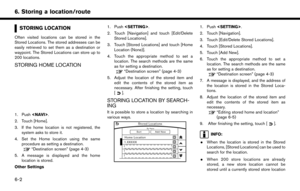 76
76 77
77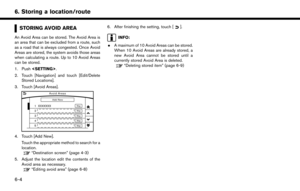 78
78 79
79 80
80 81
81 82
82 83
83 84
84 85
85 86
86 87
87 88
88 89
89 90
90 91
91 92
92 93
93 94
94 95
95 96
96 97
97 98
98 99
99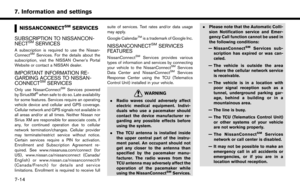 100
100 101
101 102
102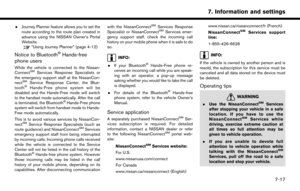 103
103 104
104 105
105 106
106 107
107 108
108 109
109 110
110 111
111 112
112 113
113 114
114 115
115 116
116 117
117 118
118 119
119 120
120 121
121 122
122 123
123 124
124 125
125 126
126 127
127 128
128 129
129 130
130 131
131 132
132 133
133 134
134 135
135 136
136 137
137 138
138 139
139 140
140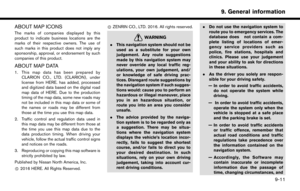 141
141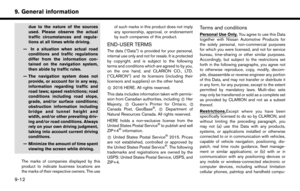 142
142 143
143 144
144 145
145 146
146 147
147 148
148 149
149 150
150 151
151 152
152 153
153 154
154 155
155 156
156 157
157 158
158 159
159 160
160 161
161 162
162 163
163![NISSAN PATHFINDER 2017 R52 / 4.G Navigation Manual StepMenu Item Result
[Other] [Language] Set the Language to your preferred settings.
“Language setting” (page 7-27)
[Keyboard Type] Set the Keyboard Type to [ABC] or [QWERTY].
[Low on Fuel Alert]](/manual-img/5/542/w960_542-110.png "NISSAN PATHFINDER 2017 R52 / 4.G Navigation Manual StepMenu Item Result
[Other] [Language] Set the Language to your preferred settings.
“Language setting” (page 7-27)
[Keyboard Type] Set the Keyboard Type to [ABC] or [QWERTY].
[Low on Fuel Alert]")
![NISSAN PATHFINDER 2017 R52 / 4.G Navigation Manual CLOCK SETTINGS
This changes the clock settings.
StepMenu item Action
1.Push<SETTING>.
2.Touch [Clock].
[On-Screen Clock] Set the clock display on/off. When this item is on, the clock display appears.](/manual-img/5/542/w960_542-111.png "NISSAN PATHFINDER 2017 R52 / 4.G Navigation Manual CLOCK SETTINGS
This changes the clock settings.
StepMenu item Action
1.Push<SETTING>.
2.Touch [Clock].
[On-Screen Clock] Set the clock display on/off. When this item is on, the clock display appears.")