2016 VOLVO XC90 T8 change time
[x] Cancel search: change timePage 350 of 546

||
STARTING AND DRIVING
* Option/accessory, for more information, see Introduction.
348
Instrument panel symbols
SymbolExplanation
A
B
Red symbol: Check the brake fluid
level. If the level is low, top up and have the system inspected todetermine the cause of the loss offluid. Yellow symbol: there is a fault in
the brake pedal sensor.
A
B
Steady glow for more than 2 seconds: there is a fault in theABS system. The normal brakesystem will still function but with-out ABS brake modulation.
If Brake pedalCharacteristics
changed Service required is
displayed, the Brake-by-Wire sys- tem is not functioning properly.The brake pedal must be pressedfarther down and with more pres-sure for braking effect.
A US models
B Canadian models
WARNING
If both symbols illuminate at the same time and the brake level is below the MIN mark in
the reservoir or if a brake system-related mes-sage is shown in the instrument panel: DO
NOT DRIVE . Have the vehicle towed to a
trained and qualified Volvo service technician and have the brake system inspected. If both symbols illuminate at the same time and the brake level is normal (not below the
MIN mark in the reservoir) or if a brake sys-
tem-related message is shown in the instru- ment panel: drive the vehicle carefully to anauthorized Volvo workshop and have thebrake system inspected by a trained andqualified Volvo service technician.
Related information
• Brake functions (p. 348)
• Brake assist system (p. 349)
• Emergency brake lights (p. 350)
• General information about the XC90 T8 Twin Engine Plug-in Hybrid (p. 16)
Brake functions
The vehicle's standard braking features are aug- mented by a number of auxiliary help functions.
In addition to the wheel brakes and the parking brake, the vehicle is equipped with several auto-matic brake assist functions. These systems helpthe driver by e.g., keeping the vehicle stationarywhen the brake pedal is not depressed (at a traf-fic light or intersection), when starting up a hill orwhen driving down a hill. These systems include: • Auto-hold brakes
• Hill Start Assist
• Braking assist after a collision
• Hill Descent Control
*
Related information
•Brakes (p. 346)
• Parking brake (p. 352)
• Hill Descent Control (HDC) (p. 350)
• Auto-hold brake function (p. 349)
Page 396 of 546
STARTING AND DRIVING
* Option/accessory, for more information, see Introduction.
394
ECO drive mode
The Eco drive mode is a function designed to give the driver the opportunity to drive more eco-nomically and to help reduce fuel consumption.
When this mode is activated, the following cha- racteristics are modified:
• The automatic transmission's shifting points
• The engine management system and accel- erator pedal response
• Climate system settings: certain functionswill be temporarily reduced or deactivated
• The suspension's self-leveling function
* low-
ers ground clearance to help reduce windresistance
• Information is shown in an ECO gauge in theinstrument panel to help promote more eco-nomical driving
NOTE
When Eco is activated, several climate system parameters are changed and the function ofcertain current-consuming systems will bereduced. Some of these functions can be restarted manually but full functionality will not berestored until Eco is deactivated.
Selecting ECO modeWhen the engine is switched off, ECO mode is deactivated and must be reactivated each time the engine is started.
ECO will appear in the
instrument panel when the function is activated.
Via Function view
Select Driving mode ECO in
the center display's Function view. A green indicator light inthe button shows that the func-tion is activated.
With the drive mode control *
1.
Press the DRIVE MODE control.
> A pop-up menu will open in the center display.
2. Roll the control upward or downward to scroll to the desired drive mode and 3. Press the control again to select it. A drive
mode can also be selected by tapping its button on the center display.
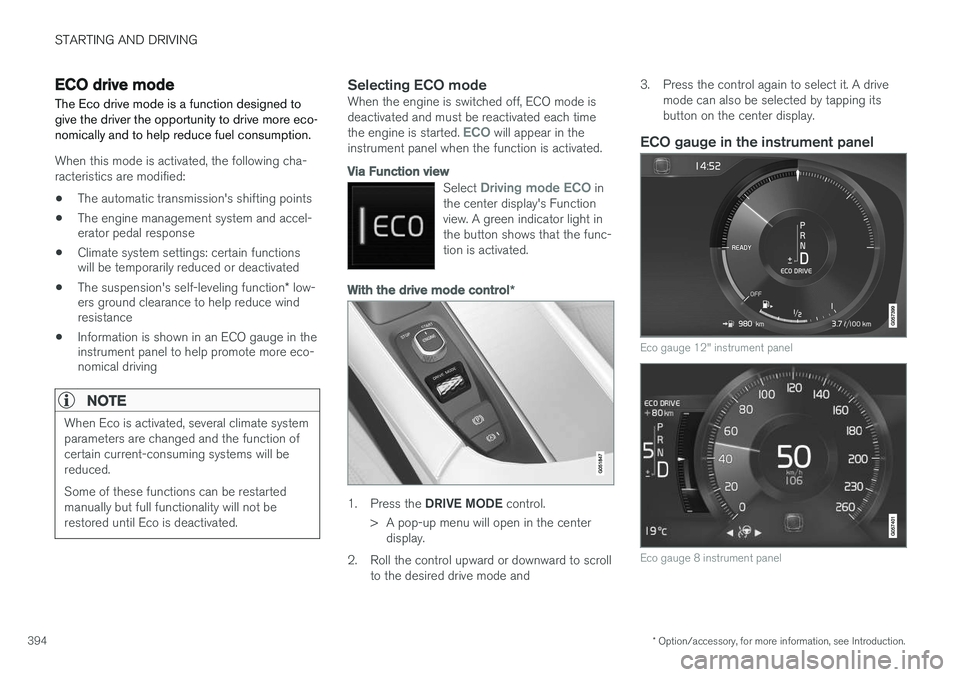
ECO gauge in the instrument panel
Eco gauge 12" instrument panel
Eco gauge 8 instrument panel
Page 400 of 546
||
STARTING AND DRIVING
* Option/accessory, for more information, see Introduction.
398
Brake – B
B can be selected at any time during a drive. In
this mode, the engine braking function is acti- vated when the accelerator pedal is released,which helps charge the hybrid battery. Thismeans that the hybrid battery is charged even ifthe brake pedal is not depressed.
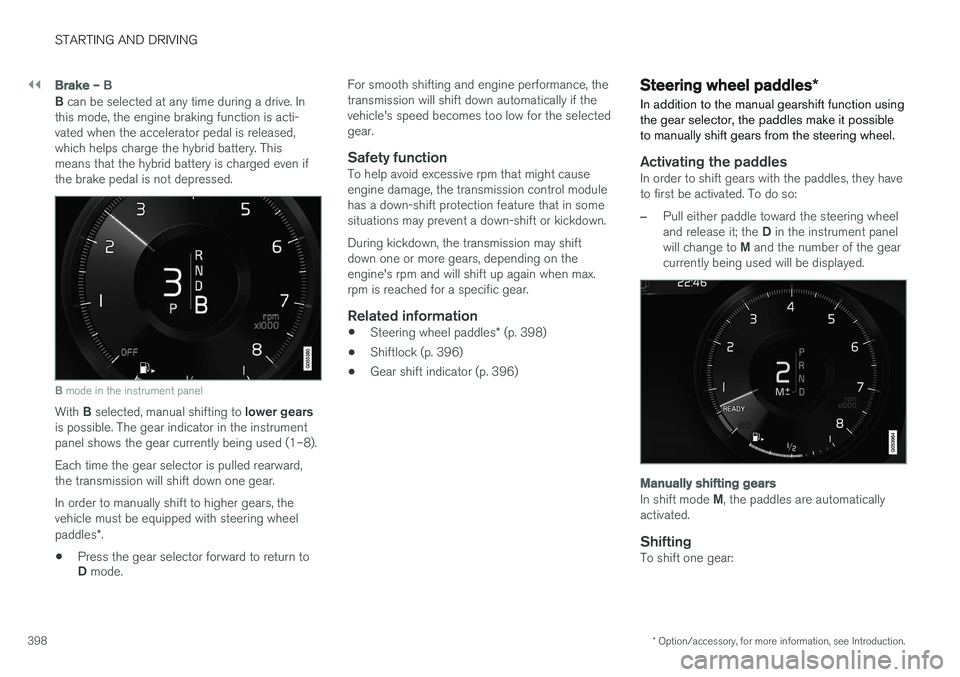
B mode in the instrument panel
With B selected, manual shifting to lower gears
is possible. The gear indicator in the instrument panel shows the gear currently being used (1–8). Each time the gear selector is pulled rearward, the transmission will shift down one gear. In order to manually shift to higher gears, the vehicle must be equipped with steering wheel paddles *.
• Press the gear selector forward to return to D
mode. For smooth shifting and engine performance, the transmission will shift down automatically if thevehicle's speed becomes too low for the selectedgear.
Safety functionTo help avoid excessive rpm that might causeengine damage, the transmission control modulehas a down-shift protection feature that in somesituations may prevent a down-shift or kickdown. During kickdown, the transmission may shift down one or more gears, depending on theengine's rpm and will shift up again when max.rpm is reached for a specific gear.
Related information
•
Steering wheel paddles
* (p. 398)
• Shiftlock (p. 396)
• Gear shift indicator (p. 396)
Steering wheel paddles
*
In addition to the manual gearshift function using the gear selector, the paddles make it possibleto manually shift gears from the steering wheel.
Activating the paddlesIn order to shift gears with the paddles, they have to first be activated. To do so:
–Pull either paddle toward the steering wheel and release it; the D in the instrument panel
will change to M and the number of the gear
currently being used will be displayed.
Manually shifting gears
In shift mode M, the paddles are automatically
activated.
ShiftingTo shift one gear:
Page 401 of 546
STARTING AND DRIVING
}}
399
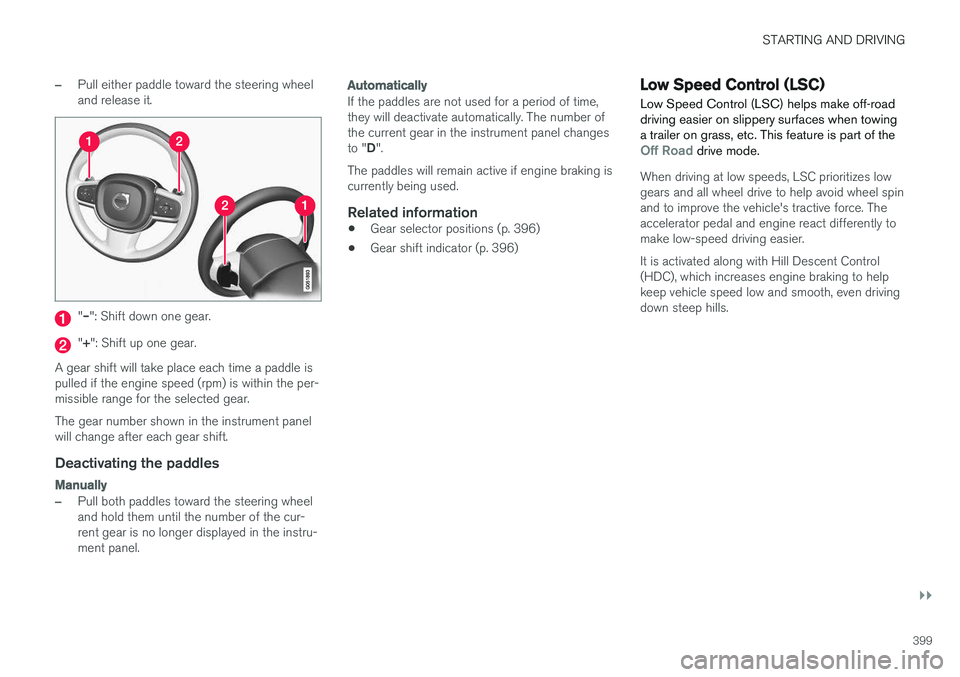
–Pull either paddle toward the steering wheel and release it.
"– ": Shift down one gear.
"+ ": Shift up one gear.
A gear shift will take place each time a paddle is pulled if the engine speed (rpm) is within the per-missible range for the selected gear. The gear number shown in the instrument panel will change after each gear shift.
Deactivating the paddles
Manually
–Pull both paddles toward the steering wheel and hold them until the number of the cur-rent gear is no longer displayed in the instru-ment panel.
Automatically
If the paddles are not used for a period of time, they will deactivate automatically. The number ofthe current gear in the instrument panel changes to " D".
The paddles will remain active if engine braking is currently being used.
Related information
• Gear selector positions (p. 396)
• Gear shift indicator (p. 396)
Low Speed Control (LSC) Low Speed Control (LSC) helps make off-road driving easier on slippery surfaces when towinga trailer on grass, etc. This feature is part of the
Off Road drive mode.
When driving at low speeds, LSC prioritizes low gears and all wheel drive to help avoid wheel spinand to improve the vehicle's tractive force. Theaccelerator pedal and engine react differently tomake low-speed driving easier. It is activated along with Hill Descent Control (HDC), which increases engine braking to helpkeep vehicle speed low and smooth, even drivingdown steep hills.
Page 403 of 546

STARTING AND DRIVING
401
Suspension leveling settings
Easy entry
The vehicle can be lowered to entering and exit- ing easier. Select
SettingsVehicleEasy Entry/Exit
Control via the center display's Top view to lower
the vehicle when getting in or out. When the vehicle is parked and the engine is turned off, the level is lowered (if a side door isopened, the level adjustment will stop). When theengine is started and the vehicle begins to move,the level will be raised to the height set by theselected drive mode.
Turning off suspension and leveling control
In certain situations, this function has to be turned off, for example when lifting the vehicle ona jack or garage hoist. 1. Tap
Settings in the center display's Top
view.
2. Tap
My CarSuspension .
3. Select
Deactivate Suspension & Leveling
Control.
Changing suspension control
Three different levels of suspension control can be selected from the center display: 1. Tap
Settings in the center display's Top
view. 2.
Tap
My CarDrive Mode.
3. Under
Suspension Control, select Eco,Comfort or Dynamic.
Loading mode
Use the buttons in the cargo compartment to raise or lower the vehicle to make loading orunloading easier or when attaching a trailer.
Parking the vehicleWhen parking, be sure that there is adequatespace above and below the vehicle since itsground clearance may vary, e.g., depending onthe ambient temperature, how the vehicle is loa-ded, if loading mode is being used or the drivemode selected after the engine is started. The level may also be adjusted for a certain time after the vehicle has been parked to compensatefor possible height adjustments due to tempera-ture changes in the pneumatic suspension whenthe vehicle has cooled.
TransportWhen transporting the vehicle on a ferry, train ora tow truck, it may only be secured (lashed)around the tires, not using any other chassiscomponents. Changes in the pneumatic suspen-sion may occur during transport that could nega-tively affect the lashing and result in damage.
Related information
• Drive modes (p. 390)
• Driving with a trailer (p. 367)
• Loading (p. 215)
8
Standard equipment on certain models.
Page 409 of 546
INFOTAINMENT
}}
* Option/accessory, for more information, see Introduction.407
Changing wavebands3
–Tap an app, e.g., FM in App view or open the
app menu from the right-side steering wheel keypad to select.
Searching for a radio stationSearching is done differently, depending on thewaveband selected.
• FM: stations, genres and frequencies.
• SiriusXM
®: program types, genres, stations.
1. Tap
Library. 2.
Tap
.
> The search view with a keyboard will open.
3. Enter a search word(s). > The search will start and change as char-acters are entered and the search results will be categorized.
Searching for a station manuallySearching manually makes it possible to find andtune to stations that are not on the automaticallycompiled list of the strongest stations in the area.
–Tap Manual tuning, drag the control or tap
< > to go to the desired frequency.
Related information
•
SiriusXM ®
Satellite radio * (p. 411)
• HD Radio
™reception (p. 407)
HD Radio ™reception
HD Radio is a brand name registered by the iBiquity digital corporation 4
. They are the devel-
oper of a broadcasting technology called IBOC or In Band On Channel, which refers to themethod of transmitting a digital radio broadcastsignal centered on the same frequency as theFM station's present frequency.
Introduction
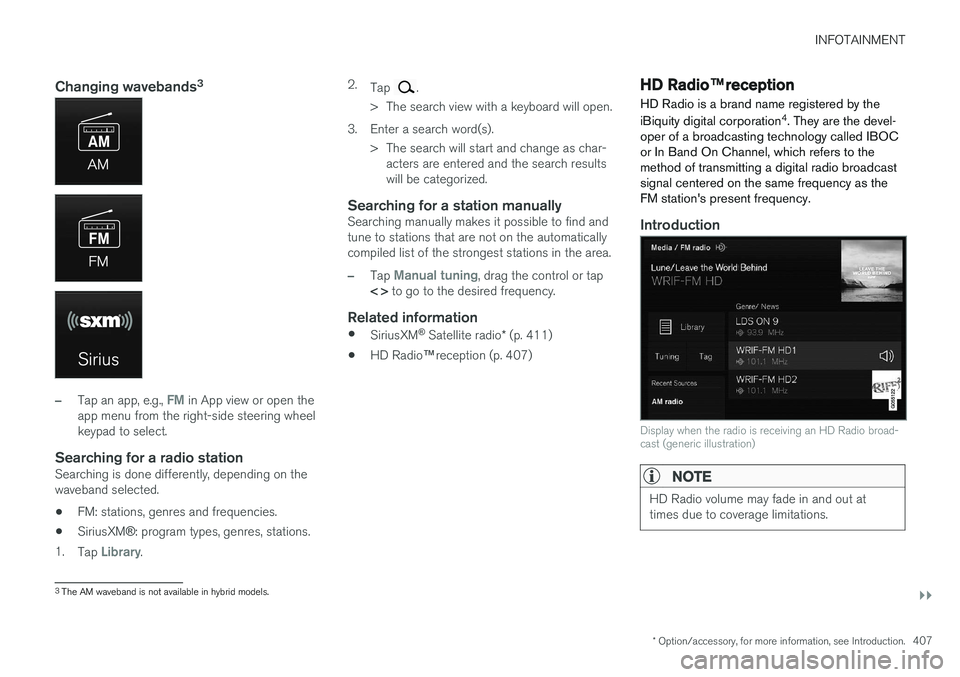
Display when the radio is receiving an HD Radio broad- cast (generic illustration)
NOTE
HD Radio volume may fade in and out at times due to coverage limitations.
3 The AM waveband is not available in hybrid models.
Page 412 of 546
||
INFOTAINMENT
410
Selecting sub-channels
To listen to a station's sub-channel(s), tap the station on the screen or press the forward/backarrow keys on the right-side steering wheel key-pad or below the screen. Sub-channels can also be stored as favorites, see the article "Changing and searching for radio sta-tions". If you tap a sub-channel favorite, it may take up to 6 seconds before the channel becomes audi-
ble. If you tap a station while you are out of digital range of the transmitter,
No reception will be
displayed.
Related information
• HD Radio
™reception (p. 407)
• Switching HD Radio on and off (p. 409)
• Changing and searching for radio stations (p. 406)
HD Radio limitations
Limitations
•
Main channel vs. sub-channels (FM only)
:
The main channel is the only channel that can receive in hybrid mode (both digital andanalogue). If a frequency has sub-channels,they are broadcast in digital mode only. Themain FM channel will be displayed as, forexample, "WRIF-FM HD1". The sub-FMchannels will be displayed as"WRIF-FMHD2", "WRIF-FM HD3", etc.
• Reception coverage area
: Due to current
IBOC transmitter power limitations, thereception coverage area in digital mode issomewhat more limited than the station'sanalogue coverage area. Please be awarethat as with any radio broadcast technology,terrain, time of day, foliage level and buildinglocation can have positive or negative effectson radio reception.
• Analogue to digital/digital to analogueblending
: Analogue to digital blending will
occur as the signal strength reaches a presetthreshold in the receiver. This will be noticea-ble in fringe areas (areas with weak recep-tion) and is normal.
NOTE
There may be a noticeable difference in sound quality when a change from analogueto digital or digital to analogue occurs, suchas:
• Volume increase or decrease
• Equalizer settings, i.e., Bass/ Midrange/ Treble cut or boost
• Time alignment (Digital program materialin extreme cases can be as much as 8seconds behind the analogue). This willnoticeable as a "stuttering" effect.
The above items are dependant on the broadcaster's equipment settings and donot indicate a fault in the vehicle's radioreceiver or antenna systems .
Related information
•HD Radio sub-channels (p. 409)
• HD Radio
™reception (p. 407)
Page 417 of 546
INFOTAINMENT
}}
415
Overview
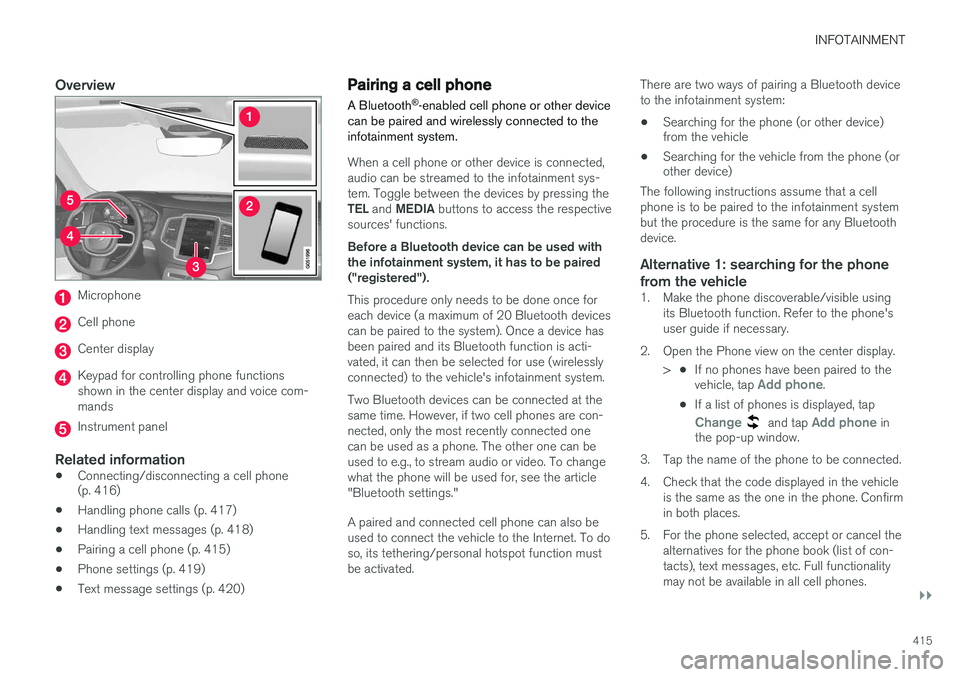
Microphone
Cell phone
Center display
Keypad for controlling phone functions shown in the center display and voice com-mands
Instrument panel
Related information
•Connecting/disconnecting a cell phone (p. 416)
• Handling phone calls (p. 417)
• Handling text messages (p. 418)
• Pairing a cell phone (p. 415)
• Phone settings (p. 419)
• Text message settings (p. 420)
Pairing a cell phone
A Bluetooth ®
-enabled cell phone or other device
can be paired and wirelessly connected to the infotainment system.
When a cell phone or other device is connected, audio can be streamed to the infotainment sys-tem. Toggle between the devices by pressing the TEL and MEDIA buttons to access the respective
sources' functions. Before a Bluetooth device can be used with the infotainment system, it has to be paired("registered"). This procedure only needs to be done once for each device (a maximum of 20 Bluetooth devicescan be paired to the system). Once a device hasbeen paired and its Bluetooth function is acti-vated, it can then be selected for use (wirelesslyconnected) to the vehicle's infotainment system. Two Bluetooth devices can be connected at the same time. However, if two cell phones are con-nected, only the most recently connected onecan be used as a phone. The other one can beused to e.g., to stream audio or video. To changewhat the phone will be used for, see the article"Bluetooth settings." A paired and connected cell phone can also be used to connect the vehicle to the Internet. To doso, its tethering/personal hotspot function mustbe activated. There are two ways of pairing a Bluetooth deviceto the infotainment system:
• Searching for the phone (or other device) from the vehicle
• Searching for the vehicle from the phone (orother device)
The following instructions assume that a cell phone is to be paired to the infotainment systembut the procedure is the same for any Bluetoothdevice.
Alternative 1: searching for the phone
from the vehicle
1. Make the phone discoverable/visible using its Bluetooth function. Refer to the phone'suser guide if necessary.
2. Open the Phone view on the center display. >•If no phones have been paired to the vehicle, tap
Add phone.
• If a list of phones is displayed, tap
Change and tap Add phone in
the pop-up window.
3. Tap the name of the phone to be connected.
4. Check that the code displayed in the vehicle is the same as the one in the phone. Confirm in both places.
5. For the phone selected, accept or cancel the alternatives for the phone book (list of con-tacts), text messages, etc. Full functionalitymay not be available in all cell phones.