2016 VOLVO XC90 T8 change time
[x] Cancel search: change timePage 428 of 546

||
INFOTAINMENT
* Option/accessory, for more information, see Introduction.
426 Play/pause: tap the track's image, press the
symbol on the keypad or press the button under the center display. Change tracks: tap the desired track on the cen- ter display, press the
< > buttons under the cen-
ter display or use the keypad. Fast forward/reverse, move within a track: press the time axis on the center display and drag from side to side, press and hold the < > buttons
under the center display or use the keypad. Change media source: Tap a media source under
Recents, tap the desired app in the center dis-
play's App view or use the keypad.
Library: tap to play a track from the library.
Shuffle: tap to play tracks in random order.
Similar: tap to use Gracenote to search for simi-
lar music on the USB device and create a playlist based on the results. The playlist can contain upto 50 tracks.
Change device: tap to toggle between USB
devices if more than one is connected.
Video settings
The following can be adjusted with the video player in full screen or by opening the center dis- play's Top view and tapping
SettingsVideo:Primary Audio Default Language, Subtitleand Primary Subtitle Default Language.
Play DivX®
This DivX device must be registered in order to play purchased DivX Video-on-Demand (VOD)movies.
1. Open the center display's Top view and tap
SettingsVideoDivX
® VOD to get a
registration code.
2. Go to vod.divx.com for additional information and to complete the registration process.
Related information
• CD (media) player
* (p. 424)
• Media player (p. 421)
• Voice control for radio and media (p. 122)
• Apps (applications) (p. 433)
• Connecting a Bluetooth ®
device (p. 420)
• Connecting a device via the AUX/USB socket (p. 420)
• Gracenote (p. 428)
• Connecting to the Internet (p. 431)
• Media searches (p. 426)
• Video (p. 429)
• Apple CarPlay (p. 422)
Media searches
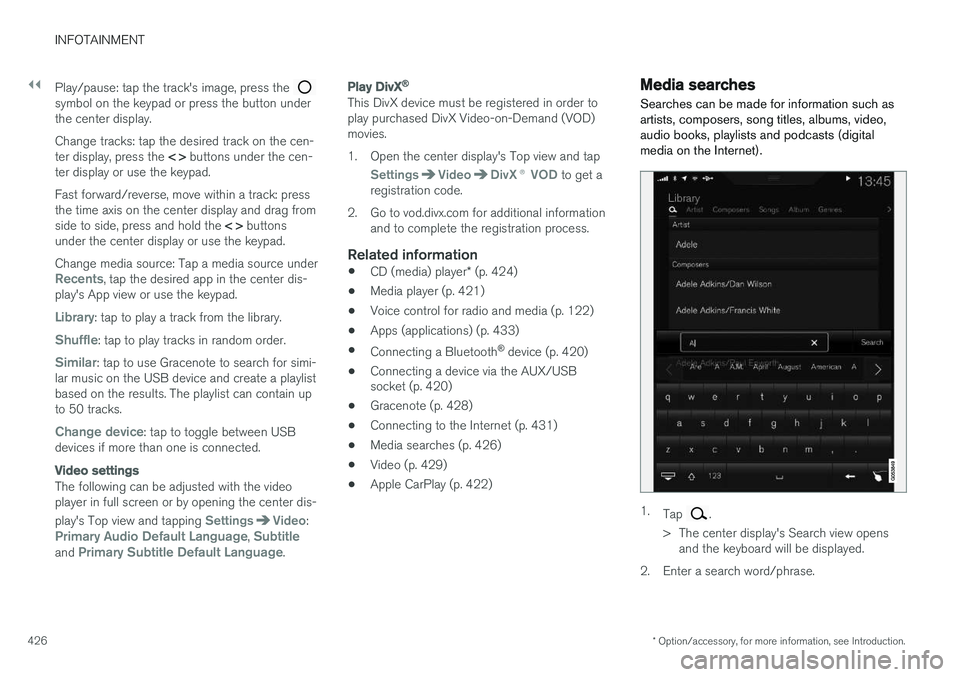
Searches can be made for information such as artists, composers, song titles, albums, video,audio books, playlists and podcasts (digitalmedia on the Internet).
1. Tap .
> The center display's Search view opens and the keyboard will be displayed.
2. Enter a search word/phrase.
Page 434 of 546

||
INFOTAINMENT
4321. Activate tethering/personal hotspot in the
cell phone.
2. Tap
Settings in the center display's Top
view.
3. Tap
CommunicationWi-Fi.
4. Tap Wi-Fi to activate/deactivate.
5. Tap the name of the network to be used.
6. Enter the network password.
7. If a different connection was used previously, confirm the connection change.
> The vehicle will connect to the network.
Please be aware that certain cell phones disable tethering when the connection to the vehicle hasbeen broken, e.g., when the phone has beenremoved from the vehicle. In such cases, thephone's tethering function will have to be reacti-vated the next time the phone is used to connectto the Internet. When a phone is connected to the vehicle, it is saved for future use. When a max. number of 50have been saved, the first one connected will bedeleted. To show the list of saved networks or to manually delete a network, tap
SettingsWi-Fi
Saved networks.
See the article "Wi-Fi technology and security" for network connection requirements.
Connect using a cable connected to the USB socket
1. Connect the phone via a cable to the USB socket in the tunnel console storage com- partment.
2. Activate USB tethering in the cell phone.
3. If a different connection was used previously, confirm the connection change.
> The vehicle will connect to the network.
Connect using the vehicle's integrated modem
When the vehicle is connected using the modem, Volvo On Call services will use the connection.
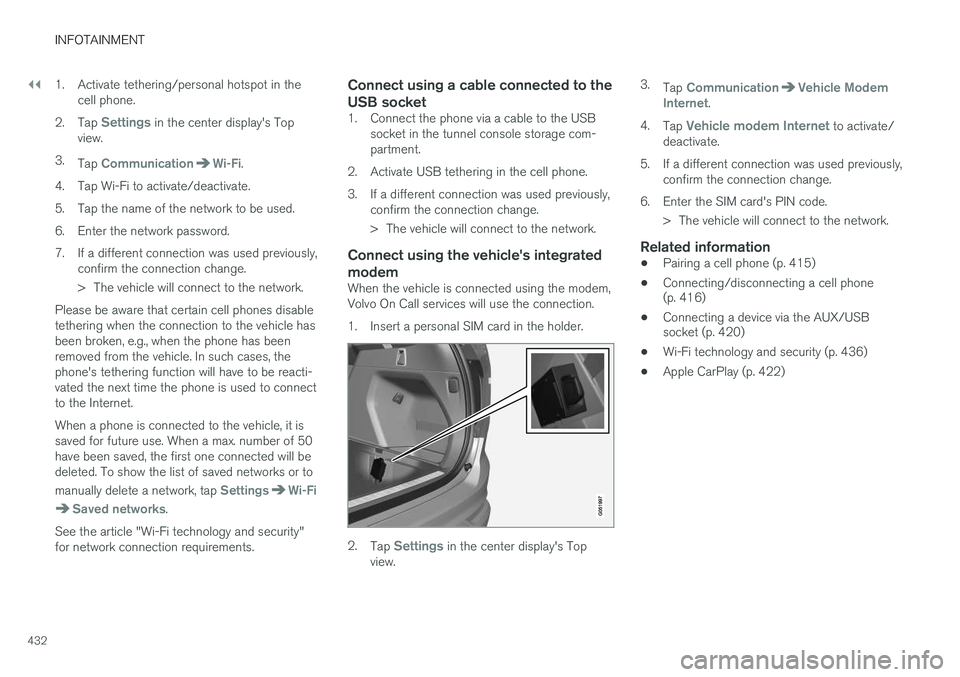
1. Insert a personal SIM card in the holder.
2.Tap Settings in the center display's Top
view. 3.
Tap
CommunicationVehicle Modem
Internet.
4. Tap
Vehicle modem Internet to activate/
deactivate.
5. If a different connection was used previously, confirm the connection change.
6. Enter the SIM card's PIN code. > The vehicle will connect to the network.
Related information
• Pairing a cell phone (p. 415)
• Connecting/disconnecting a cell phone (p. 416)
• Connecting a device via the AUX/USBsocket (p. 420)
• Wi-Fi technology and security (p. 436)
• Apple CarPlay (p. 422)
Page 441 of 546

INFOTAINMENT
}}
439
or implied, regarding the accuracy of any Grace- note Data from in the Gracenote Servers. Grace-note reserves the right to delete data from theGracenote Servers or to change data categoriesfor any cause that Gracenote deems sufficient.No warranty is made that the Gracenote Softwareor Gracenote Servers are error-free or that func-tioning of Gracenote Software or GracenoteServers will be uninterrupted. Gracenote is notobligated to provide you with new enhanced oradditional data types or categories that Grace-note may provide in the future and is free to dis-continue its services at any time. GRACENOTE DISCLAIMS ALL WARRANTIES EXPRESS OR IMPLIED, INCLUDING, BUT NOTLIMITED TO, IMPLIED WARRANTIES OF MER-CHANTABILITY, FITNESS FOR A PARTICULARPURPOSE, TITLE, AND NON-INFRINGEMENT.GRACENOTE DOES NOT WARRANT THERESULTS THAT WILL BE OBTAINED BY YOURUSE OF THE GRACENOTE SOFTWARE ORANY GRACENOTE SERVER. IN NO CASE WILLGRACENOTE BE LIABLE FOR ANY CONSE-QUENTIAL OR INCIDENTAL DAMAGES ORFOR ANY LOST PROFITS OR LOST REVENUES.
©
Gracenote, Inc. 2009
Sensus software
This software uses parts of sources from clib2 and Prex Embedded Real-time OS - Source(Copyright (c) 1982, 1986, 1991, 1993, 1994),and Quercus Robusta (Copyright (c) 1990, 1993), The Regents of the University ofCalifornia. All or some portions are derived frommaterial licensed to the University of California byAmerican Telephone and Telegraph Co. or UnixSystem Laboratories, Inc. and are reproducedherein with the permission of UNIX SystemLaboratories, Inc. Redistribution and use insource and binary forms, with or withoutmodification, are permitted provided that thefollowing conditions are met: Redistributions ofsource code must retain the above copyrightnotice, this list of conditions and the followingdisclaimer. Redistributions in binary form mustreproduce the above copyright notice, this list ofconditions and the following disclaimer in thedocumentation and/or other materials providedwith the distribution. Neither the name of the
SUBSTITUTE GOODS OR SERVICES; LOSS OFUSE, DATA, OR PROFITS; OR BUSINESSINTERRUPTION) HOWEVER CAUSED AND ONANY THEORY OF LIABILITY, WHETHER INCONTRACT, STRICT LIABILITY, OR TORT(INCLUDING NEGLIGENCE OR OTHERWISE)ARISING IN ANY WAY OUT OF THE USE OFTHIS SOFTWARE, EVEN IF ADVISED OF THEPOSSIBILITY OF SUCH DAMAGE. This software is based in part on the work of the Independent JPEG Group. This software uses parts of sources from "libtess". The Original Code is: OpenGL SampleImplementation, Version 1.2.1, released January26, 2000, developed by Silicon Graphics, Inc. TheOriginal Code is Copyright (c) 1991-2000 SiliconGraphics, Inc. Copyright in any portions createdby third parties is as indicated elsewhere herein.All Rights Reserved. Copyright (C) [1991-2000]Silicon Graphics, Inc. All Rights Reserved.Permission is hereby granted, free of charge, toany person obtaining a copy of this software andassociated documentation files (the "Software"),to deal in the Software without restriction,including without limitation the rights to use,copy, modify, merge, publish, distribute,sublicense, and/or sell copies of the Software,and to permit persons to whom the Software isfurnished to do so, subject to the followingconditions: The above copyright notice includingthe dates of first publication and either thispermission notice or a reference to http://
Page 478 of 546

||
MAINTENANCE AND SERVICING
476
NOTE
My Volvo can be found by going to www.vol- vocars.com and selecting the United States orCanada.
Before the service can be used
Volvo ID
•The owner (primary driver) must create or have a Volvo ID (see the article "Volvo ID").
• Register your Volvo ID in the vehicle asexplained in the article "Volvo ID". If you havealready registered a Volvo ID, use the sameemail address that you used to create theVolvo ID.
Changing a
Volvo ID email address
If you would like to register a different email address, open the Volvo ID app and tap Change
Volvo ID. Follow the instructions provided. See
also the article "Volvo ID" for additional informa- tion.
Selecting a Volvo retailer on the My Volvo
website
By default, the retailer where you purchased your vehicle will be your preferred retailer/Volvoauthorized workshop who will perform serviceand repairs on your vehicle. To confirm or changethe preferred retailer, go to your personalized MyVolvo website.
Prerequisites for booking service from the vehicle
In order to book an appointment from the vehicle:
• The engine must be running
• The vehicle must be connected to the Inter- net (see the article "Internet connected vehi-cle")
Using the serviceWhen it is time for service or in certain cases if repairs are necessary, a message will appear inthe instrument panel and in the center display.This message is triggered by: • the amount of time that has elapsed since the last service
• the number of hours the engine has runsince the last service
• mileage since the last service.
• Specific warnings or fault codes in the vehi-cle
Booking service or repairs
Submit a booking request whenever you need a workshop appointment or when a messageregarding the need for service or repairs hasbeen displayed in the instrument panel and in thecenter display.
Sending an appointment request
1.
Open the Car status app in the center dis-
play's App view.
2. Tap
Appointments.
3. Under
Appointments, tap Request
appoint..
4. Check that your
Volvo ID is correct.
5. Check that the correct preferred retailer is listed. If you prefer, simply tap the button to initiate a call to the retailer.
6. Tap
Send appointment request. Your
request and vehicle data will be sent to your retailer through the vehicle's Internet con-nection.
> Volvo will send a booking invitation to your email address.
7. Open the email and click the link to select an appointment slot at your workshop. Enter your Volvo ID to log in to My Volvo and pro-ceed to book your workshop appointment ata convenient time with your preferred serviceadvisor. Add any additional preferences andfree text to your booking.
Page 480 of 546

MAINTENANCE AND SERVICING
478
Wi-Fi connection to a workshop The time a vehicle is in a workshop for service or repairs can be reduced by transmitting trouble-shooting information as soon as the car reachesthe workshop. This is done most conveniently by selecting
Automatically connect when I arrive in the
center display's Settings menu.
Each time the vehicle slows down to a sufficiently low speed, it begins searching for a Wi-Fi net-work. If an authorized Volvo network (at a retaileror workshop) is found, a message will be dis-played or a pop-up window will open in the cen-ter display (this applies to manual connections,see the section "Manually connecting to a work-shop" below).
Automatically connecting to a
workshop
Without driver confirmation
This is the most convenient way to transmit trou- ble-shooting data. The driver does not need toconfirm that the vehicle will establish a connec-tion. If the vehicle stops at a workshop and the engine is switched off using the start knob, a messagewill appear above the status bar in the center dis-play. The vehicle will be automatically connectedwhen the driver's door is opened if the driver does not tap the
Cancel button in the message. To help prevent the driver from being disturbed by unwanted requests to connect (e.g., if thevehicle is often parked near a workshop with anauthorized Volvo network), the vehicle will switchto manual connection if the driver cancels a con-nection request twice within 5 days.
With driver confirmation
With this alternative, the driver must confirm a connection. If the vehicle stops at a workshop and the engine is switched off using the start knob, a pop-upwindow will open in the center display. The vehi-cle will be automatically connected when the driv- er's door is opened if the driver taps
Connect in
the pop-up window. If the driver does nothing or taps the pop-up window's
Abort button, no
attempt will be made to establish a connection.
NOTE
To help prevent the driver from being distur- bed by unwanted requests to connect (e.g., ifthe vehicle is often parked near a workshopwith an authorized Volvo network), the vehiclewill switch to manual connection if the drivercancels a connection request twice within5 days.
Manually connecting to a workshopManual connections are handled by the service technician.
Changing the way a connection is madeThe type of connection (manual or automatic)can be changed in the center display's Settingsmenu.
1. Pull down the center display's Top view and
tap
Settings.
2. Tap
CommunicationVolvo Service
Networks.
3. Select
Automatically connect when I
arrive, Ask before connecting or Never
connect and never ask (manual connec-
tions).
Related information
• Internet connected vehicle (p. 431)
• Settings view (p. 111)
Page 510 of 546

||
MAINTENANCE AND SERVICING
508
NOTE
•The system cannot detect changes in the oil level immediately. The vehicle must bedriven approximately 20 miles (30 km) orhave been parked on level ground withthe engine off for 5 minutes before theoil level reading will be correct.
• If the necessary conditions are not metfor checking the oil level electronically(time interval after the engine wasswitched off, if the vehicle is parked on an incline, etc.),
No values available will
be displayed. This does not indicate a
problem with the oil level sensor.
Related information
• Engine oil (p. 506)
• Ignition modes (p. 370)
Windshield wipers in the service position
The windshield wiper blades must be in the verti- cal (service) position for replacement, washingor to lift them away from the windshield whene.g., removing ice or snow.
Wipers in the service position
CAUTION
Be sure the wiper blades are not frozen in position before attempting to move them tothe service position.
Putting the windshield wipers in the service position
The service position can be activated while the vehicle is stationary and the wipers are not acti-vated. The service position can be activated in two waysfrom the center display:
Via Function view
–From Function view, tap the Wiper Service
Position button. The indicator light in the
button will illuminate when the service posi- tion is activated.
> The windshield wipers will move to the vertical position.
Via Settings
1. Tap Settings in the center display's Top
view.
2. Tap
My CarWipers
3.Tap the Wiper Service Position box.
> The windshield wipers will move to the vertical position.
Deactivating service positionThe service position can be deactivated in two ways from the center display: