2016 VOLVO XC90 T8 steering
[x] Cancel search: steeringPage 371 of 546
STARTING AND DRIVING
}}
369
3. Align the hole in the ball holder with the one
in the hitch assembly.
4. Slide the locking bolt through the hitch assembly/ball holder.
5. Insert the cotter pin in the hole at the end of the locking bolt.
Removing the ball holder1. Remove the cotter pin from the locking boltand slide the locking bolt out of the ball holder/hitch assembly.
2. Pull the ball holder out of the hitch assembly.
NOTE
A cover for the hitch assembly is also included in the kit.
Stowing the ball holder
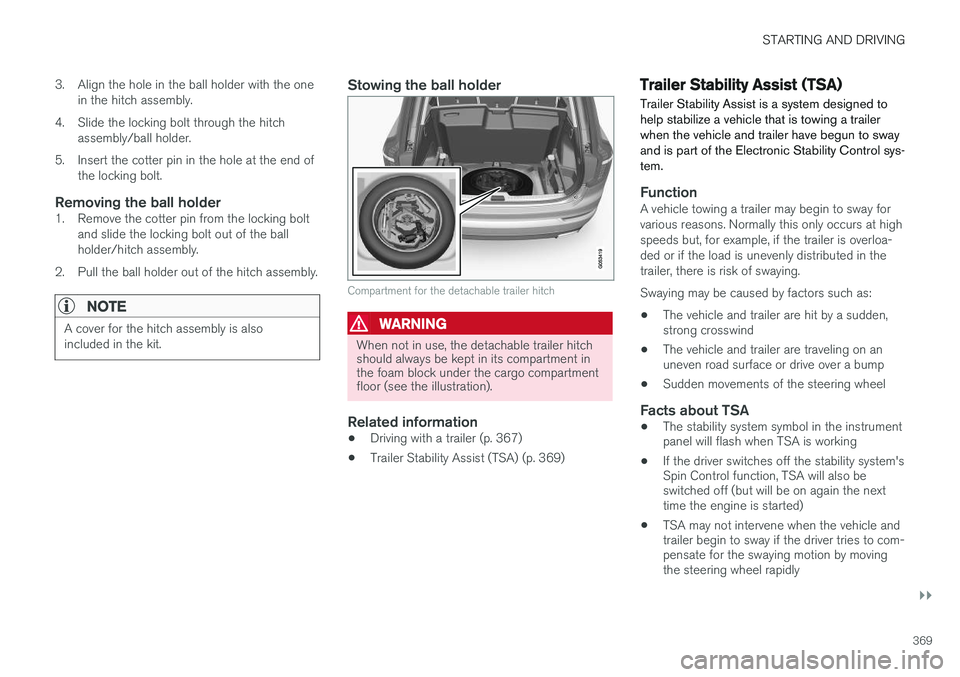
Compartment for the detachable trailer hitch
WARNING
When not in use, the detachable trailer hitch should always be kept in its compartment inthe foam block under the cargo compartmentfloor (see the illustration).
Related information
• Driving with a trailer (p. 367)
• Trailer Stability Assist (TSA) (p. 369)
Trailer Stability Assist (TSA)
Trailer Stability Assist is a system designed to help stabilize a vehicle that is towing a trailerwhen the vehicle and trailer have begun to swayand is part of the Electronic Stability Control sys-tem.
FunctionA vehicle towing a trailer may begin to sway for various reasons. Normally this only occurs at highspeeds but, for example, if the trailer is overloa-ded or if the load is unevenly distributed in thetrailer, there is risk of swaying. Swaying may be caused by factors such as:
• The vehicle and trailer are hit by a sudden, strong crosswind
• The vehicle and trailer are traveling on anuneven road surface or drive over a bump
• Sudden movements of the steering wheel
Facts about TSA
• The stability system symbol in the instrumentpanel will flash when TSA is working
• If the driver switches off the stability system'sSpin Control function, TSA will also beswitched off (but will be on again the nexttime the engine is started)
• TSA may not intervene when the vehicle andtrailer begin to sway if the driver tries to com-pensate for the swaying motion by movingthe steering wheel rapidly
Page 374 of 546

STARTING AND DRIVING
372
Battery drain Your vehicle's electrical functions drain the bat- tery to varying extents.
Avoid using ignition mode II as much as posssi-
ble, or electrical functions that require a great deal of electrical current when the engine is notrunning. Using ignition mode I whenever possible con-
sumes less electrical current. Functions that require a great deal of electrical current include:
• the climate system blower
• headlights
• wipers
• infotainment system (especially at high vol- ume).
If the battery's charge level is low, a text message will appear in the instrument panel. The vehicle'senergy-saving function will then turn off orreduce certain functions that are currently con-suming electrical current. If the battery needs to be recharged, start the engine and let it idle for at least 15 minutes ordrive the vehicle (driving charges the batteryfaster than letting the engine idle).
Related information
• Ignition modes (p. 370)
Starting the engine
The engine can be started using the start knob on the tunnel console if there is a remote key inthe passenger compartment.
Start knob in the tunnel console between the front seats
WARNING
Before starting the engine:
• Fasten the seat belt.
• Check that the seat, steering wheel and mirrors are adjusted properly.
• Make sure the brake pedal can bedepressed completely. Adjust the seat ifnecessary. To start the engine.
1. A remote key must be in the passenger com-
partment. On models with the standard Passive Start, the key has to be in the frontsection of the passenger compartment. If thevehicle is equipped the optional PassiveEntry system (keyless locking/unlocking) thekey can be anywhere in the vehicle.
2. Press firmly on the brake pedal 2
.
3. Turn the start knob toward START and
release it to start the engine.
> The starter motor will crank until the engine starts or its overheating protection is triggered.
2If the vehicle is moving, it is only necessary to turn the start knob toward START to start the engine.
Page 392 of 546
STARTING AND DRIVING
390
Drive modes
Selecting a drive mode affects the vehicle's driv- ing characteristics to help make driving moreenjoyable or easier in certain types of situations.
The following systems are adapted to help pro- vide the best vehicle performance in the respec-tive drive modes: • Steering
• Engine/transmission/All Wheel Drive
• Brakes
• Suspension control
• Instrument panel
• Climate system settings
Select the drive mode best suited to the current driving conditions. Please be aware that not all modes can be selected in all driving situations. The selectedmode will be displayed in the instrument panel.
Selecting a drive mode
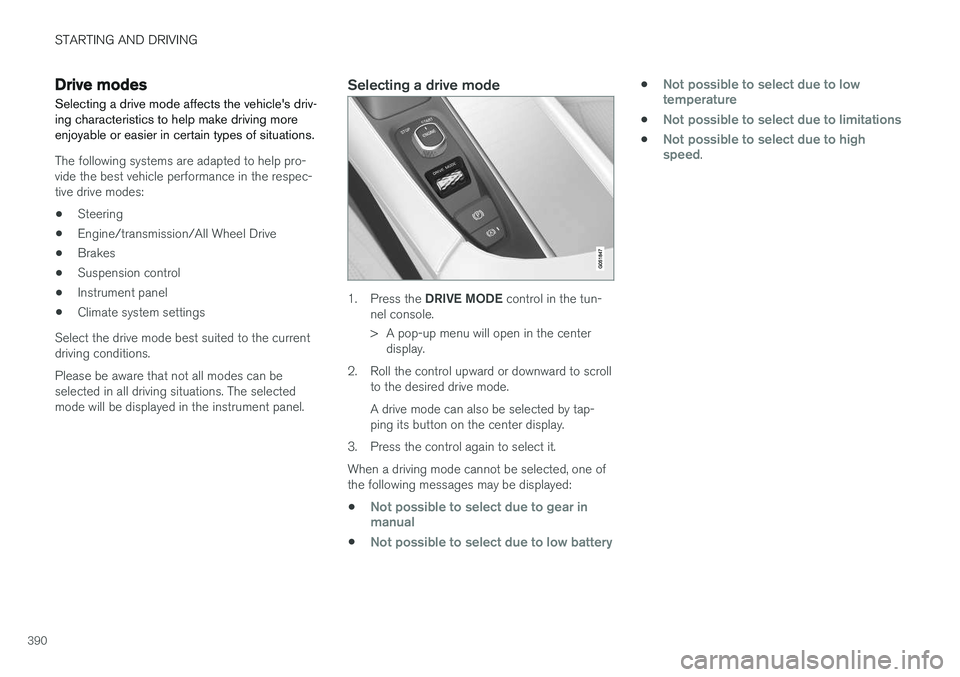
1. Press the DRIVE MODE control in the tun-
nel console.
> A pop-up menu will open in the center display.
2. Roll the control upward or downward to scroll to the desired drive mode. A drive mode can also be selected by tap- ping its button on the center display.
3. Press the control again to select it. When a driving mode cannot be selected, one of the following messages may be displayed:
•
Not possible to select due to gear in manual
•Not possible to select due to low battery
•Not possible to select due to low temperature
•Not possible to select due to limitations
•Not possible to select due to high speed.
Page 394 of 546

||
STARTING AND DRIVING
392
SAVE
This mode makes it possible to save electrical energy (hybrid battery charge) for times whenusing the electric motor is more suitable (e.g., citydriving). Using the electric motor only saves more fuel at low speeds than at high ones. Therefore, use theSAVE mode primarily when the hybrid battery'scharge level is high and driving will initially be athighway speeds but will end with city drivingwhen electric driving is preferable. If the hybrid battery's charge level is low when this mode is selected, the gasoline engine willstart and charge the hybrid battery up to approx.33%. If the battery's charge level is already above33%, this level will be maintained by the enginemanagement system, which will start/stop the gasoline engine in the same way as in
Hybriddrive mode. This mode increases fuel consumption because the gasoline engine is used to conserve batterycharge for later use.
OFF ROAD
This mode helps maximize the vehicle's capacity to traverse difficult terrain or poor roads. In OFF ROAD, ground clearance is maximized, the steering is light, All Wheel Drive and HillDescent Control are activated and a compassand altimeter will be displayed in the instrumentpanel.This drive mode can only be activated at lowspeeds (the permissible speed range will beshown on the speedometer). At higher speeds,OFF ROAD mode will be cancelled and AWD willbe activated. This mode is not intended for normal street driv- ing.
CAUTION
OFF ROAD drive mode may not be used if the vehicle is towing a trailer without an elec-trical connection. This could result in damageto the pneumatic suspension system's bel-lows.
Due to the increased ground clearance, if the OFF ROAD mode was selected when the enginewas switched off, it will also restart in this mode.
AWD
This mode offers improved traction using four- wheel drive and is intended primarily for low-speed driving on slippery surfaces. However, italso helps increase directional stability at higherspeeds. In this mode, both the electric motor and the gas- oline engine are used continuously, which resultsin higher fuel consumption.
POWER
Power mode is intended for sportier, more active
driving. This mode maximizes the combined effects of the electric motor and the gasoline engine andprovides power to all four wheels. Response topressure on the accelerator pedal is more imme-diate and the transmission shifts up at higherspeeds. Steering response is also more immedi-ate, the suspension is stiffer and lower groundclearance reduces body roll when cornering. In this mode, both the electric motor and the gas- oline engine are used continuously, which resultsin higher fuel consumption.
Page 395 of 546
STARTING AND DRIVING
* Option/accessory, for more information, see Introduction.393
INDIVIDUAL
This setting allows you to adapt a driving mode to your personal preferences. Select one of the other driving modes as a basis and change the settings to provide the drivingcharacteristics that you prefer. This driving modeis only available if it has been activated in thecenter display. INDIVIDUAL is only available if it has been acti- vated in the center display.
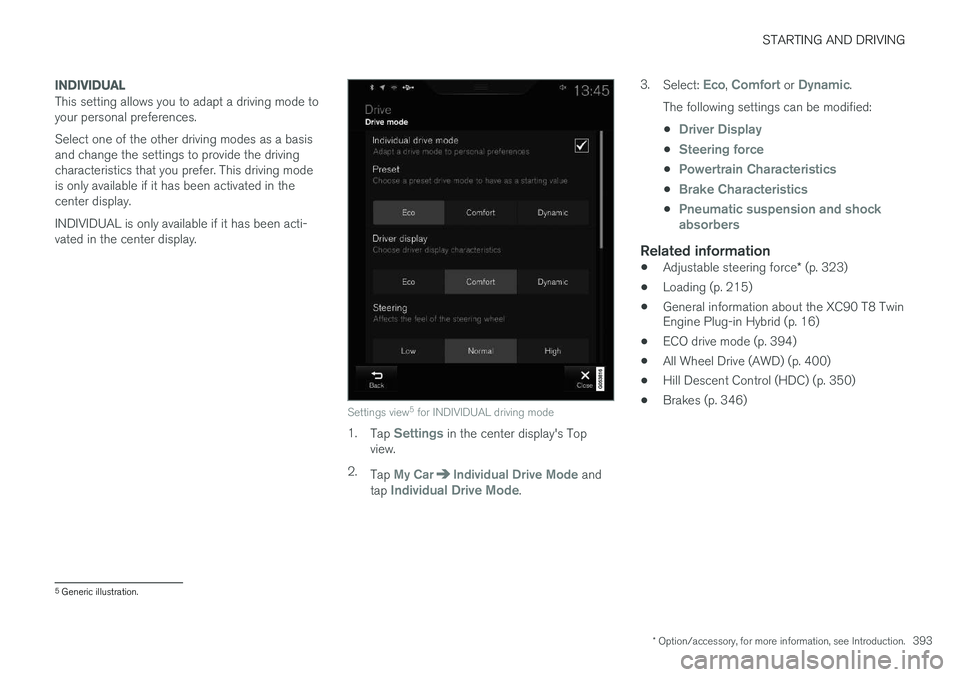
Settings view5
for INDIVIDUAL driving mode
1. Tap Settings in the center display's Top
view.
2. Tap
My CarIndividual Drive Mode and
tap Individual Drive Mode. 3.
Select:
Eco, Comfort or Dynamic.
The following settings can be modified: •
Driver Display
•Steering force
•Powertrain Characteristics
•Brake Characteristics
•Pneumatic suspension and shock absorbers
Related information
• Adjustable steering force
* (p. 323)
• Loading (p. 215)
• General information about the XC90 T8 Twin Engine Plug-in Hybrid (p. 16)
• ECO drive mode (p. 394)
• All Wheel Drive (AWD) (p. 400)
• Hill Descent Control (HDC) (p. 350)
• Brakes (p. 346)
5
Generic illustration.
Page 397 of 546
STARTING AND DRIVING
* Option/accessory, for more information, see Introduction.395
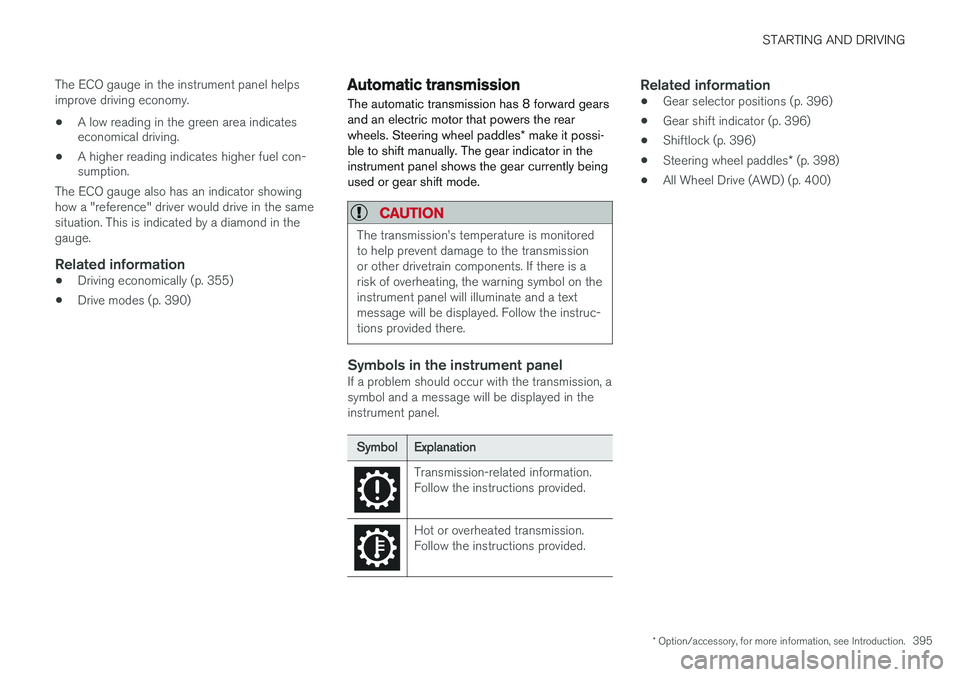
The ECO gauge in the instrument panel helps improve driving economy.
• A low reading in the green area indicates economical driving.
• A higher reading indicates higher fuel con-sumption.
The ECO gauge also has an indicator showing how a "reference" driver would drive in the samesituation. This is indicated by a diamond in thegauge.
Related information
• Driving economically (p. 355)
• Drive modes (p. 390)
Automatic transmission
The automatic transmission has 8 forward gears and an electric motor that powers the rear wheels. Steering wheel paddles * make it possi-
ble to shift manually. The gear indicator in the instrument panel shows the gear currently beingused or gear shift mode.
CAUTION
The transmission
Page 398 of 546
STARTING AND DRIVING
* Option/accessory, for more information, see Introduction.
396
Shiftlock The automatic transmission's shiftlock feature helps prevent inadvertently moving the gearselector between different positions.
Automatic shiftlock
From Park – P
In order to move the gear selector from the P
position, the brake pedal must be depressed and the ignition must be in mode II.
From neutral – N
If the gear selector is in N and the vehicle has
been stationary for more than 3 seconds (regard- less of whether or not the engine is running), theshiftlock feature will lock the gear selector in thisposition. In order to move the gear selector from the N
position, the brake pedal must be depressed and the ignition must be in mode II.
Messages in the instrument panelIf the gear selector is locked in position, a mes- sage such as: Gear lever Press brake pedal
to activate gear lever will be displayed.
There is no mechanical shiftlock function.
Related information
• Gear selector positions (p. 396)
• Automatic transmission (p. 395)
Gear shift indicator
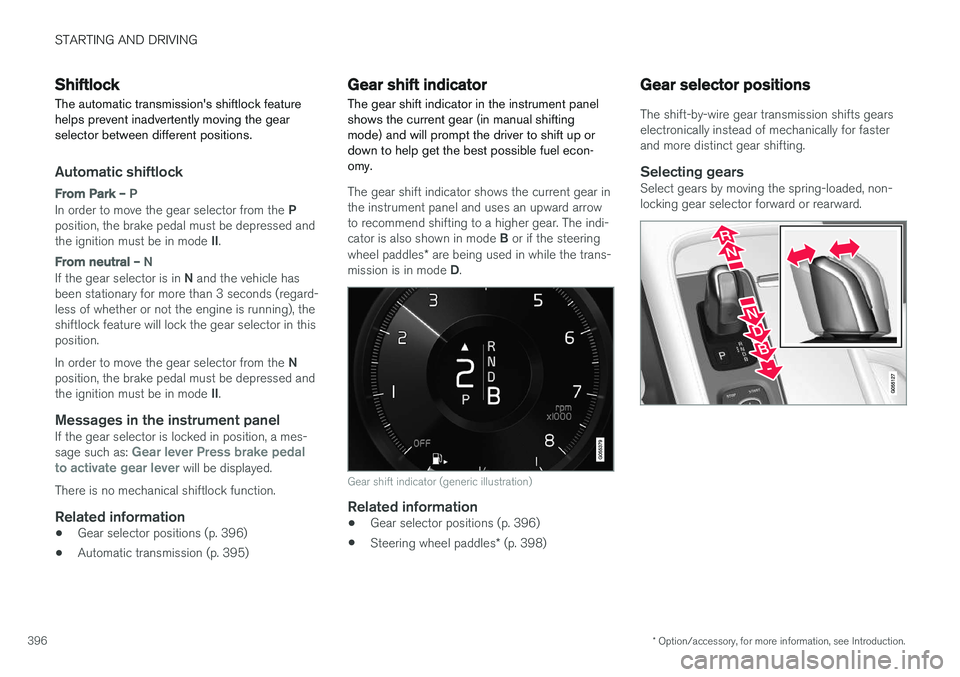
The gear shift indicator in the instrument panel shows the current gear (in manual shiftingmode) and will prompt the driver to shift up ordown to help get the best possible fuel econ-omy.
The gear shift indicator shows the current gear in the instrument panel and uses an upward arrowto recommend shifting to a higher gear. The indi- cator is also shown in mode B or if the steering
wheel paddles * are being used in while the trans-
mission is in mode D.
Gear shift indicator (generic illustration)
Related information
• Gear selector positions (p. 396)
• Steering wheel paddles
* (p. 398)
Gear selector positions
The shift-by-wire gear transmission shifts gears electronically instead of mechanically for fasterand more distinct gear shifting.
Selecting gearsSelect gears by moving the spring-loaded, non-locking gear selector forward or rearward.
Page 400 of 546
||
STARTING AND DRIVING
* Option/accessory, for more information, see Introduction.
398
Brake – B
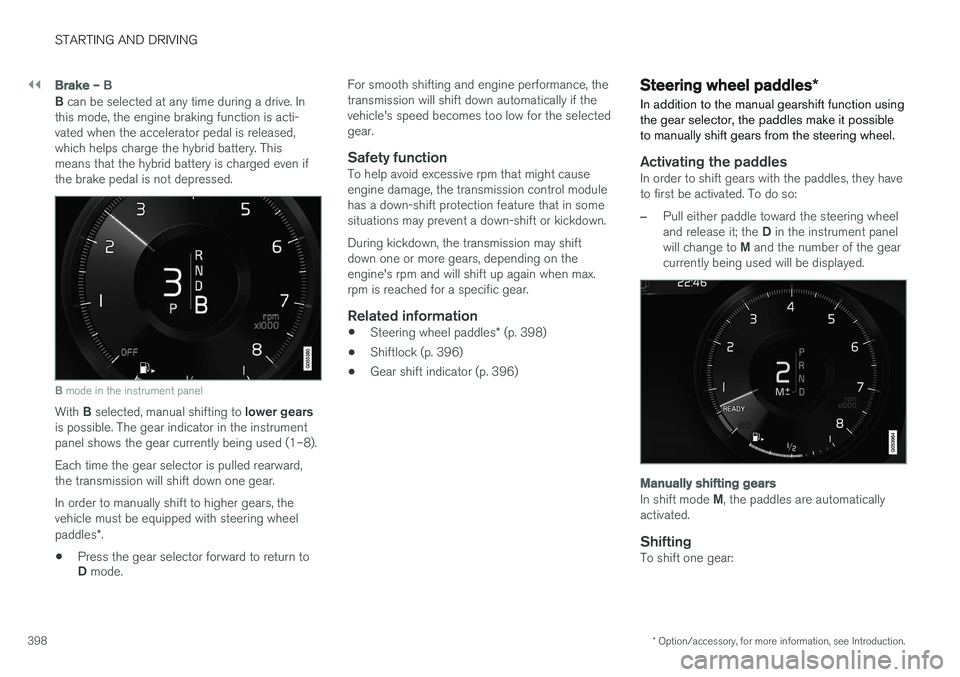
B can be selected at any time during a drive. In
this mode, the engine braking function is acti- vated when the accelerator pedal is released,which helps charge the hybrid battery. Thismeans that the hybrid battery is charged even ifthe brake pedal is not depressed.
B mode in the instrument panel
With B selected, manual shifting to lower gears
is possible. The gear indicator in the instrument panel shows the gear currently being used (1–8). Each time the gear selector is pulled rearward, the transmission will shift down one gear. In order to manually shift to higher gears, the vehicle must be equipped with steering wheel paddles *.
• Press the gear selector forward to return to D
mode. For smooth shifting and engine performance, the transmission will shift down automatically if thevehicle's speed becomes too low for the selectedgear.
Safety functionTo help avoid excessive rpm that might causeengine damage, the transmission control modulehas a down-shift protection feature that in somesituations may prevent a down-shift or kickdown. During kickdown, the transmission may shift down one or more gears, depending on theengine's rpm and will shift up again when max.rpm is reached for a specific gear.
Related information
•
Steering wheel paddles
* (p. 398)
• Shiftlock (p. 396)
• Gear shift indicator (p. 396)
Steering wheel paddles
*
In addition to the manual gearshift function using the gear selector, the paddles make it possibleto manually shift gears from the steering wheel.
Activating the paddlesIn order to shift gears with the paddles, they have to first be activated. To do so:
–Pull either paddle toward the steering wheel and release it; the D in the instrument panel
will change to M and the number of the gear
currently being used will be displayed.
Manually shifting gears
In shift mode M, the paddles are automatically
activated.
ShiftingTo shift one gear: