Page 421 of 546

INFOTAINMENT
* Option/accessory, for more information, see Introduction.419
1.
From App view, tap Messages to open.
2. Tap the name of the contact who sent the message.
3. Tap
Read out to have the message read
aloud or tap the message to be displayed.
Reading new text messages in the instrument panel
Text messages are only displayed in the instru- ment panel if this has been selected. See thearticle "Text message settings" for more informa-tion.
–Press the "down" arrow in the right-side steering wheel keypad to display the mes-sage. To have the message read aloud, select
Read out using the keypad.
Sending text messages
1. From App view, tap Messages to open.
2. •To reply to a message: tap the name of the contact who sent the message and then tap
Answer.
• To create a new message: tap
Create
new
+. Select the contact who will
receive the message or enter a phone number.
3. Write the message. 4. Tap
Send.
Message notificationSee the article "Text message settings" for a list of possible settings.
Related information
• Text message settings (p. 420)
Phone settings
The following settings can be made for a paired and connected cell phone.
Cell phones
–Pull down the center display's Top view and tap
SettingsCommunicationPhoneand choose among the following settings: •
Ringtones: select a ring tone (tones from
the cell phone or the vehicle can be used). Not all cell phones are fully com-patible and it may not be possible to usetheir ring tones in the vehicle. Go towww.volvocars.com for additional informa-tion.
•
Sort order for contacts: select sort cri-
teria for the phone book (list of contacts).
To show call notifications in the head-up dis- play *, see the article "Head-up display."
Related information
• Text message settings (p. 420)
• Bluetooth settings (p. 433)
• Phone (p. 414)
• Handling phone calls (p. 417)
• Head-up display (HUD)
* (p. 117)
Page 422 of 546
INFOTAINMENT
420
Text message settings
The following settings can be made for text mes- sages received through a paired and connectedcell phone.
Text message settings
–Pull down the center display's Top view and tap
SettingsCommunicationText
Messages and choose among the following
settings:
•
Notification in center display: shows
text messages in the center display's sta- tus bar.
•
Notification in driver display: shows
text messages in the instrument panel. With this alternative active, incoming mes-sages can be handled from the right-sidesteering wheel keypad.
•
Text message tone: select an audible
signal for incoming text messages.
Related information
• Connecting/disconnecting a cell phone (p. 416)
• Pairing a cell phone (p. 415)
• Handling text messages (p. 418)
Connecting a Bluetooth ®
device
Bluetooth ®
-enabled devices can be paired and
connected to the infotainment system to stream media and in some cases connect to the Inter-net.
Many cell phones and other devices currently on the market offer wireless Bluetooth ®
technology.
Consult your Volvo retailer or go to support.volvocars.com for any questions regar-ding a device's compatibility with the vehicle'sinfotainment system. The procedure for pairing and connecting a Bluetooth ®
-enabled device is the same as for a
cell phone. See the articles "Pairing a cell phone" and "Connecting/disconnecting a cell phone" fordetails.
Related information
• Pairing a cell phone (p. 415)
• Connecting/disconnecting a cell phone (p. 416)
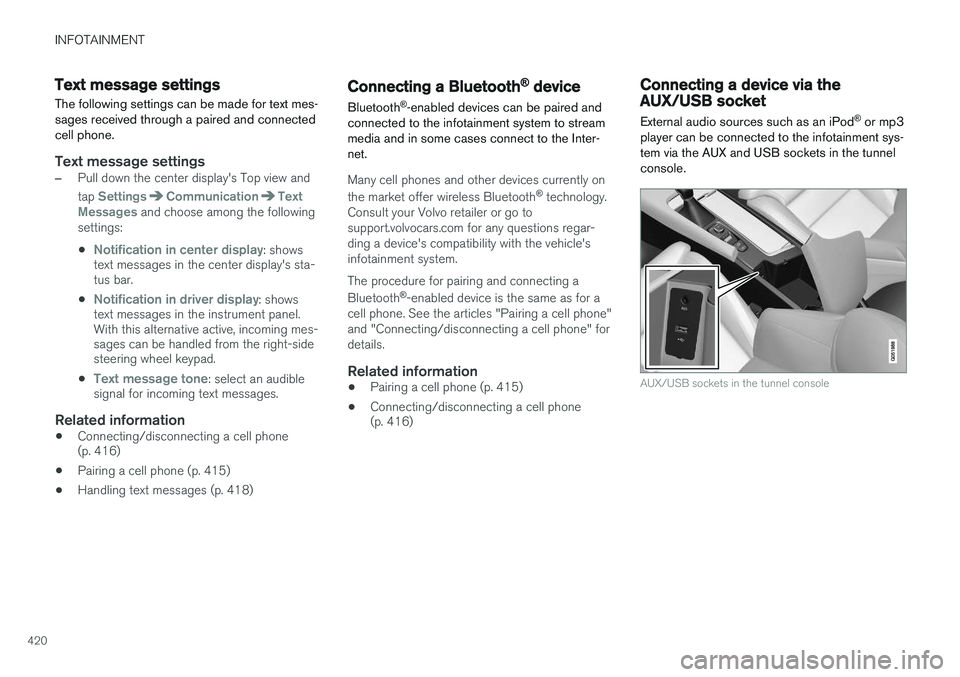
Connecting a device via the AUX/USB socket
External audio sources such as an iPod ®
or mp3
player can be connected to the infotainment sys- tem via the AUX and USB sockets in the tunnelconsole.
AUX/USB sockets in the tunnel console
Page 423 of 546
INFOTAINMENT
* Option/accessory, for more information, see Introduction.421
Media player
The media player can play audio from a CD *,
from external media devices connected to the USB/AUX sockets or it can stream audio froman external device connected to the infotainmentsystem through a Bluetooth connection. Video can also be viewed from devices con- nected to the USB socket. If the vehicle is connected to the Internet, it may also be possible to listen to web radio, audiobooks and to use various music services throughapps.
The media player is controlled from the center display but cer-tain functions can also be con-trolled from the right-sidesteering wheel keypad or byusing voice commands.
Related information
• Playing media (p. 424)
• Voice control for radio and media (p. 122)
• Radio (p. 405) •
Apps (applications) (p. 433)
• CD (media) player
* (p. 424)
• Playing media through the AUX/USB sock- ets (p. 427)
Page 426 of 546
||
INFOTAINMENT
* Option/accessory, for more information, see Introduction.
424
Related information
• Apple CarPlay (p. 422)
• Resetting the settings view (p. 115)
CD (media) player
*
The CD (media) player can play commercially purchased discs as well as ones that you haveburned yourself. See the article "Media playertechnical data" for information about compatiblefile formats.
Location of the CD player in the tunnel console
Disc slot
Eject button
Related information
• Media player technical data (p. 429)
Playing media The media player can controlled from the right- side steering wheel keypad, the center display orby using voice commands. The radio is also controlled from the media player. See the articles relating to the radio.
Starting a media source
Generic illustration
Page 427 of 546
INFOTAINMENT
}}
425
CD
1. Insert a CD. 2.Open the
CD app in the center display's App
view.
3. Select a track. > Playback will begin.
USB flash drive
1. Insert the flash drive in the USB socket. 2. Open the
USB app in the center display's
App view.
3. Select a track. > Playback will begin.
Mp3 player and iPod®
NOTE
Use the iPod app ( not the USB app) to start playback. When an iPod is the media source, the info- tainment system will use a menu structuresimilar to the iPod's own menu structure.
1. Connect the device.
2. Start playback in the connected device.3.
Open the
iPod, USB, AUX) app in the cen-
ter display's App view.
> Playback will begin.
Bluetooth-connected device
1. Connect the device.
2. Activate Bluetooth in the device.
3. Start playback from the connected device.4. Open the
Bluetooth app in the center dis-
play's App view.
> Playback will begin.
Internet media
1. Connect the vehicle to the Internet.
2. Open the app in the center display's App view.
> Playback will begin.
Video
1. Connect the device. 2.Open the
USB app in the center display's
App view.
3. Tap the title of the video content to be played.
> Playback will begin.
Apple CarPlay
Apple CarPlay is described in a separate article.
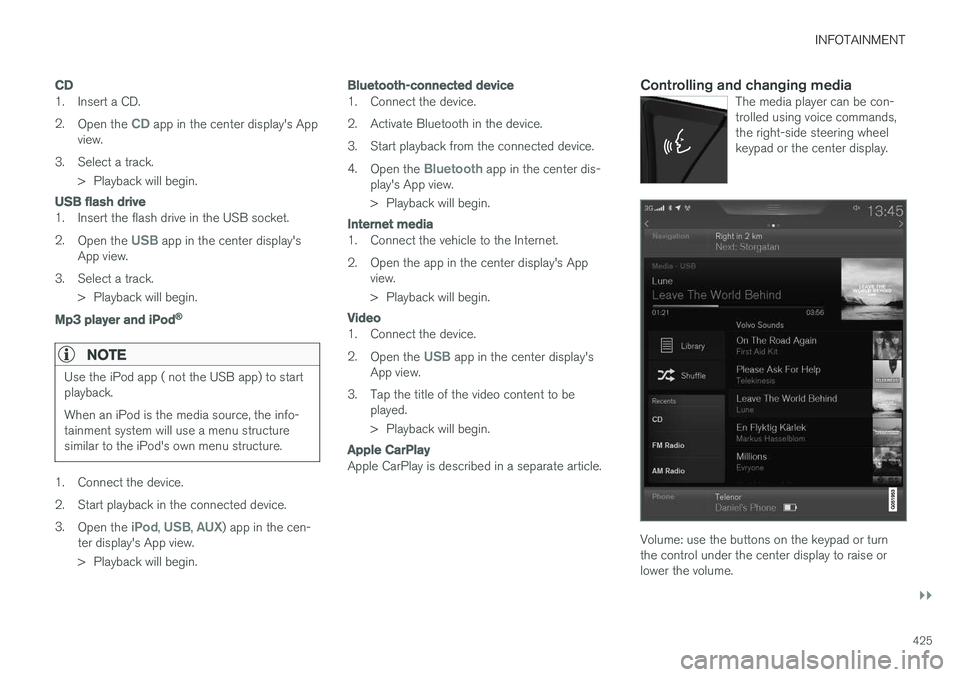
Controlling and changing mediaThe media player can be con- trolled using voice commands,the right-side steering wheelkeypad or the center display.
Volume: use the buttons on the keypad or turn the control under the center display to raise orlower the volume.
Page 466 of 546
||
WHEELS AND TIRES
464
Connecting
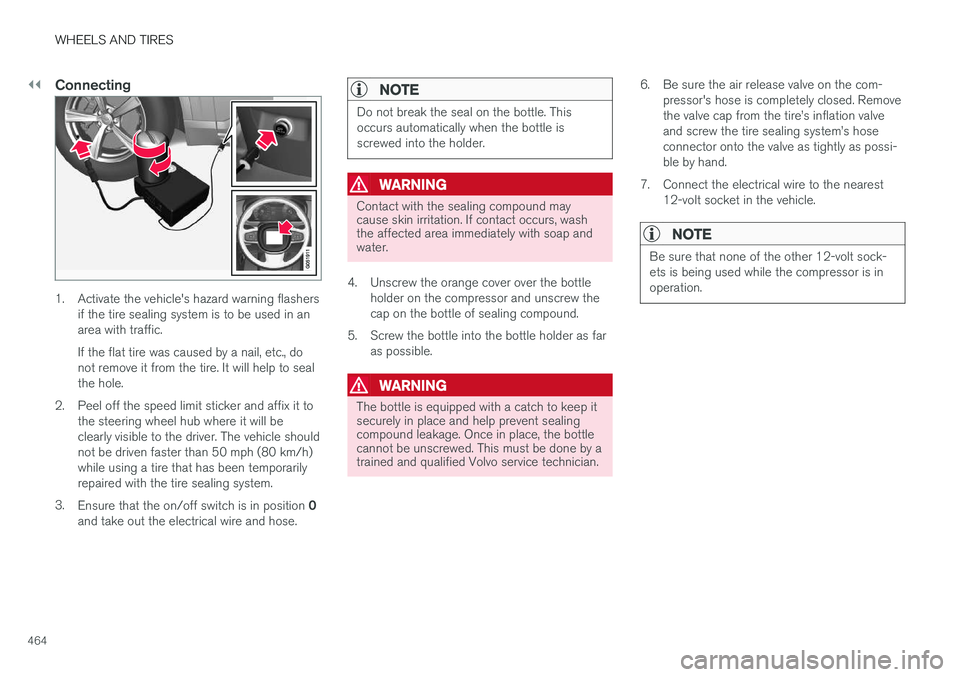
1. Activate the vehicle's hazard warning flashersif the tire sealing system is to be used in an area with traffic. If the flat tire was caused by a nail, etc., do not remove it from the tire. It will help to sealthe hole.
2. Peel off the speed limit sticker and affix it to the steering wheel hub where it will beclearly visible to the driver. The vehicle shouldnot be driven faster than 50 mph (80 km/h)while using a tire that has been temporarilyrepaired with the tire sealing system.
3. Ensure that the on/off switch is in position 0
and take out the electrical wire and hose.
NOTE
Do not break the seal on the bottle. This occurs automatically when the bottle isscrewed into the holder.
WARNING
Contact with the sealing compound may cause skin irritation. If contact occurs, washthe affected area immediately with soap andwater.
4. Unscrew the orange cover over the bottle holder on the compressor and unscrew the cap on the bottle of sealing compound.
5. Screw the bottle into the bottle holder as far as possible.
WARNING
The bottle is equipped with a catch to keep it securely in place and help prevent sealingcompound leakage. Once in place, the bottlecannot be unscrewed. This must be done by atrained and qualified Volvo service technician. 6. Be sure the air release valve on the com-
pressor's hose is completely closed. Remove the valve cap from the tire
Page 468 of 546
||
WHEELS AND TIRES
466
ice technician to have the bottle removed and properly disposed of.
WARNING
If heavy vibrations, unsteady steering behavior, or noises should occur while driving, reducespeed and park the vehicle in a safe place.Recheck the tire for bumps, cracks, or othervisible damage, and recheck its inflation pres-sure. If the pressure is below 19 psi (1.3 bar),do not continue driving. Have the vehicletowed to a trained and qualified Volvo servicetechnician.
15. Rechecking the pressure Reconnect the tire sealing system's hose to the tire's inflation valve. 16. Without starting the compressor, check the
inflation pressure on the air pressure gauge. •If the pressure is under 19 psi (1.3 bar), the puncture has not been sealed suffi-ciently and the vehicle should not bedriven. Have the vehicle towed to a trainedand qualified Volvo service technician.
• If the pressure is more than 19 psi(1.3 bar), connect the electrical wire to a12-volt socket, start the compressor andinflate the tire to the correct pressure(see the tire pressure decal on the on thedriver's side B-pillar (the structural mem-ber at the side of the vehicle, at the rearof the driver's door opening). Use the airrelease valve to release some air from thetire if necessary.
17. Switch off the compressor and disconnect the electrical wire from the 12-volt socket. Unscrew the hose from the tire
Page 469 of 546
WHEELS AND TIRES
}}
467
WARNING
•After using the tire sealing system, the vehicle should not be driven farther thanapproximately 120 miles (200 km).
• Have the tire inspected by a trained andqualified Volvo service technician as soonas possible to determine if it can be per-manently repaired or must be replaced.
• The vehicle should not be driven fasterthan 50 mph (80 km/h) while using a tirethat has been temporarily repaired withthe tire sealing system.
• After using the tire sealing system, drivecarefully and avoid abrupt steeringmaneuvers and sudden stops.
Related information
• Tire sealing system (p. 461)
• Checking tire inflation pressure (p. 451)
Inflating a tire with the tire sealing system compressor
The compressor can be used to inflate a tire.
1. The compressor should be switched off. Ensure that the on/off switch is in position 0.
Take out the electrical wire and hose.
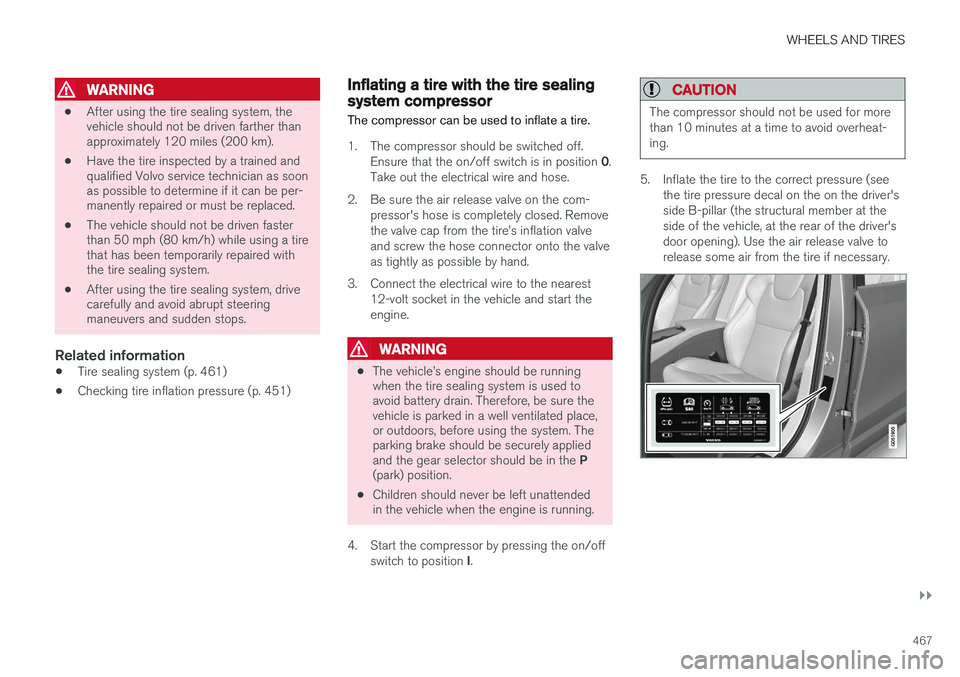
2. Be sure the air release valve on the com- pressor's hose is completely closed. Remove the valve cap from the tire