2016 VOLVO XC90 T8 steering
[x] Cancel search: steeringPage 199 of 546
CLIMATE
* Option/accessory, for more information, see Introduction.197
2. Activate/deactivate the respective defroster
functions when the engine is started by selecting/deselecting the boxes for
Auto
Electric Front Defroster and Auto Electric
Rear Defroster.
The heating function will switch off automatically when the window/mirror is sufficiently warm andthe ice/condensation has disappeared.
Related information
• Climate system controls (p. 188)
• Climate system controls in the center display (p. 189)
• Defrosting windows and mirrors (p. 195)
• Air conditioning (p. 198)
• Turning recirculation on and off (p. 194)
• Adjusting air distribution (p. 202)
• Setting the blower speed (p. 191)
• Automatic climate control (p. 187)
• Turning front seat ventilation
* on and off
(p. 200)
• Turning steering wheel heating
* on and off
(p. 197)
Turning steering wheel heating * on
and off
The steering wheel can be heated electrically for added comfort in cold weather.
Activating/deactivating steering wheel
heating
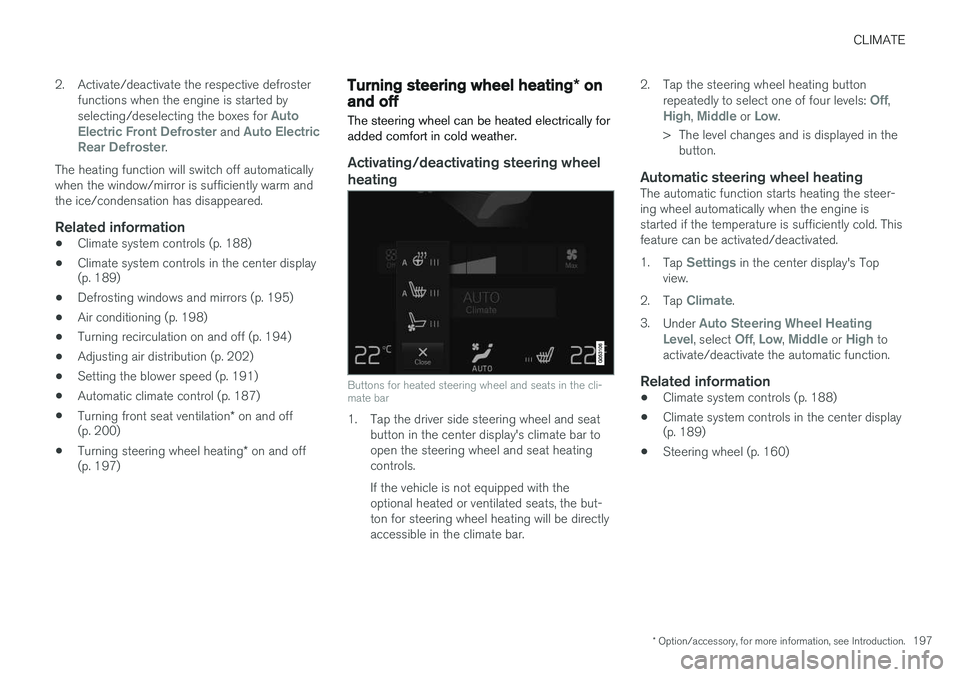
Buttons for heated steering wheel and seats in the cli- mate bar
1. Tap the driver side steering wheel and seat button in the center display's climate bar to open the steering wheel and seat heatingcontrols. If the vehicle is not equipped with the optional heated or ventilated seats, the but-ton for steering wheel heating will be directlyaccessible in the climate bar. 2. Tap the steering wheel heating button
repeatedly to select one of four levels:
Off,High, Middle or Low.
> The level changes and is displayed in the button.
Automatic steering wheel heatingThe automatic function starts heating the steer- ing wheel automatically when the engine isstarted if the temperature is sufficiently cold. Thisfeature can be activated/deactivated. 1. Tap
Settings in the center display's Top
view.
2. Tap
Climate.
3. Under
Auto Steering Wheel Heating
Level, select Off, Low, Middle or High to
activate/deactivate the automatic function.
Related information
• Climate system controls (p. 188)
• Climate system controls in the center display (p. 189)
• Steering wheel (p. 160)
Page 201 of 546
CLIMATE
}}
* Option/accessory, for more information, see Introduction.199
Turning seat heating* on and off
The seats can be heated for added comfort in cold weather.
Activating/deactivating front seat heating
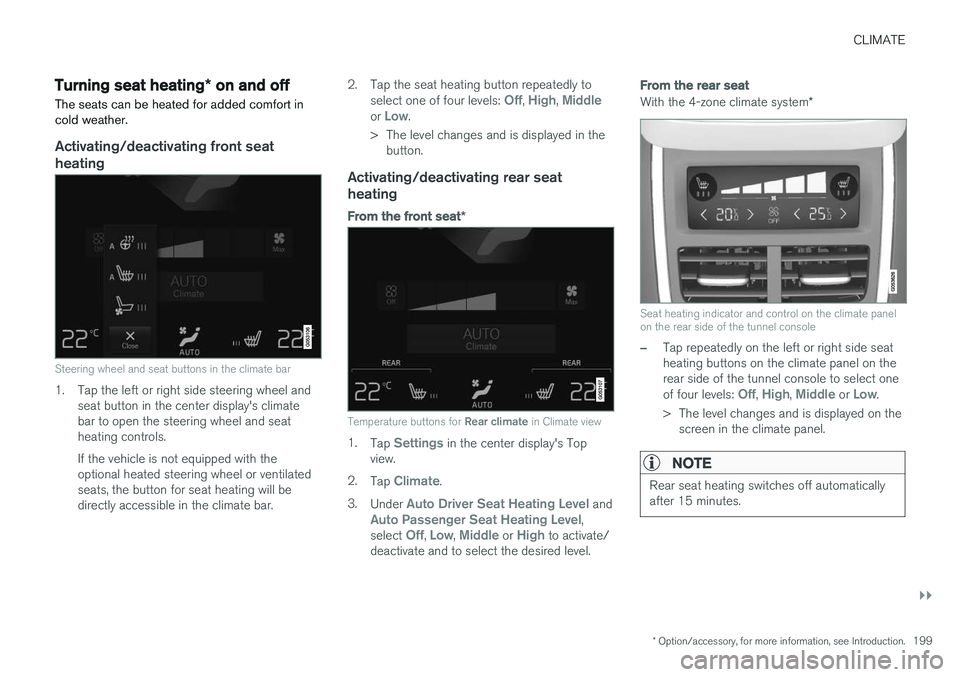
Steering wheel and seat buttons in the climate bar
1. Tap the left or right side steering wheel and seat button in the center display's climate bar to open the steering wheel and seatheating controls. If the vehicle is not equipped with the optional heated steering wheel or ventilatedseats, the button for seat heating will bedirectly accessible in the climate bar. 2. Tap the seat heating button repeatedly to
select one of four levels:
Off, High, Middleor Low.
> The level changes and is displayed in the button.
Activating/deactivating rear seat heating
From the front seat *
Temperature buttons for Rear climate in Climate view
1.
Tap Settings in the center display's Top
view.
2. Tap
Climate.
3. Under
Auto Driver Seat Heating Level andAuto Passenger Seat Heating Level,
select Off, Low, Middle or High to activate/
deactivate and to select the desired level.
From the rear seat
With the 4-zone climate system *
Seat heating indicator and control on the climate panel on the rear side of the tunnel console
–Tap repeatedly on the left or right side seat heating buttons on the climate panel on therear side of the tunnel console to select one of four levels:
Off, High, Middle or Low.
> The level changes and is displayed on the screen in the climate panel.
NOTE
Rear seat heating switches off automatically after 15 minutes.
Page 202 of 546
||
CLIMATE
* Option/accessory, for more information, see Introduction.
200
Automatically activating/deactivating the seat heating function when theengine is started
The seat heating * can be set to start automati-
cally when the engine is started. The automatic function starts heating the seats when the ambient temperature is sufficiently cold. 1. Tap
Settings in the center display's Top
view.
2. Tap
Climate.
3. Under
Auto Driver Seat Heating Level andAuto Passenger Seat Heating Level,
select Off, Low, Middle or High to activate/
deactivate the automatic function and select a level for the driver's and passenger's seats.
Related information
• Climate system controls (p. 188)
• Climate system controls in the center display (p. 189)
• Rear climate system controls on the tunnelconsole (p. 190)
Turning front seat ventilation
* on
and off
Seat ventilation can be used e.g., to help remove dampness from the seat occupant's clothing.
The ventilation system consists of fans in the seats and backrests that draw air through theseat upholstery. The cooling effect increases asthe air in the passenger compartment becomescooler. This feature can be activated when theengine is running and it monitors the seat's tem-perature, sunlight in the passenger compartmentand the ambient temperature.
Activating/deactivating front seat ventilation
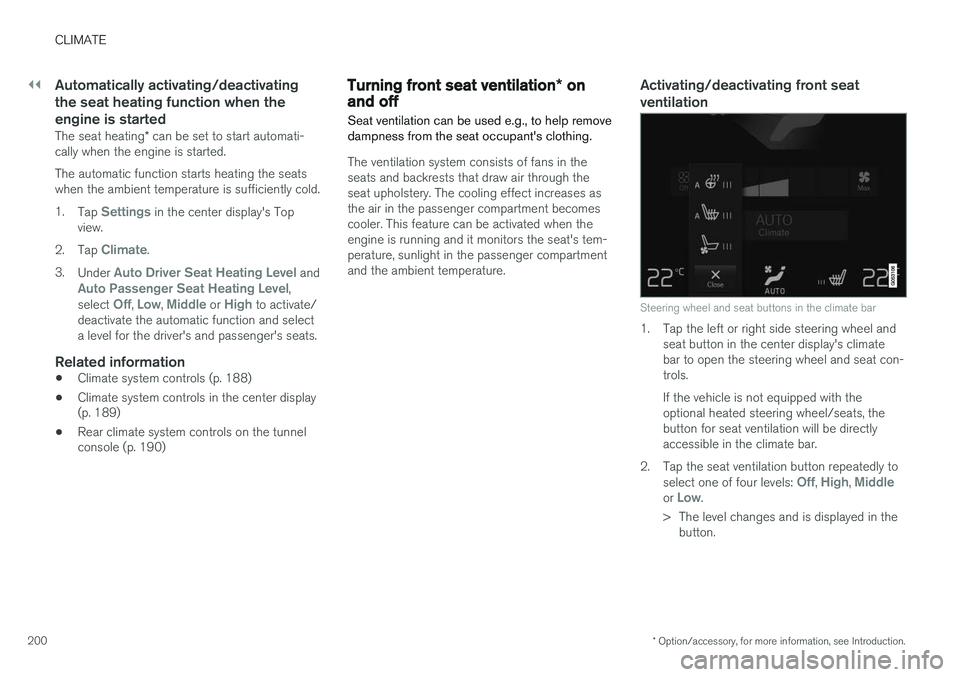
Steering wheel and seat buttons in the climate bar
1. Tap the left or right side steering wheel and seat button in the center display's climate bar to open the steering wheel and seat con-trols. If the vehicle is not equipped with the optional heated steering wheel/seats, thebutton for seat ventilation will be directlyaccessible in the climate bar.
2. Tap the seat ventilation button repeatedly to select one of four levels:
Off, High, Middleor Low.
> The level changes and is displayed in the button.
Page 210 of 546

LOADING AND STORAGE
* Option/accessory, for more information, see Introduction.
208
Cargo space
The vehicle has flexible cargo capacity that makes it possible to load and secure largeobjects.
By folding down the backrests in the second and third rows * of seats, the cargo capacity of the
vehicle increases considerably. To make loading easier, the rear section of the vehicle can beraised and lowered using the pneumatic suspen- sion *. Use the load anchoring eyelets or the gro-
cery bag holder to secure objects and the cargo compartment cover helps conceal the load. The jack * and tools can be found under the cargo
compartment's floor.
Related information
• Loading (p. 215)
• Cargo compartment cover
* (p. 221)
• Cargo net (p. 217)
• Grocery bag holder (p. 217)
• Load anchoring eyelets (p. 220)
• Steel cargo grid
* (p. 219)
Passenger compartment storage spaces
The following is an overview of the passenger compartment and its storage spaces.
Front seats
Storage spaces in the door panel, near the steering wheel, the glove compartment and the sun visors
Storage spaces, cup holders and 12-volt socket in the tunnel console
Second row of seats
Storage compartments in the door panels, cupholders in the center seat's backrest, storage pockets on the rearside of the front seat backrest, and 12-volt socket onthe rear side of the tunnel console
Page 237 of 546

LOCKS AND ALARM
}}
235
Remote key's range
In order to function correctly, the remote key must be within a certain distance of the vehicle.
Manual useThe remote key's functions, such as locking and unlocking the vehicle, which are activated by pressing the
or buttons, have a range
of approx. 65 feet (20 meters) from the vehicle. Buildings or other obstacles may interfere with the function of the remote key. The vehicle canalso be locked or unlocked with the key blade. If the vehicle's locks do not react, move closer and try again.
Keyless use 5
The shaded areas illustrate the range of the Passive Entry system's antennas
For keyless entry into the vehicle, the remote key must be within approximately 5 feet (1.5 meters)of the sides of the vehicle or approximately 3 feet(1 meter) of the tailgate as shown in the illustra-tion. The remote key may not function properly due to ambient radio waves, buildings or topographicalobstructions, etc. The vehicle can always belocked/unlocked with the detachable key blade.
If the remote key is removed from the vehicle
If all of the remote keys are removed from the vehicle while the engine is running, Vehicle key
not found Removed from vehicle will be dis-
played in the instrument panel and an audible signal will sound when all of the doors have beenclosed. The message will be erased when aremote key has been returned to the vehicle and the O button on the right-side steering wheel
keypad has been pressed or when all of the doors have been closed again.
Related information
• Remote key (p. 235)
• Antenna locations for the start and lock sys- tem (p. 230)
Remote key
The remote key is used to lock/unlock the vehi- cle and must be in the passenger compartmentin order to start the engine.
The standard remote key (left) and the Key Tag (right)
In models with the standard Passive Start system, the remote key only needs to be in the front sec-tion of the passenger compartment or in the tun-nel console cup holders in order to start theengine. The keyless Passive Entry system for locking/ unlocking the vehicle is available as an option.This system has a range of approximately 5 feet(1.5 meters) from the sides of the vehicle orapproximately 3 feet (1 meter) from the tailgate.With this system, a remote key can be anywherein the vehicle.
5 Models equipped with the optional Passive Entry only.
Page 254 of 546
DRIVER SUPPORT
* Option/accessory, for more information, see Introduction.
252
Driver support systems
The vehicle is equipped with a number of driver support systems that help provide the driver withactive/passive support.
Some of these systems are standard while others are optional and they are designed to e.g., helpthe driver maintain a set speed or a set distanceto a vehicle ahead, or warn the driver of a poten-tial collision situation and in certain cases applythe brakes if necessary. Certain optional systemscan also assist in various parking situations.
Related information
• Adjustable steering force
* (p. 323)
• Electronic Stability Control (ESC) (p. 323)
• Speed limiter (SL)
* (p. 298)
• Cruise Control (CC) (p. 261)
• Adaptive Cruise Control (ACC)
* (p. 266)
• Pilot Assist
* (p. 273)
• Distance Alert
* (p. 329)
• City Safety
™ (p. 287)
• Blind Spot Information (BLIS)
* (p. 330)
• Cross Traffic Alert (CTA)
* (p. 333)
• Driver Alert Control (DAC) (p. 327)
• Driving lane assistance (p. 338)
• Road Sign Information (RSI)
* (p. 304)
• Park Assist
* (p. 306)
• Park Assist Pilot (PAP)
* (p. 316) •
Park Assist Camera (PAC)
* (p. 311)
Driver support system camera
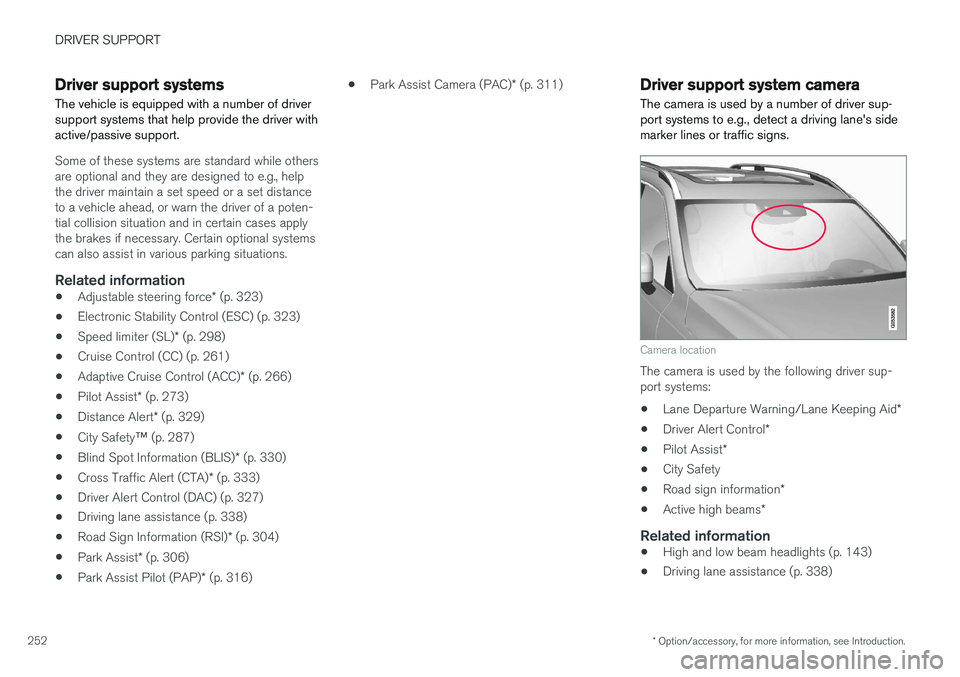
The camera is used by a number of driver sup- port systems to e.g., detect a driving lane's sidemarker lines or traffic signs.
Camera location
The camera is used by the following driver sup- port systems:
• Lane Departure Warning/Lane Keeping Aid
*
• Driver Alert Control
*
• Pilot Assist
*
• City Safety
• Road sign information
*
• Active high beams
*
Related information
•High and low beam headlights (p. 143)
• Driving lane assistance (p. 338)
Page 264 of 546
||
DRIVER SUPPORT
* Option/accessory, for more information, see Introduction.
262
NOTE
Before CC can be activated, the vehicle's speed must be at least 20 mph (30 km/h).This is also the lowest speed that can be set.
Activating CC (putting it in active mode and setting a speed)
–With the symbol displayed (CC is in
standby mode), press the
button (2) on
the left-side steering wheel keypad.
> This puts CC in active mode and will maintain the vehicle's current speed.
Related information
• Cruise Control (CC) (p. 261)
• Switching between Cruise Control (CC) and Adaptive Cruise Control (ACC)
* (p. 265)
• Deactivating/resuming Cruise Control (CC) (p. 263)
• Turning Cruise Control off (p. 264)
Changing Cruise Control speed
Changing a set speed
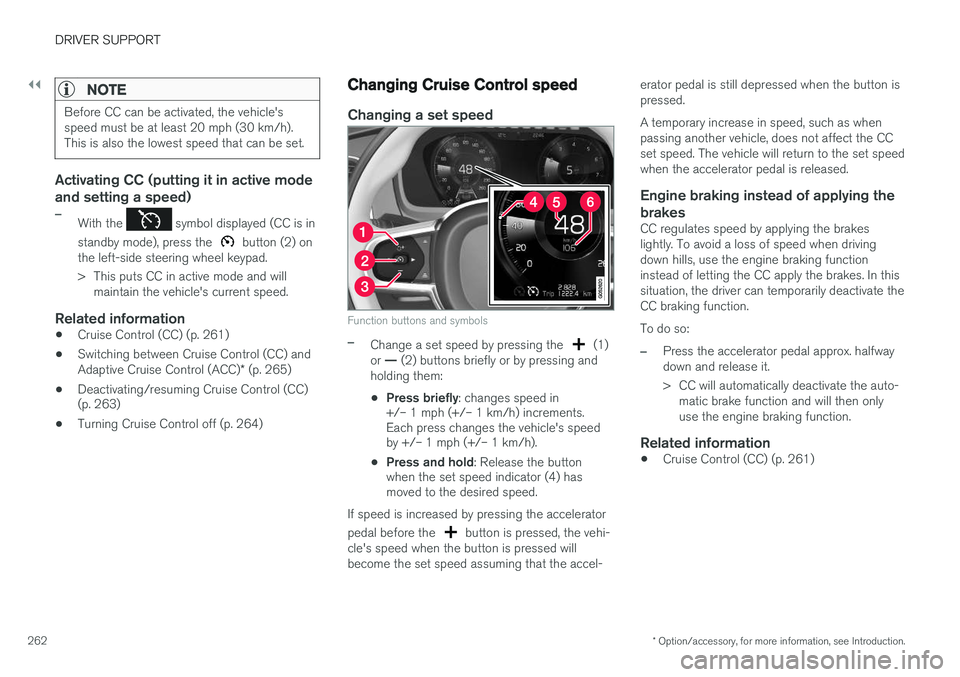
Function buttons and symbols
–Change a set speed by pressing the (1)
or — (2) buttons briefly or by pressing and
holding them:
• Press briefly
: changes speed in
+/– 1 mph (+/– 1 km/h) increments. Each press changes the vehicle's speedby +/– 1 mph (+/– 1 km/h).
• Press and hold
: Release the button
when the set speed indicator (4) hasmoved to the desired speed.
If speed is increased by pressing the accelerator pedal before the
button is pressed, the vehi-
cle's speed when the button is pressed will become the set speed assuming that the accel- erator pedal is still depressed when the button ispressed. A temporary increase in speed, such as when passing another vehicle, does not affect the CCset speed. The vehicle will return to the set speedwhen the accelerator pedal is released.
Engine braking instead of applying the
brakes
CC regulates speed by applying the brakeslightly. To avoid a loss of speed when drivingdown hills, use the engine braking functioninstead of letting the CC apply the brakes. In thissituation, the driver can temporarily deactivate theCC braking function. To do so:
–Press the accelerator pedal approx. halfway down and release it.
> CC will automatically deactivate the auto- matic brake function and will then only use the engine braking function.
Related information
• Cruise Control (CC) (p. 261)
Page 266 of 546
||
DRIVER SUPPORT
264
–Press the button (2).
> The set speed marker (4) and symbols will change colors from GRAY to WHITE. CC will then set and maintain the vehicle's current speed.
Related information
•Cruise Control (CC) (p. 261)
• Starting and activating Cruise Control (p. 261)
Turning Cruise Control off
Cruise Control (CC) can be deactivated (turned off).
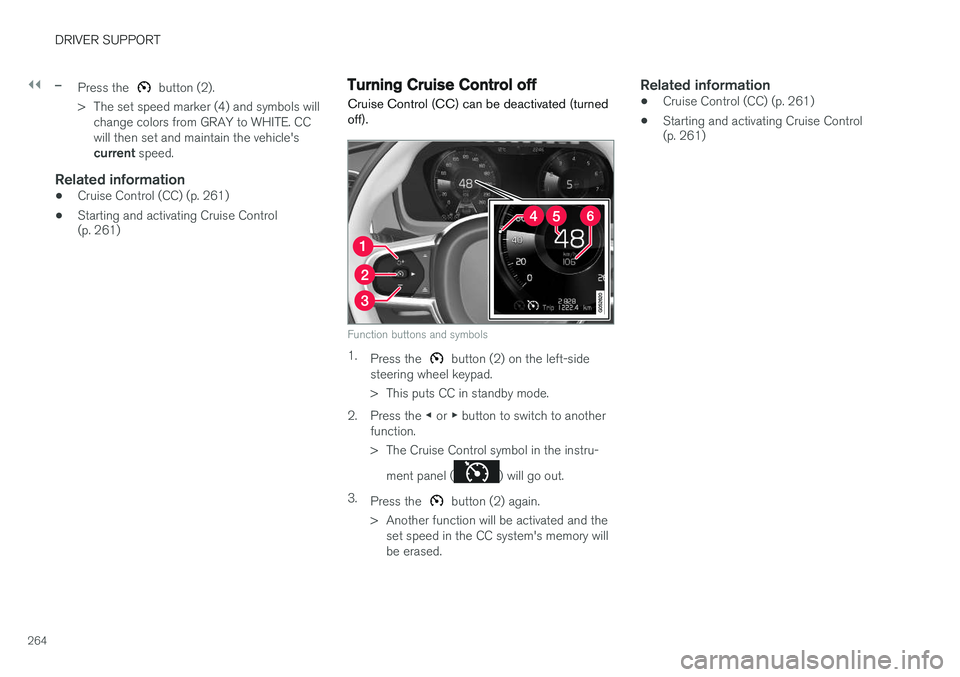
Function buttons and symbols
1. Press the button (2) on the left-side
steering wheel keypad.
> This puts CC in standby mode.
2. Press the ◀ or ▶ button to switch to another
function.
> The Cruise Control symbol in the instru-
ment panel (
) will go out.
3. Press the
button (2) again.
> Another function will be activated and the set speed in the CC system's memory will be erased.
Related information
• Cruise Control (CC) (p. 261)
• Starting and activating Cruise Control (p. 261)