Page 41 of 184
 or
(warning) continue to be displayed.
O")
As long as the faults are not rectified the messages are always shown. After
the message is displayed for the first time, the warning lights (danger) or
(warning) continue to be displayed.
Operation of the information system
Operation via the operating lever
Fig. 24
Buttons on the control lever
Operating the multifunction display
Press (up or down) - select data / Setting values
Press - show / confirm entry
Operating the MAXI DOT display Press (up or down) - move to the selected menu
Hold (up or down) - display main menu
Press - confirm selected menu item
Operation via the multifunction steering wheel
Fig. 25
Buttons/dials on the multifunction steering wheel
ABABButtons/dials on the multifunction steering wheel
Switch on/off voice control
Turn - sets the volume
Press - sound on / off
Skip to next track/station
Switch to previous track/station
Display the assistance systems menu
Press - display the telephone menu; accept/end the call; select contact
Hold - repeat last call; reject call
Operating the multifunction display Turn - select data / set values
Press - show / confirm entry
Operating the MAXI DOT display Hold - display main menu
Press - return to a previous level in the menu
Turn - move in the selected menu
Press - confirm selected menu item
Note
Depending on equipment not all functions may be available. The system can
indicate this fact by a text message in the display of the instrument cluster or
in the Infotainment display.
Driving data (Multifunction display)
Introduction
This chapter contains information on the following subjects:
Information overview
40
Warning when exceeding the set speed
40
Memory
40
The driving data display is only possible with the ignition switched on. After
the ignition is switched on, the function that was last selected before switch-
ing off the ignition is displayed.
If vehicles with MAXI DOTdisplay do not show the driving data after switching
on the ignition, select the menu item
Driving data
in the main menu and confirm
» page 41 , MAXI DOT display .
ABB39Information system
Page 42 of 184
.
Range")
The units and the display of some information can be set in Infotainment
» Owner´s Manual - Infotainment .
Information overview
Overview of driving data (depending on the vehicle equipment).
Range - drive distance in km which can be covered with the existing tank ca-
pacity and with the same driving style. If you drive more efficiently this value
can increase.
Average fuel consumption - is calculated continuously since the last clearing
of the memory. After erasing the memory, no data will appear for the first 100
m driven.
Current fuel consumption - when the vehicle is stationary or moving slowly,
the fuel consumption is displayed in l/h (in models in some countries the fol-
lowing appears --,- km/l).
Oil temperature - if the temperature is lower than 50 °C or if there is a fault in
the system for checking the oil temperature, the symbols are displayed.
Warning when the preset speed is exceeded - allows the setting of a speed
limit where, if exceeded, an acoustic warning signal and a warning message
appears on the display of the instrument cluster.
Current Speed - digital speedometer.
Average speed - value constantly recalculated, for distance since last clearing
the memory. After erasing the memory, no data will appear for the first 300 m
driven.
Distance driven - distance driven since the memory was last cleared.
Driving time - driving time since last clearing the memory.
Coolant temperature - if the coolant temperature is in the range 70-120 °C, the
engine operating temperature has been reached. If the temperature is below
70 ° C, high engine speeds and straining the engine should be avoided. If the
temperature is above 120 ° C, the warning light lights up the instrument
cluster » page 35 .
Warning when exceeding the set speed
The system offers the possibility to set a speed limit beyond which an acoustic
warning signal will sound and the following warning message appears in the
display of the instrument cluster.
Adjust the speed limit while the vehicle is stationary›Select the menu item
Warning at
at ( ) or ( ) and confirm.›
Set the desired speed limit is 5 km/h steps.
›
Confirm the set value, or wait several seconds; your settings will be saved
automatically.
Adjusting the speed limit while the vehicle is moving
›
Select the menu item
Warning at
at (
) or
(
) and confirm.
›
Drive at the desired speed.
›
Confirm the current speed as the speed limit.
The set speed limit can be manually adjusted later if needed.
Reset speed limit
›
Select the menu item
Warning at
at ( ) or
(
) and confirm.
›
By confirming the speed stored in the memory, the speed limit is reset.
The set driving mode remains stored even after switching the ignition on and
off. After a gap between driving exceeding 2 hours, the pre-set speed limit is
deactivated.
Memory
Fig. 26
Memory display: MAXI DOT dis-
play (
) / Segment display (
)
The system saves the data in the three memories described below which are
displayed at the position
A
» Fig. 26 .
Since start
(
) or “1” (
)
Drive data is stored from when the ignition is switched on to when it is switch-
ed off. If the trip is continued within 2 hours after switching off the ignition,
new data will also flow into the calculation of the current driving information.
If the trip is interrupted for more than 2 hours, the memory is automatically
erased.
40Using the system
Page 43 of 184
 and “2” ( )
The memory gathers driving data from any number of individual journeys up to
a total of 99 hours and 59 minutes driving time or 9999 kilometres driven.
The indicato")
Long-term ( ) and “2” ( )
The memory gathers driving data from any number of individual journeys up to
a total of 99 hours and 59 minutes driving time or 9999 kilometres driven.
The indicator is automatically set back to zero if one of the indicated values is
exceeded.Since refuel
(
) or “3” (
)
The driving data is stored in the memory since the last fuel refuelling.
The memory is erased automatically the next time you fill up.
›
For the Storage choice , repeatedly confirm the selected indication and select
the desired memory.
›
For Deleting the memory for the selected information, hold down the button
confirming the specification.
The following driving data is stored in different memory banks.
▶ Average fuel consumption.
▶ Distance driven.
▶ Average speed.
▶ Driving time.
Note
Disconnecting the vehicle battery will delete all memory data.
MAXI DOT display
Introduction
This chapter contains information on the following subjects:
Menu item
Navigation41
Menu item
Audio41
Menu item
Telephone42
Menu item
Assist systems42
The MAXI DOT display is a user interface which, depending on the equipment
configuration, provides information about the Infotainment, the multifunction
display, the assistance systems etc.
The menus with details can be operated and displayed using the buttons on
the operating lever or the multifunction steering wheel » page 39.
Main menu items (depending on vehicle equipment)
■Driving data
» page 39
■
Assist systems
» page 42
■
Navigation
» page 41
■
Audio
» page 41
■
Telephone
» page 42 ;
■
Vehicle
» page 38 , Auto Check Control
Note
■
If warning messages are displayed, these messages must first be confirmed
to access the main menu.■
The display language can also be set in Infotainment » Owner´s Manual -In-
fotainment .
■
For vehicles without Infotainment, the display language can only be adjusted
by a specialist garage.
Menu item
Navigation
The following information is displayed in the
Navigation
menu item.
▶ Driving recommendations
▶ Compass
▶ Last destinations
Menu item
Audio
The following information is displayed in the
Audio
menu item.
Radio
▶ Currently playing station (name/frequency).
▶ The selected frequency range (e.g. FM) optionally with the number of the sta-
tion button (e.g. FM 3), if the station is stored in the memory list.
▶ List of available stations (if more than 5 stations can be received).
▶ TP traffic announcements.
Media
▶ Name of the track being played, if necessary, further information regarding
title (e.g. artist, album name), if this information is stored as a so called ID3
tag on the audio source.
41Information system
Page 44 of 184

Menu itemTelephone
The call list with the following symbols is displayed in the
Telephone
menu item.
Incoming call
Outgoing call
Missed call
Symbols in the display Charge status of the telephone battery 1)
Signal strength 1)
A telephone is connected to the unit
Missed calls (if there are several missed calls, the number of calls is shown
next to the symbol)
Switch-off microphone
Menu item
Assist systems
In the
Assist systems
menu item, the Front Assist system can be activated/deac-
tivated.
Service interval display
Introduction
This chapter contains information on the following subjects:
Displaying the distance and days until the next service interval
42
Service messages
42
Resetting the service interval display
43
The service interval display shows the kilometres or days until the next service
event.
Information regarding the service intervals » page 120.
Displaying the distance and days until the next service intervalFig. 27
Button in the instrument cluster
›
Switch on the ignition.
›
Press and hold the button
A
» Fig. 27 until the
Service
menu item is shown in
the display.
›
Release the button
A
.
In the display, the symbol appears for 4 seconds along with the following
message for the kilometres or days to the next service appointment.
The details regarding the remaining kilometres or days until the next sched- uled service can also be displayed in Infotainment » Owner´s Manual - Info-
tainment .
Service messages
Messages before reaching the scheduled service date
Before the next service date has been reached, the symbol as well as a mes-
sage about the mileage or days until the next service event appears in the dis-
play after switching on the ignition.
Messages upon reaching scheduled service date
Once the service interval is reached, the symbol appears in the display after
the ignition is switched on, together with the message:
1)
This function is only supported by some mobile phones.
42Using the system
Page 45 of 184

Resetting the service interval display
We recommend that the display reset is completed by a specialist garage.
We recommend that you do not reset the service interval display yourself. In-
correctly setting the service interval display could cause problems to the vehi-
cle.
Variable service interval
For vehicles with variable service intervals, after resetting the oil change serv-
ice display in a specialist garage, the values of the new service interval are dis-
played, which are based on the previous operating conditions of the vehicle.
These values are then continuously matched according to the actual operating
conditions of the vehicle.
SmartGate
Introduction to the subject
Fig. 28
QR code with reference to the
ŠKODA websites
SmartGate is a system that transmits certain driving data (such as fuel con-
sumption, speed or similar) via Wi-Fi or Wi-Fi Direct.
The ŠKODA applications installed in a supported external device (e.g. tele-
phone, tablet) give the option to further transmit the received data.
Some ŠKODA applications can be displayed in the Infotainment display by
means of a SmartLinkconnection » Owner´s Manual - Infotainment .
Read in the QR code » Fig. 28 using the respective application on your external
device or enter the following address in the web browser to open the website
with an overview of the available applications, compatible devices and other
information about SmartGate.
http://go.skoda.eu/connectivity-smartgate
CAUTION
■ To increase the access security to the transmitted vehicle data, once the
ŠKODA application has been started, you are requested to change the pass-
word/PIN code if the default password/PIN code has not yet been changed
» page 44 , Password/PIN code . It is not possible to start the ŠKODA applica-
tion without having made this change.■
ŠKODA accepts no responsibility for any problems caused by incompatibility
or improper functioning of the external devices.
connection to SmartGate using Wi-Fi
This type of connection is intended for external devices running Android and
iOS operating systems.
Connecting to an Android external device
›
Switch on the ignition.
›
Switch on Wi-Fi in the external device that is to be connected and search for
available Wi-Fi networks (see Owner´s Manual for the external device).
›
In the menu of the detected networks, select the “SmartGate_...” 1)
menu item.
›
Enter the password (vehicle identification number using uppercase let-
ters » page 44 ).
›
In the external device that is to be connected to, start the SmartGate appli-
cation.
›
Then follow the instructions in the manual, which is included in the
SmartGate application.
With SmartGate, a maximum of four external devices can be connected simul-
taneously using Wi-Fi, with as many launched ŠKODA applications as required.
Connecting to an external iOS device
›
Switch on the ignition.
›
Switch on Wi-Fi in the external device that is to be connected and search for
available Wi-Fi networks (see Owner´s Manual for the external device).
›
In the menu of the detected networks, select the “SmartGate_...” 1)
menu item.
1)
The last 6 characters of the vehicle identification number of your vehicle are displayed at position
....
43Information system
Page 46 of 184
.
With SmartGate, a maximum of four external devices can be connected simul-
taneously using Wi-Fi. In these")
›Enter the password (vehicle identification number using uppercase let-
ters » page 44 ).
With SmartGate, a maximum of four external devices can be connected simul-
taneously using Wi-Fi. In these external devices, up to four ŠKODA applications
can be started simultaneously.
Disconnection
The connection can be switched off in one of the following ways.›
Switch off the ignition for longer than 5 seconds (for vehicles with a starter
button, switch off the engine and open the driver's door).
›
End the connection in the SmartGate application.
›
Switch off Wi-Fi in the connected external device.
Automatic connection
If the communication device has already had a connection with SmartGate,
then the connection is automatically restored under the following conditions.
The ignition is switched on.
Wi-Fi is switched on in the external device that is to be connected to.
The external device that is to be connected to stores the password re-
quired for the connection check.
Connection to SmartGate using Wi-Fi direct
This type of connection is intended for external devices running the Android
operating system.
Connection set-up
›
Switch on the ignition.
›
In the external device that is to be connected to, start the SmartGate appli- cation.
›
In the application, change the connection type to Wi-Fi direct.
›
Then follow the instructions in the manual, which is included in the
SmartGate application.
The password for the connection to SmartGate _... 1)
includes the last six digits
of the vehicle identification number » page 44.
With SmartGate, a maximum of two external devices can be connected simul-
taneously using Wi-Fi direct, with as many launched ŠKODA applications as re-
quired.
If you want to connect to SmartGate in a different vehicle, you must make a
new connection in the SmartGate application.
Disconnection
The connection can be switched off in one of the following ways.›
Switch off the ignition for longer than 5 seconds (for vehicles with a starter
button, switch off the engine and open the driver's door).
›
End the connection in the SmartGate application.
›
Switch off Wi-Fi in the connected external device.
Automatic connection
If the external device once had a connection with SmartGate, then the connec-
tion is automatically restored after the ignition is started.
SmartGate web interface
SmartGate parameters can be set in the SmartGate web interface.
The following address must be entered in the web browser of the external de-
vice that is connected with SmartGate.
HTTP://192.168.123.1
The setting changes are only effective after tapping the buttons “Save” →
“Reboot”.
Password/PIN code
The password for the Wi-Fi connection preset by the factory is the complete
vehicle identification number (entered in upper case); the PIN code for the Wi-
Fi direct connection is the last 6 digits of the vehicle identification number.
After changing the password/PIN, the connection to SmartGate must be re-es-
tablished on the external device to be connected using the new password or
new PIN code.
Changing the password for the Wi-Fi connection
›
Open the SmartGate web interface » page 44, SmartGate web interface .
›
In the “WPA / WPA2 key:”menu item, enter the new password (8 to 63 alpha-
numeric characters and special characters, small and capital letters).
›
Confirm the password change by tapping on the “Save” button.
1)
The last 6 characters of the vehicle identification number of your vehicle are displayed at position
....
44Using the system
Page 47 of 184

button.
Changing the PIN code for the Wi-Fi Direct connection›
Open the SmartGate web interface » page 44, SmartGate web interface .
›
In")
›Restart SmartGate by tapping on the “Reboot” 1)
button.
Changing the PIN code for the Wi-Fi Direct connection›
Open the SmartGate web interface » page 44, SmartGate web interface .
›
In the“WiFi Direct PIN:”menu item, enter the new PIN code (6 digits).
›
Confirm the PIN code change by tapping on the “Save” button.
›
Restart SmartGate by tapping on the “Reboot” 1 )
button.
Note
If you have forgotten your password/PIN code for connecting to SmartGate,
SmartGate must be reset to the factory settings in a specialised workshop.Unlocking and opening
Unlocking and locking
Introduction
This chapter contains information on the following subjects:
With the key on the lock cylinder unlock / lock
46
Unlocking/locking with the remote control key
46
Unlocking/locking - KESSY
47
Vehicle locking / unlocking with the central locking button
47
SafeLock
48
Individual settings
48
Opening/closing a door
48
Child safety lock
49
Malfunctions
49
The vehicle is equipped with a central locking system which makes it possible
to unlock / lock all the doors, the fuel filler flap and boot lid simultaneously.
The door unlocking can be adjusted individually » page 48.
The unlocking of the vehicle is displayed by the turn signal lights flashing
twice.
If you unlock the vehicle and do not open a door or the boot lid within the next
45 seconds, the vehicle will lock again automatically.
The locking of the vehicle is displayed by the turn signal lights flashing once.
If the driver's door has been opened, the vehicle cannot be locked.
If the doors or the luggage compartment lid remain open after the vehicle has
been locked, the turn signal lights do not flash until they have been closed.
1)
If the “Reboot” interface is not displayed, you must manually restore the web browser display.
45Unlocking and opening
Page 48 of 184
 could lock the car, turn on the ignition or start
the engine - danger of injury and accid")
WARNING■Never leave the key in the vehicle when you exit the vehicle. Unauthor-
ised persons (e.g. children) could lock the car, turn on the ignition or start
the engine - danger of injury and accidents!■
When leaving the vehicle, never leave persons who are not completely in-
dependent, such as children, unattended in the vehicle. These individuals
might not be able to leave the vehicle on their own or to help themselves.
Can be fatal at very high or very low temperatures!
CAUTION
■ Each key contains electronic components; therefore it must be protected
against moisture and severe shocks.■
Keep the key grooves clean. Impurities (textile fibres, dust etc.) have a nega-
tive effect on the functionality of the locking cylinder and ignition lock.
With the key on the lock cylinder unlock / lock
Fig. 29
Left side of the vehicle: Turning
the key for unlocking and locking
the vehicle
Read and observe and on page 46 first.
Unlocking/locking the vehicle with the key » Fig. 29
Unlocking the vehicle
Locking the vehicle
CAUTION
On vehicles with the KESSY system, to lock / unlock the vehicle using the key
on the lock cylinder, first of all remove the cap of the lock cylinder » page 150.Unlocking/locking with the remote control keyFig. 30
Key with pop-out key bit
Read and observe and on page 46 first.
Description of the key » Fig. 30
Unlock button
Lock button
Button to lock/unlock the boot lid
Button for folding out/folding in the key bit
Battery status warning light - if the warning light does not flash when you
press a button on the key, the battery is discharged.
Unlocking / locking the boot lid
By pressing lightly on the button
the lid is unlocked.
By pressing down on the button
the lid is unlocked and unlatched (partly-
opened).
If the lid is unlocked or released with the button , then the lid is automati-
cally locked after closing. The period of time after which the flap is locked can
be set » page 51 .
CAUTION
■
The remote control may be affected by signal superimposition from transmit-
ters close to the car.■
The range of the remote control key is about 30 m. The battery must be re-
placed if the central locking only reacts to the remote control at a distance of
less than 3 m away » page 150.
AB46Using the system
 1
1 2
2 3
3 4
4 5
5 6
6 7
7 8
8 9
9 10
10 11
11 12
12 13
13 14
14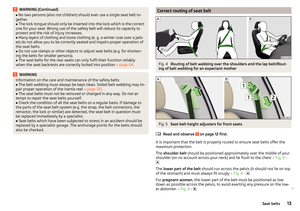 15
15 16
16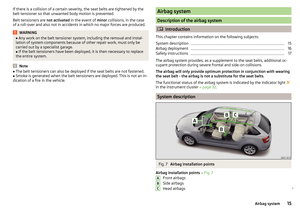 17
17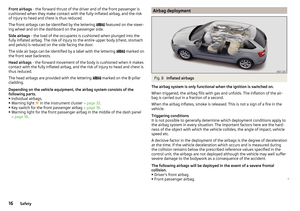 18
18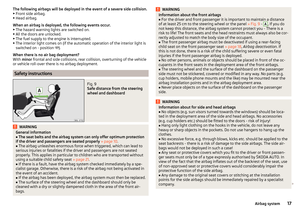 19
19 20
20 21
21 22
22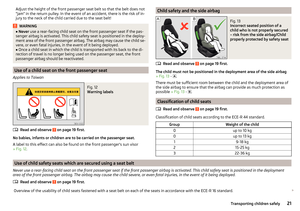 23
23 24
24 25
25 26
26 27
27 28
28 29
29 30
30 31
31 32
32 33
33 34
34 35
35 36
36 37
37 38
38 39
39 40
40 41
41 42
42 43
43 44
44 45
45 46
46 47
47 48
48 49
49 50
50 51
51 52
52 53
53 54
54 55
55 56
56 57
57 58
58 59
59 60
60 61
61 62
62 63
63 64
64 65
65 66
66 67
67 68
68 69
69 70
70 71
71 72
72 73
73 74
74 75
75 76
76 77
77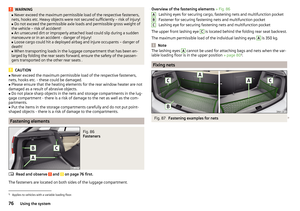 78
78 79
79 80
80 81
81 82
82 83
83 84
84 85
85 86
86 87
87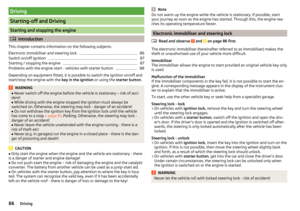 88
88 89
89 90
90 91
91 92
92 93
93 94
94 95
95 96
96 97
97 98
98 99
99 100
100 101
101 102
102 103
103 104
104 105
105 106
106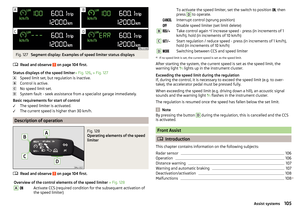 107
107 108
108 109
109 110
110 111
111 112
112 113
113 114
114 115
115 116
116 117
117 118
118 119
119 120
120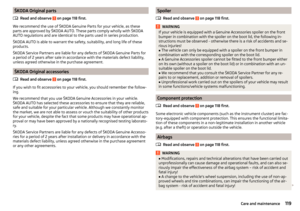 121
121 122
122 123
123 124
124 125
125 126
126 127
127 128
128 129
129 130
130 131
131 132
132 133
133 134
134 135
135 136
136 137
137 138
138 139
139 140
140 141
141 142
142 143
143 144
144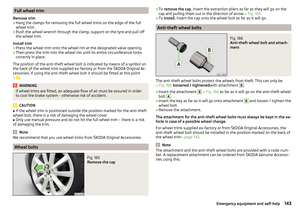 145
145 146
146 147
147 148
148 149
149 150
150 151
151 152
152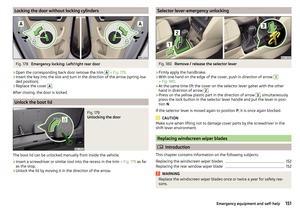 153
153 154
154 155
155 156
156 157
157 158
158 159
159 160
160 161
161 162
162 163
163 164
164 165
165 166
166 167
167 168
168 169
169 170
170 171
171 172
172 173
173 174
174 175
175 176
176 177
177 178
178 179
179 180
180 181
181 182
182 183
183