2016 MERCEDES-BENZ GLS SUV light
[x] Cancel search: lightPage 197 of 397

If you press the
%ora button on the
multifunction steering wheel, the message will
disappear. Once normal level has been reached,
all indicator lamps =go out.
The vehicle automatically selects normal level if
you:
R drive at speeds above 115 km/h or
R drive at speeds between 100 km/h and
115 km/h for approximately 20 seconds
The vehicle is lowered to low level if you are
travelling at higher speeds.
Normal level Setting the vehicle to normal level
X Start the engine.
X Press selector wheel :.
Selector wheel :extends.
X To lower the vehicle: turn selector wheel :
anti-clockwise ?.
The vehicle is lowered.
If one or more indicator lamps =are on:
X Turn selector wheel :anti-clockwise ?
until all indicator lamps =that are lit start to
flash.
The vehicle is lowered to normal level. As
soon as the next lowest level is reached, the
indicator lamp stops flashing and goes out.
Offroad levels General notes
Only select an offroad level if this is appropriate for road conditions. Otherwise, fuel consump-
tion may increase and handling performance
may be affected. You can select the following:
R Offroad level 1 at speeds up to 100 km/h
R Offroad level 2 at speeds up to 65 km/h
R Offroad level 3 at speeds up to 20 km/h
If you select an offroad level when driving at too
high a speed, the Please reduce speed Please reduce speed mes-
sage appears in the multifunction display.
Offroad level 3 is only suitable for driving on
extremely difficult off-road terrain under partic- ularly rough conditions.
R Adjust your driving style to the altered han-
dling characteristics.
R Do not drive faster than 20 km/h. Indicator lamps
=for the desired offroad level
flash:
R the lower indicator lamp flashes, offroad
level 1 is selected
R the lower and centre indicator lamps flash,
offroad level 2 is selected
R all three indicator lamps flash, offroad level 3
is selected
The vehicle is being adjusted to the offroad level
selected. As soon as an offroad level is reached,
the corresponding indicator lamp stops flashing and lights up constantly.
Raising the vehicle
Setting the vehicle level using the selector
wheel
X To raise the vehicle: turn selector wheel :
clockwise ;.
The vehicle is raised to offroad level 1 by
30 mm compared to the normal level.
During the adjustment, the Vehicle rising Vehicle rising
message, for example, appears in the multifunc-
tion display. 194
Driving systemsDriving and parking
Page 202 of 397
If this vehicle is not driven in a safe manner, it
can lead to an accident, to the vehicle over-
turning as well as serious or even fatal inju-
ries.
R In the event of an accident with the vehicle
overturning, passengers who are not wearing
their seat belt are considerably more likely to die than passengers wearing their seat belt.
You and all vehicle occupants should always
wear your seat belts.
General notes
Only select raised level if this is appropriate for
the road conditions. Otherwise, fuel consump-
tion may increase and handling may be affected.
Make changes to the vehicle level while the
vehicle is in motion. This enables the vehicle to
adjust to the new level as quickly as possible.
The vehicle level may change visibly if you park
the vehicle and the outside temperature
changes. If the temperature drops, the vehicle
level lowers; with an increase in temperature,
the vehicle level rises.
If you unlock the vehicle or open a door, the
vehicle begins to compensate for load discrep-
ancies while still parked. However, for signifi-
cant level changes, e.g. after the vehicle has
been stationary for a long period, the engine
must be running. For safety reasons, the vehicle is only lowered when the doors are closed. Low-
ering is interrupted if a door is opened; it con-
tinues once the door has been closed.
Vehicles with no trailer coupled: below a
speed of 60 km/h, you can choose between the
normal and raised vehicle level. Select the nor-
mal vehicle level for normal road conditions and
the raised vehicle level when using snow chains or if the road conditions are very poor. Your
selection remains stored even if you remove the
key from the ignition lock. If you try to select
raised level at a speed above 60 km/h, the
Please
Please reduce reducespeed
speedmessage appears in the
multifunction display.
Vehicles with a trailer coupled: below a speed
of 30 km/h, you can choose between the nor-
mal and raised vehicle level. Setting the raised vehicle level X
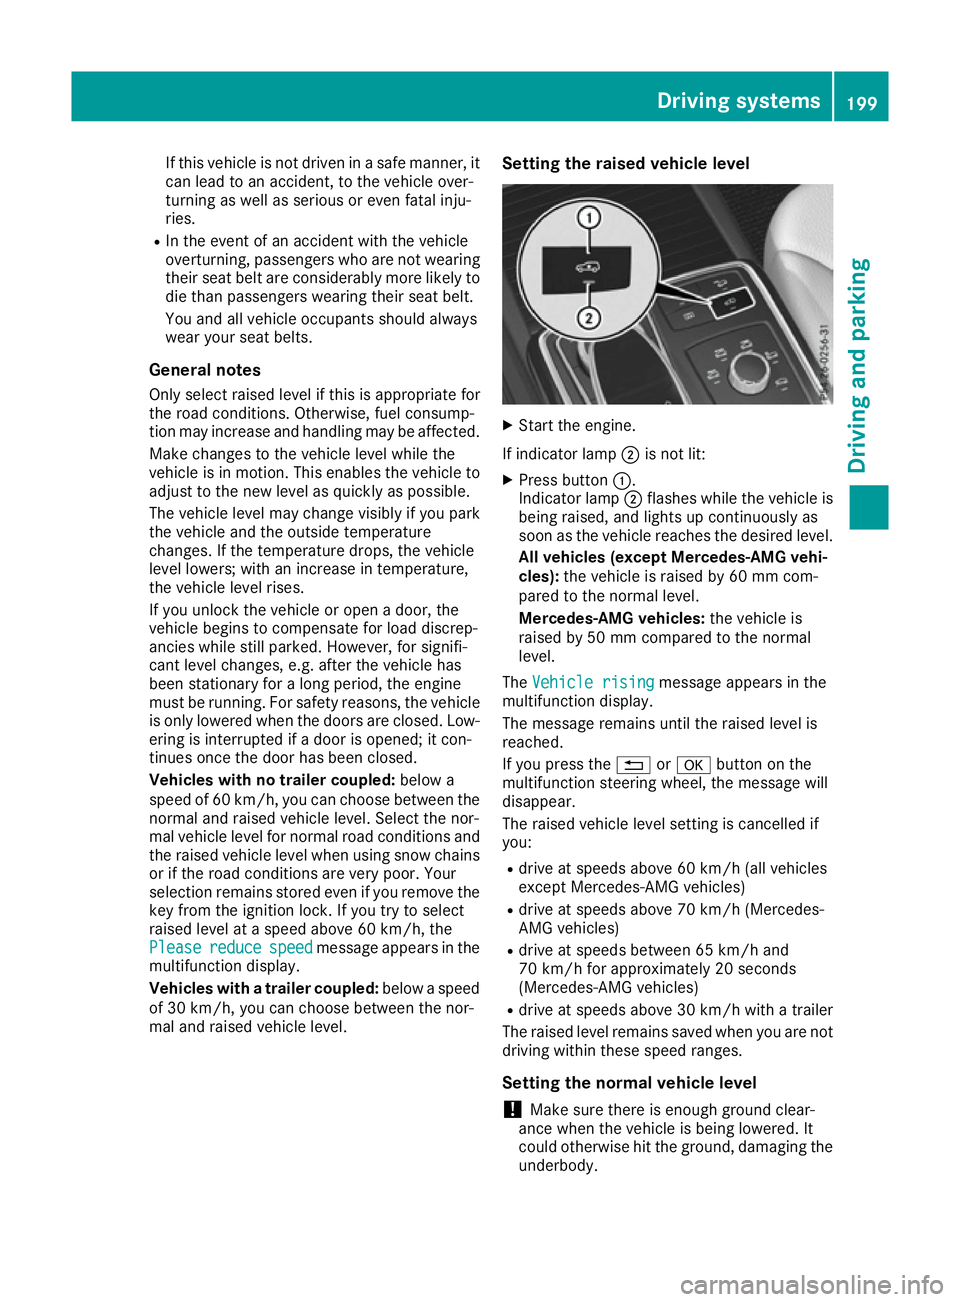
Start the engine.
If indicator lamp ;is not lit:
X Press button :.
Indicator lamp ;flashes while the vehicle is
being raised, and lights up continuously as
soon as the vehicle reaches the desired level.
All vehicles (except Mercedes-AMG vehi-
cles): the vehicle is raised by 60 mm com-
pared to the normal level.
Mercedes-AMG vehicles: the vehicle is
raised by 50 mm compared to the normal
level.
The Vehicle rising Vehicle rising message appears in the
multifunction display.
The message remains until the raised level is
reached.
If you press the %ora button on the
multifunction steering wheel, the message will
disappear.
The raised vehicle level setting is cancelled if
you:
R drive at speeds above 60 km/h (all vehicles
except Mercedes-AMG vehicles)
R drive at speeds above 70 km/h (Mercedes-
AMG vehicles)
R drive at speeds between 65 km/h and
70 km/h for approximately 20 seconds
(Mercedes-AMG vehicles)
R drive at speeds above 30 km/h with a trailer
The raised level remains saved when you are not driving within these speed ranges.
Setting the normal vehicle level
! Make sure there is enough ground clear-
ance when the vehicle is being lowered. It
could otherwise hit the ground, damaging the
underbody. Driving systems
199Driving and parking Z
Page 203 of 397
X
Start the engine.
If indicator lamp ;is lit:
X Press button :.
Indicator lamp ;flashes while the vehicle is
being lowered, and goes out as soon as the
desired vehicle level is reached.
Vehicles with no trailer coupled: the vehi-
cle is adjusted to the height of the selected
drive program (Y page 155).
Vehicles with a trailer coupled: the vehicle
is adjusted to normal level regardless of the
drive program selected (Y page 155). The
vehicle remains at normal level, even if you
change drive programs.
During the adjustment, the Lowering
Lowering mes-
sage appears in the multifunction display.
If you press the %ora button on the
multifunction steering wheel, the message will
disappear. AMG RIDE CONTROL
General notes The electronically controlled damping system
works continuously. This improves driving
safety and ride comfort.
The damping is tuned individually to each wheel
and depends on:
R your driving style, e.g. sporty
R the road surface condition, e.g. bumps
R your individual selection of Sport, Sport + or
Comfort
The suspension setting can be adjusted using
the corresponding button in the centre console
or the DYNAMIC SELECT controller
(Y page 155).
If the ignition is switched off for less than four
hours, the previously selected drive program is
activated when the engine is next started. If the
ignition is switched off for more than four hours, Comfort mode is activated when the engine is
next started. Sport mode The firmer setting of the suspension tuning in
Sport mode ensures even better contact with
the road. Select this mode when employing a
sporty driving style, e.g. on winding country
roads.
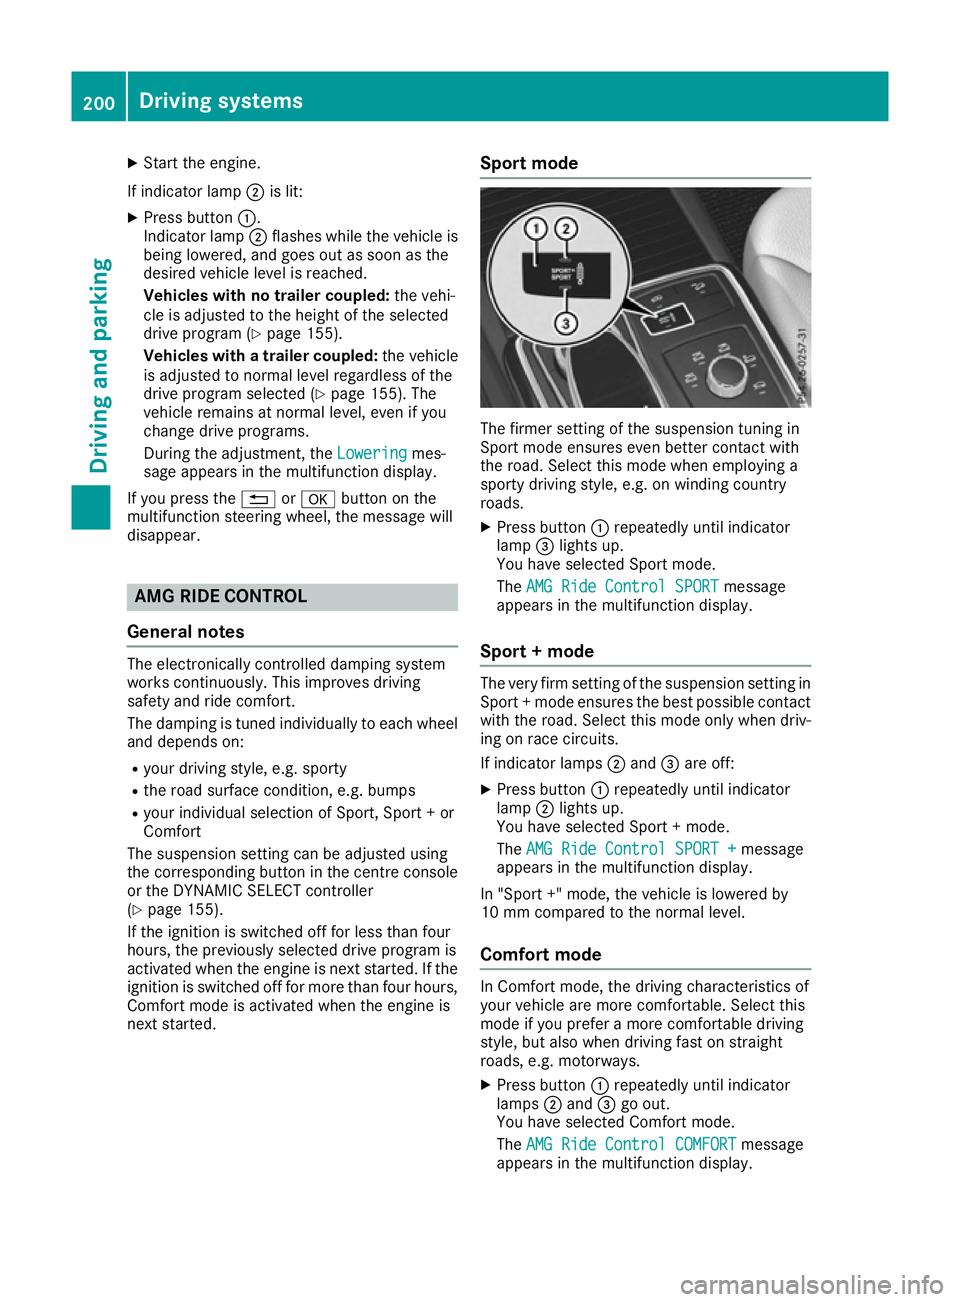
X Press button :repeatedly until indicator
lamp =lights up.
You have selected Sport mode.
The AMG Ride Control SPORT AMG Ride Control SPORT message
appears in the multifunction display.
Sport + mode The very firm setting of the suspension setting in
Sport + mode ensures the best possible contact
with the road. Select this mode only when driv-
ing on race circuits.
If indicator lamps ;and =are off:
X Press button :repeatedly until indicator
lamp ;lights up.
You have selected Sport + mode.
The AMG Ride Control SPORT + AMG Ride Control SPORT + message
appears in the multifunction display.
In "Sport +" mode, the vehicle is lowered by
10 mm compared to the normal level.
Comfort mode In Comfort mode, the driving characteristics of
your vehicle are more comfortable. Select this
mode if you prefer a more comfortable driving
style, but also when driving fast on straight
roads, e.g. motorways.
X Press button :repeatedly until indicator
lamps ;and =go out.
You have selected Comfort mode.
The AMG Ride Control COMFORT AMG Ride Control COMFORT message
appears in the multifunction display. 200
Driving systemsDriving and parking
Page 205 of 397
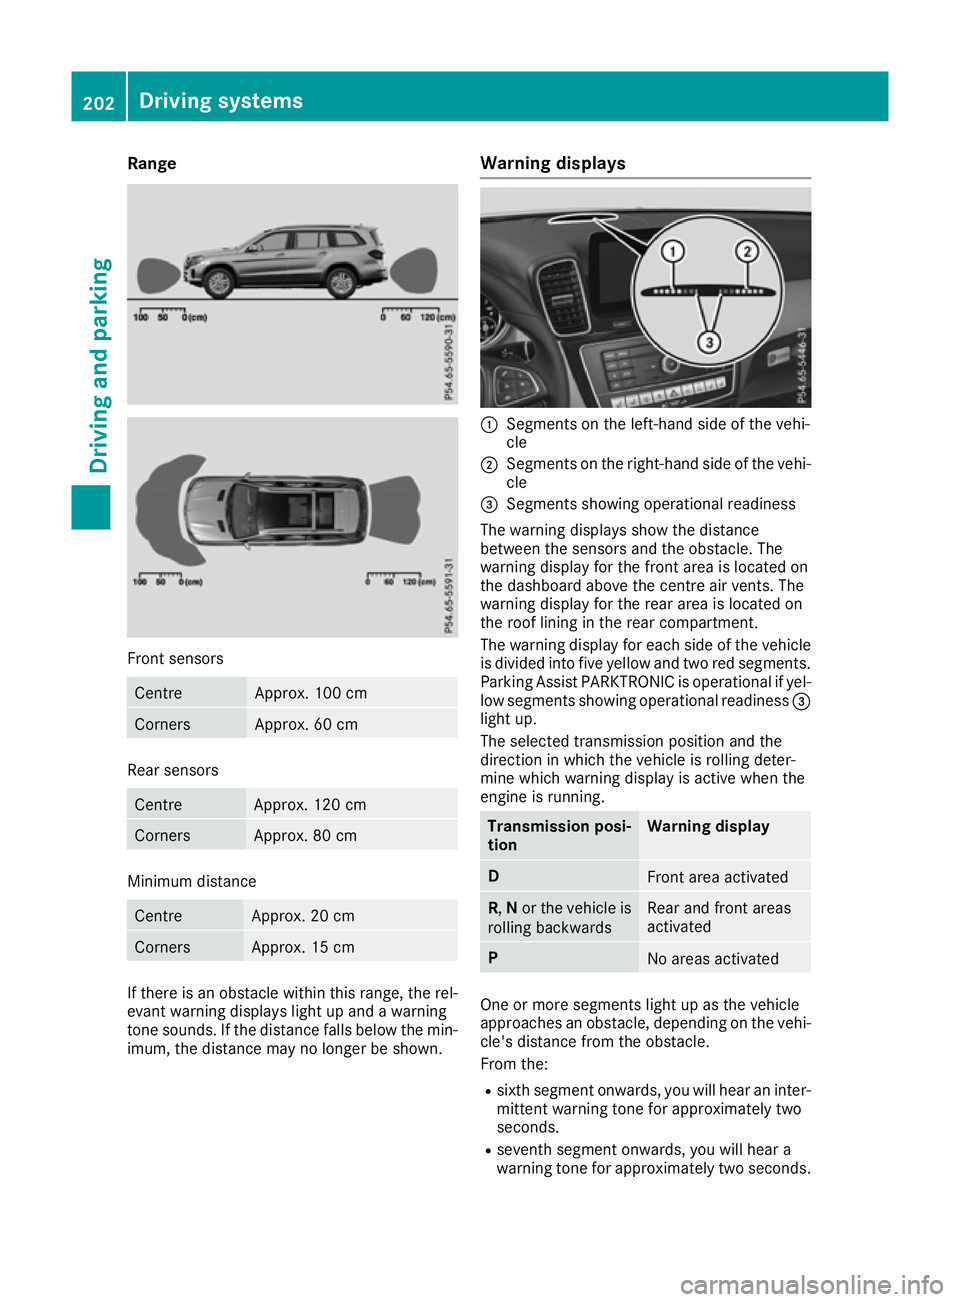
Range
Front sensors
Centre Approx. 100 cm
Corners Approx. 60 cm
Rear sensors
Centre Approx. 120 cm
Corners Approx. 80 cm
Minimum distance
Centre Approx. 20 cm
Corners Approx. 15 cm
If there is an obstacle within this range, the rel-
evant warning displays light up and a warning
tone sounds. If the distance falls below the min- imum, the distance may no longer be shown. Warning displays
:
Segments on the left-hand side of the vehi-
cle
; Segments on the right-hand side of the vehi-
cle
= Segments showing operational readiness
The warning displays show the distance
between the sensors and the obstacle. The
warning display for the front area is located on
the dashboard above the centre air vents. The
warning display for the rear area is located on
the roof lining in the rear compartment.
The warning display for each side of the vehicle
is divided into five yellow and two red segments.
Parking Assist PARKTRONIC is operational if yel-
low segments showing operational readiness =
light up.
The selected transmission position and the
direction in which the vehicle is rolling deter-
mine which warning display is active when the
engine is running. Transmission posi-
tion Warning display
D
Front area activated
R,
Nor the vehicle is
rolling backwards Rear and front areas
activated
P
No areas activated
One or more segments light up as the vehicle
approaches an obstacle, depending on the vehi-
cle's distance from the obstacle.
From the:
R sixth segment onwards, you will hear an inter-
mittent warning tone for approximately two
seconds.
R seventh segment onwards, you will hear a
warning tone for approximately two seconds. 202
Driving systemsDriving and parking
Page 206 of 397
This indicates that you have now reached the
minimum distance.
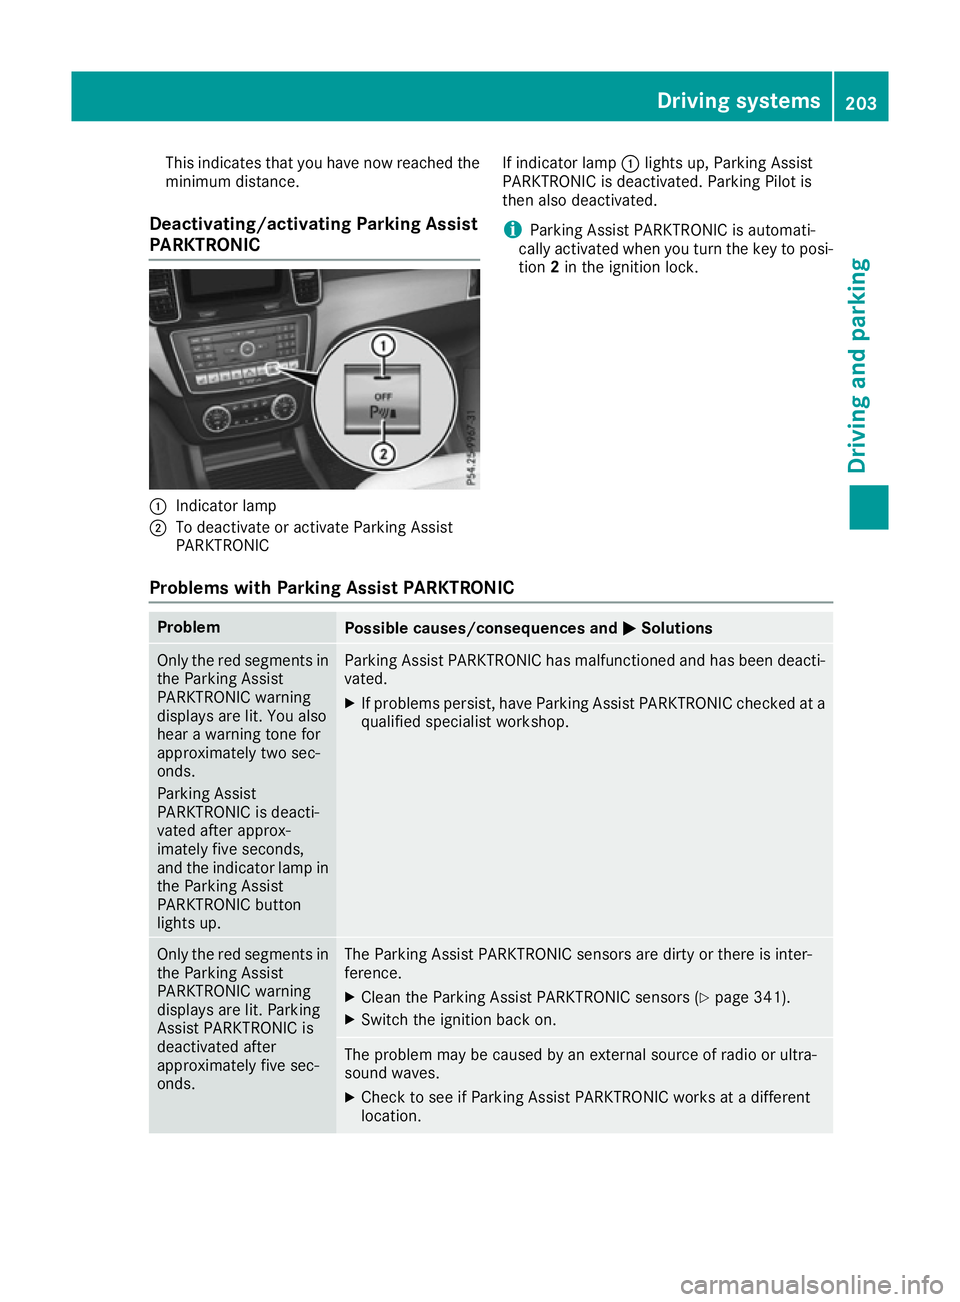
Deactivating/activating Parking Assist
PARKTRONIC :
Indicator lamp
; To deactivate or activate Parking Assist
PARKTRONIC If indicator lamp
:lights up, Parking Assist
PARKTRONIC is deactivated. Parking Pilot is
then also deactivated.
i Parking Assist PARKTRONIC is automati-
cally activated when you turn the key to posi- tion 2in the ignition lock.
Problems with Parking Assist PARKTRONIC Problem
Possible causes/consequences and
M MSolutions Only the red segments in
the Parking Assist
PARKTRONIC warning
displays are lit. You also
hear a warning tone for
approximately two sec-
onds.
Parking Assist
PARKTRONIC is deacti-
vated after approx-
imately five seconds,
and the indicator lamp in
the Parking Assist
PARKTRONIC button
lights up. Parking Assist PARKTRONIC has malfunctioned and has been deacti-
vated.
X If problems persist, have Parking Assist PARKTRONIC checked at a
qualified specialist workshop. Only the red segments in
the Parking Assist
PARKTRONIC warning
displays are lit. Parking
Assist PARKTRONIC is
deactivated after
approximately five sec-
onds. The Parking Assist PARKTRONIC sensors are dirty or there is inter-
ference.
X Clean the Parking Assist PARKTRONIC sensors (Y page 341).
X Switch the ignition back on. The problem may be caused by an external source of radio or ultra-
sound waves.
X Check to see if Parking Assist PARKTRONIC works at a different
location. Driving systems
203Driving and parking Z
Page 210 of 397
X
Shift the transmission to position Dor R.
The Start Parking Pilot? Yes: OK No:
Start Parking Pilot? Yes: OK No:
% message appears in the multifunction
display.
X To cancel the procedure:press the %
button on the multifunction steering wheel or pull away.
or
X To exit a parking space using Parking
Pilot: press the abutton on the multi-
function steering wheel.
The Parking Pilot active Accelerate
Parking Pilot active Accelerate
and brake Observe surroundings
and brake Observe surroundings mes-
sage appears in the multifunction display.
X Release the multifunction steering wheel.
X Pull away, being ready to brake at all times. Do
not exceed a maximum speed of approx-
imately 10 km/h when exiting a parking
space. Otherwise, Parking Pilot will be can-
celled.
X Shift the transmission to position Dor Ras
required or according to the message while
the vehicle is stationary.
Parking Pilot immediately steers in the other
direction. The Parking Pilot active
Parking Pilot active
Accelerate and brake Observe sur‐
Accelerate and brake Observe sur‐
roundings
roundings message appears in the multi-
function display.
i You will achieve the best results by waiting
for the steering procedure to complete before
pulling away.
If you reverse after activation, the steering
wheel is moved to the straight-ahead posi-
tion.
X Drive forwards and reverse as prompted by
the Parking Assist PARKTRONIC warning dis-
plays, several times if necessary.
Once you have exited the parking space com-
pletely, the steering wheel is moved to the
straight-ahead position. You hear a tone and the
Parking
Parking Pilot Pilotended
endedmessage appears in the
multifunction display. You will then have to steer
and merge into traffic on your own. Parking
Assist PARKTRONIC is still available. You can
take over the steering before the vehicle has
exited the parking space completely. This is
useful, for example, when you recognise that it
is already possible to pull out of the parking
space. Cancelling Parking Pilot X
Stop the movement of the multifunction
steering wheel or steer yourself.
Parking Pilot is immediately cancelled. The
Parking Pilot cancelled Parking Pilot cancelled message
appears in the multifunction display.
or X Press the Parking Assist PARKTRONIC button
(Y page 203).
Parking Assist PARKTRONIC is switched off
and Parking Pilot is immediately cancelled.
The Parking Pilot cancelled Parking Pilot cancelled message
appears in the multifunction display.
Parking Pilot is cancelled automatically if: R the electric parking brake is applied
R transmission position Pis selected
R parking using Parking Pilot is no longer pos-
sible
R you are driving faster than 10 km/h
R a wheel spins and ESP ®
intervenes or fails.
The ÷ warning lamp lights up in the instru-
ment cluster
A warning tone sounds. The parking symbol dis-
appears and the multifunction display shows the
Parking Pilot cancelled Parking Pilot cancelled message.
When Parking Pilot is cancelled, you must steer and brake again yourself.
If a system malfunction occurs, the vehicle is
braked to a standstill. To drive on, depress the
accelerator pedal again. Reversing camera
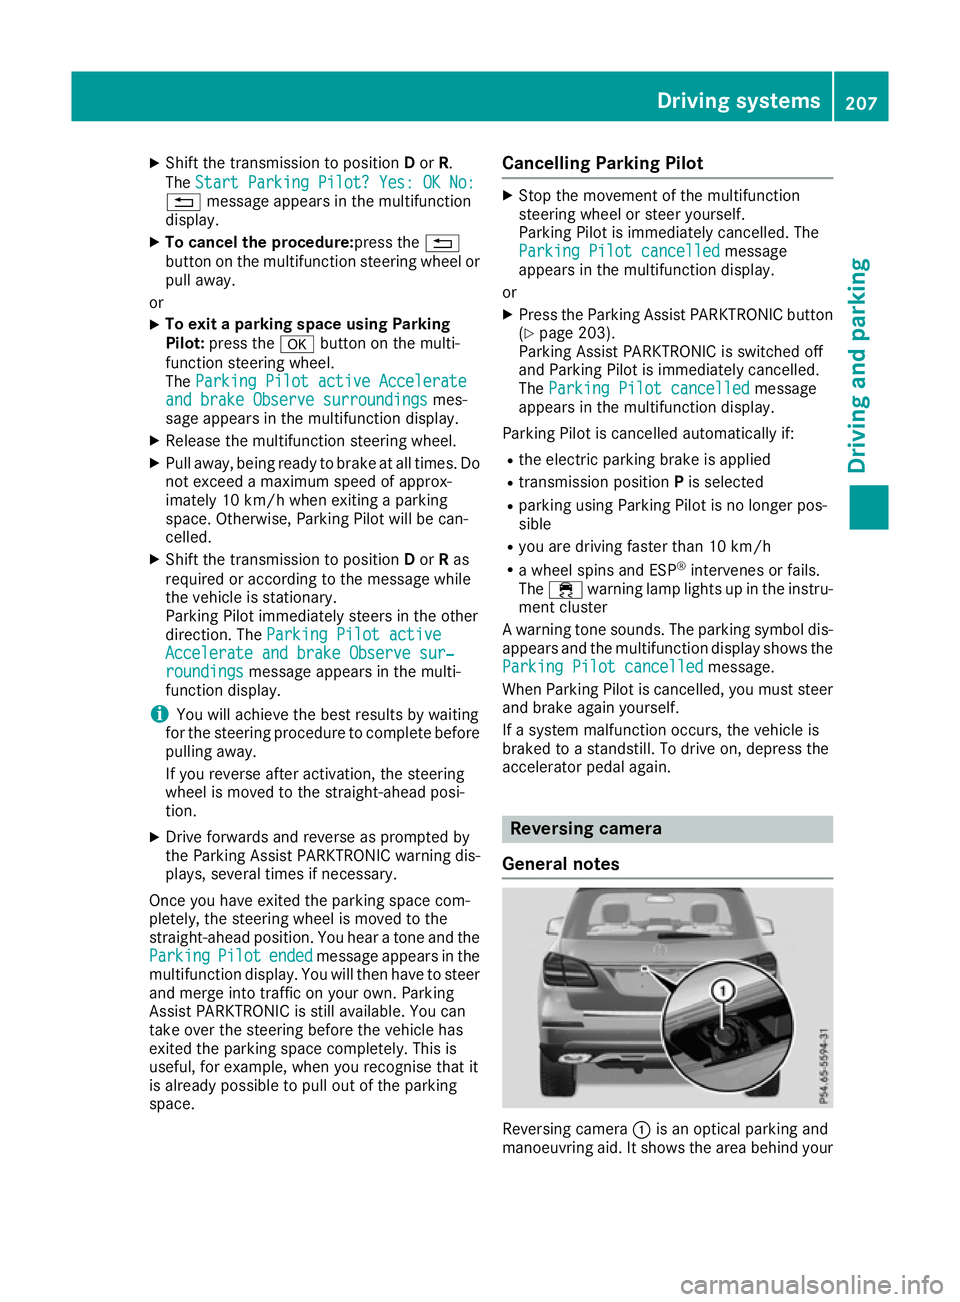
General notes Reversing camera
:is an optical parking and
manoeuvring aid. It shows the area behind your Driving systems
207Driving and parking Z
Page 211 of 397
vehicle with guide lines in the multimedia sys-
tem.
The area behind the vehicle is displayed as a
mirror image, as in the rear-view mirror.
i The text shown in the multimedia system
display depends on the language setting. The following are examples of reversing camera
messages in the multimedia system.
Important safety notes The reversing camera is only an aid. It is not a
substitute for your attention to the immediate
surroundings. The responsibility for safe
manoeuvring and parking remains with you.
Make sure that there are no persons, animals or objects in range while manoeuvring and parking.
Under the following circumstances, the revers-
ing camera will not function, or will function in a limited manner:
R if the boot lid is open
R in heavy rain, snow or fog
R at night or in very dark places
R if the camera is exposed to very bright light
R if the area is lit by fluorescent bulbs or LED
lighting (the display may flicker)
R If there is a sudden change in temperature,
e.g. when driving into a heated garage in win- ter
R if the camera lens is dirty or obstructed.
Observe the notes on cleaning
(Y page 341)
R if the rear of your vehicle is damaged. In this
case, have the camera position and setting
checked at a qualified specialist workshop.
The field of vision and other functions of the
reversing camera may be restricted due to addi-
tional accessories on the rear of the vehicle (e.g. licence plate holder, bicycle rack).
For technical reasons, leaving the standard
height can result in inaccuracies in the guide
lines on vehicles with a height-adjustable chas-
sis.
i The reversing camera is protected from rain-
drops and dust by a flap. When the reversing
camera is activated, this flap opens.
The flap closes again when:
R you have finished the manoeuvring process
R you switch off the engine
R you open the luggage compartment See the notes on cleaning (Y
page 341).
For technical reasons, the flap may remain
open briefly after the reversing camera has
been deactivated.
Activating/deactivating the reversing
camera X
To activate: make sure that the key is in
position 2in the ignition lock.
X Make sure that the Activation by R gear Activation by R gear
function is selected in the multimedia system; see the Digital Owner's Manual.
X Engage reverse gear.
The reversing camera flap opens. The multi-
media system shows the area behind the vehi-
cle with guide lines.
The image from the reversing camera is avail-
able throughout the manoeuvring process.
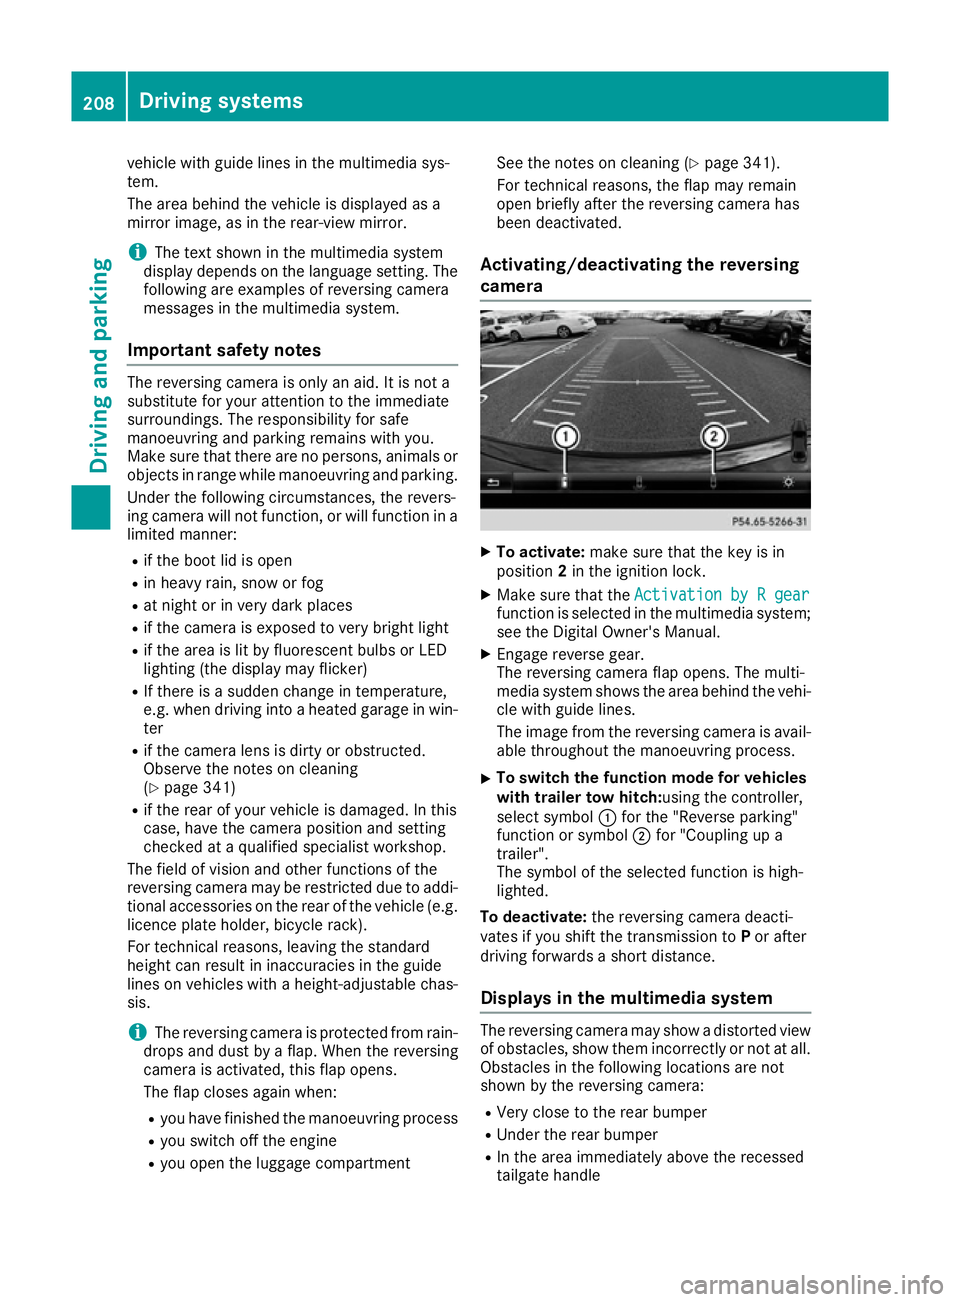
X To switch the function mode for vehicles
with trailer tow hitch: using the controller,
select symbol :for the "Reverse parking"
function or symbol ;for "Coupling up a
trailer".
The symbol of the selected function is high-
lighted.
To deactivate: the reversing camera deacti-
vates if you shift the transmission to Por after
driving forwards a short distance.
Displays in the multimedia system The reversing camera may show a distorted view
of obstacles, show them incorrectly or not at all. Obstacles in the following locations are not
shown by the reversing camera:
R Very close to the rear bumper
R Under the rear bumper
R In the area immediately above the recessed
tailgate handle 208
Driving systemsDriving and parking
Page 212 of 397
!
Objects not at ground level may appear to
be further away than they actually are, e.g.:
R the bumper of a parked vehicle
R the drawbar of a trailer
R the ball coupling of a trailer tow hitch
R the rear section of an HGV
R a slanted post
Use the guidelines only for orientation.
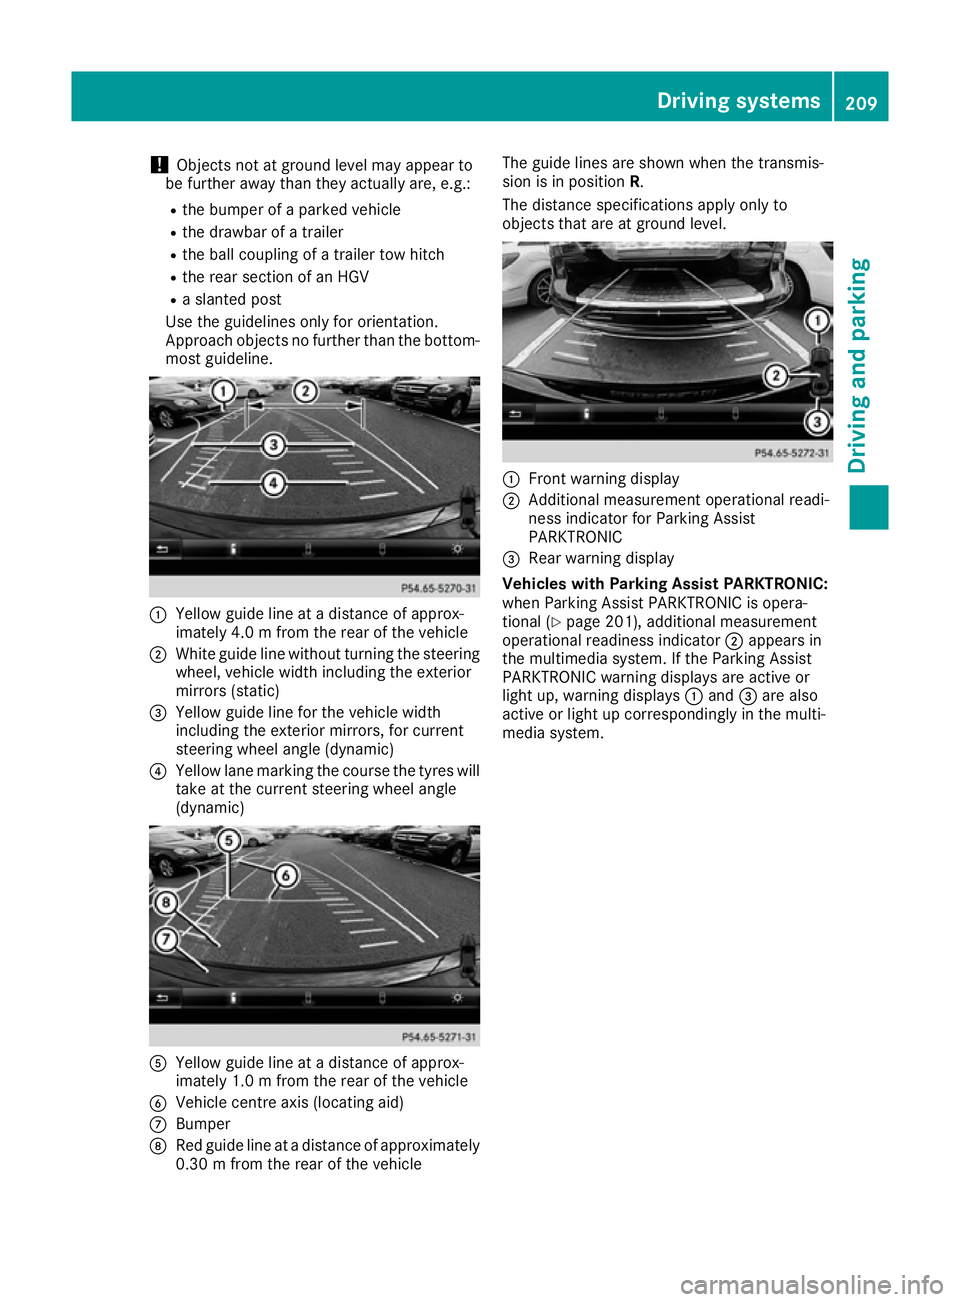
Approach objects no further than the bottom- most guideline. :
Yellow guide line at a distance of approx-
imately 4.0 m from the rear of the vehicle
; White guide line without turning the steering
wheel, vehicle width including the exterior
mirrors (static)
= Yellow guide line for the vehicle width
including the exterior mirrors, for current
steering wheel angle (dynamic)
? Yellow lane marking the course the tyres will
take at the current steering wheel angle
(dynamic) A
Yellow guide line at a distance of approx-
imately 1.0 m from the rear of the vehicle
B Vehicle centre axis (locating aid)
C Bumper
D Red guide line at a distance of approximately
0.30 m from the rear of the vehicle The guide lines are shown when the transmis-
sion is in position R.
The distance specifications apply only to
objects that are at ground level. :
Front warning display
; Additional measurement operational readi-
ness indicator for Parking Assist
PARKTRONIC
= Rear warning display
Vehicles with Parking Assist PARKTRONIC:
when Parking Assist PARKTRONIC is opera-
tional (Y page 201), additional measurement
operational readiness indicator ;appears in
the multimedia system. If the Parking Assist
PARKTRONIC warning displays are active or
light up, warning displays :and =are also
active or light up correspondingly in the multi-
media system. Driving systems
209Driving and parking Z