2016 MERCEDES-BENZ GLC COUPE key
[x] Cancel search: keyPage 191 of 389
Vehicle level
Setting the raised vehicle level
It is possible to choose between the "Normal"
and "Raised" vehicle levels below a speed of
80 km/h. Select the "Normal" setting for normal
road surfaces and "Raised" for driving with snow chains or on particularly poor road surfaces.
Your selection remains stored even if you
remove the key from the ignition lock.
X Start the engine.
If indicator lamp ;is not lit:
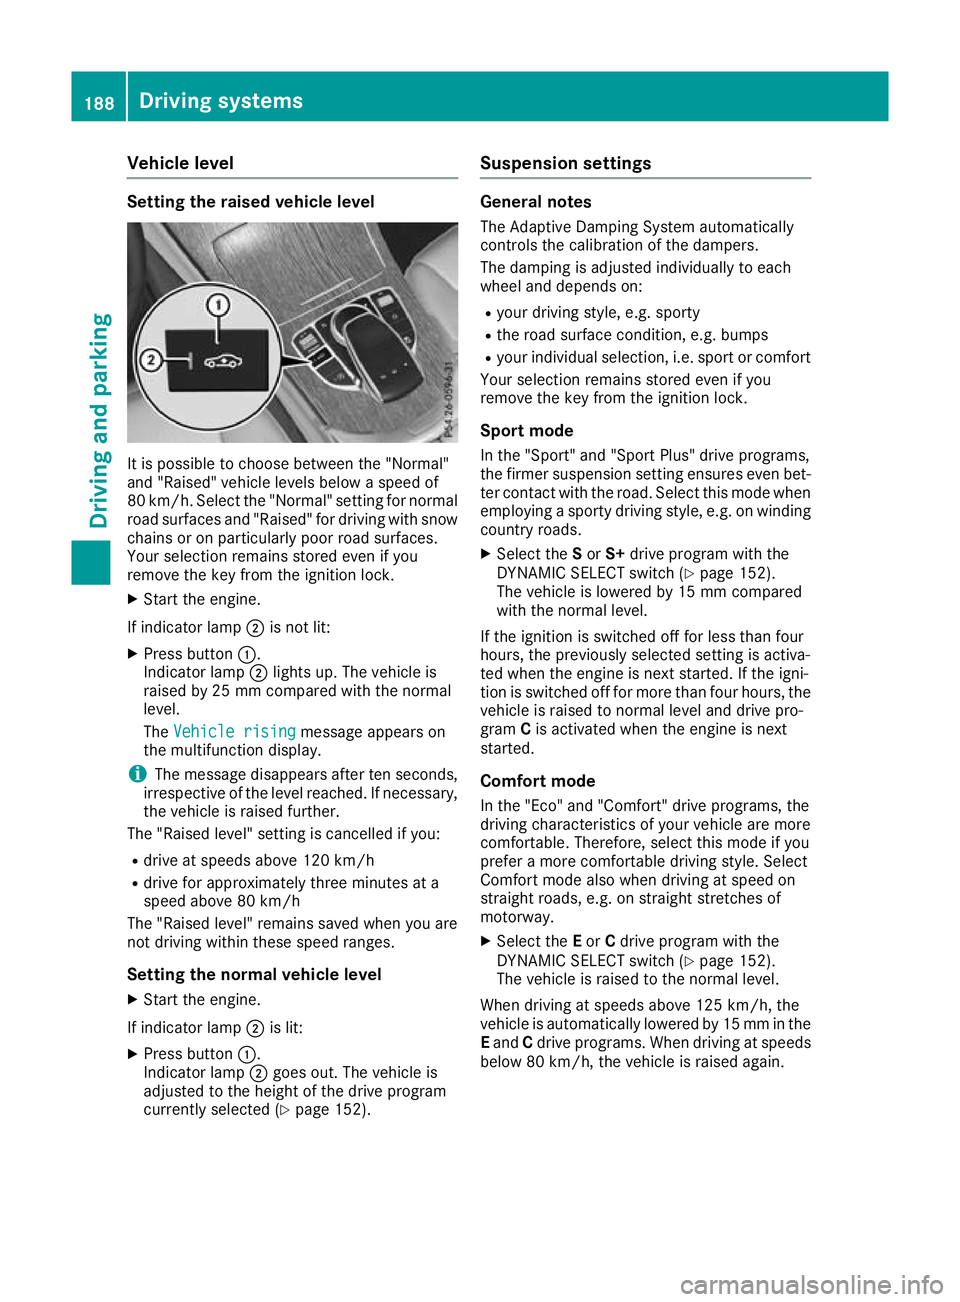
X Press button :.
Indicator lamp ;lights up. The vehicle is
raised by 25 mm compared with the normal
level.
The Vehicle rising
Vehicle rising message appears on
the multifunction display.
i The message disappears after ten seconds,
irrespective of the level reached. If necessary,
the vehicle is raised further.
The "Raised level" setting is cancelled if you:
R drive at speeds above 120 km/h
R drive for approximately three minutes at a
speed above 80 km/h
The "Raised level" remains saved when you are
not driving within these speed ranges.
Setting the normal vehicle levelX Start the engine.
If indicator lamp ;is lit:
X Press button :.
Indicator lamp ;goes out. The vehicle is
adjusted to the height of the drive program
currently selected (Y page 152). Suspension settings General notes
The Adaptive Damping System automatically
controls the calibration of the dampers.
The damping is adjusted individually to each
wheel and depends on:
R your driving style, e.g. sporty
R the road surface condition, e.g. bumps
R your individual selection, i.e. sport or comfort
Your selection remains stored even if you
remove the key from the ignition lock.
Sport mode In the "Sport" and "Sport Plus" drive programs,
the firmer suspension setting ensures even bet- ter contact with the road. Select this mode when
employing a sporty driving style, e.g. on winding
country roads.
X Select the Sor S+ drive program with the
DYNAMIC SELECT switch (Y page 152).
The vehicle is lowered by 15 mm compared
with the normal level.
If the ignition is switched off for less than four
hours, the previously selected setting is activa-
ted when the engine is next started. If the igni-
tion is switched off for more than four hours, the vehicle is raised to normal level and drive pro-
gram Cis activated when the engine is next
started.
Comfort mode
In the "Eco" and "Comfort" drive programs, the
driving characteristics of your vehicle are more
comfortable. Therefore, select this mode if you
prefer a more comfortable driving style. Select
Comfort mode also when driving at speed on
straight roads, e.g. on straight stretches of
motorway. X Select the Eor Cdrive program with the
DYNAMIC SELECT switch (Y page 152).
The vehicle is raised to the normal level.
When driving at speeds above 125 km/h, the
vehicle is automatically lowered by 15 mm in the
E and Cdrive programs. When driving at speeds
below 80 km/h, the vehicle is raised again. 188
Driving systemsDriving an
d parking
Page 192 of 389
Lowering the rear of the vehicle
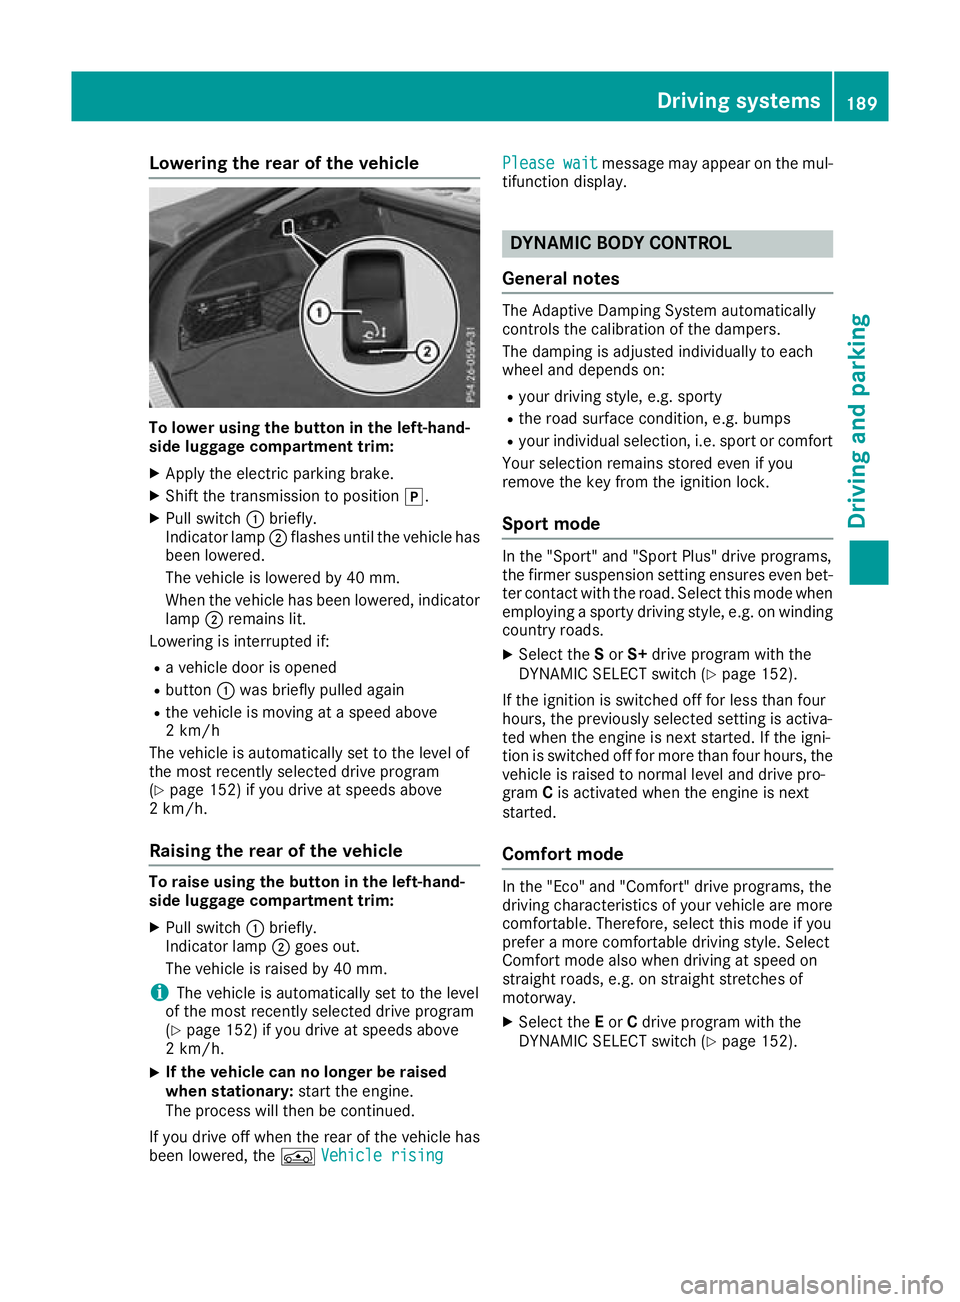
To lower using the button in the left-hand-
side luggage compartment trim:
X Apply the electric parking brake.
X Shift the transmission to position j.
X Pull switch :briefly.
Indicator lamp ;flashes until the vehicle has
been lowered.
The vehicle is lowered by 40 mm.
When the vehicle has been lowered, indicator lamp ;remains lit.
Lowering is interrupted if:
R a vehicle door is opened
R button :was briefly pulled again
R the vehicle is moving at a speed above
2 km/h
The vehicle is automatically set to the level of
the most recently selected drive program
(Y page 152) if you drive at speeds above
2 km/h.
Raising the rear of the vehicle To raise using the button in the left-hand-
side luggage compartment trim:
X Pull switch :briefly.
Indicator lamp ;goes out.
The vehicle is raised by 40 mm.
i The vehicle is automatically set to the level
of the most recently selected drive program
(Y page 152) if you drive at speeds above
2 km/h.
X If the vehicle can no longer be raised
when stationary: start the engine.
The process will then be continued.
If you drive off when the rear of the vehicle has
been lowered, the ÁVehicle rising
Vehicle rising Please wait Please wait
message may appear on the mul-
tifunction display. DYNAMIC BODY CONTROL
General notes The Adaptive Damping System automatically
controls the calibration of the dampers.
The damping is adjusted individually to each
wheel and depends on:
R your driving style, e.g. sporty
R the road surface condition, e.g. bumps
R your individual selection, i.e. sport or comfort
Your selection remains stored even if you
remove the key from the ignition lock.
Sport mode In the "Sport" and "Sport Plus" drive programs,
the firmer suspension setting ensures even bet-
ter contact with the road. Select this mode when
employing a sporty driving style, e.g. on winding
country roads.
X Select the Sor S+ drive program with the
DYNAMIC SELECT switch (Y page 152).
If the ignition is switched off for less than four
hours, the previously selected setting is activa-
ted when the engine is next started. If the igni-
tion is switched off for more than four hours, the vehicle is raised to normal level and drive pro-
gram Cis activated when the engine is next
started.
Comfort mode In the "Eco" and "Comfort" drive programs, the
driving characteristics of your vehicle are more
comfortable. Therefore, select this mode if you
prefer a more comfortable driving style. Select
Comfort mode also when driving at speed on
straight roads, e.g. on straight stretches of
motorway.
X Select the Eor Cdrive program with the
DYNAMIC SELECT switch (Y page 152). Driving systems
189Driving and parking Z
Page 196 of 389
This indicates that you have now reached the
minimum distance.
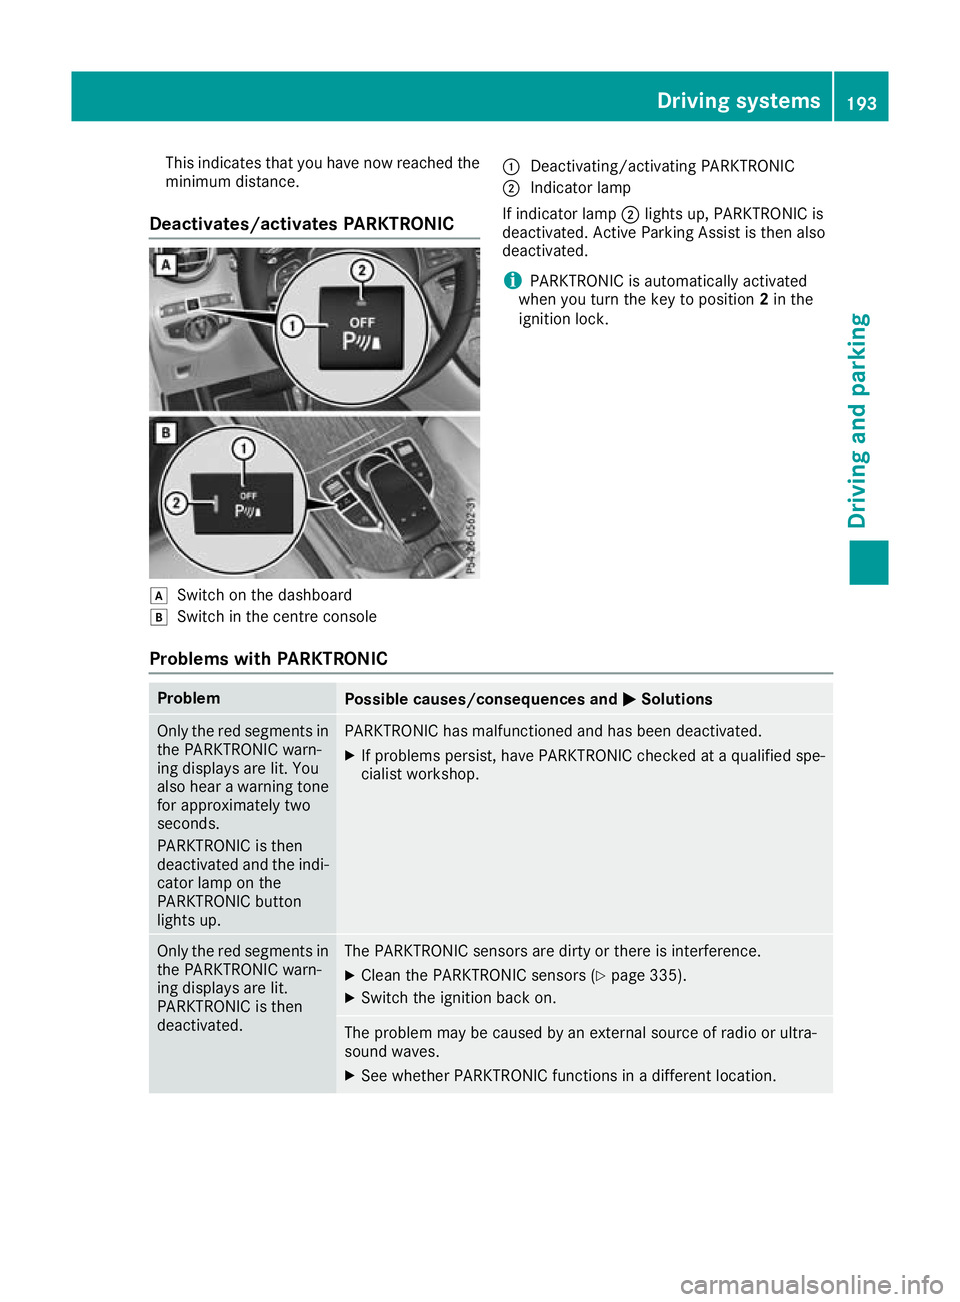
Deactivates/activates PARKTRONIC d
Switch on the dashboard
e Switch in the centre console :
Deactivating/activating PARKTRONIC
; Indicator lamp
If indicator lamp ;lights up, PARKTRONIC is
deactivated. Active Parking Assist is then also
deactivated.
i PARKTRONIC is automatically activated
when you turn the key to position 2in the
ignition lock.
Problems with PARKTRONIC Problem
Possible causes/consequences and
M
MSolutions Only the red segments in
the PARKTRONIC warn-
ing displays are lit. You
also hear a warning tone
for approximately two
seconds.
PARKTRONIC is then
deactivated and the indi-
cator lamp on the
PARKTRONIC button
lights up. PARKTRONIC has malfunctioned and has been deactivated.
X If problems persist, have PARKTRONIC checked at a qualified spe-
cialist workshop. Only the red segments in
the PARKTRONIC warn-
ing displays are lit.
PARKTRONIC is then
deactivated. The PARKTRONIC sensors are dirty or there is interference.
X
Clean the PARKTRONIC sensors (Y page 335).
X Switch the ignition back on. The problem may be caused by an external source of radio or ultra-
sound waves.
X See whether PARKTRONIC functions in a different location. Driving systems
193Driving and parking Z
Page 214 of 389
Warning lamp
:
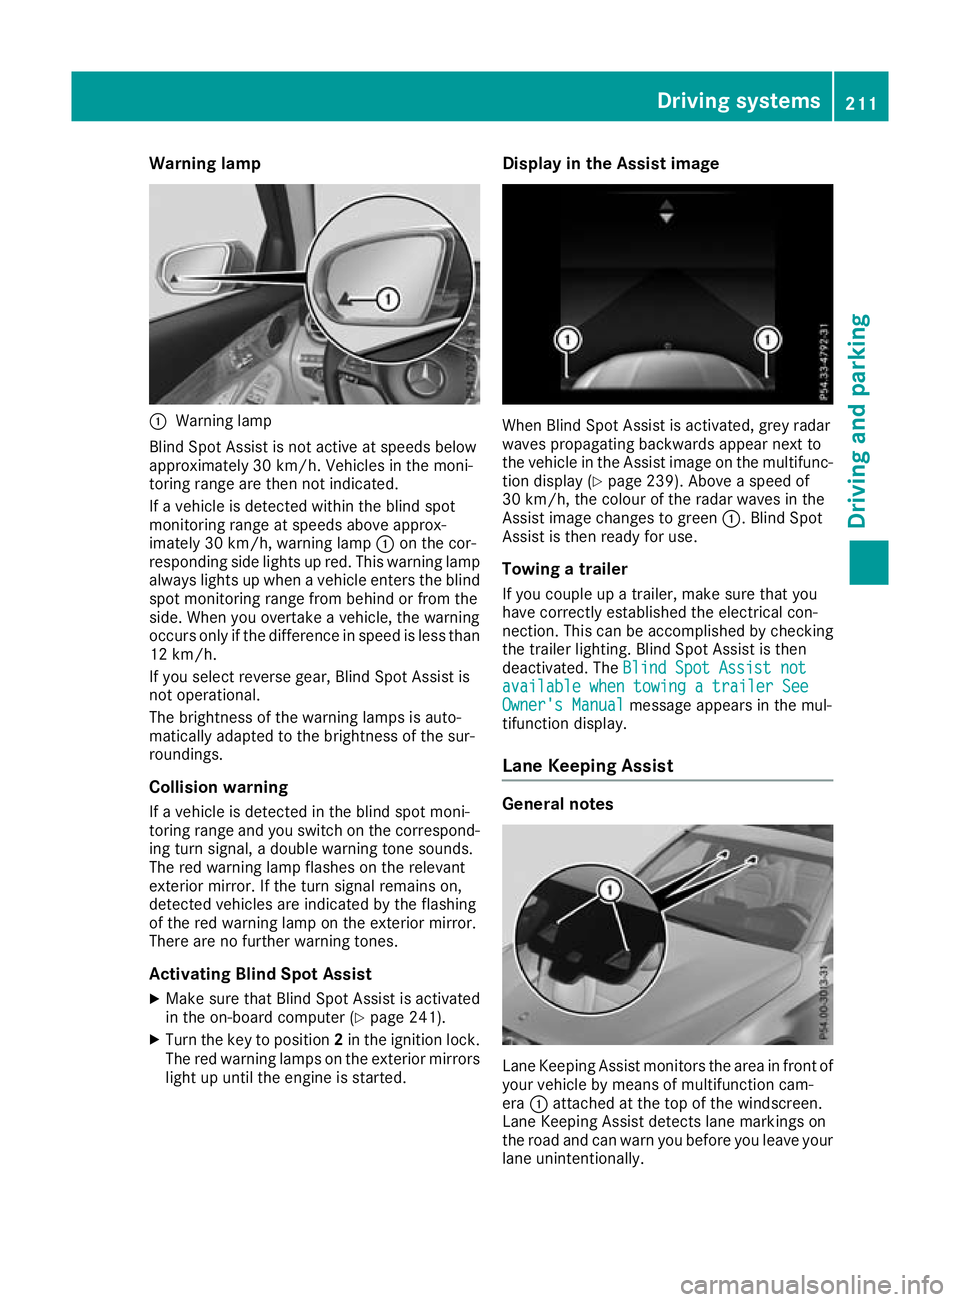
Warning lamp
Blind Spot Assist is not active at speeds below
approximately 30 km/h. Vehicles in the moni-
toring range are then not indicated.
If a vehicle is detected within the blind spot
monitoring range at speeds above approx-
imately 30 km/h, warning lamp :on the cor-
responding side lights up red. This warning lamp always lights up when a vehicle enters the blindspot monitoring range from behind or from the
side. When you overtake a vehicle, the warning
occurs only if the difference in speed is less than
12 km/h.
If you select reverse gear, Blind Spot Assist is
not operational.
The brightness of the warning lamps is auto-
matically adapted to the brightness of the sur-
roundings.
Collision warning
If a vehicle is detected in the blind spot moni-
toring range and you switch on the correspond-
ing turn signal, a double warning tone sounds.
The red warning lamp flashes on the relevant
exterior mirror. If the turn signal remains on,
detected vehicles are indicated by the flashing
of the red warning lamp on the exterior mirror.
There are no further warning tones.
Activating Blind Spot Assist
X Make sure that Blind Spot Assist is activated
in the on-board computer (Y page 241).
X Turn the key to position 2in the ignition lock.
The red warning lamps on the exterior mirrors
light up until the engine is started. Display in the Assist image
When Blind Spot Assist is activated, grey radar
waves propagating backwards appear next to
the vehicle in the Assist image on the multifunc-
tion display (Y page 239). Above a speed of
30 km/h, the colour of the radar waves in the
Assist image changes to green :. Blind Spot
Assist is then ready for use.
Towing a trailer
If you couple up a trailer, make sure that you
have correctly established the electrical con-
nection. This can be accomplished by checking
the trailer lighting. Blind Spot Assist is then
deactivated. The Blind Spot Assist not Blind Spot Assist not
available when towing a trailer See
available when towing a trailer See
Owner's Manual Owner's Manual message appears in the mul-
tifunction display.
Lane Keeping Assist General notes
Lane Keeping Assist monitors the area in front of
your vehicle by means of multifunction cam-
era :attached at the top of the windscreen.
Lane Keeping Assist detects lane markings on
the road and can warn you before you leave your lane unintentionally. Driving systems
211Driving and parking Z
Page 225 of 389
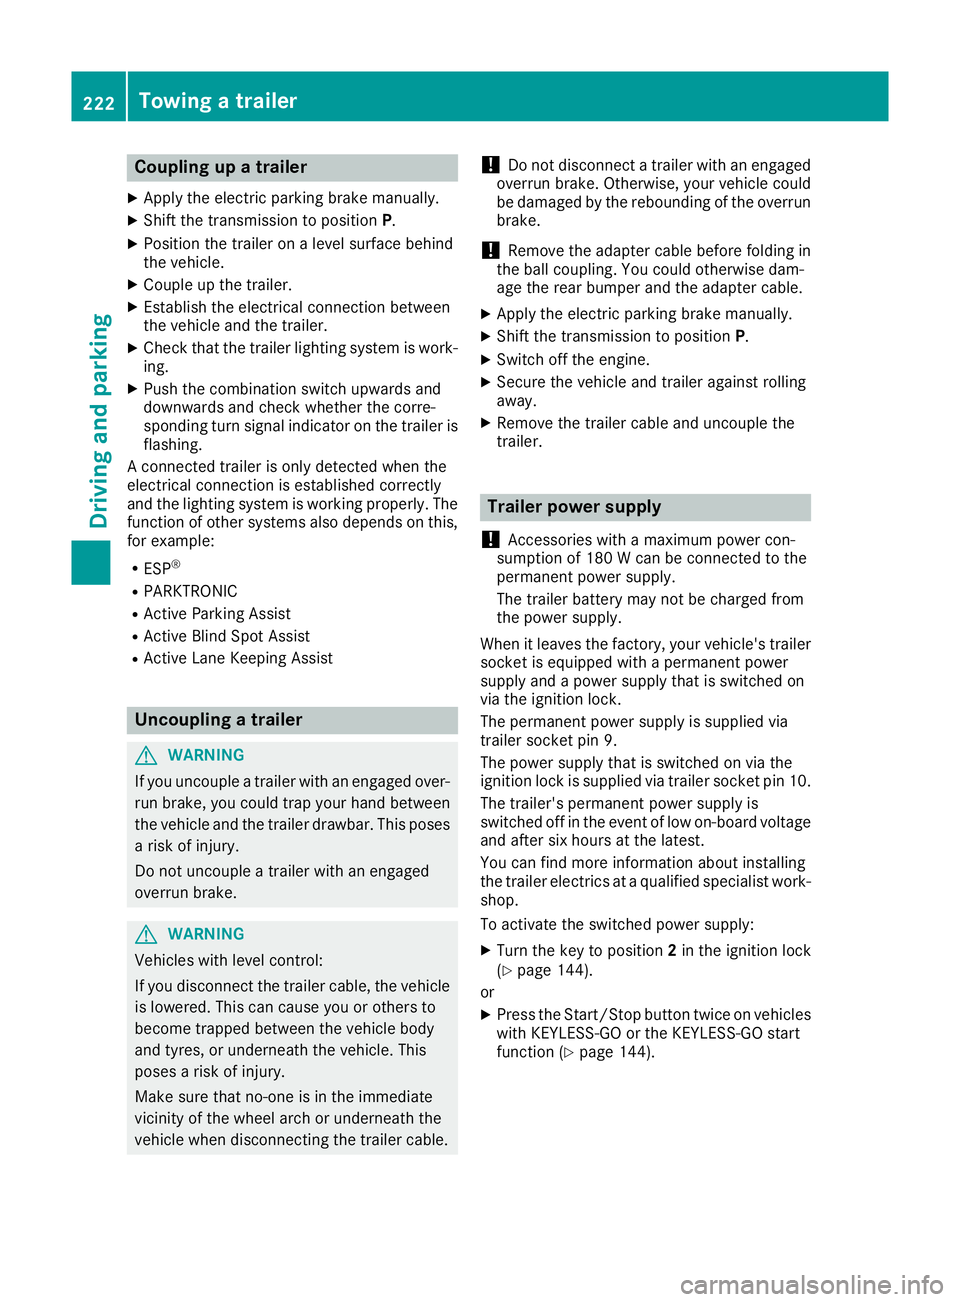
Coupling up a trailer
X Apply the electric parking brake manually.
X Shift the transmission to position P.
X Position the trailer on a level surface behind
the vehicle.
X Couple up the trailer.
X Establish the electrical connection between
the vehicle and the trailer.
X Check that the trailer lighting system is work-
ing.
X Push the combination switch upwards and
downwards and check whether the corre-
sponding turn signal indicator on the trailer is
flashing.
A connected trailer is only detected when the
electrical connection is established correctly
and the lighting system is working properly. The
function of other systems also depends on this, for example:
R ESP ®
R PARKTRONIC
R Active Parking Assist
R Active Blind Spot Assist
R Active Lane Keeping Assist Uncoupling a trailer
G
WARNING
If you uncouple a trailer with an engaged over- run brake, you could trap your hand between
the vehicle and the trailer drawbar. This poses a risk of injury.
Do not uncouple a trailer with an engaged
overrun brake. G
WARNING
Vehicles with level control:
If you disconnect the trailer cable, the vehicle is lowered. This can cause you or others to
become trapped between the vehicle body
and tyres, or underneath the vehicle. This
poses a risk of injury.
Make sure that no-one is in the immediate
vicinity of the wheel arch or underneath the
vehicle when disconnecting the trailer cable. !
Do not disconnect a trailer with an engaged
overrun brake. Otherwise, your vehicle could
be damaged by the rebounding of the overrun
brake.
! Remove the adapter cable before folding in
the ball coupling. You could otherwise dam-
age the rear bumper and the adapter cable.
X Apply the electric parking brake manually.
X Shift the transmission to position P.
X Switch off the engine.
X Secure the vehicle and trailer against rolling
away.
X Remove the trailer cable and uncouple the
trailer. Trailer power supply
! Accessories with a maximum power con-
sumption of 180 W can be connected to the
permanent power supply.
The trailer battery may not be charged from
the power supply.
When it leaves the factory, your vehicle's trailer
socket is equipped with a permanent power
supply and a power supply that is switched on
via the ignition lock.
The permanent power supply is supplied via
trailer socket pin 9.
The power supply that is switched on via the
ignition lock is supplied via trailer socket pin 10.
The trailer's permanent power supply is
switched off in the event of low on-board voltage
and after six hours at the latest.
You can find more information about installing
the trailer electrics at a qualified specialist work- shop.
To activate the switched power supply:
X Turn the key to position 2in the ignition lock
(Y page 144).
or
X Press the Start/Stop button twice on vehicles
with KEYLESS-GO or the KEYLESS-GO start
function (Y page 144).222
Towing a trailerDriving and parking
Page 226 of 389
To deactivate the switched power supply:
X Turn the key to position 0in the ignition lock
(Y page 144).
or
X Press the Start/Stop button once on vehicles
with KEYLESS-GO or the KEYLESS-GO start
function (Y page 144). Failure check for LEDs
If LED lamps are fitted in the trailer, a malfunc-
tion message may appear in the multifunction
display even if there is no fault. The reason for
the error message may be that the current has
fallen below the minimum of 50 mA.
To ensure reliable operation of the failure indi-
cator, each LED chain in the trailer lighting must
be guaranteed a minimum current of 50 mA. Trailer with 7-pin connector
General notes Trailer with 7-pin connector:
you can connect
to the 13-pin socket on the ball coupling using
an adapter or, if necessary, an adapter cable.
Both can be obtained at a qualified specialist
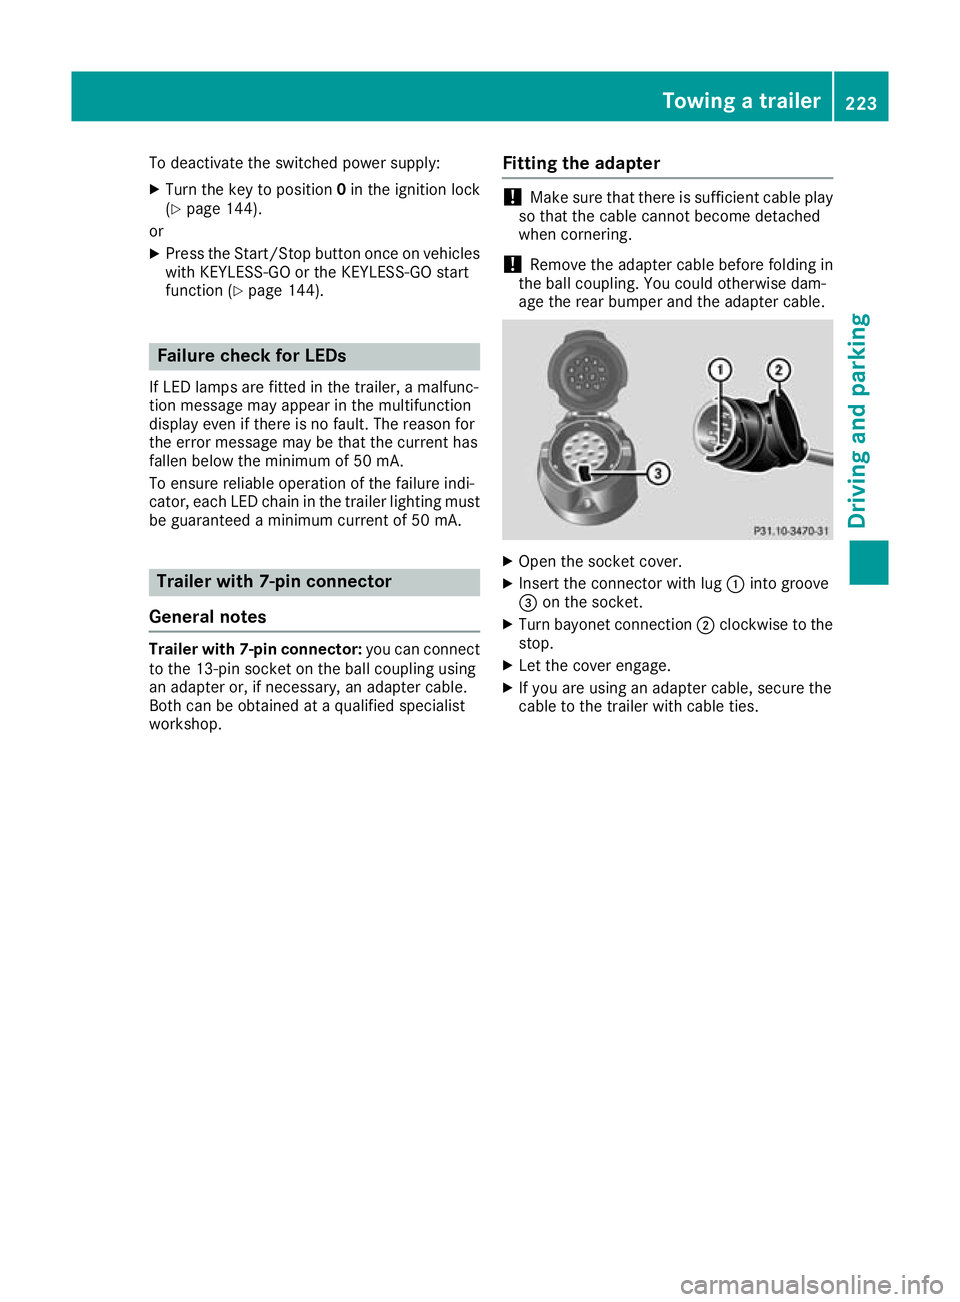
workshop. Fitting the adapter !
Make sure that there is sufficient cable play
so that the cable cannot become detached
when cornering.
! Remove the adapter cable before folding in
the ball coupling. You could otherwise dam-
age the rear bumper and the adapter cable. X
Open the socket cover.
X Insert the connector with lug :into groove
= on the socket.
X Turn bayonet connection ;clockwise to the
stop.
X Let the cover engage.
X If you are using an adapter cable, secure the
cable to the trailer with cable ties. Towing a trailer
223Driving and parking Z
Page 282 of 389
Display messages
Possible causes/consequences and
M
MSolutions Telephone
Telephone
No
Noservice
service Your vehicle is outside the mobile phone network provider's trans-
mitter/receiver range.
X Wait until the mobile phone operational readiness symbol appears
on the multifunction display. ¥
Top up washer fluid Top up washer fluid The washer fluid level in the washer fluid reservoir has dropped below
the minimum.
X Top up the washer fluid (Y page 329).Key
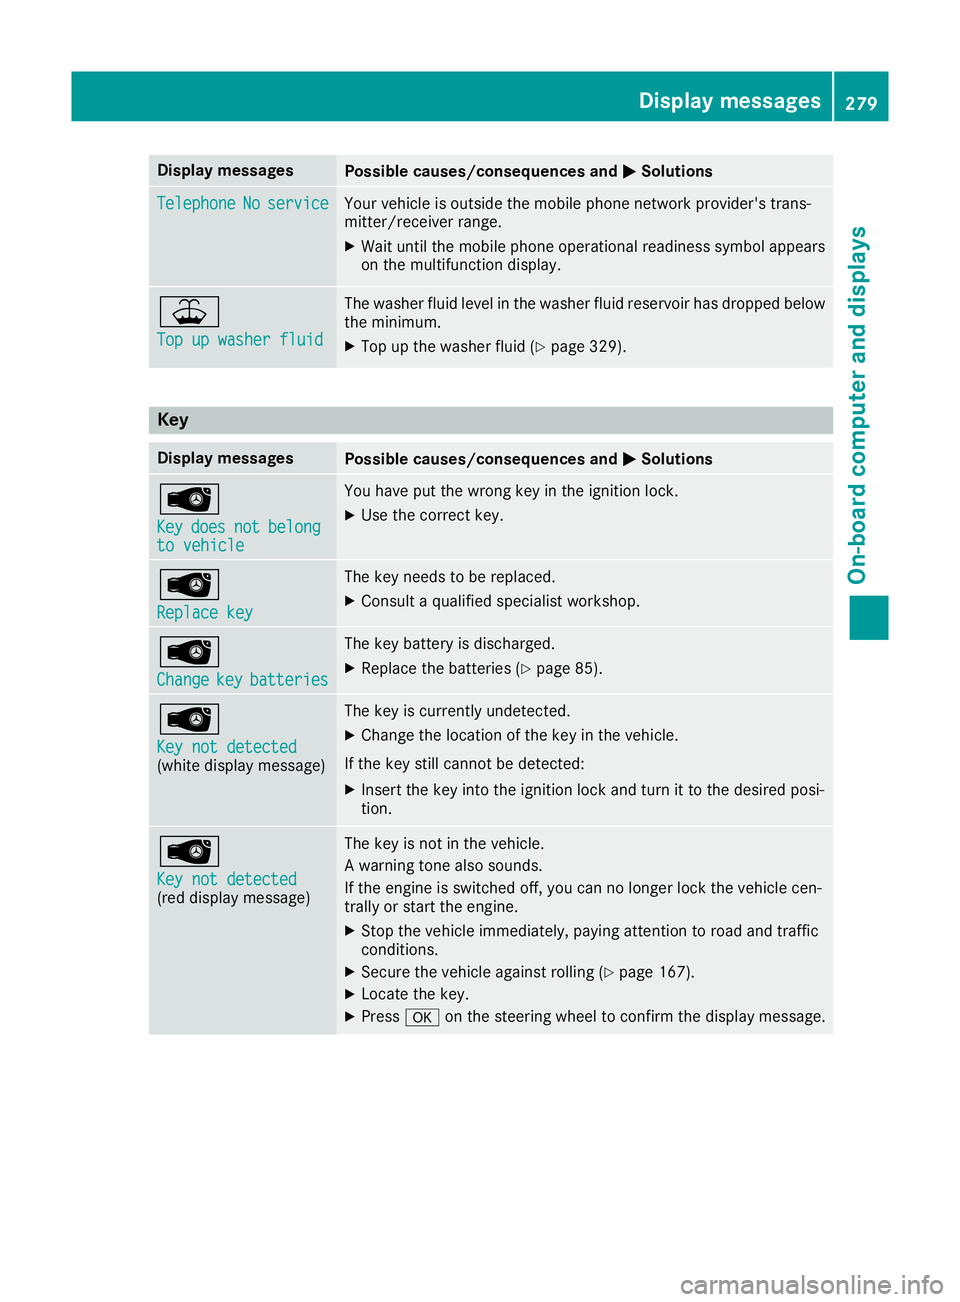
Display messages
Possible causes/consequences and
M
MSolutions Â
Key Key
does
does not
notbelong
belong
to vehicle
to vehicle You have put the wrong key in the ignition lock.
X Use the correct key. Â
Replace key Replace key The key needs to be replaced.
X Consult a qualified specialist workshop. Â
Change Change
key
keybatteries
batteries The key battery is discharged.
X Replace the batteries (Y page 85).Â
Key not detected Key not detected
(white display message) The key is currently undetected.
X Change the location of the key in the vehicle.
If the key still cannot be detected:
X Insert the key into the ignition lock and turn it to the desired posi-
tion. Â
Key not detected Key not detected
(red display message) The key is not in the vehicle.
A warning tone also sounds.
If the engine is switched off, you can no longer lock the vehicle cen-
trally or start the engine.
X Stop the vehicle immediately, paying attention to road and traffic
conditions.
X Secure the vehicle against rolling (Y page 167).
X Locate the key.
X Press aon the steering wheel to confirm the display message. Display
messages
279On-board computer and displays Z
Page 283 of 389
Display messages
Possible causes/consequences and
M
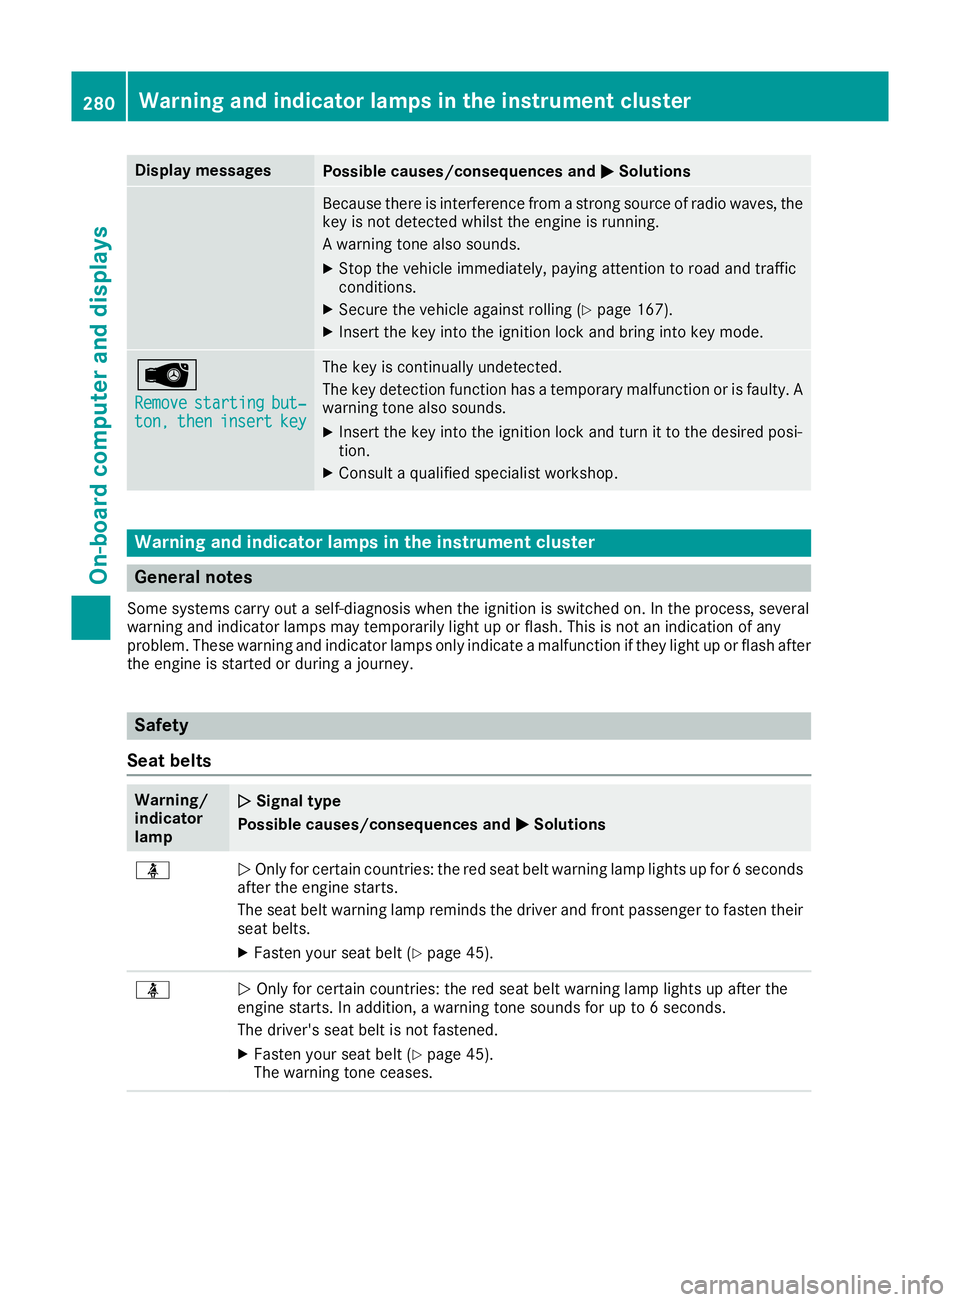
MSolutions Because there is interference from a strong source of radio waves, the
key is not detected whilst the engine is running.
A warning tone also sounds.
X Stop the vehicle immediately, paying attention to road and traffic
conditions.
X Secure the vehicle against rolling (Y page 167).
X Insert the key into the ignition lock and bring into key mode. Â
Remove Remove
starting
starting but‐
but‐
ton,
ton, then
theninsert
insert key
key The key is continually undetected.
The key detection function has a temporary malfunction or is faulty. A
warning tone also sounds.
X Insert the key into the ignition lock and turn it to the desired posi-
tion.
X Consult a qualified specialist workshop. Warning and indicator lamps in the instrument cluster
General notes
Some systems carry out a self-diagnosis when the ignition is switched on. In the process, several
warning and indicator lamps may temporarily light up or flash. This is not an indication of any
problem. These warning and indicator lamps only indicate a malfunction if they light up or flash after
the engine is started or during a journey. Safety
Seat belts Warning/
indicator
lamp
N N
Signal type
Possible causes/consequences and M
MSolutions ü
N
Only for certain countries: the red seat belt warning lamp lights up for 6 seconds
after the engine starts.
The seat belt warning lamp reminds the driver and front passenger to fasten their
seat belts.
X Fasten your seat belt (Y page 45).ü
N
Only for certain countries: the red seat belt warning lamp lights up after the
engine starts. In addition, a warning tone sounds for up to 6 seconds.
The driver's seat belt is not fastened.
X Fasten your seat belt (Y page 45).
The warning tone ceases. 280
Wa
rning and indi cator lamps in the instrument clusterOn-board computer and displays