2016 MERCEDES-BENZ GLC COUPE key
[x] Cancel search: keyPage 355 of 389
The battery must be connected and charged.
Otherwise, you:
R cannot turn the key to position 2in the igni-
tion lock
R cannot release the electric parking brake
R cannot shift the automatic transmission to
position N
Deactivate the automatic locking feature before towing the vehicle (Y page 89). You could oth-
erwise be locked out when pushing or towing
the vehicle.
Deactivate tow-away protection before the vehi-
cle is towed away (Y page 80).Fitting/removing the towing eye
Fitting the towing eye G
WARNING
The exhaust tail pipe may be extremely hot.
There is a risk of burning when removing the
rear cover.
Do not touch the exhaust tail pipe. Use
extreme caution when removing the rear
cover. Mercedes-AMG vehicles All other vehicles
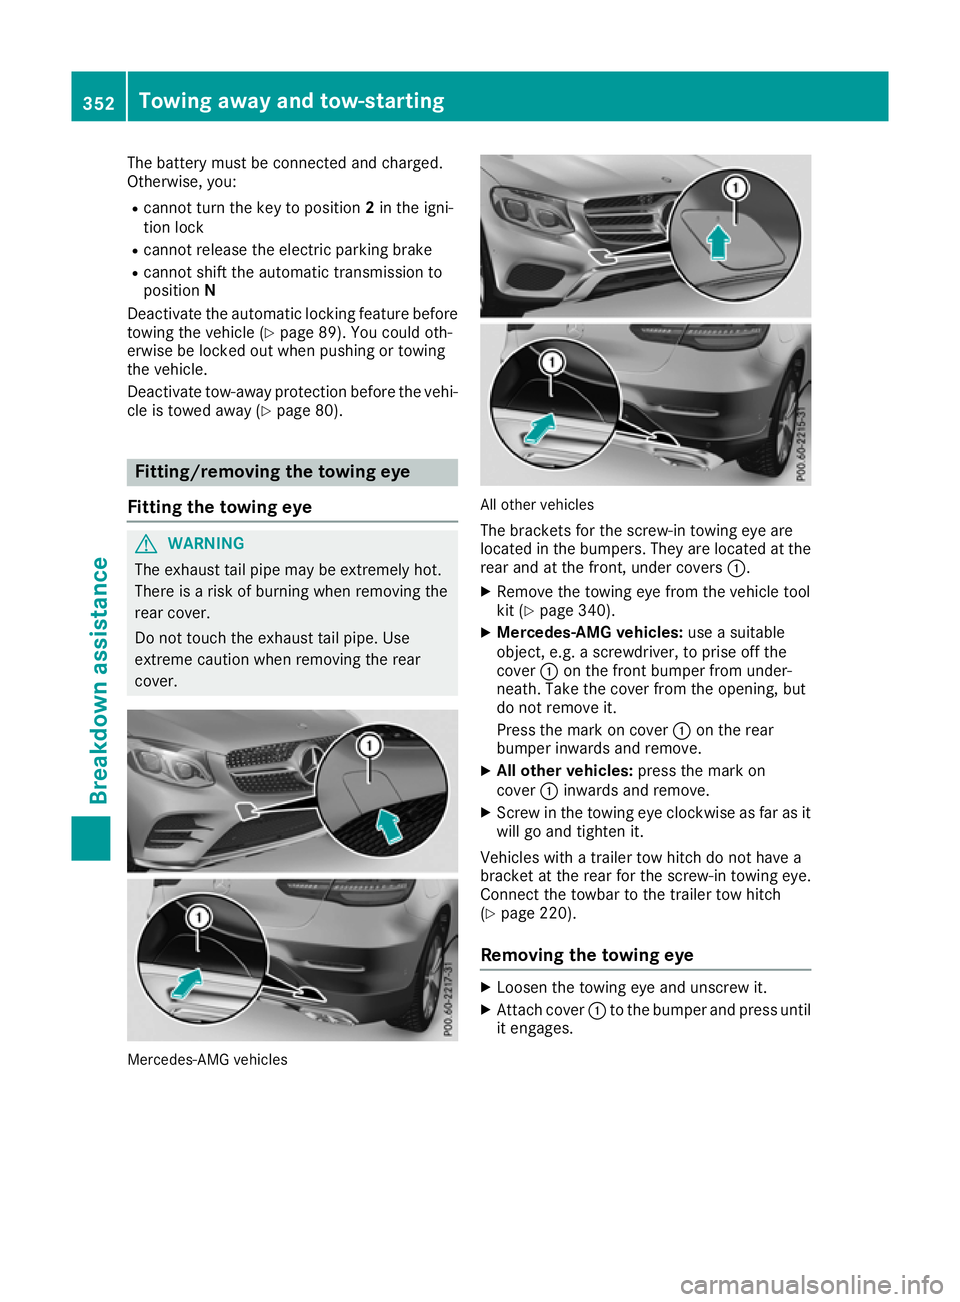
The brackets for the screw-in towing eye are
located in the bumpers. They are located at therear and at the front, under covers :.
X Remove the towing eye from the vehicle tool
kit (Y page 340).
X Mercedes-AMG vehicles: use a suitable
object, e.g. a screwdriver, to prise off the
cover :on the front bumper from under-
neath. Take the cover from the opening, but
do not remove it.
Press the mark on cover :on the rear
bumper inwards and remove.
X All other vehicles: press the mark on
cover :inwards and remove.
X Screw in the towing eye clockwise as far as it
will go and tighten it.
Vehicles with a trailer tow hitch do not have a
bracket at the rear for the screw-in towing eye.
Connect the towbar to the trailer tow hitch
(Y page 220).
Removing the towing eye X
Loosen the towing eye and unscrew it.
X Attach cover :to the bumper and press until
it engages. 352
Towing away and tow-startingBreakdown assistance
Page 356 of 389
Towing the vehicle with both axles on
the ground
The automatic transmission automatically shifts to position Pwhen you open the driver's or front-
passenger door or when you remove the key
from the ignition lock. In order to ensure that the
automatic transmission stays in position N
when the vehicle is being towed, you must
observe the following points:
X Make sure that the vehicle is stationary.
X Turn the key to position 2in the ignition lock.
X Depress the brake pedal and keep it
depressed.
X Shift the automatic transmission to position
N.
X Leave the key in position 2in the ignition lock.
X Release the brake pedal.
X Release the electric parking brake.
X Switch on the hazard warning lamps
(Y page 117).
In order to signal a change of direction when
towing the vehicle with the hazard warning
lamps switched on, use the combination switch
as usual. In this case, only the turn signals for
the desired direction flash. When you reset the
combination switch, the hazard warning lamps
start flashing again. Transporting the vehicle
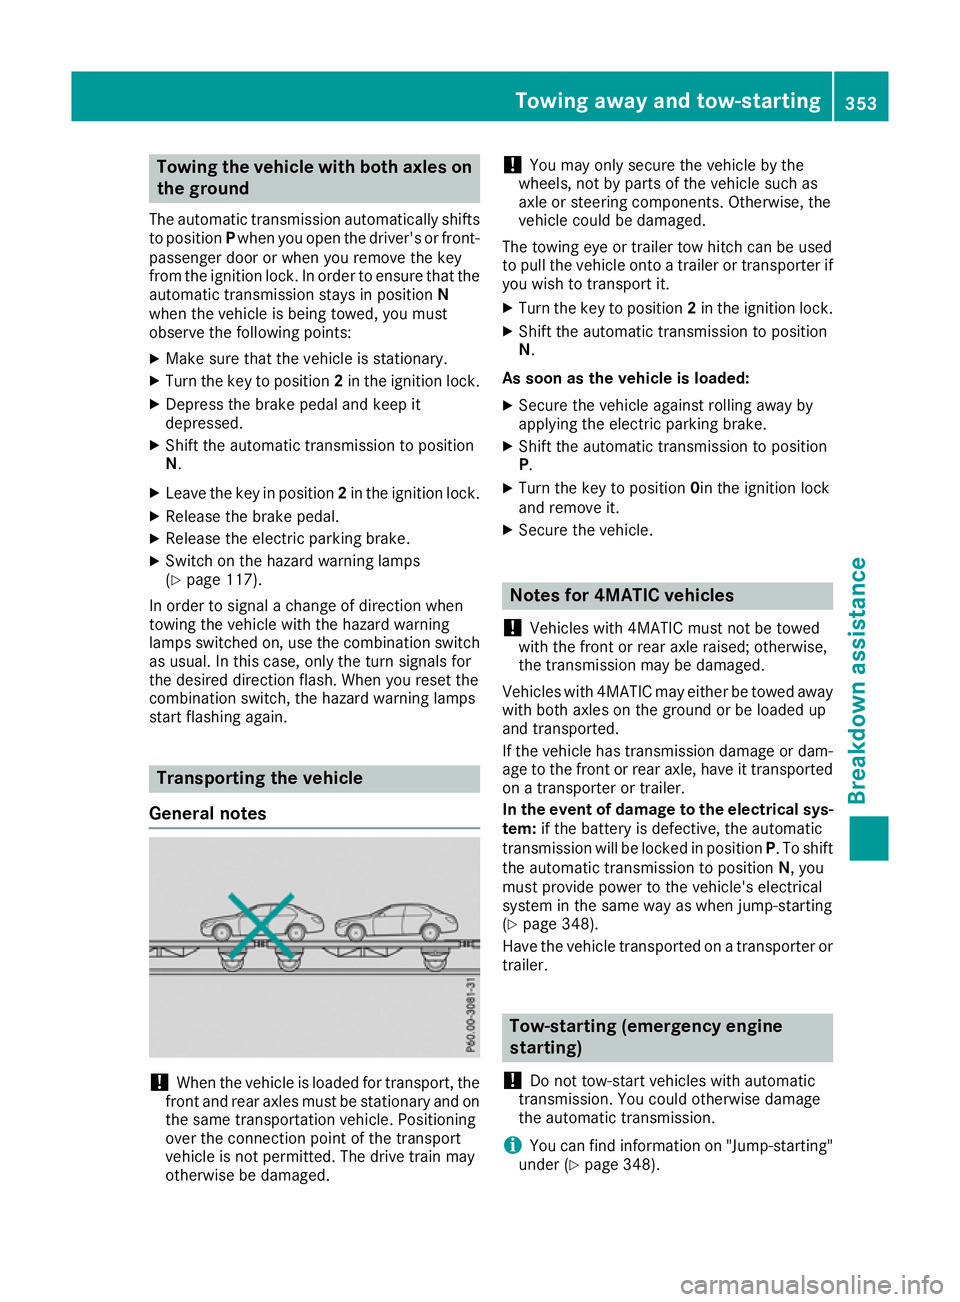
General notes !
When the vehicle is loaded for transport, the
front and rear axles must be stationary and on
the same transportation vehicle. Positioning
over the connection point of the transport
vehicle is not permitted. The drive train may
otherwise be damaged. !
You may only secure the vehicle by the
wheels, not by parts of the vehicle such as
axle or steering components. Otherwise, the
vehicle could be damaged.
The towing eye or trailer tow hitch can be used
to pull the vehicle onto a trailer or transporter if
you wish to transport it.
X Turn the key to position 2in the ignition lock.
X Shift the automatic transmission to position
N.
As soon as the vehicle is loaded:
X Secure the vehicle against rolling away by
applying the electric parking brake.
X Shift the automatic transmission to position
P.
X Turn the key to position 0in the ignition lock
and remove it.
X Secure the vehicle. Notes for 4MATIC vehicles
! Vehicles with 4MATIC must not be towed
with the front or rear axle raised; otherwise,
the transmission may be damaged.
Vehicles with 4MATIC may either be towed away
with both axles on the ground or be loaded up
and transported.
If the vehicle has transmission damage or dam- age to the front or rear axle, have it transportedon a transporter or trailer.
In the event of damage to the electrical sys-
tem: if the battery is defective, the automatic
transmission will be locked in position P. To shift
the automatic transmission to position N, you
must provide power to the vehicle's electrical
system in the same way as when jump-starting
(Y page 348).
Have the vehicle transported on a transporter or
trailer. Tow-starting (emergency engine
starting)
! Do not tow-start vehicles with automatic
transmission. You could otherwise damage
the automatic transmission.
i You can find information on "Jump-starting"
under (Y page 348). Towing away and tow-starting
353Breakdown assistance Z
Page 357 of 389
Fuses
Important safety notes
G
WARNING
If you manipulate, bridge or replace a faulty
fuse with a fuse of a higher amperage, the
electric cables could be overloaded. This may result in a fire. There is a risk of an accident
and injury.
Always replace faulty fuses with specified new fuses of the correct amperage.
Blown fuses must be replaced with fuses of the same rating, which you can recognise by the
colour and fuse rating. The fuse ratings are listed
in the fuse allocation chart.
The fuse allocation chart is on the fuse box in the luggage compartment (Y page 355).
If the newly inserted fuse also blows, have the
cause traced and rectified at a qualified special-
ist workshop, e.g. a Mercedes-Benz Service
Centre.
! Only use fuses that have been approved for
Mercedes-Benz vehicles and which have the
correct fuse rating for the system concerned.
Otherwise, components or systems could be
damaged.
! Make sure that no moisture can enter the
fuse box when the cover is open.
! When closing the cover, make sure that it is
lying correctly on the fuse box. Moisture seep-
ing in or dirt could otherwise impair the oper- ation of the fuses.
The fuses in your vehicle disconnect faulty cir-
cuits. If a fuse blows, all the components on the circuit and their functions will fail. Before replacing a fuse
Observe the important safety notes
(Y page 354)
X Switch off the engine.
X Switch off all electrical consumers. X
Make sure that the ignition is switched off
(Y page 144).
or
X When using the key, turn the key to position 0
in the ignition lock and remove it
(Y page 144).
X Secure the vehicle against rolling away
(Y page 167).
All indicator lamps on the instrument cluster
must be off.
The fuses are located in various fuse boxes:
R Fuse box on the driver's side of the dashboard
R Fuse box in the front-passenger footwell
R Fuse box in the engine compartment on the
driver's side
R Fuse box under the luggage compartment
floor on the right-hand side of the vehicle,
when viewed in the direction of travel Dashboard fuse box
The fuse box is under a cover on the side of the dashboard. You can obtain further information
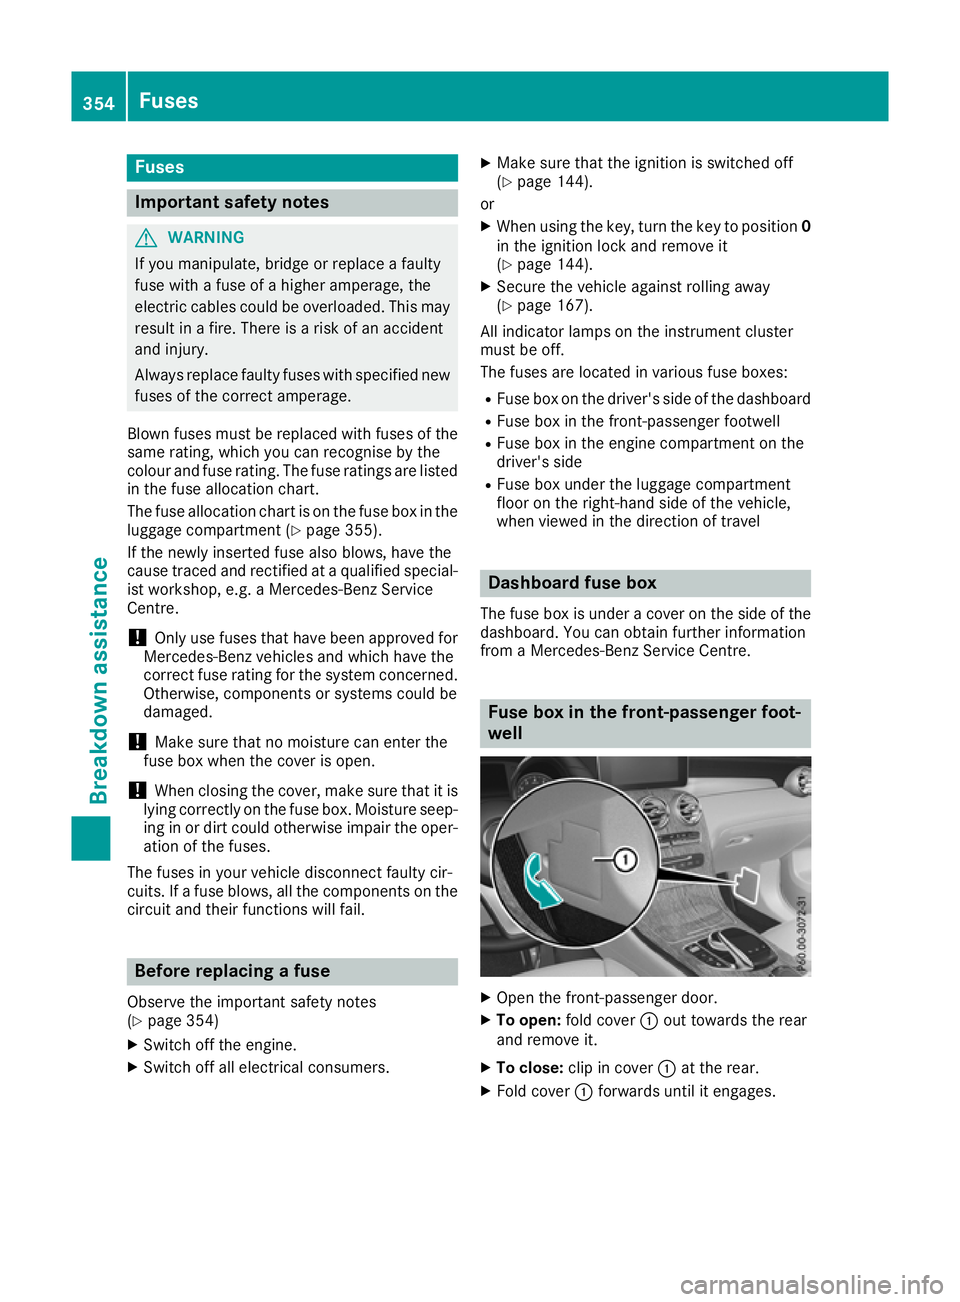
from a Mercedes-Benz Service Centre. Fuse box in the front-passenger foot-
well
X
Open the front-passenger door.
X To open: fold cover :out towards the rear
and remove it.
X To close: clip in cover :at the rear.
X Fold cover :forwards until it engages. 354
FusesBreakdown assistance
Page 364 of 389
Important safety notes
The tyre pressure warning system does not warn
you of an incorrectly set tyre pressure. Observe
the notes on the recommended tyre pressure
(Y page 359).
The tyre pressure loss warning system does not
replace the need to regularly check the tyre
pressure. An even loss of pressure on several
tyres at the same time cannot be detected by
the tyre pressure loss warning system.
The tyre pressure loss warning system is not
able to warn you of a sudden loss of air, e.g. if the
tyre is penetrated by a foreign object. In the
event of a sudden loss of air, bring the vehicle to
a halt by braking carefully. Avoid abrupt steering manoeuvres.
The function of the tyre pressure loss warning
system is limited or delayed if:
R snow chains are fitted on your vehicle
R road conditions are wintry
R you are driving on a loose surface (e.g. sand or
gravel)
R you adopt a very sporty driving style (corner-
ing at high speeds or driving with high rates of
acceleration)
R you are towing a very heavy or large trailer
R you are driving with a heavy load (in the vehi-
cle or on the roof)
Restarting the tyre pressure loss warn-
ing system Restart the tyre pressure loss warning system if
you have:
R changed the tyre pressure
R changed the wheels or tyres
R fitted new wheels or tyres
X Before restarting, make sure that the tyre
pressures are set properly on all four tyres for
the respective operating conditions. The rec-
ommended tyre pressures can be found in the
tyre pressure table on the fuel filler flap.
The tyre pressure loss warning system can
only give reliable warnings if you have set the correct tyre pressure. If an incorrect tyre
pressure is set, this incorrect value will be
monitored.
X Observe the notes in the section on tyre pres-
sure (Y page 359). X
Make sure that the key is in position 2in the
ignition lock (Y page 144).
X Press òon the steering wheel to call up
the menu list.
X Press 9or: on the steering wheel to
select the Service
Service menu.
X Confirm by pressing aon the steering
wheel.
X Select Tyre pressure Tyre pressure with9 or:.
X Press ato confirm.
The Run
Run Flat
Flat Indicator
Indicator active
activeRestart
Restart
with OK
with OK message is shown in the multifunc-
tion display.
If you wish to confirm the restart: X Press the abutton.
The Tyre pressure now OK?
Tyre pressure now OK? message is
shown in the multifunction display.
X Select Yes
Yes with 9 or:.
X Press ato confirm.
The Run Flat Indicator restarted
Run Flat Indicator restarted mes-
sage is shown in the multifunction display.
After a teach-in period, the tyre pressure loss
warning system will monitor the set tyre pres- sures of all four tyres.
If you wish to cancel the restart:
X Press the %button.
or
X If the Tyre pressure now OK? Tyre pressure now OK? message
appears, select Cancel
Cancelwith9 or:.
X Press ato confirm.
The tyre pressure values stored at the last
restart will continue to be monitored. Tyre pressure monitor
General notes If a tyre pressure monitor system is fitted, the
vehicle's wheels have sensors fitted that moni-
tor the tyre pressures in all four tyres. The tyre
pressure monitor warns you if the pressure
drops in one or more of the tyres. The tyre pres- sure monitor functions only if the corresponding
sensors are fitted to all wheels.
Information on tyre pressures is shown on the
multifunction display. After a few minutes of
driving, the current tyre pressure of each tyre is
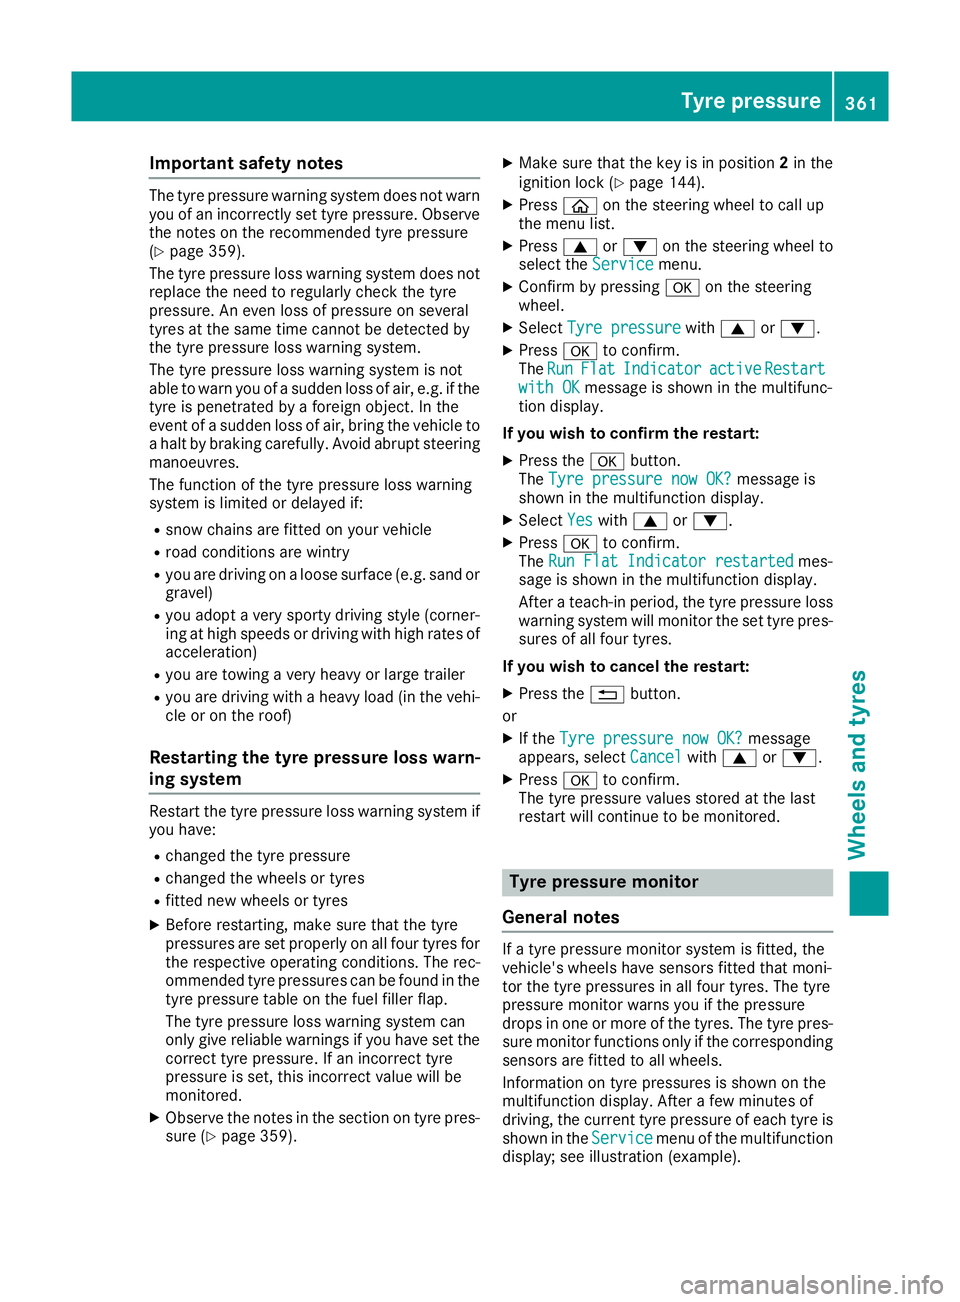
shown in the Service Servicemenu of the multifunction
display; see illustration (example). Tyre pressure
361Wheels and tyres Z
Page 365 of 389
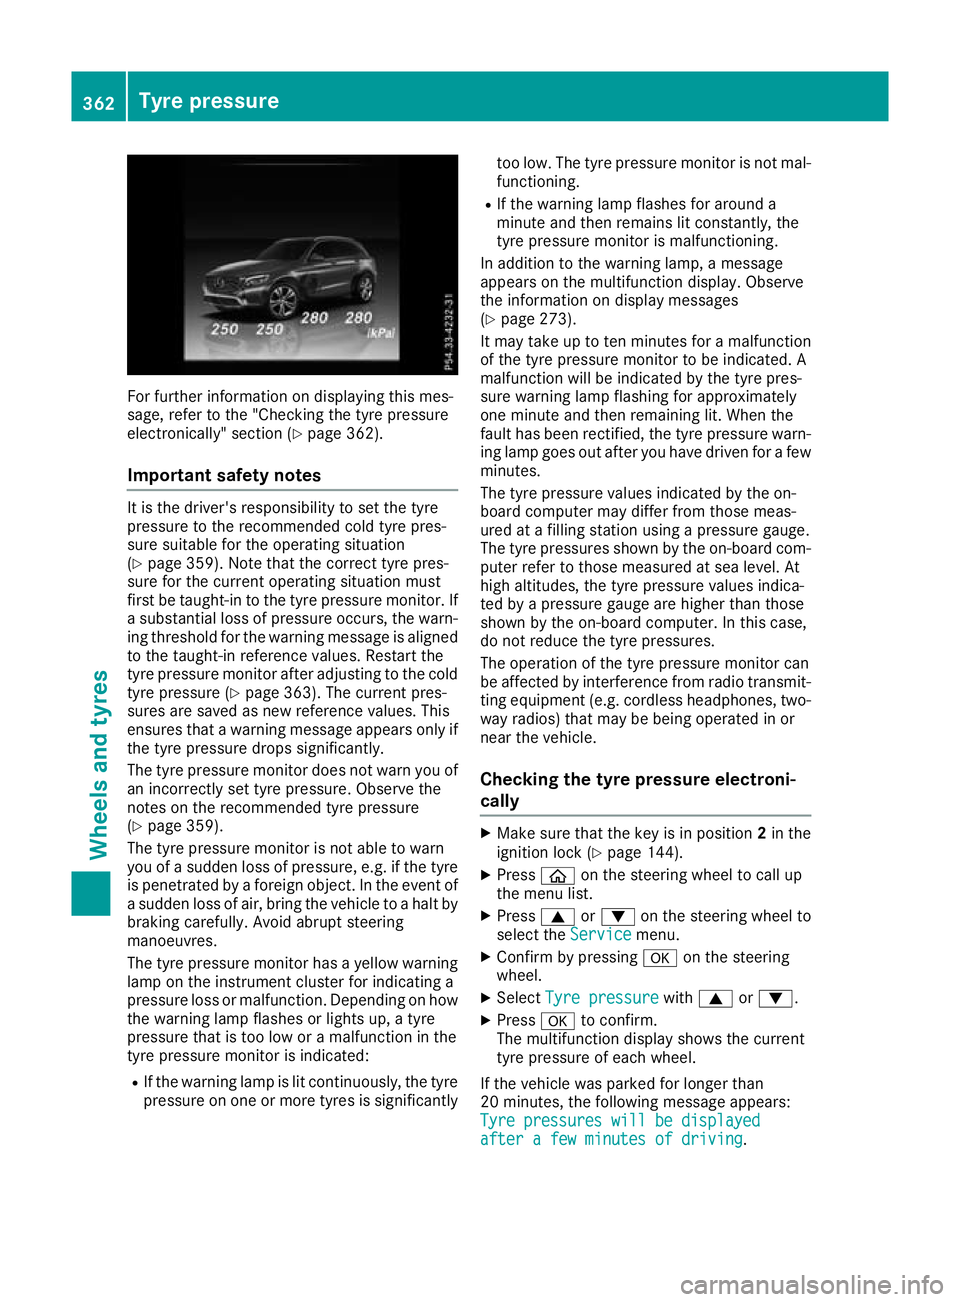
For further information on displaying this mes-
sage, refer to the "Checking the tyre pressure
electronically" section (Y page 362).
Important safety notes It is the driver's responsibility to set the tyre
pressure to the recommended cold tyre pres-
sure suitable for the operating situation
(Y page 359). Note that the correct tyre pres-
sure for the current operating situation must
first be taught-in to the tyre pressure monitor. If
a substantial loss of pressure occurs, the warn- ing threshold for the warning message is aligned
to the taught-in reference values. Restart the
tyre pressure monitor after adjusting to the cold tyre pressure (Y page 363). The current pres-
sures are saved as new reference values. This
ensures that a warning message appears only if
the tyre pressure drops significantly.
The tyre pressure monitor does not warn you of
an incorrectly set tyre pressure. Observe the
notes on the recommended tyre pressure
(Y page 359).
The tyre pressure monitor is not able to warn
you of a sudden loss of pressure, e.g. if the tyre
is penetrated by a foreign object. In the event of
a sudden loss of air, bring the vehicle to a halt by braking carefully. Avoid abrupt steering
manoeuvres.
The tyre pressure monitor has a yellow warning
lamp on the instrument cluster for indicating a
pressure loss or malfunction. Depending on how
the warning lamp flashes or lights up, a tyre
pressure that is too low or a malfunction in the
tyre pressure monitor is indicated:
R If the warning lamp is lit continuously, the tyre
pressure on one or more tyres is significantly too low. The tyre pressure monitor is not mal-
functioning.
R If the warning lamp flashes for around a
minute and then remains lit constantly, the
tyre pressure monitor is malfunctioning.
In addition to the warning lamp, a message
appears on the multifunction display. Observe
the information on display messages
(Y page 273).
It may take up to ten minutes for a malfunction
of the tyre pressure monitor to be indicated. A
malfunction will be indicated by the tyre pres-
sure warning lamp flashing for approximately
one minute and then remaining lit. When the
fault has been rectified, the tyre pressure warn- ing lamp goes out after you have driven for a few
minutes.
The tyre pressure values indicated by the on-
board computer may differ from those meas-
ured at a filling station using a pressure gauge.
The tyre pressures shown by the on-board com- puter refer to those measured at sea level. At
high altitudes, the tyre pressure values indica-
ted by a pressure gauge are higher than those
shown by the on-board computer. In this case,
do not reduce the tyre pressures.
The operation of the tyre pressure monitor can
be affected by interference from radio transmit- ting equipment (e.g. cordless headphones, two-
way radios) that may be being operated in or
near the vehicle.
Checking the tyre pressure electroni-
cally X
Make sure that the key is in position 2in the
ignition lock (Y page 144).
X Press òon the steering wheel to call up
the menu list.
X Press 9or: on the steering wheel to
select the Service
Service menu.
X Confirm by pressing aon the steering
wheel.
X Select Tyre pressure Tyre pressure with9 or:.
X Press ato confirm.
The multifunction display shows the current
tyre pressure of each wheel.
If the vehicle was parked for longer than
20 minutes, the following message appears:
Tyre pressures will be displayed Tyre pressures will be displayed
after a few minutes of driving after a few minutes of driving. 362
Tyre pressureWheels and tyres
Page 366 of 389
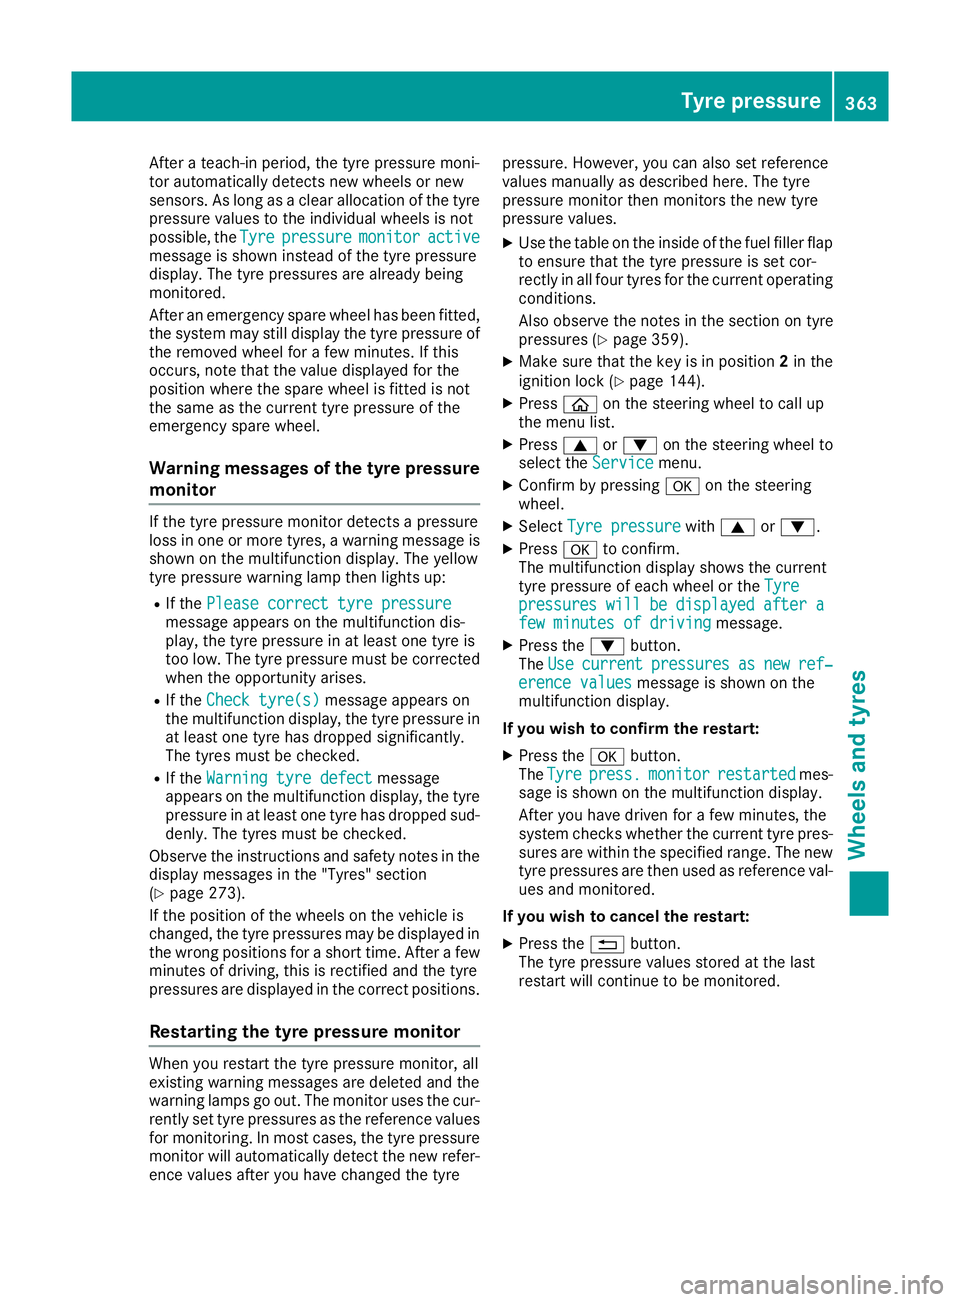
After a teach-in period, the tyre pressure moni-
tor automatically detects new wheels or new
sensors. As long as a clear allocation of the tyre pressure values to the individual wheels is not
possible, the Tyre
Tyre pressure pressure monitor
monitoractive
active
message is shown instead of the tyre pressure
display. The tyre pressures are already being
monitored.
After an emergency spare wheel has been fitted,
the system may still display the tyre pressure of
the removed wheel for a few minutes. If this
occurs, note that the value displayed for the
position where the spare wheel is fitted is not
the same as the current tyre pressure of the
emergency spare wheel.
Warning messages of the tyre pressuremonitor If the tyre pressure monitor detects a pressure
loss in one or more tyres, a warning message is shown on the multifunction display. The yellow
tyre pressure warning lamp then lights up:
R If the Please correct tyre pressure
Please correct tyre pressure
message appears on the multifunction dis-
play, the tyre pressure in at least one tyre is
too low. The tyre pressure must be corrected
when the opportunity arises.
R If the Check tyre(s)
Check tyre(s) message appears on
the multifunction display, the tyre pressure in
at least one tyre has dropped significantly.
The tyres must be checked.
R If the Warning tyre defect
Warning tyre defect message
appears on the multifunction display, the tyre
pressure in at least one tyre has dropped sud- denly. The tyres must be checked.
Observe the instructions and safety notes in the display messages in the "Tyres" section
(Y page 273).
If the position of the wheels on the vehicle is
changed, the tyre pressures may be displayed in the wrong positions for a short time. After a few
minutes of driving, this is rectified and the tyre
pressures are displayed in the correct positions.
Restarting the tyre pressure monitor When you restart the tyre pressure monitor, all
existing warning messages are deleted and the
warning lamps go out. The monitor uses the cur-
rently set tyre pressures as the reference values for monitoring. In most cases, the tyre pressure
monitor will automatically detect the new refer- ence values after you have changed the tyre pressure. However, you can also set reference
values manually as described here. The tyre
pressure monitor then monitors the new tyre
pressure values.
X Use the table on the inside of the fuel filler flap
to ensure that the tyre pressure is set cor-
rectly in all four tyres for the current operating conditions.
Also observe the notes in the section on tyre
pressures (Y page 359).
X Make sure that the key is in position 2in the
ignition lock (Y page 144).
X Press òon the steering wheel to call up
the menu list.
X Press 9or: on the steering wheel to
select the Service Servicemenu.
X Confirm by pressing aon the steering
wheel.
X Select Tyre pressure
Tyre pressure with9 or:.
X Press ato confirm.
The multifunction display shows the current
tyre pressure of each wheel or the Tyre Tyre
pressures
pressures will
willbe
bedisplayed
displayed after
aftera
a
few minutes of driving
few minutes of driving message.
X Press the :button.
The Use
Use current
current pressures
pressures as
as new
new ref‐
ref‐
erence values
erence values message is shown on the
multifunction display.
If you wish to confirm the restart: X Press the abutton.
The Tyre
Tyre press.
press. monitor
monitor restarted
restarted mes-
sage is shown on the multifunction display.
After you have driven for a few minutes, the
system checks whether the current tyre pres-
sures are within the specified range. The new
tyre pressures are then used as reference val-
ues and monitored.
If you wish to cancel the restart: X Press the %button.
The tyre pressure values stored at the last
restart will continue to be monitored. Tyre pressure
363Wheels and tyres Z
Page 368 of 389
The wear patterns on the front and rear tyres
differ depending on the operating conditions.
Interchange the wheels before a clear wear pat-
tern has formed on the tyres. Front tyres typi-
cally wear more on the shoulders, while rear
tyres wear more in the centre.
On vehicles that have front and rear wheels of
the same size, you can interchange the wheels
every 5,000 to 10,000 km depending on the
degree of tyre wear. Ensure the direction of
rotation is maintained.
Clean the contact surfaces of the wheel and the
brake disc thoroughly every time a wheel is
interchanged. Check the tyre pressure and, if
necessary, restart the tyre pressure loss warn-
ing system (Y page 361) or the tyre pressure
monitor (Y page 363). Direction of rotation
Tyres with a specified direction of rotation have additional benefits, e.g. if there is a risk of aqua- planing. These advantages can only be gained if
the tyres are fitted corresponding to the direc-
tion of rotation.
An arrow on the sidewall of the tyre indicates its correct direction of rotation. Storing wheels
Store wheels in a cool, dry and preferably dark
place if they are not being used. Protect the
tyres against oil, grease, petrol and diesel. Fitting a wheel
Preparing the vehicle X
Stop the vehicle on solid, non-slippery and
level ground.
X Apply the electric parking brake manually.
X Move the front wheels to the straight-ahead
position.
X Shift the transmission to position P.
X Make sure that the vehicle level is set to "Nor-
mal" on vehicles with AIR BODY CONTROL
(Y page 188).
X Switch off the engine.
X Vehicles without KEYLESS-GO: remove the
key from the ignition lock. X
Vehicles with KEYLESS-GO start-function
or KEYLESS-GO: open the driver's door.
The vehicle electronics now have status 0.
This is the same as the key having been
removed.
X Vehicles with KEYLESS-GO start function
or KEYLESS-GO: remove the Start/Stop but-
ton from the ignition lock (Y page 144).
X If included in the vehicle equipment, remove
the tyre-change tool kit from the vehicle.
X Safeguard the vehicle against rolling away.
i Apart from some country-specific variants,
vehicles are not equipped with tyre-changing
tools. Some tools for changing a tyre are spe- cific to the vehicle. For more information on
which tools are required to perform a wheel
change on your vehicle, consult a qualified
specialist workshop.
Necessary tyre-changing tools may include,
for example:
R Jack
R wheel chock
R Wheel wrench
R Centring pin
Securing the vehicle against rolling
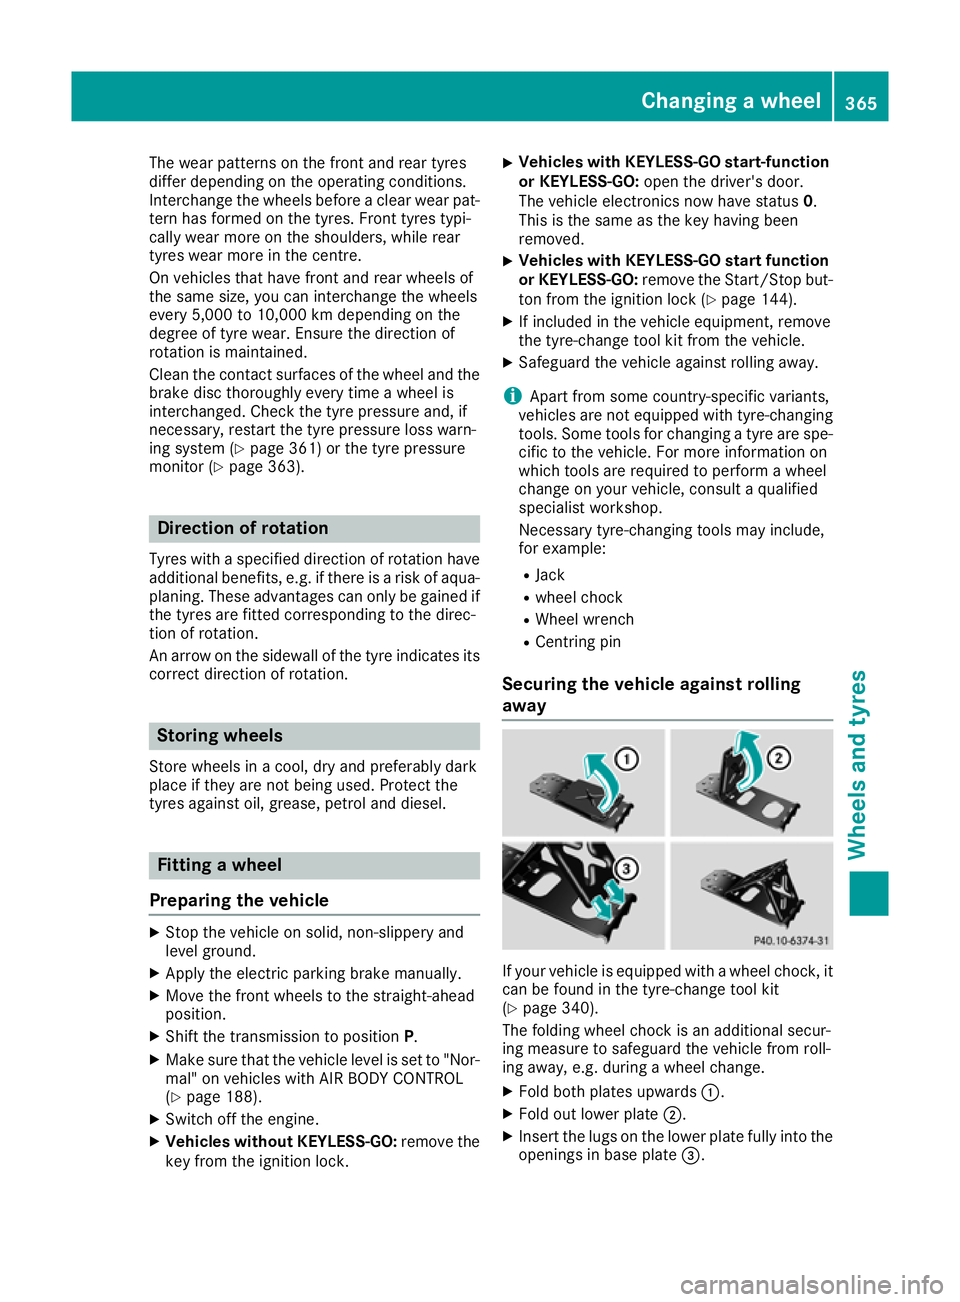
away If your vehicle is equipped with a wheel chock, it
can be found in the tyre-change tool kit
(Y page 340).
The folding wheel chock is an additional secur-
ing measure to safeguard the vehicle from roll-
ing away, e.g. during a wheel change.
X Fold both plates upwards :.
X Fold out lower plate ;.
X Insert the lugs on the lower plate fully into the
openings in base plate =. Changing a wheel
365Wheels and tyres Z