Page 55 of 250

54
uu Map u View (Map Orientation)
System Setup
View (Map Orientation)
H HOME u Settings u Navigation u Map tab u Vi ew
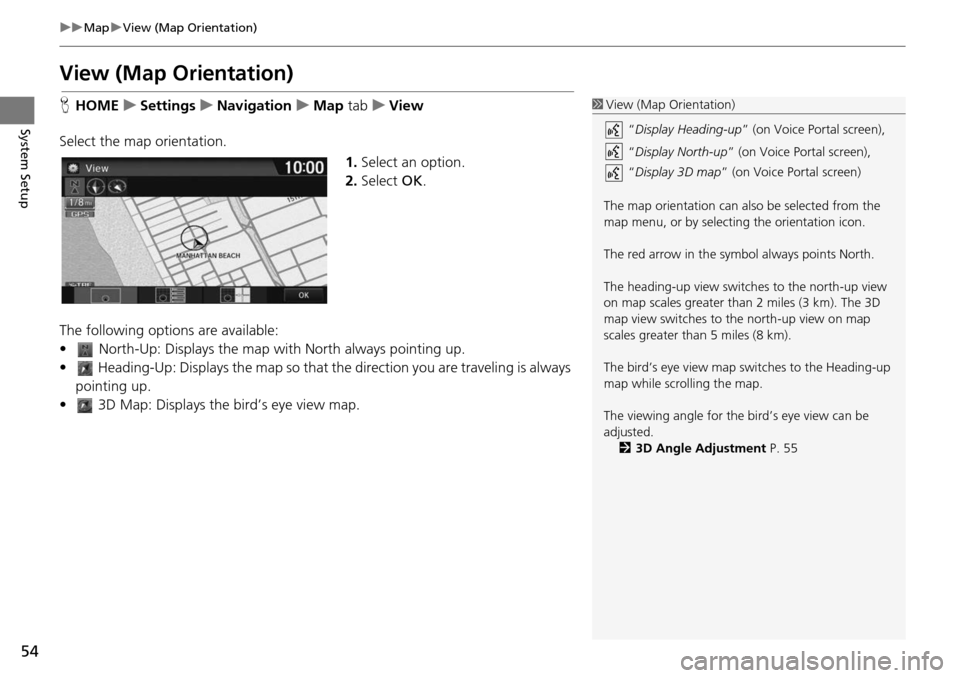
Select the map orientation. 1.Select an opt
ion.
2. Select OK.
The following options are available:
• North-Up: Displays the map with North always pointing up.
• Heading-Up: Displays the map so that the direction you are traveli
ng is always
pointing up.
• 3D Map: Displays th e bird’s eye view map.
1View (Map Orientation)
“Display Heading-up ” (on Voice Portal screen),
“ Display North-up” (on Voice Portal screen),
“ Display 3D map ” (on Voice Portal screen)
The map orientation can also be selected from the
map menu, or by selecting the orientation icon.
The red arrow in the symbol always points North.
The heading-up view switch es to the north-up view
on map scales greater than 2 miles (3 km). The 3D
map view switches to th e north-up view on map
scales greater than 5 miles (8 km).
The bird’s eye view map switches to the Heading-up
map while scrolling the map.
The viewing angle for the bird’s eye view can be
adjusted. 2 3D Angle Adjustment P. 55
Page 56 of 250
55
uu Map u 3D Angle Adjustment
System Setup
3D Angle Adjustment
H HOME u Settings u Navigation u Map tab u 3D Angle Adjustment
Adjust the viewing angle. 1.Select or to adjust the
angle.
2. Select OK.
u You can also slid e or flick
the
bar to adjust the angle.
Straight Line Guide
H HOME u Settings u Navigation u Map tab u Straight Line Guide
Set whether to display a straight guid el
ine to the destination or waypoint.
Select an option.
The following options are available:
• On (fac tory default): Displays the straight guideline on the map.
• Off : Disables the feature.
Page 57 of 250
56
uu Map u Current Location
System Setup
Current Location
H HOME u Settings u Navigation u Map tab u Current Location
Disp
lay and save your current location fo
r future use as a destination. The address,
latitude, longitude, and elevation of your current location are displayed.
1.Select Address Book .
2. Select the user to save the
lo
cation.
3. Edit the name, phone number,
an
d category.
2Address Book P. 28
4. Select OK.
1Current Location
“Display Current Location ” (on Voice Portal
screen)
You can also save the current location by saying
“Register the Current Location ”, or selecting the
vehicle icon on the map.
If you have PIN-protecte d your address book, enter
your PIN when prompted. Select OK. PINs are
optional. 2 PIN Numbers P. 34
Saving your current loca tion does not change or
cancel your current route.
Page 58 of 250
57
uu Map u Map Legend
Continued
System Setup
Map Legend
H HOME u Settings u Navigation u Map tab u Map Legend
See an overview of the map lines, areas, routes, traffic informatio n,
navigation icons.
Select an item.
u The system displays the map
legend.
1 Map Legend
A visual guide helps you see the map legend. 2 Map Screen Legend P. 10
2 Traffic Rerouting
TM P. 109
Page 62 of 250
61
uu Map u Off-road Tracking
System Setup
Off-road Tracking
H HOME u Settings u Navigation u Map tab u Off-road Tracking
The navigation system can be set to display white off-road tr
acking dots
(“breadcrumbs”) on the map screen whenever you drive into an area approximately
1/2 mile (800 m) away from a mapped road.
Select an option.
The following options are available:
• On : Th e system displays the white
tracking dots.
2Driving Off-road P. 103
• Off (factory default): Disables the feature.
1Off-road Tracking
To clear existing breadcrumbs, set Off-road
Tracking to Off , exit the Settings screen, and then
set Off-road Tracking to On again.
Page 63 of 250

62
uu Map u Correct Vehicle Position
System Setup
Correct Vehicle Position
H HOME u Settings u Navigation u Map tab u C orrect Vehicle Position
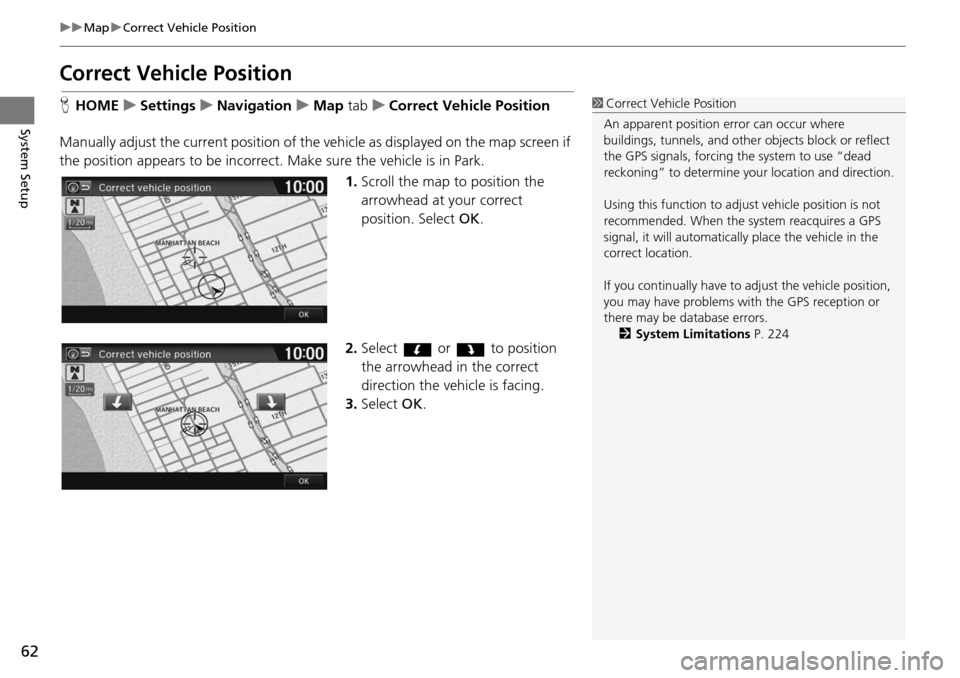
Manually adjust the current position of the vehicle as displaye
d on the map screen if
the position appears to be incorrect. Make sure the vehicle is in Park.
1.Scroll the map to position the
arrowhead at
your correct
position. Select OK.
2. Select or to position
the arrowhead in the correct
d i
rection the vehicle is facing.
3. Select OK.
1Correct Vehicle Position
An apparent position error can occur where
buildings, tunnels, and other objects block or reflect
the GPS signals, forcing the system to use “dead
reckoning” to determine your location and direction.
Using this function to adju st vehicle position is not
recommended. When the system reacquires a GPS
signal, it will automaticall y place the vehicle in the
correct location.
If you continually have to adjust the vehicle position,
you may have problems with the GPS reception or
there may be database errors. 2 System Limitations P. 224
Page 68 of 250
67
System Setup
Sound and Beep Settings
HHOME u Settings u System u Sound/Beep tab
Changes the system sound and beep settings. Select an item.
The following items are available:
• Volume: Adjusts
the navigation system volume level.
2Volume Setting P. 68
• Verbal Reminder : Turns the verbal reminders on and off.
On (factory default): Sets the verbal rem
inders.
Off : Disables the feature.
• Beep Volume : Se
ts the beep volume to 1, 2 (factory default), 3, or Off.
Page 71 of 250

70
System Setup
Clock Adjustment
HHOME u Settings u Clock/Info u Clock tab
Set the automatic adjustment of the sy st
em clock for daylight saving and
international time zones.
Select an item.
The following items are available:
• Clock/Wallpaper Type: Changes the clock display
type and the wallpaper type.
2Clock Type P. 71
• Clock Adjustment : Adjust the current time manually.
2Adjust Time P. 75
•Clock Format : Sets the time notation to either 12-hour clock ( 12H, factory
default) or 24-hour clock ( 24H).
• Auto Time Zone :
The navigation system automa tically adjusts the clock when
driving through different time zones.
On (factory default): Adjust s
the clock automatically.
Off : Disables
the feature.
• Auto Daylight : The
navigation system automati cally adjusts the clock (“spring
ahead” or “fall back” by one hour) when a daylight saving time change occurs.
On (factory default): Adjust s
the clock automatically.
Off : Disables
the feature.
• Clock Display :
Sets whether to display the clock at the header of the screen.
1Clock Adjustment
You can check the time a nd date from any screen
using voice commands.
2 Global Commands P. 234
Auto Time Zone
If you live and work in tw o different time zones, you
may want to turn Auto Time Zone to Off. When
driving near a time zone boundary, the displayed
time zone may fluctuat e between the two zone
times.
Auto Daylight
This function is not activated in areas that have not
adopted daylight saving time , even if you have set
Auto Daylight to On.