Page 257 of 294

.... N
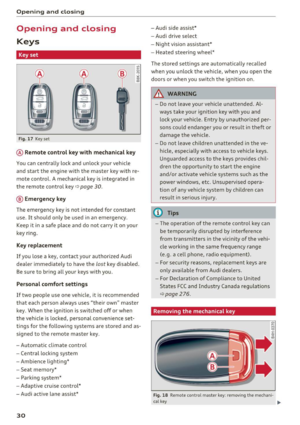
0 CJ '
M I.Cl ......
Removing
• Push the
pla stic clip (provided with the veh icle
tool kit) over the whe el bolt cap unti l the inner
retainers on th e clip align with the edge of the
cover.
• Remove the cap with the
pla stic cli p (vehicle
tool kit)
<=> fig . 203.
Refitting
• Place the caps over the wheel bolts and push
them back on.
The caps are to pro tect and keep the wheel bolts
clean.
loosening and tightening the wheel bolts
The wheel bolts must be loosened before raising
the vehicle.
Fig. 204 C hangin g a whee l: loo sening t he w heel bo lt s
loo sening
• Slide the
w heel wre nch onto the wheel bolt as
far as it w ill go.
• Take tight hold of the
end of the wrench handle
and turn the wheel bolts
count er-clockwi se
about one single tu rn in the d irection of arrow
<=> fig . 204.
Tightening
• Slide the wheel wrench onto the wheel bolt as
far as i t will go.
• Take t ight hold of the
end of the wrench handle
and turn each wheel bolt
clockwi se until it is
seated .
Emergen cy a ssis tanc e
A WARNING
--Do not use force or hurry when changing a
wheel -you can cause the vehicle to slip off
the jack and cause ser ious personal injuries .
-Do not loosen the wheel bo lts more than
one turn
befo re you raise the veh icle w ith
the jack . -You r isk an injury .
(D Tips
- Never use the hexagona l socket in the han
dle of the screwdr iver to loosen or tighten
the wheel bolts .
- If a wheel bo lt is very tight, you may find it
easier to loosen by ca refully pushing down
on the e nd of the wheel bolt wrench with
one foot only. As you do so, hold on to the
car to keep your balance and take care not
to slip.
Raising the vehicle
The vehicle must be lifted with the jack first be
fore the wheel can be removed.
F ig . 205 Sill pan els: markings
Fig . 206 Sill: p osit ion ing the veh icle jack
• Activate the veh icle jack mode * in the MMI:
!CARI function button> (C ar )* s ystems control .,.
255
Page 258 of 294

Emerg ency assis ta nce
button > Se rvicing & c heck s > Air sus p.: jac k
m od e> On .
.. Engage the pa rking b rake to prevent your vehi
cle from rolling unintentionally.
.. Move the
se lect or l eve r to pos it ion P .
.. Find the mark ing (impr int) on the sill that is
nearest the whee l that will be changed
¢ fig . 205 . Behind the marking, there is a lift
ing p oint on the sill for the vehicle jack.
.,. Vehicles with a sill: remove the cover from the
si ll before lifting the vehicle with a vehicle jack
¢ page 256.
.. Turn the vehi cle j ack located under the lift ing
point on the sill to ra ise the jack until its arm@
c> fig. 206 is located under the designated plas
tic mount
c> .&, c>(D.
.. Al ign the jack so that its arm@ c> fig. 206 en
gages in the des ignated lift ing po int i n the door
si ll and the movable base @ lies flat on the
ground. The base @ must be
vertical under the
l ift ing point @.
.. Wind the jack up further unt il the flat tire
comes off the ground
¢ .&, .
Position the veh icle jack on ly under the designat
ed lifting points on the sill
c> fig. 205 . There is ex
actly
one locat ion for each wheel. The jack must
not be positioned at any other location
c> .&. c>0 .
An un sta ble s urface under the jack can cause the
ve hicle to slip off the jack . Always provide a firm
base for the jack on the ground. If necessa ry
p lace a sturdy board or similar support under th e
jack . On
h ar d, s lippe ry surface s (such as tiles)
use a rubber mat or similar to prevent the jack
from slipping¢ &.
A WARNING
-
- You or your passengers could be injured
wh ile changing a wheel if you do not follow
these safety precaut ions:
- Position the vehicle jack only at the desig
nated lifting points and align the jack.
Otherw ise, the vehicle jack cou ld slip and
cause an injury if it does not have suffi
cient hold on the vehicle.
- A soft or unstable surface under the jack
may cause the vehicle to slip off the jack.
Always provide a firm base for the jack on
256
the ground. If necessary, use a sturdy board under the jack .
- On hard, slippery surface (such as tiles)
use a rubber mat or similar to prevent the
jack from slipping .
- To help prevent injury to yourself and your
passengers:
- Do not raise the veh icle until you are sure
the jack is securely engaged .
- Passengers must not remain in the vehicle
when it is jacked up.
- Make su re that passengers wait in a safe
place away from the vehicle and well away
from the road and traffic.
- Make sure jack position is correct, adjust
as necessary and then continue to ra ise
the jack .
- Changes in temperatu re or load can affect
the height of the vehicle.
(D Note
Do not lift the ve hicle by the si ll. Pos ition the
vehicle jack only at the des ignated l ift ing
po ints on the sill. Othe rwise, your veh icle will
be damaged.
(j) Tips
The vehicle jack mode* switches off automati
cally at speeds above 6 mph (10 km/h) .
Removing and installing the sill extension
cover
Appl ies to vehicles: with sill extension
F ig. 207 S ill: r em ovin g the cover
.,. Pull the cover down to remove it . c> fig. 207
.,. To install the cove r, insert it in the mount and
press it upwa rd until it clicks into place . The .,..
Page 259 of 294

.... N
0 CJ '
M I.Cl ......
cover must be flush with the surface of the sill
extension.
(D T ips
Some mode ls may also have a cover for the
rear vehicle lift point .
Taking the wheel off/installing the spare
Follow these instructions step-by-step for chang
ing the wheel.
Fig. 208 C hangin g a whee l: u sin g t he screwdrive r ha ndle
(wi th the b lade removed) to turn t he bo lts
F ig. 20 9 Ch an gin g a wheel: alignmen t pin insid e th e top
ho le
After you have loosened all wheel bol ts and
raised the vehicle off the ground, remove and re
place the whee l as fo llows:
Remo ving the wheel
• Use the he xagon al socket in the sc rewd river
ha ndle
to completely remove the topmost
wheel bolt and set it aside on a
clean surface
Q fig . 208.
• Screw the threaded end of the alignmen t pin
from the tool kit hand-tight into the empty bolt
hole
Q fig. 209 .
• Then remove the other whee l bolts as described
above .
Emergen cy a ssis tanc e
•Takeoff the whee l leaving the alignment pin in
the bolt hol e
Q0.
Putting on th e spare whe el
• Lift the spare whee l and carefu lly slide it over
t he alignment p in to g uide it in place
Q 0.
• Use the hexagonal socket in the screwdr iver
handle to screw in and tighten all wheel bolts
slightly .
.. Remove the alignment pin and insert and tight
en the remaining wheel bol t slight ly like the
rest.
• Turn the jack handle counter -clockw ise to lower
the vehicle unt il the jack is fully released .
• Use the wheel bo lt wrench to t ighten a ll wheel
bolts firmly
9 page 255. Tighten them cross
wise,
from one bo lt to the ( approx imately) op
posite one, to keep the wheel centered.
(D Note
When removing o r installing the wheel, the
rim co uld h it the brake rotor and damage t he
rotor . Work carefully and have a second per
son help you .
@ Tips
Never use the he xagonal socke t in the hand le
of the sc rewdriver to loosen or t ighten the
whee l bolts.
- Pull the reversible blade from the screwdr iv
er before you use the hexagona l socket in
the handle to t urn the whee l bolts .
- When mount ing tires with
unidirectional
tread design
make sure the tread pattern is
pointed the right way
Q page 258.
- T he wheel bolts shou ld be clean and easy to
turn. Check for dirt and corrosion on the mating surfaces of both the wheel and the
hub. Remove all dirt from these surfaces be
fore remounting the wheel.
257
Page 260 of 294

Emergency assistance
Tires with unidirectional tread design
Tires with unidirectional tread design must be
mounted with their tread pattern pointed in the
right direction .
Using a spare tire with a tread pattern
intended for use in a specific direction
When using a spare ti re with a tread pa tte rn in
tended fo r use in a spec ific d irection, p lease note
the following:
- The direct io n of rotat io n is marked by an arrow
o n the side of the tire.
- If the spare tire has to be installed in the incor
rect d irection, use the spare tire only tempora
rily s ince the tire w ill not be ab le to achieve its
opt imum pe rformance cha racter istics with re
gard to aq uaplaning, noise and we ar.
- We recommend that you pay particular atten
t ion to this fac t during wet weathe r and t hat
yo u ad just yo ur speed to m atch road condi
t ions.
- R eplace t he flat t ire wi th a new one a nd have it
i nsta lled on yo ur vehicle as soon as pos sible to
res to re t he handling advantages of a unidirec
tiona l tire .
Notes on wheel changing
Please read the information q page 238, New
tires or wheels
if you are going to use a spare tire
which is different from the tires on your vehicle.
After you change a tire:
- Check the tire pressure on the spare immedi
ately after installation .
- Have the wheel bolt tightening torque
che cked with a torque wrench as s oon as pos
sible by your authorized Audi dealer or a
qualified service station.
- With steel and alloy wheel rims , the wheel
bolts are correctly tightened at a torque of 90
ft lb
(120 Nm) .
- If you notice that the wheel bolt s are corroded
and difficult to turn while changing a tire ,
they should be replaced before you check the
tightening torque.
258
- Replace the flat tire with a new one and have
it installed on your vehicle as soon as possi
ble. Remount the wheel cover.
Until then , drive with extra care and at reduced
speeds.
_& WARNING
- If you are going to equip yo ur vehicle with
tires or r ims which differ from those which
were facto ry installed, then be sure to read
the information
q page 238, New tires or
wheels.
- Always make sure the damaged wheel or
eve n a flat tire and the jack and tool kit are
properly secured in the l uggage compart
men t and a re not loose in the passenger
compa rtme nt.
- In an accident or sudde n maneuver they
could fly forward, i njuring anyone i n the ve
hicle .
- Always s to re damaged wheel, jack and tools
secure ly in the luggage comp artment . Oth
e rwi se, in an a cci den t or sudden m aneuve r
t hey could
fly forwar d, causing injury to pas
sen gers in the veh icle.
-
Page 261 of 294

.... N
0 CJ '
M I.Cl ......
Fuses
Replacing fuses
A fuse that has blown will have metal strips that have burned through.
F ig . 2 10 Drive r's side o f the cockpit : cove r
The fuses a re located on front left and r ight of
the cockpit and beh in d the tri m on the right side
of the luggage compartmen t.
.,. Switch the ign ition and all electr ica l equipment
off .
.,. Check the following table to see which fuse be
longs to the equipment .
.,. Remove the approp ria te cove r.
.,. Remove the colore d plastic clip from the fuse
panel, if necessary ~
page 260, fig. 211. You
can dispose of the p lastic clip .
.,. Remove the clamp from the rear side of the
cover
C? fig . 210 .
.,. Remove the fuse us ing the clamp .
.,. Replace the b lown f use only with an identical
new one .
.,. Install the cover.
Fuse color identification
Color Current rating
in amps
Black 1
Purp le 3
Li ght b rown 5
Brown 7 .5
Red 10
Blue 15
Yellow 20
White o r transparent 25
Fuses
Color Current rating
in amps
green 30
orange 4 0
,&_ WARNING
= -D o not repair fuses and never rep lace a blown
fuse wit h one that has a higher amp rating.
This can cause damage to the e lectr ica l sys
tem and a fire.
(D Note
If a new fuse burns out again shortly after you have insta lled it, have the electrical system
checked as soon as poss ib le by an authorized
Audi dealer or authorized Audi Service Fac ili
ty .
Ci) Tips
-The following table does not list fuse loca
tions that are not used .
- Some of the equipment listed in the fo llow
ing tables applies on ly to certain model ver
sions or certa in optional equipment.
259
Page 262 of 294

Fuses
Driver side cockpit fuse
assignment
F ig. 211 Driver 's side of t he cockpit : fuse pa nel w it h plastic
clip
Fuse panel @ (black )
No . Equipment
Electromecha nica l powe r stee ring, trai ler
1 hitch, io nizer, sw itch st rip, sea t heat ing
(rear), ele ctromech an ical parking br ake
Horn, climate control system, Gateway,
2 automatic dimming interior rearv
iew mir-
ror
4 Parking aid, headlight range adjustment
5 Dynamic steering, Electron
ic Stabilization
Control (ESC)
6 Headlights
7 Adaptive cru ise control
8 Front passenger's seat senso rs, airbag
9 Gateway
1 0 E
ngine sound, night vision ass ist, garage
door opener (Homelink), parking aid
1 1 Video camera im age pro cessing
12 Headlights
1 3 Steeri ng col umn sw itch module
14 Term inal 15 ( luggage compartment)
260
Fuse panel @ (black)
15 Terminal 15 (engine compartment)
16 Starte r
Fuse panel @ (brown )
No. Equipment
1 Infotainment
2 Infotainmen t
3 F
ront passenger's seat
5 A
irbag, Elect ronic S tabiliza tion Con trol
( E SC)
6 Ant i- theft alarm system
7 Electromechanical pa rking brake
8 Inter io r li ghts
9
Windshie ld video camera heating, light/
rain sensor
10 Lumbar support (dr iver's seat)
11 Driver's seat
12 Elec tronic stab ilizati on con trol
13 Horn
1 4 H eadlights
15 Front seat heating
16 Dynamic stee ring
Fuse panel © (red)
No . Equipment
1 C lutch peda l
2 Fuel pump
3 Brake light sensor
4 AdB
lue (diese l eng ine)/engine aco ustics
5 Rear door
6 Fr
ont door
7 Electronic stab ili z at ion con trol
8 Windshie ld wiper motor
9 Headlight washer system
10 Inter
ior lig hting, climate control system
1 1 Headlights
12 Sunroof
Page 263 of 294

..... N
0 CJ '
M I.Cl ......
Front passenger side
cockpit fuse assignment
Fig. 212 Front passenger's sid e of t he cockpit fuse pane l
with plastic cl ip
Fuse panel @ (red)
No. Equipment
1 Infotainment, CD changer
2 Infotainment
(display)
Fuse panel@ (brown)
No . Equipment
1 Climate
control system
2 Climate control
system (blower)
3 Diagnostic interface
4 Electrical ignition lock
5 Electronic steering column lock
6 Steering column sw itch module
7 Power steering column adjustment
8 Light switch
9 Head-up display
10 I
nst rument cluster
1 1 Infotainment, DVD changer
Fuses
Luggage compartment
fuse assignment
Fig. 213 Luggage compartment: fuse panel with plastic
clip
Fuse panel @ (black )
No. Equipment
1 Tra
iler hitch/220 volt socket
2 Tra ile r hitch/climatized cup holder
3
Tra iler hitch/adjusting front passenger's
seat from the rear
4 Elec trom echan ica l parking brake
5 Electromec hanical parking brake
6 Front door (front passenger's side)
7 Rear exterior lighting
8 Central locking, closing aid
9 Seat heating (front)
1 1 Seat heating
(rear), climate control system
12 Tra iler hitch
Fuse panel @ (red)
No . Equipment
1 Left
safety belt tensioner
2 R ight safety belt tensioner
3 Ad Blue tank (diesel engine)/fuel pump
4 Ad Blue tank (diesel engine)/engine mount
(gasoline eng ine)
s
Sensor-controlled luggage compartment
lid
6 Air suspension, adaptive dampers
7 Rear door (front passenger's side)
8 Tail lights
9 Luggage compartmen t lid
261
Page 264 of 294
Fuses
Fuse panel@ (red )
10 Rear seat enterta inment
12
Rea r spo ile r (Sportbac k), t ilt/open sun-
roof, P anorama glass roof
Fuse panel © (brown)
No . Equipment
1 Infotainment
2 In fota inment
3
Infotainment , automatic d imm ing inter ior
rearv iew mir ror
s TV t uner
6 Tank leak detect io n system
7 Sockets
8 Par king heater
10 Lumba r su pport (front passenger's seat)
12 Infota inme nt
Fuse panel @ (black)
No . Equipment
Air suspens ion, adapt ive dampers, sport
l different ial, ele ctromechanical parking
brake
2 Clu tch pedal position senso r/automatic
transmission
3 Sea ts
4 Rear wiper (Avant)
s Side ass ist
6 E ngine sound
7 Info ta inment/so und amplifie r
8 Gateway
9 Sport differen tial
10 Climate cont rol system
11
T ire pressu re moni to ring sys te m /par king
he ater
12 Sta rt-Stop-System
Fuse panel © (black)
No . Equipment
1 Special p urpose vehicles/ rear seats
Fuse panel ® (black)
No. Equipment
1 Rear window de fogger
262