Page 17 of 248

The essentials
Side airbags* Fig. 18
Side airbag in driver seat. Fig. 19
Illustration of completely inflated side
airb ag
s
on the left side of the vehicle. The side airbags are located in the backrest
c
u
shion
s of the driver seat ››› Fig. 18 and the
front passenger seat as well as in the back-
rest of the side rear seats. The locations are
identified by the text “AIRBAG” in the upper
region of the backrests. In conjunction with the seat belts, the side
airbag sys
tem provides additional protection
for the upper body in the event of a severe
side collision ›››
page 61, The whys
and wherefores of seat belts .
In a side collision, the side airbags reduce
the risk of injury to passengers to the areas
of the body facing the impact. In addition to
their normal function of protecting the occu-
pants in a collision, the front and rear outer
seat belts also hold the passengers in the
event of a side collision; this is how these air-
bags provide maximum protection.
››› in Side airbags* on page 69 Head-protection airbags*
Fig. 20
Location of head-protection airbags. Fig. 21
Deployed head-protection airbags. The head-protection airbags are located on
both s
ide
s
in the interior above the doors
››› Fig. 20 and are identified with the text
“AIRBAG”.
In conjunction with the seat belts, the head-
protection airbag system gives the vehicle
occupants additional protection for the head
and upper body in the event of a severe side
collision ››› page 15.
››› in Curtain airbags* on page 70 15
Page 18 of 248

The essentials
Child seats Impor t
ant
information regarding the
front passenger's airbag Fig. 22
Passenger's side sun visor: airbag
s tic
k
er. Fig. 23
On the rear frame of the passenger
s ide door: airb
ag s
ticker.A sticker with important information about
the p
a
s
senger airbag is located on the pas- senger's sun visor and/or on the passenger
side door frame.
››› in Important information regarding
the front passenger's airbag on page 73
››› page 73 Possible ways to secure child seats
You can secure a child seat to the rear seat or
front
p
assenger seat in the following ways:
● Child seats in groups 0 to 3 c
an be secured
with a seat belt.
● Child seats for groups 0, 0+ and 1 can be
fa
stened without seatbelts, using the “ISO-
FIX” and Top Tether* system, using the “ISO-
FIX” and Top Tether* securing rings
››› page 17.
CategoryWeight
Seat locations
Front
passen- gerRear
outerRear
centre
Group 0<10 kgU*U/LU
Group
0+<13 kgU*U/LU
Group 19-18 kgU*U/LU
Group
2/315-36 kgU*UU Suitable for universal approved restrain-
ing sy
s
tems for use in this age category
(universal retention systems are those
fitted using the adult seat belt).
Move the front passenger seat as far
back as possible, as high as possible
and always disable the airbag.
Suitable for retention systems using the
“ISOFIX” and Top Tether* anchors.
The systems include the child restraint sys-
tem mounting with an upper retaining strap
(Top Tether) and lower anchoring points on
the seat.
››› in Safety instructions on page 74 U:
*:
L:
16
Page 19 of 248

The essentials
“ISOFIX” and Top Tether child seat
mou ntin
g sy
stem*Fig. 24
ISOFIX securing rings. Fig. 25
Top Tether* securing ring. Child seats with the “ISOFIX” or Top Tether*
sy
s
t
em can be secured quickly, easily and
safely on the rear outer seats.
When removing or fitting the child seat,
please be sure to follow the manufacturer's
instructions. ●
Move the r
ear seat as far to the rear as it
will go.
● Press the child seat onto the “ISOFIX” re-
taining rin
gs until the child seat can be heard
to engage. If the child seat is equipped with
Top Tether* anchor points, secure it to the
correspondent ring. Observe the manufactur-
er's instructions.
● Pull on both sides of the child seat to en-
sure th
at it is secure.
Two “ISOFIX” retaining rings are fitted on
each rear seat. In some vehicles, the rings
are secured to the seat frame and, in others,
they are secured to the rear floor. Access to
the “ISOFIX” rings is between the rear seat
backrest and the seat cushioning. The Top
Tether* rings are located at the rear of the
backrests of the rear seats (behind the seat
backrest or in the boot).
Child seats with the “ISOFIX” and Top Tether*
attachment system are available from Techni-
cal Services.
››› in Safety instructions on page 74 Starting the vehicle
Ignition loc k Fig. 26
See position on page 7-8 Switch ignition on: Place the key in the igni-
tion and s
t
ar
t the engine.
Locking and unlocking the steering wheel
● Engaging the steering wheel lock: Remove
the key fr
om the ignition and turn the wheel
until it locks. In vehicles with an automatic
gearbox, the gear lever must be in the P posi-
tion in order to remove the key. If necessary,
press the locking key on the selector lever
and release it again.
● Unlocking the steering wheel: Put the key
into the ignition and turn it
at the same time
as the steering wheel in the direction indica-
ted by the arrow. If it is not possible to turn
the steering wheel, it may be because it is
locked. » 17
Page 20 of 248

The essentials
Turning on/switching off the ignition, glow
p lug
s
reheating
● Switch ignition on: Turn the key to the 2position.
●
Switch ignition off. Turn the key to the 1position.
●
Diesel vehicles : The glo
w p
lugs reheat
when the ignition is switched on
Starting the engine
● Manual gearbox: press the clutch pedal all
the way
down and move the gearbox lever in-
to neutral.
● Automatic gearbox: Press the brake pedal
and move the sel
ector lever to the P position
or into N.
● Turn the key to the 3 position. The key au-
t om
atic
ally returns to the 2 position. Do not
pr e
s
s the accelerator.
Start-Stop System*
When you stop and release the clutch pedal,
the Start-Stop system* turns off the engine.
The ignition remains switched on.
››› in Introduction on page 153
››› page 153 Lights and visibility
Light sw
it
ch Fig. 27
See position on page 7-8 Turn the switch to the required position
› ›
›
Fig. 27.
Sym-
bolIgnition switch-
ed offIgnition is switch-
ed on
Fog lights, dipped
beam and side
lights off.Light off or daytime
driving light on.
The “Coming home”
and “Leaving
home” guide lights
may be switched
on.Automatic control of
dipped beam and day-
time driving light.
Side light on.
Dipped beam head-
light offDipped beam switch-
ed on. Fr
ont fog lights:
mo
v
e the switch to the
first position, from positions , or .
Rear fog light: move the switch completely
from positions , or .
Switching off fog lights: Push the switch or
turn it to the position.
››› in Introduction on page 121
››› page 121 Turn signal and main beam lever
Fig. 28
See position on page 7-8 More the lever to the required position:
Right t
urn s
ignal: Right-hand parking
light (ignition switched off).
1 18
Page 21 of 248

The essentials
Left turn signal: Left-hand parking light
(ignition sw it
c
hed off).
Main beam switched on: Control lamp
lit up on the instrument panel.
Headlight flasher: lit up when the lever is
pushed. Control lamp lit up.
Lever all the way down to switch it off.
››› page 123 Hazard warning lights
Fig. 29
See position on page 7-8 Switched on, for example:
● When approaching a traffic jam
● In an emergency
● The vehicle has broken down
● When towing or being towed
2 3
4
›››
page 126 Interior lights
Fig. 30
Detail of headliner: version 1 Fig. 31
Detail of headliner: version 2
KnobFunction
Switches interior lights off.
KnobFunction
Switches interior lights on.
Switches door contact control on (central po-
sition).
The interior lights come on automatically
when the vehicle is unlocked, a door is
opened or the key is removed from the igni-
tion.
The lights go off a few seconds after all the
doors are closed, the vehicle is locked or the
ignition is switched on.
Turning the reading light on and off
›››
page 127 Windscreen wipers and window wiper
b
l
a
de Fig. 32
Operating the windscreen wiper and
r e
ar w
iper » 19
Page 22 of 248
The essentialsMore the lever to the required position:
0
Windscreen wiper off.
1
Windscreen wipers interval wipe.
Using the control
››› Fig. 32 A adjust the
interval (vehicles without rain sensor), or
the sensitivity of the rain sensor.
2 Slow wipe.
3
Continuous wipe.
4
Short wipe. Brief press, short clean. Hold
the lever down for more time to increase
the wipe frequency.
More the lever to the required position:
5
Automatic wipe. The windscreen washer
function is activated by pushing the lever
forwards, and simultaneously the wind-
screen wipers start.
6
Interval wipe for rear window. The wiper
will wipe the window approximately every
six seconds.
7
The rear window wash function is activa-
ted by pressing the lever, and the rear wip-
er starts simultaneously.
››› in Introduction on page 129
›››
page 129
››› page 53 Easy Connect
CAR menu settin g
s
(Setup)Fig. 33
See position on page 7-8 Fig. 34
See position on page 7-820
Page 23 of 248

The essentials
To select the settings menus, press the Easy
C onnect
button and the
Set
up function
b utt
on.
The act
ual number of menus available and
the name of the various options in these me-
nus will depend on the vehicle’s electronics
and equipment.
● Switch the ignition on. ●
If the Infot ainment System is off, switch it
on.
● Press the system's MENU button and then
the sy s
t
em's
› ››
Fig. 33
button or but-
t on t
o g
o to the CAR menu ››› Fig. 34.
● Press the function button Setup to open the
menu Vehicle settings › ›
›
Fig. 34.
● To select a function in the menu, press the
desir
ed button. When you press the menu button, the last se-
lected menu w
ill always be displayed.
When the function button check box is activa-
ted , the function is active.
Any changes made using the settings menus
are automatically saved on closing the BACK menus.
MenuSubmenuPossible settingDescription
ESC system–Activation of the Electronic Stability Programme (ESC)›››
page 167
TyresTyre pressure monitoringTyre pressure storing (Calibration)››› page 219
Winter tyresActivation and deactivation of the speed warning. Setting the speed warning value››› page 219
Driver assistance
Front Assist (monitoring sys-
tem)Activation/deactivation: monitoring system, pre-warning, distance warning display››› page 177
City emergency braking func-
tionActivation/deactivation of the City emergency braking function.››› page 181
Tiredness detectionActivation/deactivation››› page 184
Parking and ma-
noeuvringParkPilotAutomatically activate, front volume, front sound settings, rear volume, rear sound settings,
adjust volume››› page 168
Vehicle lights
Vehicle interior lightingInstrument and switch lighting, footrest lighting››› page 127
Coming home/Leaving home
functionStart time for “Coming home” function, start time for “Leaving home” function››› page 125
Daytime driving lightActivation/deactivation››› page 122
Mirrors/wind‐
screen wipersRear vision mirrorsSynchronised regulation, lower the rear-view mirror when reversing, fold in after parking››› page 130
Windscreen wipersAutomatic windscreen wipers, wipe when reversing››› page 129» 21
Page 24 of 248

The essentialsMenuSubmenuPossible settingDescription
Opening and clos-
ingRadio-operated remote controlConvenience open function››› page 109
Central locking systemUnlocking doors, automatic locking/unlocking, audible confirmation››› page 112
Multifunction
display–
Current consumption, average consumption, volume to fill up, convenience equipment,
ECOAdvice, journey duration, distance travelled, digital speed display, average speed,
speeding warning, oil temperature, coolant temperature, restore data “from start”, restore
data “total calculation”
››› page 22
Date and time–Time source, set the time, automatic summer time setting, select time zone, time format, set
the date, date format–
Measurement units–Distance, speed, temperature, volume, consumption–
Service–Chassis number, date of next SEAT service inspection, date of next oil change service››› page 30
Factory settings–All settings can be reset: driver assistance, parking and manoeuvring, lights, rear view mir-
rors and windscreen wipers, opening and closing, multi-function display–
››› in CAR menu (Setup) on page 104
›››
page 104 Driver information system
Intr oduction With the ignition switched on, it is possible
to r
e
ad the different functions of the display
by scrolling through the menus. In vehicles with multifunction steering wheel,
the multif
u
nction display can only be operat-
ed with the steering wheel buttons.
The number of menus displayed on the in-
strument panel will vary according to the ve-
hicle electronics and equipment.
A specialised workshop will be able to pro-
gramme or modify additional functions, ac-
cording to the vehicle equipment. SEAT rec-
ommends visiting a SEAT Official Service.
Some menu options can only be read when
the vehicle is at a standstill.
As long as a priority 1 warning is displayed, it
will not be possible to read the menus. Some
warning messages can be confirmed and made to disappear with the windscreen wiper
lever b
utton or the multifunction steering
wheel button.
The information system also provides the fol-
lowing information and displays (depending
on the vehicle's equipment):
Driving data ››› page 26
■ Vehicle status
■ MFD from departure
■ MFD from refuelling
■ MFD total calculation
Assist systems ››› table on page 24
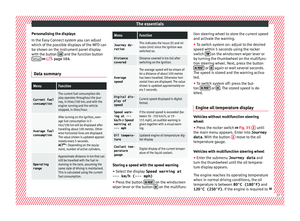
■ Reverse (optional) 22