2015 Peugeot 208 ESP
[x] Cancel search: ESPPage 80 of 341
78
208_en_Chap04_confort_ed01-2015
A setting around 21 enables you to obtain an
optimum level of comfort. Depending on your
requirements, a setting between 18 and 24 is
usual.
In addition, it is recommended that you avoid a
left /right setting difference of more than 3.
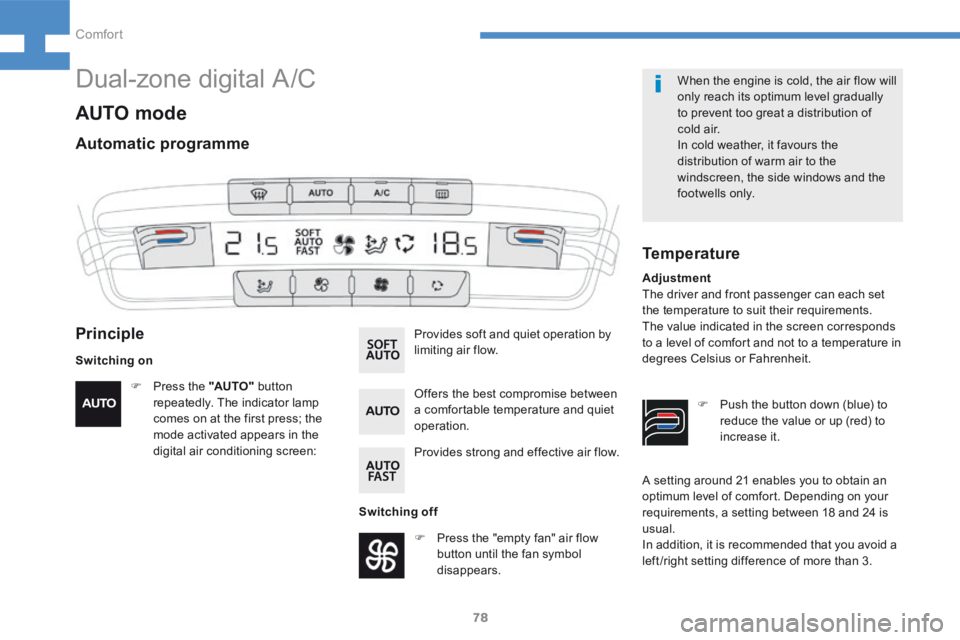
Temperature
Adjustment
The driver and front passenger can each set
the temperature to suit their requirements.
The value indicated in the screen corresponds
to a level of comfort and not to a temperature in
degrees Celsius or Fahrenheit.F Push the button down (blue) to
reduce the value or up (red) to
increase it.
Dual-zone digital A /C
AUTO mode
Switching on When the engine is cold, the air flow will
only reach its optimum level gradually
to prevent too great a distribution of
c o l d a i r.
In cold weather, it favours the
distribution of warm air to the
windscreen, the side windows and the
footwells only.
Offers the best compromise between
a comfortable temperature and quiet
operation. Provides soft and quiet operation by
limiting air flow.
Provides strong and effective air flow.
F
Press the "AUTO" button
repeatedly. The indicator lamp
comes on at the first press; the
mode activated appears in the
digital air conditioning screen:
Automatic programme
Principle
Switching off
F Press the "empty fan" air flow
button until the fan symbol
disappears.
Comfort
Page 84 of 341
82
208_en_Chap04_confort_ed01-2015
Reinitialisation
Following reconnection of the battery, the
safety anti-pinch function must be reinitialised.
The safety anti-pinch is not active during these
operations:
- lower the window completely, then raise
it; it will rise in steps of a few centimetres
each time the switch is pressed. Repeat
the operation until the window closes
completely,
- press and hold the switch upwards for
at least one second after reaching this
position, window closed. Always remove the key when leaving
the vehicle, even for a short time.
In the event of contact during operation
of the windows, you must reverse the
movement of the window. To do this,
press the switch concerned.
When operating the passenger electric
window controls, the driver must ensure
that no one prevents the correct closing
of the windows.
The driver must ensure that passengers
use the electric windows correctly.
Be aware of children when operating
the windows.
Advice
Inhibition
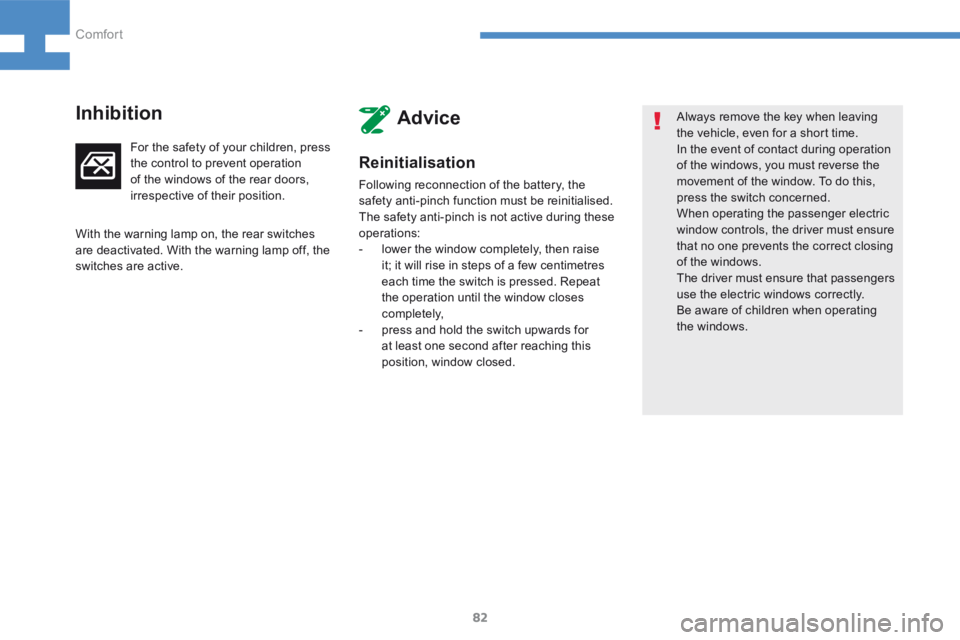
For the safety of your children, press
the control to prevent operation
of the windows of the rear doors,
irrespective of their position.
With the warning lamp on, the rear switches
are deactivated. With the warning lamp off, the
switches are active.
Comfort
Page 88 of 341
86
208_en_Chap04_confort_ed01-2015
Maintenance
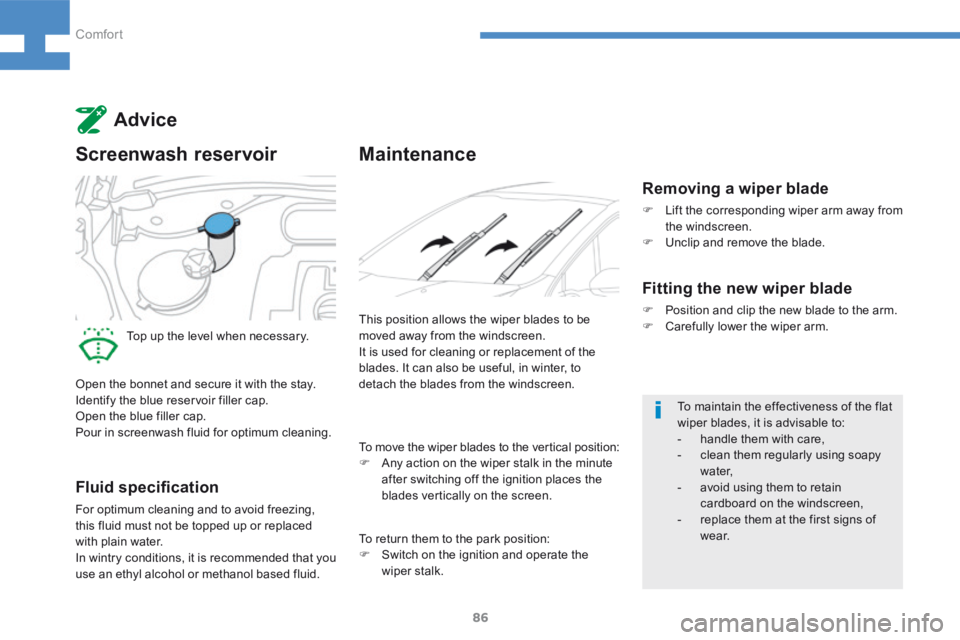
This position allows the wiper blades to be
moved away from the windscreen.
It is used for cleaning or replacement of the
blades. It can also be useful, in winter, to
detach the blades from the windscreen.To maintain the effectiveness of the flat
wiper blades, it is advisable to:
- handle them with care,
- clean them regularly using soapy
water,
- avoid using them to retain
cardboard on the windscreen,
- replace them at the first signs of
w e a r.
To move the wiper blades to the vertical position:
F
Any action on the wiper stalk in the minute
after switching off the ignition places the
blades vertically on the screen.
Advice
Screenwash reservoir
Top up the level when necessary.
Open the bonnet and secure it with the stay.
Identify the blue reservoir filler cap.
Open the blue filler cap.
Pour in screenwash fluid for optimum cleaning.
Fluid specification
For optimum cleaning and to avoid freezing,
this fluid must not be topped up or replaced
with plain water.
In wintry conditions, it is recommended that you
use an ethyl alcohol or methanol based fluid.
Removing a wiper blade
F Lift the corresponding wiper arm away from
the windscreen.
F Unclip and remove the blade.
Fitting the new wiper blade
F Position and clip the new blade to the arm.
F Carefully lower the wiper arm.
To return them to the park position:
F Switch on the ignition and operate the
wiper stalk.
Comfort
Page 92 of 341
AR
BG
НИКОГА НЕ инсталирайте детско столче на седалка с АКТИВИРАНА предна ВЪЗДУШНА ВЪЗГЛАВНИЦ А. Това може да причини
СМЪРТ или СЕРИОЗНО НАРАНЯВАНЕ на детето.
CSNIKDY neumisťujte dětské zádržné zařízení orientované směrem dozadu na sedadlo chráněné AKTIVOVANÝM čelním AIRBAGEM. Hrozí
nebezpečí SMRTI DÍTĚTE nebo VÁ ŽNÉHO ZR ANĚNÍ.
DABrug ALDRIG en bagudvendt barnestol på et sæde, der er beskyttet af en AKTIV AIRBAG. BARNET risikerer at blive ALVORLIGT
K VÆSTET eller DR ÆBT.
DEMontieren Sie auf einem Sitz mit AKTIVIERTEM Front-Airbag NIEMALS einen Kindersitz oder eine Babyschale entgegen der
Fahrtrichtung, das Kind könnte schwere oder sogar tödliche Verletzungen erleiden.
ELΜη χρησιμοποιείτε ΠΟΤΕ παιδικό κάθισμα με την πλάτη του προς το εμπρός μέρος του αυτοκινήτου, σε μια θέση που προστατεύεται από
ΜΕΤΩΠΙΚΟ αερόσακο που είναι ΕΝΕΡΓΟΣ. Αυτό μπορεί να έχει σαν συνέπεια το ΘΑΝΑΤΟ ή το ΣΟΒΑΡΟ ΤΡΑΥΜΑΤΙΣΜΟ του ΠΑΙΔΙΟΥ
ENNEVER use a rear ward facing child restraint on a seat protected by an ACTIVE AIRBAG in front of it, DEATH or SERIOUS INJURY to the
CHILD can occur
ESNO INSTALAR NUNCA un sistema de retención para niños de espaldas al sentido de la marcha en un asiento protegido mediante un
AIRBAG frontal ACTIVADO, ya que podría causar lesiones GR AVES o incluso la MUERTE del niño.
ETÄrge MITTE KUNAGI paigaldage “seljaga sõidusuunas“ lapseistet juhi kõrvalistmele, mille ESITURVAPADI on AKTIVEERITUD.
Tur vapadja avanemine võib last TÕSISELT või ELUOHTLIKULT vigastada.
FIÄLÄ KOSK A AN aseta lapsen tur vaistuinta selkä ajosuuntaan istuimelle, jonka edessä suojana on käyttöön aktivoitu TURVAT Y YNY. Sen
laukeaminen voi aiheuttaa LAPSEN KUOLEMAN tai VAK AVAN LOUKK A ANTUMISEN.
FRNE JAMAIS installer de système de retenue pour enfants faisant face vers l’arrière sur un siège protégé par un COUSSIN GONFLABLE
frontal ACTIVÉ.
Cela peut provoquer la MORT de l’ENFANT ou le BLESSER GR AVEMENT
HRNIK ADA ne postavljati dječju sjedalicu leđima u smjeru vožnje na sjedalo zaštićeno UKLJUČENIM prednjim ZR AČNIM JASTUKOM. To bi
moglo uzrokovati SMRT ili TEŠKU OZLJEDU djeteta.
HUSOHA ne használjon menetiránynak háttal beszerelt gyermekülést AKTIVÁLT (BEK APCSOLT) FRONTLÉGZSÁKK AL védett ülésen. Ez a
gyermek HALÁLÁT vagy SÚLYOS SÉRÜLÉSÉT okozhatja.
ITNON installare MAI seggiolini per bambini posizionati in senso contrario a quello di marcia su un sedile protetto da un AIRBAG frontale
ATTIVATO. Ciò potrebbe provocare la MORTE o FERITE GR AVI al bambino.
LTNIEK ADA neįrenkite vaiko prilaikymo priemonės su atgal atgręžtu vaiku ant sėdynės, kuri saugoma VEIKIANČIOS priekinės ORO
PAGALVĖS. Išsiskleidus oro pagalvei vaikas gali būti MIRTINAI arba SUNKIAI TR AUMUOTAS.
LVNEK AD NEuzstādiet uz aizmuguri vērstu bērnu sēdeklīti priekšējā pasažiera sēdvietā, kurā ir AKTIVIZĒTS priekšējais DROŠĪBAS GAISA
S P I LV E N S .
Tas var izraisīt BĒRNA NĀVI vai radīt NOPIETNUS IEVAINOJUMUS.
90
208_en_Chap04_confort_ed01-2015
Comfort
Page 109 of 341
107
208_en_Chap04_confort_ed01-2015
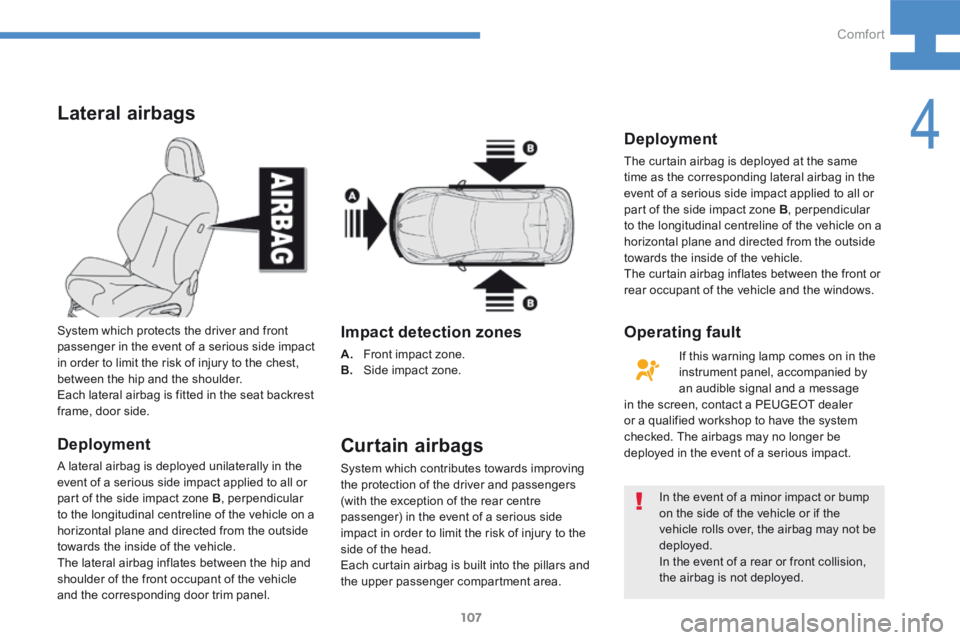
Lateral airbags
Deployment
A lateral airbag is deployed unilaterally in the
event of a serious side impact applied to all or
part of the side impact zone B, perpendicular
to the longitudinal centreline of the vehicle on a
horizontal plane and directed from the outside
towards the inside of the vehicle.
The lateral airbag inflates between the hip and
shoulder of the front occupant of the vehicle
and the corresponding door trim panel. System which protects the driver and front
passenger in the event of a serious side impact
in order to limit the risk of injury to the chest,
between the hip and the shoulder.
Each lateral airbag is fitted in the seat backrest
frame, door side.
Impact detection zones
A. Front impact zone.
B. Side impact zone.
Curtain airbags
System which contributes towards improving
the protection of the driver and passengers
(with the exception of the rear centre
passenger) in the event of a serious side
impact in order to limit the risk of injury to the
side of the head.
Each curtain airbag is built into the pillars and
the upper passenger compartment area. In the event of a minor impact or bump
on the side of the vehicle or if the
vehicle rolls over, the airbag may not be
deployed.
In the event of a rear or front collision,
the airbag is not deployed.
Deployment
The curtain airbag is deployed at the same
time as the corresponding lateral airbag in the
event of a serious side impact applied to all or
part of the side impact zone B
, perpendicular
to the longitudinal centreline of the vehicle on a
horizontal plane and directed from the outside
towards the inside of the vehicle.
The curtain airbag inflates between the front or
rear occupant of the vehicle and the windows.
If this warning lamp comes on in the
instrument panel, accompanied by
an audible signal and a message
in the screen, contact a PEUGEOT dealer
or a qualified workshop to have the system
checked. The airbags may no longer be
deployed in the event of a serious impact.
Operating fault
4
Comfort
Page 112 of 341
110
208_en_Chap05_conduite_ed01-2015
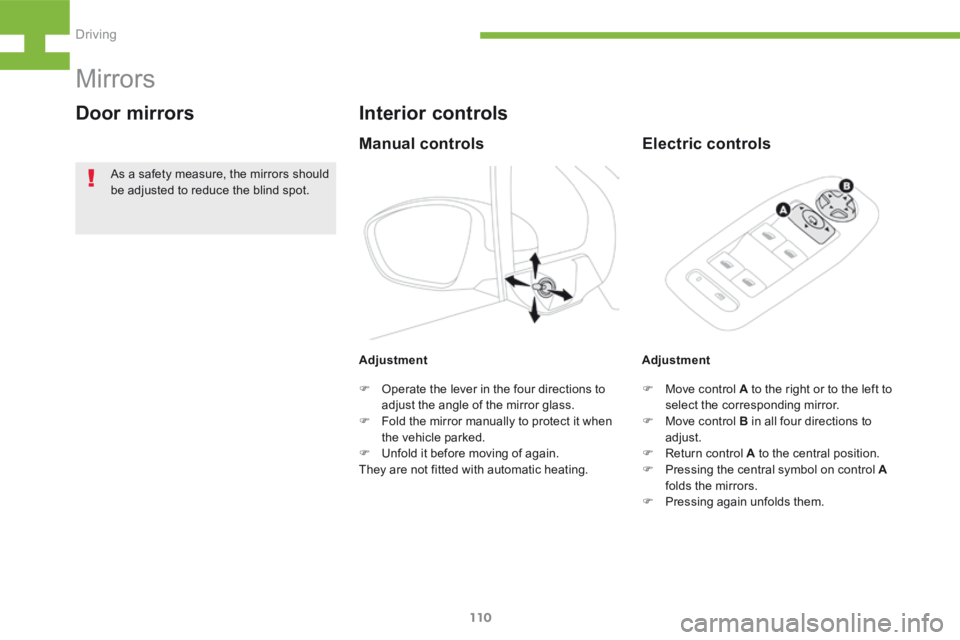
Mirrors
Door mirrors
Adjustment
Interior controls
Electric controls
F Move control A to the right or to the left to
select the corresponding mirror.
F Move control B in all four directions to
adjust.
F Return control A to the central position.
F Pressing the central symbol on control A
folds the mirrors.
F Pressing again unfolds them.
Adjustment
Manual controls
F
Operate the lever in the four directions to
adjust the angle of the mirror glass.
F Fold the mirror manually to protect it when
the vehicle parked.
F Unfold it before moving of again.
They are not fitted with automatic heating.
As a safety measure, the mirrors should
be adjusted to reduce the blind spot.
Driving
Page 118 of 341
116
208_en_Chap05_conduite_ed01-2015
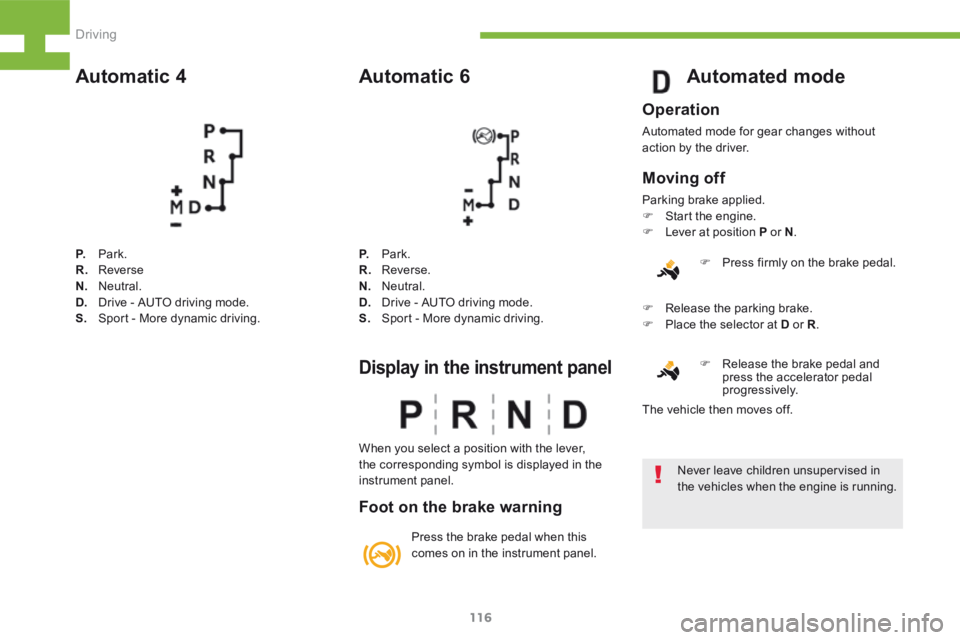
Automatic 4
P. Park.
R. Reverse
N. Neutral.
D. Drive - AUTO driving mode.
S. Sport - More dynamic driving.
Automatic 6
P. Park.
R. Reverse.
N. Neutral.
D. Drive - AUTO driving mode.
S. Sport - More dynamic driving.
Display in the instrument panel
Foot on the brake warning
When you select a position with the lever,
the corresponding symbol is displayed in the
instrument panel.
Press the brake pedal when this
comes on in the instrument panel.
Automated mode
Operation
Automated mode for gear changes without
action by the driver.
Moving off
Parking brake applied.
F Start the engine.
F Lever at position P or N .
F Press firmly on the brake pedal.
F Release the brake pedal and
press the accelerator pedal
progressively.
F
Release the parking brake.
F Place the selector at D or R .
The vehicle then moves off. Never leave children unsupervised in
the vehicles when the engine is running.
Driving
Page 123 of 341
121
208_en_Chap05_conduite_ed01-2015
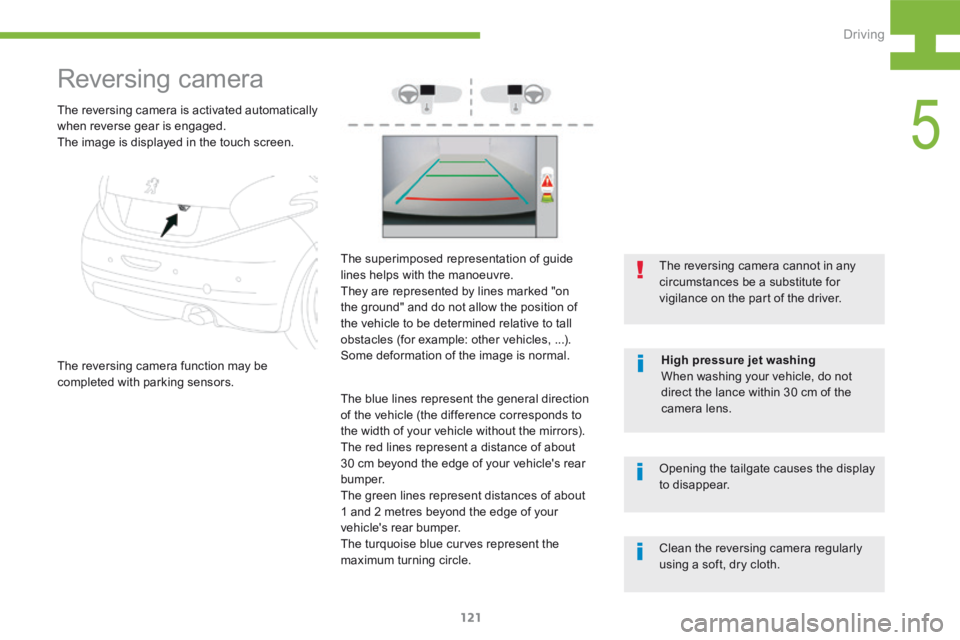
Reversing camera
The reversing camera function may be
completed with parking sensors.The reversing camera cannot in any
circumstances be a substitute for
vigilance on the part of the driver.
The superimposed representation of guide
lines helps with the manoeuvre.
They are represented by lines marked "on
the ground" and do not allow the position of
the vehicle to be determined relative to tall
obstacles (for example: other vehicles, ...).
Some deformation of the image is normal.
High pressure jet washing
When washing your vehicle, do not
direct the lance within 30 cm of the
camera lens.
The reversing camera is activated automatically
when reverse gear is engaged.
The image is displayed in the touch screen.
The blue lines represent the general direction
of the vehicle (the difference corresponds to
the width of your vehicle without the mirrors).
The red lines represent a distance of about
30 cm beyond the edge of your vehicle's rear
b u m p e r.
The green lines represent distances of about
1 and 2 metres beyond the edge of your
vehicle's rear bumper.
The turquoise blue curves represent the
maximum turning circle. Opening the tailgate causes the display
to disappear.
Clean the reversing camera regularly
using a soft, dry cloth.
5
Driving