Page 5 of 341

3
208_en_Chap00a_sommaire_ed01-2015
Fittings 161
Fitting roof bars 164
Towing a trailer 165
To w i n g 16 7
Accessories 169
Fittings
General information 174
B o n n et 175
We i g ht s 179
Fuel tank 180
BlueHDi and AdBlue
® additive 185
Battery 190
Fuses 193
Triangle 199
Under-inflation 200
Temporary puncture repair kit 203
Spare wheel 208
Advice 215
Dimensions 217
Identification markings 219
Practical information
Emergency call 220
Assistance call 221
7-inch touch screen 223
Audio system / Bluetooth 287
Audio system 307
Audio equipment and telematics
Alphabetical index
Direction indicators 144
Hazard warning lamps 144
Lighting 145
Automatic illumination of headlamps 149
LED lamps 150
Daytime running lamps 150
Headlamp adjustment 152
Cornering lighting 153
Changing a bulb 154
Lighting and signalling Key
Warning
This symbol marks warnings which it is
essential to observe for your own safety,
for the safety of others or to avoid any risk
of damaging your vehicle.
InformationThis symbol draws your attention to
additional information for better use of
your vehicle.
Protection of the environmentThis symbol accompanies advice relating
to protection of the environment.
AdviceThis symbol indicates a reminder of
practical information.
Section identificationColoured blocks separate and identify each
section.
Start
Heading
End
Contents
Page 12 of 341
10
208_en_Chap01_vue-ensemble_ed01-2015
Underbonnet view
Identification markings 219
Dimensions 217-218
Changing bulbs
154-160
- front
- rear Running out of fuel, Diesel
184
Opening the bonnet 175
Under the bonnet, petrol 176
Under the bonnet, Diesel 177
Petrol engines 174, 178
Diesel engines 174, 17912V bat ter y
19 0 -192
Load reduction, economy mode 60
Engine compartment fuses 193-194, 198
Dashboard fuses 193-197
Petrol weights 174, 178
Diesel weights 174, 179
AdBlue
® additive
185 -189
C h e c k i n g l eve l s 176 -17 7
- oil
- brake fluid
- coolant
- screenwash fluid
- additive (HDi Diesel AdBlue
®)
Checks and maintenance 181, 215-216
- air filter
- oil, oil filter
- particle filter (Diesel)
- brake fluid
- brake pads / discs
Over view
Page 172 of 341

170
208_en_Chap07_ Amenagements_ed01-2015
Installation of radio
communication
transmitters
Before installing any after-market radio
communication transmitter, you can
contact a PEUGEOT dealer for the
specification of transmitters which can
be fitted (frequency, maximum power,
aerial position, specific installation
requirements), in line with the Vehicle
Electromagnetic Compatibility
Directive (2004/104/EC). Depending on the legislation in force in
the country, certain safety equipment
may be compulsory: high visibility
safety vests, warning triangles,
breathalyzers, spare bulbs, spare fuses,
fire extinguisher, first aid kit, mud flaps
at the rear of the vehicle.
By visiting a PEUGEOT dealer, you can also
obtain products for cleaning and maintenance
(exterior and interior) - including ecological
products in the "TECHNATURE*" range,
topping up products (screenwash...), touch-up
pens and paint aerosols for the exact colour of
your vehicle, refills (cartridge for the temporary
puncture repair kit...), ...
"Multimedia":
audio systems, portable satellite navigation
systems, semi-integral support for portable
satellite navigation system, hands-free kit, CD
changer, speakers, DVD player (depending on
version), connection kit for MP3 or CD player,
USB Box, Wi-Fi on-board...
* The "TECHNATURE" range comprises
products for the care and maintenance of
your vehicle, recommended and approved by
P E U G E O T.
Fittings
Page 178 of 341
176
208_en_Chap08_Informations-pratiques_ed01-2015
The various caps and covers allow access for
checking the levels of the various fluids and for
replacing certain components.
Petrol
1. Screenwash reservoir.
2. Coolant header tank.
3. Brake fluid reservoir.
4. Battery / Fuses.
5. Fusebox.
6. A i r f i l t e r.
7. Engine oil dipstick.
8. Engine oil filler cap.
Take care when working under the
bonnet, as certain areas of the engine
may be extremely hot (risk of burns) and
the cooling fan could start at any time
(even with the ignition off).
Checking levels
Check the levels regularly, in line with the
manufacturer's service schedule. Top them up
if necessary, unless otherwise indicated.
If a level drops significantly, have the
corresponding system checked by a PEUGEOT
dealer or a qualified workshop.
Practical information
Page 179 of 341
177
208_en_Chap08_Informations-pratiques_ed01-2015
The various caps and covers allow access for
checking the levels of the various fluids, for
replacing certain components and for priming
the fuel system.
Diesel
1. Screenwash reservoir.
2. Coolant header tank.
3. Brake fluid reservoir.
4. Battery / Fuses.
5. Fusebox.
6. A i r f i l t e r.
7. Engine oil dipstick.
8. Engine oil filler cap.
9. Priming pump (depending on engine).
The AdBlue
® additive tank filler is located in the
boot below the spare wheel.
Take care when working under the
bonnet, as certain areas of the engine
may be extremely hot (risk of burns) and
the cooling fan could start at any time
(even with the ignition off).
Checking levels
Check the levels regularly, in line with the
manufacturer's service schedule. Top them up
if necessary, unless otherwise indicated.
If a level drops significantly, have the
corresponding system checked by a PEUGEOT
dealer or a qualified workshop.
8
Practical information
Page 195 of 341
193
208_en_Chap08_Informations-pratiques_ed01-2015
Fuses
Changing
For the dashboard:
F Unclip the cover by pulling at the top left,
then right.
F Disengage the cover completely and turn it
ove r.
F Remove the carrier on which the tweezer is
fitted.
The extraction tweezer is fitted to the back of
the dashboard or glove box fusebox cover.
Access to tooling
For the glove box:
F
Open the glove box lid.
F Unclip the fusebox cover by pulling at top
right.
F Disengage the cover fully and turn it over.
F Remove the back of the carrier on which
the tweezer is fitted.
8
Practical information
Page 196 of 341

194
208_en_Chap08_Informations-pratiques_ed01-2015
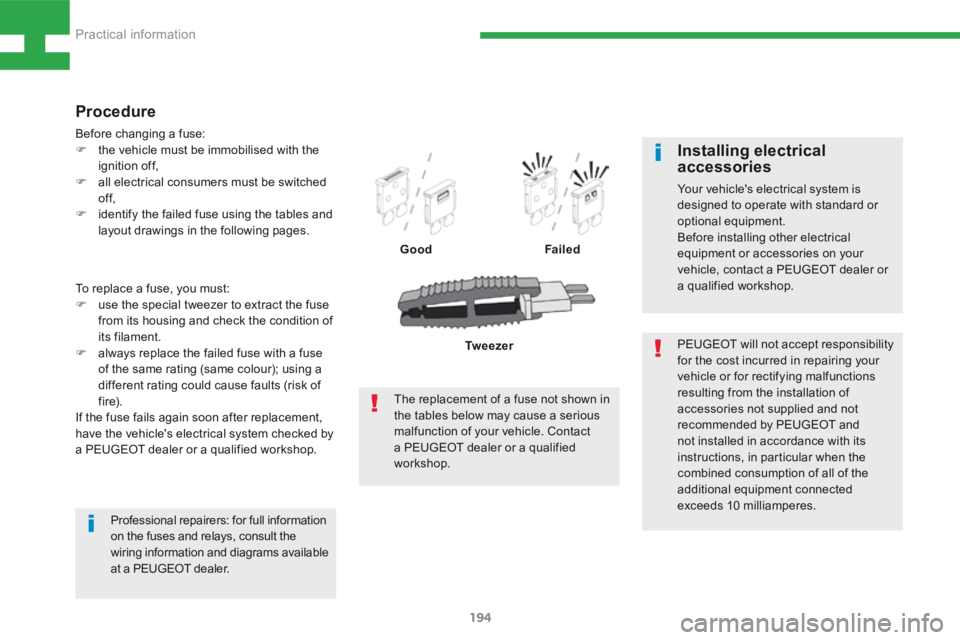
To replace a fuse, you must:
F use the special tweezer to extract the fuse
from its housing and check the condition of
its filament.
F always replace the failed fuse with a fuse
of the same rating (same colour); using a
different rating could cause faults (risk of
f i r e).
If the fuse fails again soon after replacement,
have the vehicle's electrical system checked by
a PEUGEOT dealer or a qualified workshop.
Procedure
Before changing a fuse:
F the vehicle must be immobilised with the
ignition off,
F all electrical consumers must be switched
of f,
F identify the failed fuse using the tables and
layout drawings in the following pages.
GoodFailed
PEUGEOT will not accept responsibility
for the cost incurred in repairing your
vehicle or for rectifying malfunctions
resulting from the installation of
accessories not supplied and not
recommended by PEUGEOT and
not installed in accordance with its
instructions, in particular when the
combined consumption of all of the
additional equipment connected
exceeds 10 milliamperes.
Installing electrical
accessories
Your vehicle's electrical system is
designed to operate with standard or
optional equipment.
Before installing other electrical
equipment or accessories on your
vehicle, contact a PEUGEOT dealer or
a qualified workshop.
The replacement of a fuse not shown in
the tables below may cause a serious
malfunction of your vehicle. Contact
a PEUGEOT dealer or a qualified
workshop. Tw e e z e r
Professional repairers: for full information
on the fuses and relays, consult the
wiring information and diagrams available
at a PEUGEOT dealer.
Practical information
Page 200 of 341
198
208_en_Chap08_Informations-pratiques_ed01-2015
Fuse N°Rating Functions
F16 15 AFront foglamps.
F18 10 ARight hand main beam headlamp.
F19 10 ALeft hand main beam headlamp.
F25 30 AHeadlamp wash relay (accessory).
F29 40 AFront wiper motor.
Engine compartment
Access to the fuses
F Unclip the cover.
F Change the fuse (see corresponding
paragraph).
F When you have finished, close the cover
carefully to ensure correct sealing of the
fusebox.
The fusebox is placed in the engine
compartment near the battery (left-hand side).
Practical information