Page 105 of 268
 ..,.,
N ..,., ,....,
Audi drive select Driving settings
Introduction
App lies to vehicles: with Audi drive select
Drive select provides the possibi lity to e")
M N
ci u.. co ,...., \!) ..,.,
N ..,., ,....,
Audi drive select Driving settings
Introduction
App lies to vehicles: with Audi drive select
Drive select provides the possibi lity to experience
d ifferent types of vehicle settings in one vehicle.
F or instance, using the three
Comfort, Auto and
Dynamic modes, the driver can switch from a
sporty to a comfortable driving mode with the
press of a button.
Addit ionally, in vehicles with
MM I*, the vehicle
setup for
Individual* mode can be customized by
you. This makes it possib le to combine settings
such as a sporty engine tuning with comfortab le
steering .
A WARNING
-
Improper use of the Audi drive select can
cause collisions, other acc idents and serious
personal injury.
Description
App lies to vehicles: with Audi drive select
The vehicle setup in each mode depends on the
veh icle's featu res . However, the engine, automat
ic transmission and steering are always involved.
Engine and automatic transmission
Depending on the mode, the engine and the au
tomatic transmission respond quicker or in a
more balanced manner to accelerator pedal
movements. In the sporty dynamic mode, the au
tomatic transmission shifts at higher RPMs .
Steering
The steering adapts in terms of steering effort
and steering ratios. Ind irect steer ing that moves
eas ily, like the steering in comfort mode, is best
suited to long drives on a highway. In contrast,
dynamic mode provides sporty, direct stee ring.
The follow ing applies to vehicles with dynam ic
steer ing*: the steering ratio changes based on ve
hicle speed in order to maintain optimum steer
ing effort for the dr iver at all times. This sets the
steer ing to be less sensitive at higher speeds in
Audi drive select
order to provide improved vehicle control. At re
duced speeds, however, steering is more direct in
order to keep the steering effort as m inima l as
possib le when the driver is maneuvering the vehi
cle. At low and average speeds, dynamic steering
additionally provides more responsive steering performance.
Adaptive dampers*
The adaptive dampers* use sensors to record in
formation regarding steering movements, braking and acceleration operations by the driver,
road surface, driving speed, and load. This makes
i t possible to adapt damping to the driving situa
t ion virtually in real t ime . Drive select also makes
it possible to sat isfy the desire for sporty suspen
s ion (Dynamic) and comfortab le suspension
(Comfort) without giving up ba lanced tuning (Au
to) .
Sport differential*
As a component of the all whee l dr ive system
(quattro)
~ page 174, the sport differential* dis
tributes the driving power to the rear axle de
pending on the situation. The dist ribution of
power varies depending on the mode selected.
The goal is a high level of agility and ability to ac
ce lerate on curves. The vehicle is very responsive
to steering.
Audi adaptive cruise control*
T he behavior when accelerating can be adjusted
from comfortable to sporty, depending on the
drive select mode. Adaptive cruise control also
responds to the driving behavior of the vehicle
ahead in a more conservative or sporty manner.
Engine sound*
The sound of the engine is adapted to the select
ed mode and ranges from subtle to sporty.
(D Tips
- In some models, the maximum vehicle
speed can only be reached in the
Auto and
Dynamic modes.
- For vehicles with an automatic transmis-
sion, selecting the
Dynamic mode results in ..,.
103
Page 106 of 268

Audi drive select
sporty shifting characteristics . The S gear
position engages automatically.
- In vehicles that have dynamic steering*, op
erating noise is heard when starting or stop
ping the engine. This does not indicate a
problem.
Selecting the driving mode
Applies to veh icles: with Audi drive select
You con choose between Comfo rt, Auto , Dynam·
ic
and Individual * modes.
N N 0
0
'I::======:..,. gJ
drive I sel,.c,ct _ J -~-
F ig. 119 Cente r conso le: Control fo r Aud i drive se lect
Fig . 120 MMI*: A udi drive select
Adjusting the Individual mode
Applies to vehicles: w ith MMI and Audi drive select
.,. To set the mode, press the~:/:'.~ button
r::!) fig. 119 multiple times until the desired
mode is displayed in the instrument cluster . Or
.,. In the MMI*, select: ICARlfunction button>
Comfort, Auto, Dynamic or Individual*.
In vehicles without the MMI*, the r:::~ button is
found underneath the shift/selector lever.
You can change the driving mode when the vehi
cle is stationary or while driving . If traffic per
mits, after changing modes, briefly take your
foot off the accelerator pedal so that the recently
selected mode is also activated for the engine
and transmission .
Comfort -provides a comfort-oriented vehicle
setup and is suited for long drives on highways.
Auto -provides an overall comfortable yet dy
namic driving feel and is suited for every day use.
Dynamic -gives the driver a sporty driving feel
and is suited to a sporty driving style .
Individual* -c>page 104 .
&_ WARNING
Pay attention to traffic when operating drive
select to prevent potential risk o f an acciden t.
You can personally specify the vehicle setup in the MMI* .
.,. Select the ICAR I function button > Set individu·
al
control button. Once you select the menu,
you w ill automatically drive in the
individual
mode.
Systems Comfort
Eng i ne/Tra nsm ission ba
lanced
Steering comfortable
Dynamic steering* comfortable/indirect
104
The equipment in your vehicle will determine
which settings you can adjust. The following ta
ble prov ides an overview of the characteristics of
each driving mode.
Auto Dynamic
balanced sporty
balanced sporty
balanced/direct sporty/direct
Page 107 of 268
M N
ci u.. co ,...., \!) 1.1'1
N 1.1'1 ,....,
Systems Comfort
Adapti ve dampers *
comfortable
Sport differenti al* ba la nced
Adaptive cruise control * comfortable
Engin e sound * subtle
al Subt le in the dri ving pos itio n D and spo rty i n th e d rivin g pos ition S .
(D Tips
Your Individual* mode se ttings are au tom ati
cally stored and assigne d to the remote con
trol key being used.
Audi drive select
Auto Dynamic
balanced sporty
agi le sporty
balanced sporty
su bt le/ sportya)
sp orty
105
Page 108 of 268

Parking System
Parking System
Parking system
App lies to veh icles: w ith pa rk in g system
Different pork assist systems may be used for
parking or maneuvering, depending on the vehi
cle's features.
Pa rking system (rear)*:
F or the parking system (rear), the aco ustic par k
assist system is insta lled in the rear of t he vehicle
¢ page 106.
The re ar p arking ass ist system uses ultrasoni c
sensors to determ ine the distance of the veh icle
from a detected obstacle. There are a total of
four sensors located on the rear bumper (two in
the middle and two on the sides) .
Parking system (rear, with rear view
camera)*:
For the parking system (rear, with rear view cam
era),
the rear acoustic park ass ist system is inte
grated i n the rear of the vehicle and the rear v iew
camera is integrated in the rear lid
¢page 109 .
The parking system (rear, with rear view camera)
uses ultrasonic sensors to determine the distance
of the vehicle from a detected obstacle. There are
a total of four sensors located on the rear bump
er ( two in t he middle and two on the s ides) .
A WARNING
-
Make sure the s ensors ar e not covered by
st ic kers , dep osi ts or any o ther obs truct ions a s
i t may imp air the sensor function . Fo r i nfo r
m ation on cle aning, re fer to¢
page 184.
Rear parking system
Rear acoustic park assist
Applies to veh icles : w ith pa rking system (rea r)
The rear acoustic pork assist warns you of obsta
cles or objects behind your car.
Description
T he rear acoustic p arki ng ass is t system deter
mines t he d istance o f th e veh icle from an obs ta -
106
cle using ultraso nic sensors. There are 4 sensors
in the rea r bumpe r.
The r ange at w hich t he sen so rs s tart to me asure
i s
about :
To the side 2 ft (0.60 m)
Center rear 5.2 ft (1. 60 m)
Activation
Acoustic pa rking assis t is act ivated a utomatica lly
whe n
rever se gear is engaged. A b rief tone con
f irm s that the sys tem i s activate d.
Warning tones
D istance warni ng is give n by warning tones wh ich
are generated by the rear signa l ge nera to r. T he
vo lume and t he p itch of the wa rn ing tones can be
adjus ted in the M MI*
<=>page 10 7.
Reversing
D istance warning when reve rsing starts when an
obstacle is detected in t he range of the parking
ass ist system . As the distance dec reases, th e
tim e inte rva l between the a udible tones becomes
s h ort er.
When the distance is less than 1ft (0 .30 m) , the
tone becomes cont inuo us. At this poin t you
shou ld stop bac king up .
Please note that low objects already signa lled by
a war ning can d isappear from the system's detec
tion ra nge and will not continue to be sig na lled .
If the distance to an obstacle remains the same,
the volume of the d ista nce warning is gradually
reduced after abo ut 4 seconds (this does not ap
ply i n the continous tone rang e). App roach ing an
othe r obstacle will res ult in the distance wa rning
sou nd ing a t the normal volume aga in.
Malfunctions in the system
If a warning tone is aud ible for about five sec
o nds when you turn on the ignition, the re is a
malfu nction in the system . Have th e problem co r
r e cted by your author ized Audi deal er.
Keep the senso rs in the rea r bumper clea n and
free from ice so that the aco ust ic par k assist sys -
tem ca n fu nction properly .
IIJl,
Page 109 of 268

M N
ci LL co
rl I.O
"' N
"' rl
,&_ WARNING
-Sensors have dead spaces in which objects
cannot be detected . Be especially alert for
small chi ldren and animals, since they are
not always detected by the sensors .
- The acoustic parking system is not a substi
tute for the dr iver's own caution and alert
ness. Ultimate responsibility always remains
with the driver during parking and sim ilar
maneuvers . A lways watch where you are
dr iv ing .
- You should always adjust the volume and
frequency of the warning tones so that you
can eas ily hear the acoustic distance warn
ing
even if the radio is playing, the air-cond i
tioner blower is on High or there is a high
level of outs ide no ise.
- Check the settings whenever anyone else
has driven the vehicle be fore you.
(D Note
- Remember that low obstacles for whic h a
warning has already been issued may "dive"
below the system 's sensing zone if the vehi
cle is being backed up closer . In this case,
the warn ing sound shutting off does
not in
dicate that you have cleared the obstacle.
Instead, impact is imm inent.
- Objects such as trailer h itches, cha ins, nar
row posts or fences covered by a thin layer
of pa int may not a lways be detected by the
system. They can still damage your vehicle
wi thou t warn ing.
{O) Tips
Keep the sensors in the rear bumper clean
and free of snow and ice so that the acoust ic
parking assist system can f unction properly.
Adjusting the warning tones
Applies to vehicles: with parking system (rear)
The warning tones can be adjusted in the MMI*.
• Select : ICARI function button > Parking system.
Or
• Se lect :
I C ARI funct ion button > Car syste m s*
control button> Dr iver a ssist> Parking aid .
Parking Sy stem
- Rear volum e -rear sensor vo lume
- Rea r fre quenc y -rear sensor frequency
- Mu sic vo lume while parking -when the park-
ing system is switched on, the vo lume of the
active audio source is lowered.
The newly adjusted value is briefly hea rd from
the signal generator . T he settings are automat i
ca lly stored and assigned to the master key w ith
remote control.
Rear parking system
with rearview camera
Introduction
Applies to vehicles: with parking system (rear, with rear view
camera)
F ig . 1 21 Park ing mode 1: reve rse pa rking
Fig . 1 22 Park ing mode 2: parallel parking
Vehicles with the parking system are equipped
with a
rear vi ew ca mera in addi tion to the acous
t ic pa rking system.
You can choose between two modes to ass ist you
with pa rking. For example, you can use "parking
mode l" when park ing in a parking sp ace or ga
rage ¢
fig. 121. When you wan t to park parallel
to the edge of the street, select "park ing mode
2" ¢ fig. 122 . 11>
107
Page 110 of 268

Parking System
The rear acoustic park assist system is integrated
in the rear of the vehicle and the rear view cam
era is integrated in the rear lid
c::> page 109.
A WARNING
-
- The rear view camera has blind spots, in
which objects cannot be detected. Be espe
cially careful to check for small children and
animals before backing up. Small children and animals will not always be detected by
the sensors.
General Information
Applies to vehicles: with parking system (rear, with rear view
camera)
Fig. 123 Covered ar ea (D and uncovered area @ of the rea r
view came ra
Fig. 124 T runk lid: Location of the rear v iew camera
Sensors in the bumper
Sensors are located in the rear bumpers . If these
detect an obstacle, audible signals warn you . The
range at which the sensors begin to measure is
approximately:
To the side 2 ft (0.60 m)
Center rear 5.2 ft (1.60 m)
Distance warning when reversing starts when an
obstacle is detected in the range of the parking
108
assist system. As the distance decreases, the
time interval between the audible tones becomes
shorter.
When the distance is less than 1ft (0.30 m), the
tone becomes continuous. At this point you
should stop backing up.
If the distance to an obstacle stays the same, the
volume of the distance signal chime is gradually
reduced after about 4 seconds (does not affect
the continuous signal tone). Approaching anoth
er obstacle will cause the distance signal to
sound again at the normal volume.
Rear view camera coverage area
The MMI display shows the area covered by the
rear v iew camera
c::> fig. 123 @. Objects that are
not in the area covered @are not shown on the
MMI display.
We recommend that you practice parking with
the rear view camera in a traffic-free location or
parking lot to become familiar with the system,
the orientation lines, and their function. When
doing this, there should be good light and weath
er conditions.
In the MMI display, objects or vehicles appear
closer or further away if:
-you are driving in reverse gear from a level sur
face onto an incline, or a downward slope,
- you are driving in reverse gear toward protrud
ing objects,
- the vehicle is carrying too much load in the
rear.
The accuracy of the orientation lines and blue
surfaces diminishes if:
- the rear view camera does not provide a reliable
image, for example, in poor visibility conditions
or if the lens is dirty,
- the image on the screen is not visible due to sun glare and reflection .
Caring for the rear view camera lens
The rear view camera is located above the rear li
cense plate bracket. For the parking assist to op-
erate, the lens
c::> fig . 124 must be kept clean : .,._
Page 111 of 268
 1.11
N 1.11 ......
-Dampen the lens with a househo ld alcoho l
based glass cleaner, and clean the lens with a
dry cloth
¢ 0 .
- Remove snow with a hand brush")
M N
ci u.. co ...... \!) 1.1'1
N 1.1'1 ......
-Dampen the lens with a househo ld alcoho l
based glass cleaner, and clean the lens with a
dry cloth
¢ 0 .
- Remove snow with a hand brush and ice pref
erably with a de-icing spray
¢0 .
A WARNING
- The parking aid cannot replace the driver's
attent ion. The driver alone is responsible for
park ing and s imilar driving maneuvers .
-Always keep your eyes on the veh icle's sur
roundings, using the rear view m irror as
well.
- Do not allow yourself to be distracted from
traffic by the rear view camera pictures.
- If the posit ion and the installation ang le of
the camera has c hanged, for example, after
a rear end collision, do not continue to use
the system for safety reasons. Have it
checked by a qualified deale rship .
@ Note
-Low obstacles already signaled by a warning
can d isappear from the system's detection
range as they are approached and will not
continue to be signa led. Objects such as
barrier chains, tra ile r draw bars, thin paint
ed vertical po les or fences may not be de
tec ted by the sys tem, posing r isk of dam
age.
- Never use warm or hot w ater to remove
snow or ice from the rear view camera lens -
danger of crack formation on the lens!
- When cleaning the lens, never use products
that are abrasive .
Switching on/off
Applies to vehicles: with parking system (rear, with rear view
camera)
The rear view camera switches on automatically
together with the acoustic park assist when you
put the vehicle in reverse.
Sw itching on
.,. Put the vehicle in reverse gear, the acoustic
parking system w ith rear view camera is act ivat
ed automat ica lly. Act ivat ion of the acoust ic
Parking Syste m
pa rking system is confirmed by a brief acknow l
edgement so und.
Switching off
.,. Dr ive faste r than 9 mph (15 km/h) , or
.,. take the vehicle out o f reverse gea r. The aco us
tic parking sys tem is immed iate ly deactivated,
and the rear view camera picture is deactivated
automatically after a period of about 15 sec
onds, or
.,. sw itch
off the ignition.
The de lay in deact ivating the camera provides an
u ninterrupted view be hind the vehicle especia lly
when maneuvering in t ight parking spaces and
prevents the p icture from turning
off the every
time you shift out of reverse.
If the warning message appears in the display
but not the rear view camera p icture, read and
confirm the warning message . The acoustic d is
tance signal is always active .
If you press a function button on the MMI contro l
console, the rear view camera picture disappears.
The rear v iew camera p icture reappears the next
time you park .
Furthe r information on the warning message and
the MMI contro l conso le can be found in the MMI
instruct ion booklet.
A WARNING
--
- On ly use the rearview camera to assist you if
it shows a good, clea r picture . For example,
the image may be affected by the su n shi n
ing into the le ns, dirt on the lens o r if the re
is a defec t.
- Use the rea rv iew camera only with the rear
lid comple tely closed . Make sure any objects
you m ay have moun ted on the rea r lid do
not block the rearv iew camera .
(D Tips
-The rear view camera picture is available as
soo n as the MMI Di splay o r th e MMI is
switched on, or the s tart- up pha se is com
ple ted.
- The sensors m ust be ke pt clean and free of
snow and ice fo r the park ass ist to opera te.
109
Page 112 of 268

Parking System
-You can change the volume and pitch of the
signals as well as the display
~ page 112.
-What appears in the display is time-delayed.
Reverse Parking
App lies to veh icles: w ith pa rking system (rea r, w ith rea r v iew
camera)
Parking mode 1 can be used when parking in a
garage or parking space.
Fig. 125 MM I Di splay: Aiming at a parking spot
Fig . 126 MMI Di splay: Al ignin g th e ve hicle
• Switch the MMI on and select the reverse gear.
• Turn the steering wheel until the orange orien
tation lines
(D appear in the parking spot
¢ fig. 125. Use the markings @to help you es
timate the distance from an obstacle. Each
marking corresponds to 3
ft (1 m). The blue
area represents an extension of the vehicle's
outline by approximately
16 ft (5 m) to the
rear .
• While driving in reverse gear, adjust the steer
ing wheel angle to fit the parking space with
the aid of the orange orientation lines ¢0 .@
marks the rear bumper. You should stop driving
in reverse as soon as and no later than when
the red orientation line @abuts an object
¢ _& !
110
A WARNING
- The rear view camera does not show the en
tire area behind the vehicle¢
page 108,
fig . 123.
Watch out especially for small chil
dren and animals . The rear view camera can
not always detect them, posing risk of an
accident!
- Please note that objects not touching the
ground can appear to be further away than
they really are (for example, the bumper of
a parked vehicle, a trailer hitch, or the rear
of a truck). In this case, you should not use
the help lines to help with parking, which poses danger of an accident!
cg) Note
- Low obstacles already signaled by a warning can disappear from the system's detection
range as they are approached and will not
continue to be signaled. Objects such as
barrier chains, trailer draw bars, thin paint
ed vertical poles or fences may not be de
tected by the system, posing risk of dam age.
- In the MMI display, the direction of travel of the vehicle rear is represented depending on
the steering wheel angle. The vehicle front
swings out more than the vehicle rear. Main
tain plenty of distance from an obstacle so
that your outside mirror or a corner of your
vehicle does not collide with any obstacles -
danger of accident!
 1
1 2
2 3
3 4
4 5
5 6
6 7
7 8
8 9
9 10
10 11
11 12
12 13
13 14
14 15
15 16
16 17
17 18
18 19
19 20
20 21
21 22
22 23
23 24
24 25
25 26
26 27
27 28
28 29
29 30
30 31
31 32
32 33
33 34
34 35
35 36
36 37
37 38
38 39
39 40
40 41
41 42
42 43
43 44
44 45
45 46
46 47
47 48
48 49
49 50
50 51
51 52
52 53
53 54
54 55
55 56
56 57
57 58
58 59
59 60
60 61
61 62
62 63
63 64
64 65
65 66
66 67
67 68
68 69
69 70
70 71
71 72
72 73
73 74
74 75
75 76
76 77
77 78
78 79
79 80
80 81
81 82
82 83
83 84
84 85
85 86
86 87
87 88
88 89
89 90
90 91
91 92
92 93
93 94
94 95
95 96
96 97
97 98
98 99
99 100
100 101
101 102
102 103
103 104
104 105
105 106
106 107
107 108
108 109
109 110
110 111
111 112
112 113
113 114
114 115
115 116
116 117
117 118
118 119
119 120
120 121
121 122
122 123
123 124
124 125
125 126
126 127
127 128
128 129
129 130
130 131
131 132
132 133
133 134
134 135
135 136
136 137
137 138
138 139
139 140
140 141
141 142
142 143
143 144
144 145
145 146
146 147
147 148
148 149
149 150
150 151
151 152
152 153
153 154
154 155
155 156
156 157
157 158
158 159
159 160
160 161
161 162
162 163
163 164
164 165
165 166
166 167
167 168
168 169
169 170
170 171
171 172
172 173
173 174
174 175
175 176
176 177
177 178
178 179
179 180
180 181
181 182
182 183
183 184
184 185
185 186
186 187
187 188
188 189
189 190
190 191
191 192
192 193
193 194
194 195
195 196
196 197
197 198
198 199
199 200
200 201
201 202
202 203
203 204
204 205
205 206
206 207
207 208
208 209
209 210
210 211
211 212
212 213
213 214
214 215
215 216
216 217
217 218
218 219
219 220
220 221
221 222
222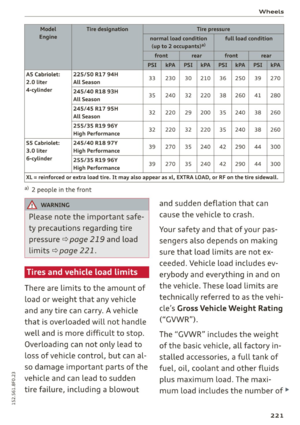 223
223 224
224 225
225 226
226 227
227 228
228 229
229 230
230 231
231 232
232 233
233 234
234 235
235 236
236 237
237 238
238 239
239 240
240 241
241 242
242 243
243 244
244 245
245 246
246 247
247 248
248 249
249 250
250 251
251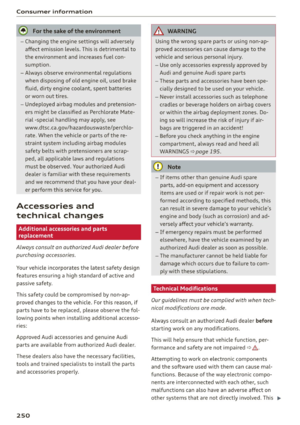 252
252 253
253 254
254 255
255 256
256 257
257 258
258 259
259 260
260 261
261 262
262 263
263 264
264 265
265 266
266 267
267 1.11
N 1.11 ,....,
Systems Comfort
Adapti ve dampers *
comfortable
Sport differenti al* ba la nced
Adaptive cruise control * comfortable
Engin e sound * subtle
al")