2014 MERCEDES-BENZ B-CLASS SPORTS hood release
[x] Cancel search: hood releasePage 116 of 360
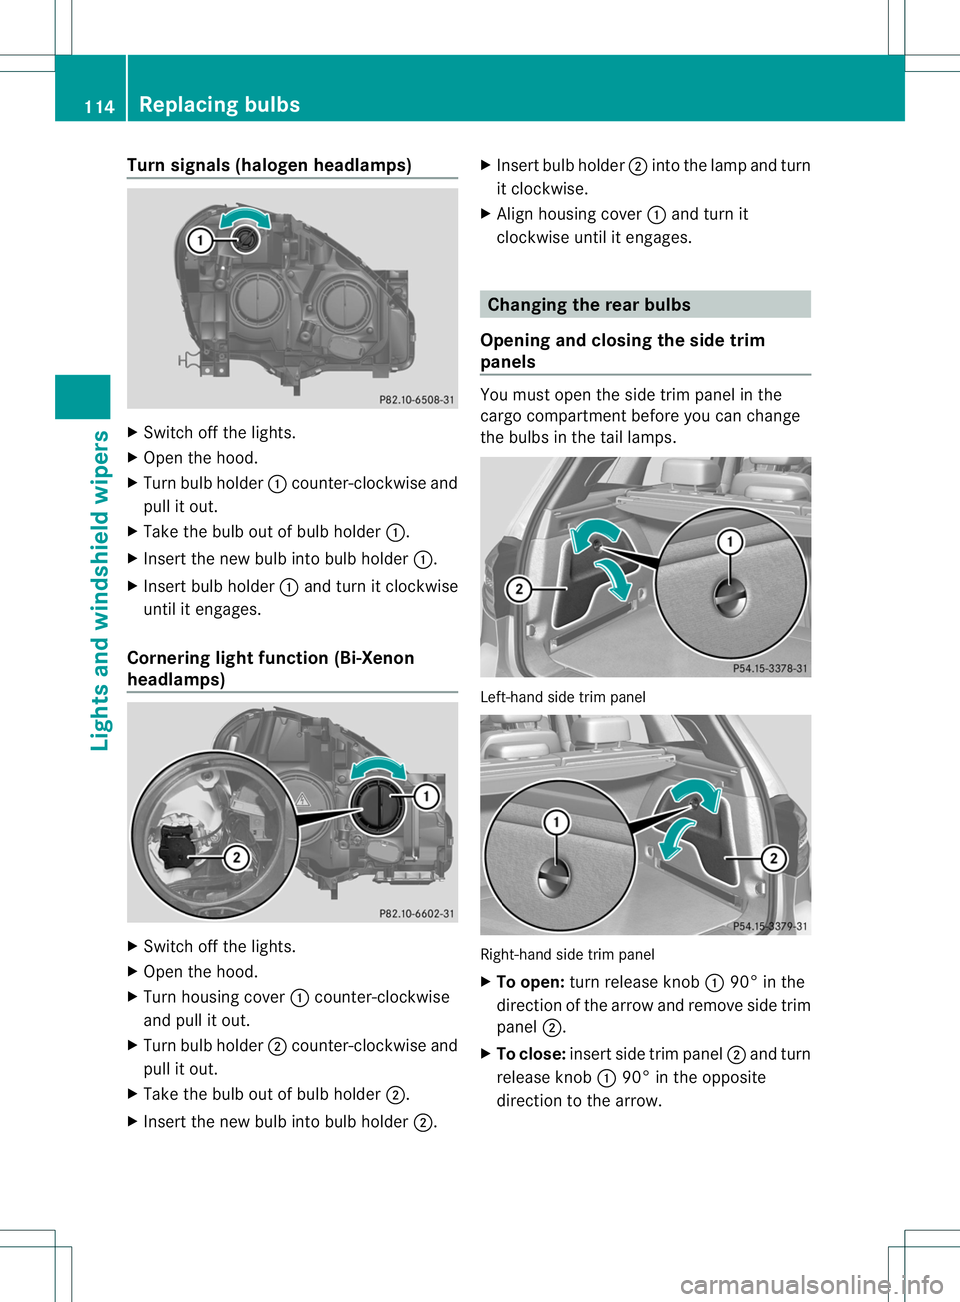
Turn signals (haloge
nheadlamps) X
Switch off the lights.
X Open the hood.
X Turn bulb holder 001Acounter-clockwis eand
pull it out.
X Take the bulb ou tofbulb holder 001A.
X Inser tthe new bulb into bulb holder 001A.
X Insert bulb holder 001Aand turn it clockwise
until it engages.
Cornering light function (Bi-Xenon
headlamps) X
Switch off the lights.
X Open the hood.
X Turn housing cover 001Acounter-clockwise
and pull it out.
X Turn bulb holder 0010counter-clockwise and
pull it out.
X Take the bulb out of bulb holder 0010.
X Insert the new bulb into bulb holder 0010.X
Insert bulb holder 0010into the lamp and turn
it clockwise.
X Align housing cover 001Aand turn it
clockwise until it engages. Changing the rear bulbs
Opening and closing the side trim
panels You must open the side trim panel in the
cargo compartmentb
efore you can change
the bulbs in the tail lamps. Left-hand side trim panel
Right-hand side trim panel
X
To open: turn release knob 001A90° in the
direction of the arrow and remove side trim
panel 0010.
X To close: insert side trim panel 0010and turn
release knob 001A90° in the opposite
direction to the arrow. 114
Replacing bulbsLights and windshield wipers
Page 120 of 360
the
0002 position, causing the windshield
wipers to wipe mor efrequently.
If the wipe rblades are worn ,the windshield
will no longer be wiped properly. This could
prevent you fro mobservin gthe traffic
conditions. Replace the wiper blades twic ea
year, ideally in sprin gand fall. Switching th
erearw indow wiper on/
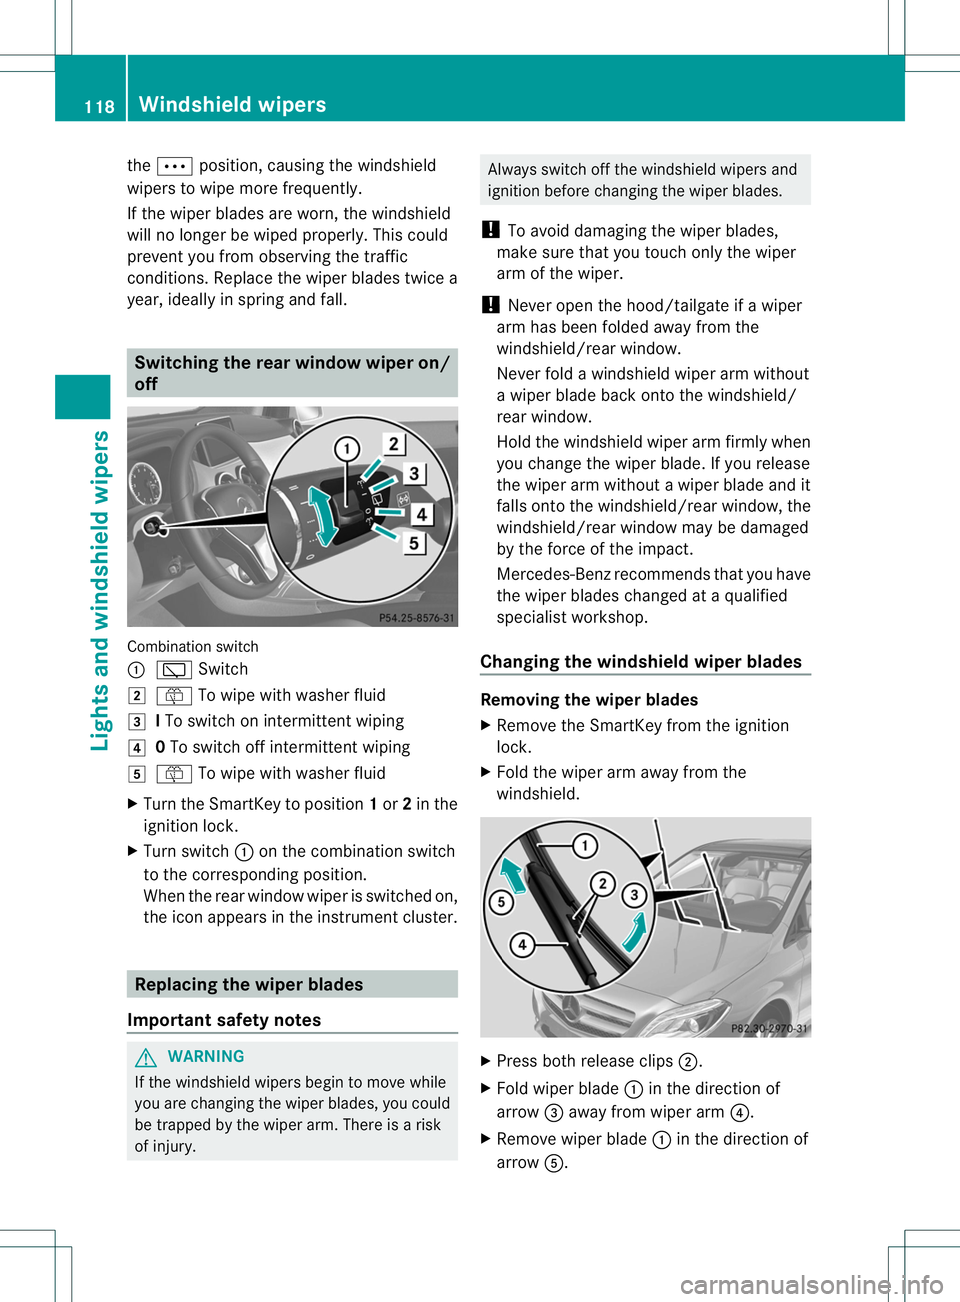
off Combination switch
001A
001B Switch
0001 0018 To wipe with washer fluid
0002 ITo switc honintermitten twiping
001F 0To switc hoff intermitten twiping
0011 0018 To wipe with washer fluid
X Turn the SmartKey to position 1or 2in the
ignition lock.
X Turn switch 001Aon the combination switch
to the correspondin gposition.
When the rear window wiper is switched on,
the icon appears in the instrumen tcluster. Replacing th
ewiper blades
Important safety notes G
WARNING
If the windshield wipers begin to mov ewhile
you are changing the wiper blades, you could
be trapped by the wiper arm. There is arisk
of injury. Always switc
hoff the windshield wipers and
ignition befor echanging the wiper blades.
! To avoid damagin gthe wiper blades,
mak esure that you touc honly the wiper
ar moft he wiper.
! Never open the hood/tailgate if awiper
arm has been folded away from the
windshield/rear window.
Never fold awindshield wiper arm without
aw iper blade back onto the windshield/
rear window.
Hold the windshield wiper arm firmly when
you change the wiper blade. If you release
the wiper arm without awiper blade and it
falls onto the windshield/rear window, the
windshield/rear window may be damaged
by the force of the impact.
Mercedes-Ben zrecommends that you have
the wiper blades changed at aqualified
specialist workshop.
Changing th ewindshield wiper blades Removing th
ewiper blades
X Remove th eSmartKey from th eignition
lock.
X Fold th ewiper arm away from the
windshield. X
Press bot hrelease clips 0010.
X Fold wiper blade 001Ain th edirection of
arrow 0023away from wiper arm 0021.
X Remove wiper blade 001Ain th edirection of
arrow 001E. 118
Windshiel
dwipersLight sand windshield wipers
Page 277 of 360
Synchronizing the rolling code
Observe the "Important safety notes"
(Y
page 273).
Your vehicle must be within reach of the
garage door or exterior gate drive. Make sure
that neither your vehicle nor any persons/
objectsa re present within the sweep of the
door or gate.
X Turn the SmartKey to position 2in the
ignition lock.
X Press the program button of the door or
gate drive (see the door or gate drive
operating instructions, e.g. under
"programming of additional remote
controls").
i Usually, you now have 30seconds to
initiate the next step.
X Press previously programmed button 0010,
0023 or0021 of the integrated garage door
opener until the door closes.
The rolling code synchronization is then
complete.
Notes on programming the remote
control
Canadianr adio frequency laws require a
"break "(or interruption )ofthetransmission
signals after broadcastin gfor afew seconds.
Therefore, these signals may no tlast long
enough for th eintegrate dgarag edoor
opener. The signal is no trecognized during
programming. Comparable with Canadian
law, some U.S.g arage door openers also
feature a"break".
Procee dasfollows:
R if you live in Canada
R if you have difficulties programmin gthe
garag edoor opener (regardless of where
you live) when usin gthe programming
steps X
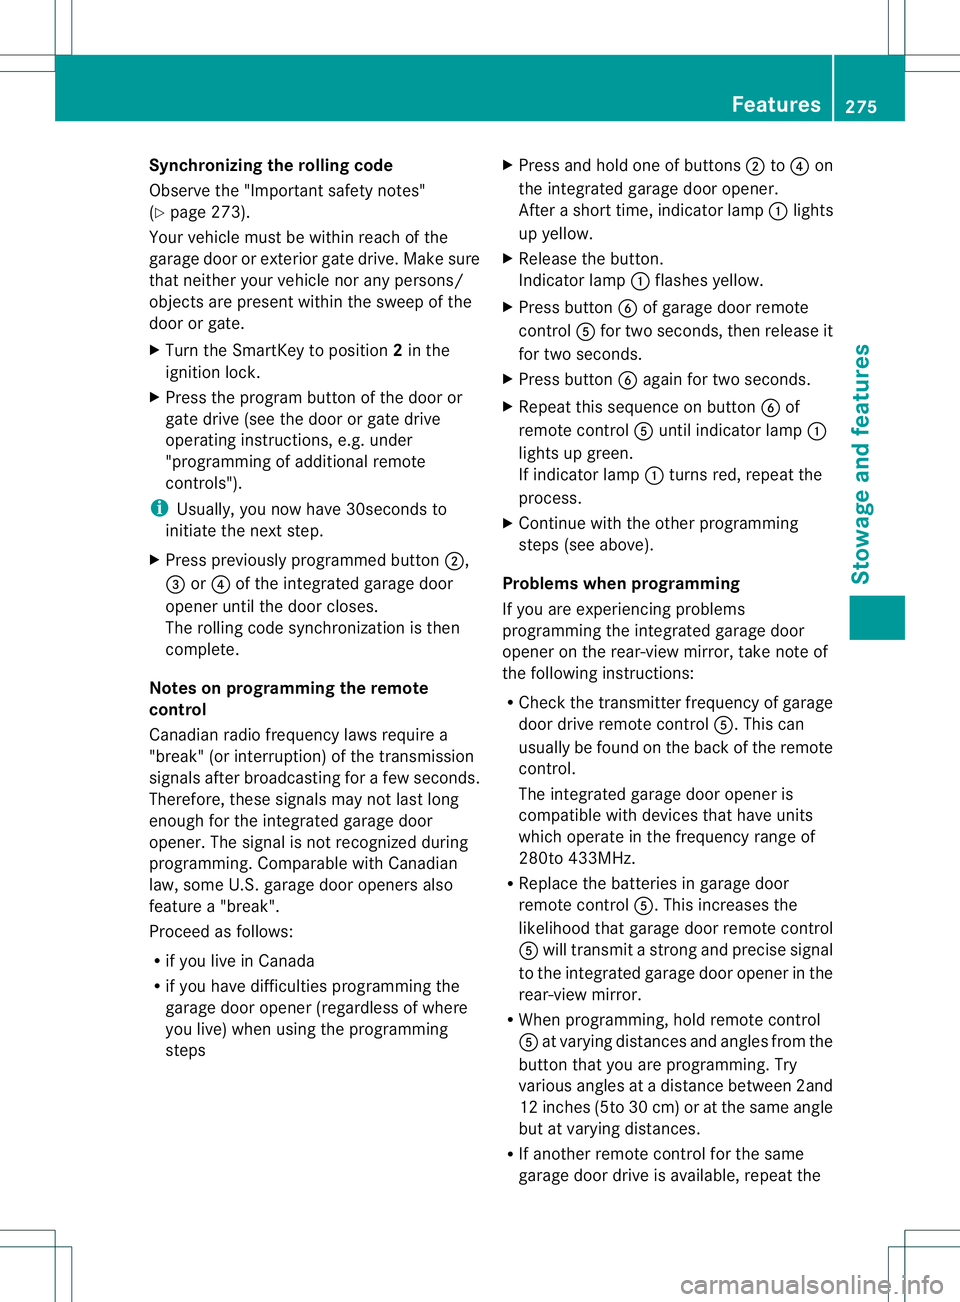
Press and hold on eofbuttons 0010to0021 on
th ei ntegrate dgarag edoor opener.
Afte ras hort time, indicator lamp 001Alights
up yellow.
X Release the button.
Indicator lamp 001Aflashes yellow.
X Press button 0024of garage door remote
control 001Efor two seconds, then release it
for two seconds.
X Press button 0024againf or two seconds.
X Repeat this sequence on button 0024of
remote control 001Euntil indicator lamp 001A
lights up green.
If indicator lamp 001Aturns red, repeat the
process.
X Continue with the other programming
steps (see above).
Problems when programming
If you are experiencing problems
programming the integrated garage door
opener on the rear-view mirror, take noteof
the following instructions:
R Check the transmitter frequency of garage
door drive remote control 001E.This can
usually be found on the back of the remote
control.
The integrated garage door opener is
compatible with devices that have units
which operate in the frequency range of
280to4 33MHz.
R Replace the batteries in garage door
remote control 001E.This increases the
likelihood that garage door remote control
001E will transmit astronga nd precis esignal
to the integrated garage door opene rinthe
rear-view mirror.
R When programming, hold remote control
001E at varying distances and angles from the
button that you are programming. Try
various angles at adistance between 2and
12 inches (5to 30 cm) or at the same angle
but at varying distances.
R If another remote control for the same
garage door drive is available, repeat the Features
275Stowage and features Z
Page 283 of 360
could otherwise damag
ethe windshield
wiper sorthe hood. X
Make sure that the windshield wiper sare
switched off.
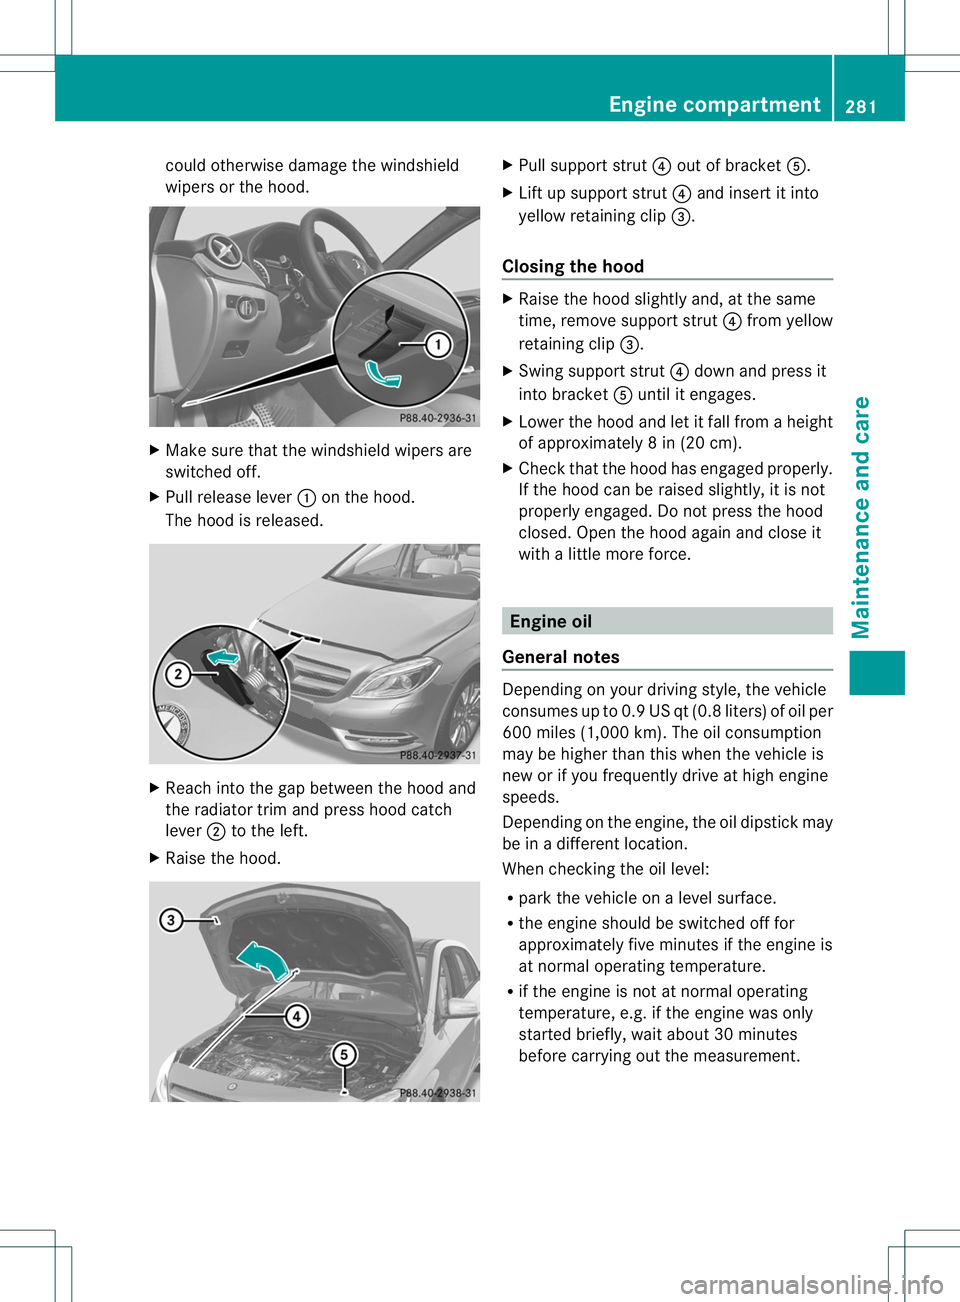
X Pull release lever 001Aon the hood.
The hoo disreleased. X
Reach into the ga pbetween the hoo dand
the radiator trim and press hoo dcatch
lever 0010to the left.
X Raise the hood. X
Pull support strut 0021outofb racket 001E.
X Lift up support strut 0021and insert it into
yellow retaining clip 0023.
Closin gthe hood X
Raise the hoo dslightl yand,att he same
time ,remove support strut 0021from yellow
retaining clip 0023.
X Swing support strut 0021dow nand press it
into bracket 001Eunti lite ngages.
X Lower the hoo dand le titfall from aheight
of approximately 8in(20 cm).
X Chec kthat the hood has engaged properly.
If the hood can be raised slightly, it is not
properly engaged. Do not press the hood
closed. Open the hood again and close it
with alittle more force. Engine oil
General notes Depending on your driving style, the vehicle
consumes up to 0.9 US qt (0.8 liters) of oil per
600 miles (1,000 km). The oil consumption
may be higher than this when the vehicle is
new or if you frequently drive at high engine
speeds.
Depending on the engine, the oil dipstick may
be in
adifferent location.
When checking the oil level:
R park the vehicle on alevel surface.
R the engine should be switched off for
approximately five minutes if the engine is
at normal operating temperature.
R if the engine is not at normal operating
temperature, e.g. if the engine was only
started briefly, wait about 30 minutes
before carrying out the measurement. Engine compartment
281Maintenance and care Z
Page 311 of 360
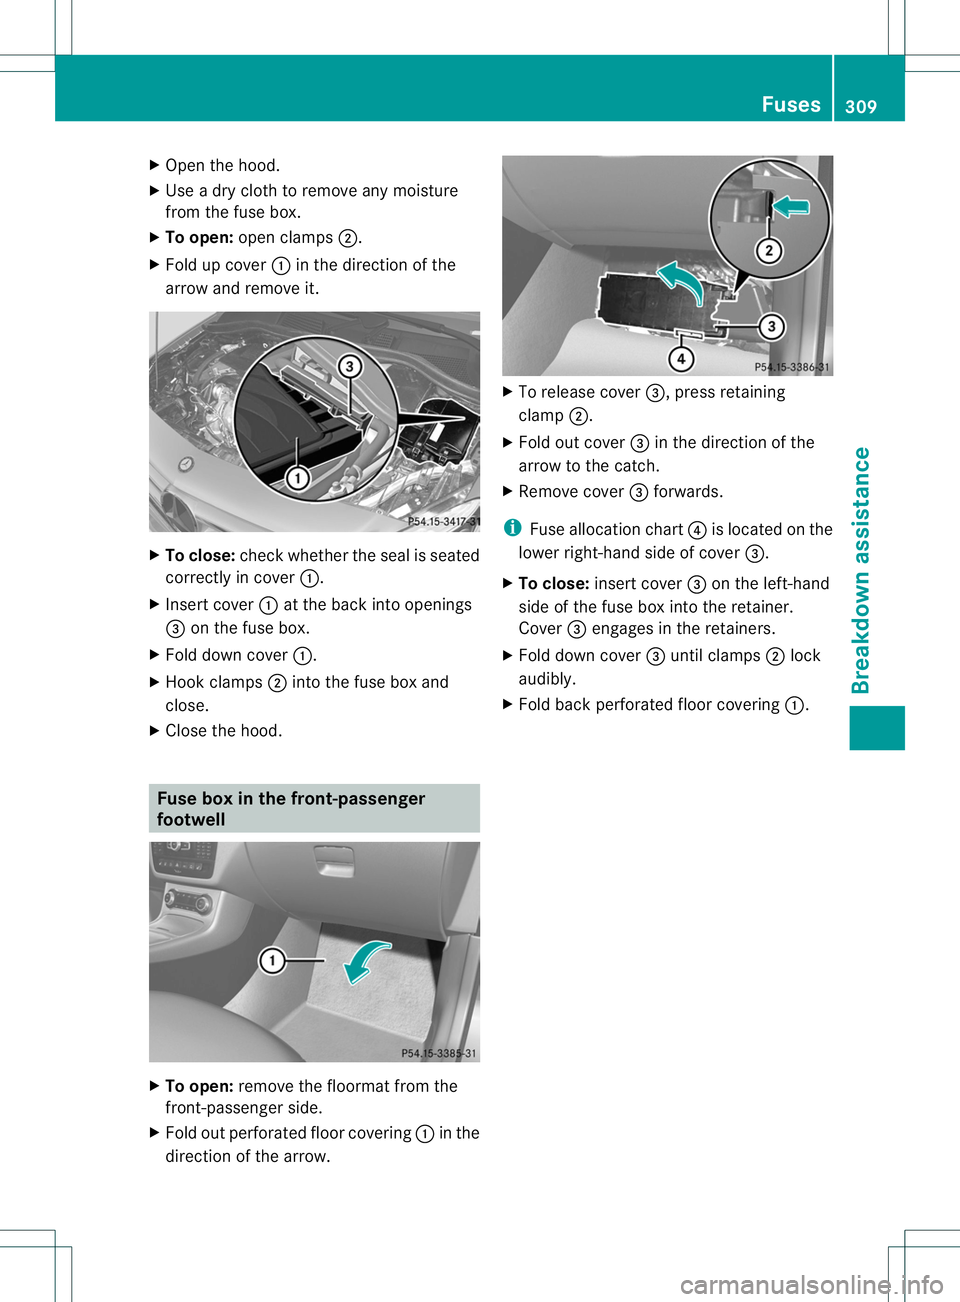
X
Open the hood.
X Use adry cloth to remove any moisture
from the fuse box.
X To open: open clamps 0010.
X Fold up cover 001Ain the direction of the
arrow and remove it. X
To close: check whether the seal is seated
correctly in cover 001A.
X Insert cover 001Aat the back into openings
0023 on the fuse box.
X Fold down cover 001A.
X Hook clamps 0010into the fuse box and
close.
X Close the hood. Fuse box in the front-passenger
footwell X
To open: remove the floormat from the
front-passenger side.
X Fold out perforated floor covering 001Ain the
direction of the arrow. X
To release cover 0023,press retaining
clamp 0010.
X Fold out cover 0023in the direction of the
arrow to the catch.
X Remove cover 0023forwards.
i Fuse allocation chart 0021is located on the
lower right-hand side of cover 0023.
X To close: insert cover 0023on the left-hand
side of the fuse box into the retainer.
Cover 0023engages in the retainers.
X Fold down cover 0023until clamps 0010lock
audibly.
X Fold back perforated floor covering 001A. Fuses
309Breakdown assistance Z