2014 MERCEDES-BENZ B-CLASS SPORTS length
[x] Cancel search: lengthPage 111 of 360
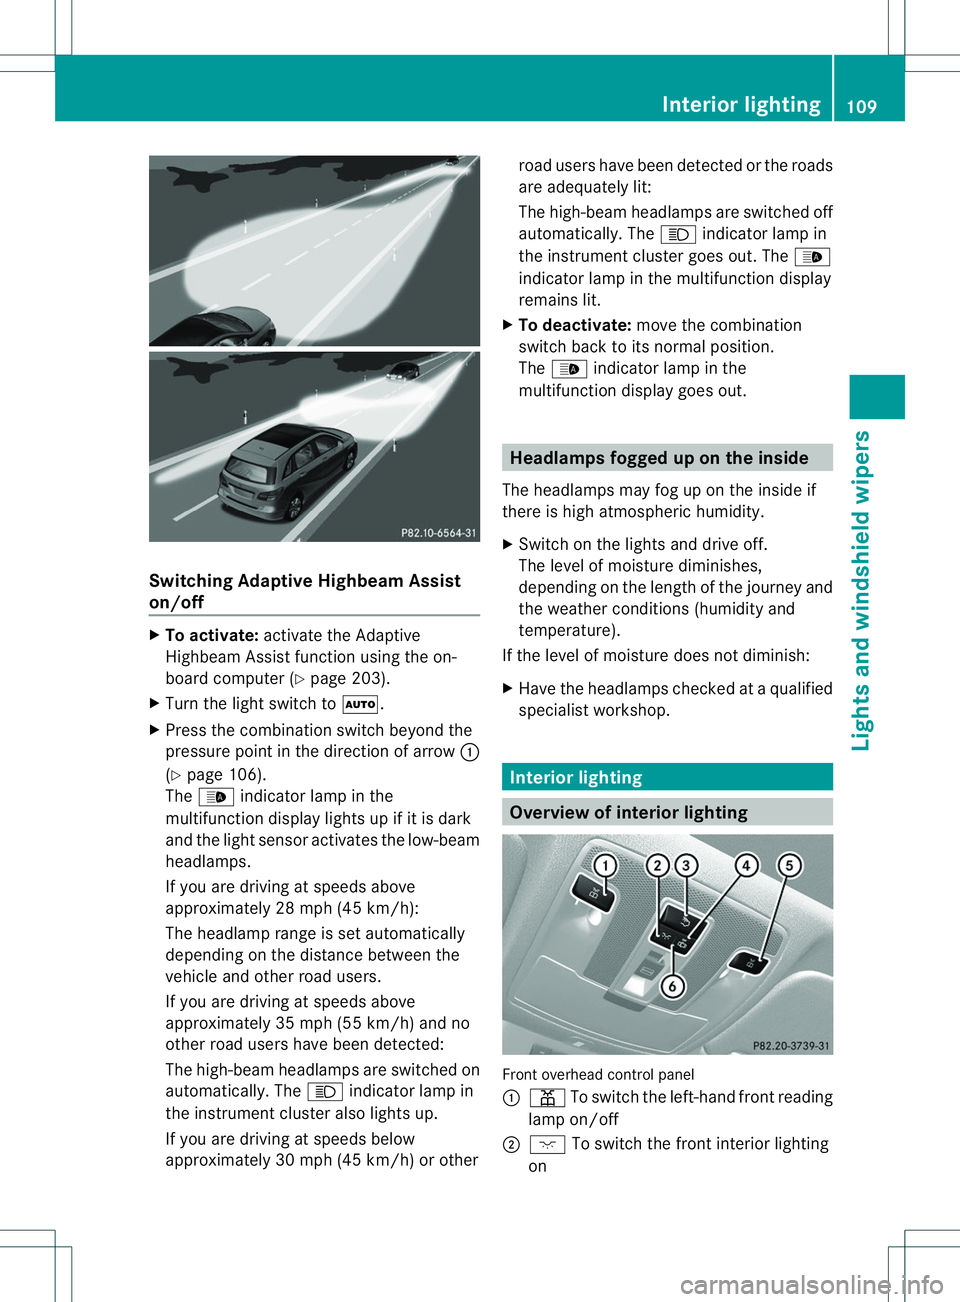
Switching Adaptive Highbeam Assist
on/off X
To activate: activate the Adaptive
Highbeam Assist function using the on-
board computer (Y page 203).
X Turn the light switch to 000C.
X Press the combination switch beyond the
pressure point in the direction of arrow 001A
(Y page 106).
The 000C indicator lamp in the
multifunction display lights up if it is dark
and the light sensor activates the low-beam
headlamps.
If you are driving at speeds above
approximately 28 mph (45 km/h):
The headlamp range is set automatically
depending on the distance between the
vehicle and other road users.
If you are driving at speeds above
approximately 35 mph (55 km/h) and no
other road users have been detected:
The high-beam headlamps are switched on
automatically. The 0011indicator lamp in
the instrumen tcluster also light sup.
If you are drivin gatspeeds below
approximately 30 mph (45 km/h) or other road users have been detected or the roads
are adequately lit:
The high-beam headlamps are switched off
automatically. The
0011indicator lamp in
the instrumen tcluster goes out. The 000C
indicator lamp in the multifunction display
remain slit.
X To deactivate: movethe combination
switc hback to its normal position.
The 000C indicator lamp in the
multifunction display goes out. Headlamps fogged up on th
einside
The headlamps may fog up on the insid eif
there is high atmospheric humidity.
X Switch on the light sand drive off.
The level of moisture diminishes,
depending on the length of the journey and
the weathe rcondition s(humidity and
temperature).
If the level of moisture does not diminish:
X Have the headlamps checked at aqualified
specialist workshop. Interior lighting
Overview of interior lighting
Fronto
verhead control panel
001A 001D To switch the left-hand front reading
lamp on/off
0010 0001 To switch the front interior lighting
on Interior lighting
109Lights and windshiel dwipers Z
Page 156 of 360
engin
eisswitched off. The sounds that can
be heard while this is occurring are normal.
Applying/releasing manually Applying
X
Push handle 001A.
When the electric parkin gbrake is
engaged, the 000Ared indicator lamp lights
up in the instrument cluster.
i The electric parkin gbrake can also be
applied when the SmartKey is removed.
Releasing
X Pull handle 001A.
The red 000Aindicator lamp in the
instrument cluster goes out.
i You can only release the electric parking
brake when the SmartKey is in position 1
or 2in the ignition lock.
Applying automatically The electric parkin
gbrake is applied
automatically:
R if DISTRONIC PLUS brings the vehicle to a
standstill or
R if the HOLD function is keeping the vehicle
stationary
In addition, at least one of the following
conditions must be fulfilled:
R the engin eisswitched off.
R the driver's door is open and the seat belt
is not fastened.
R ther eisas ystem malfunction.
R the power supply is insufficient.
R the vehicle is stationary for alengthy
period.
The red 000Aindicator lamp in the instrument
cluster lights up.
i The electric parkin gbrake is not
automatically engaged if the engin eis
switched off by the ECO start/stop
function. Releasing automatically Your vehicle's electric parkin
gbrake is
automatically released if all of the following
conditions are met:
R the engin eisrunning.
R the transmission is in position Dor R.
R the seat belt has been fastened.
R you depress the accelerator pedal.
If the transmission is in position R,the tailgate
must be closed.
If your seat belt is not fastened, the following
conditions must be fulfilled to automatically
release the electric parkin gbrake:
R the driver's door is closed.
R you have shifted out of transmission
position Por you have previousl ydriven
faster than 2mph (3 km/h).
Emergency braking The vehicl
ecan alsobeb raked during an
emergency by using the electric parking
brake.
X Whil edriving, pushh andle001Aof the electric
parking brake (Y page153).
i The vehicl eisbraked for as long as
handle 001Aof the electric parking brake is
pressed. The longer electric parking brake
handle 001Ais depressed, the greater the
braking force.
During braking:
R aw arning tone sounds
R the Release Park. Brake message
appears
R the red 000Aindicator lamp in the
instrument cluster flashes
When the vehicl ehas been braked to a
standstill, the electric parking brake is
engaged. 154
ParkingDriving and parking
Page 185 of 360
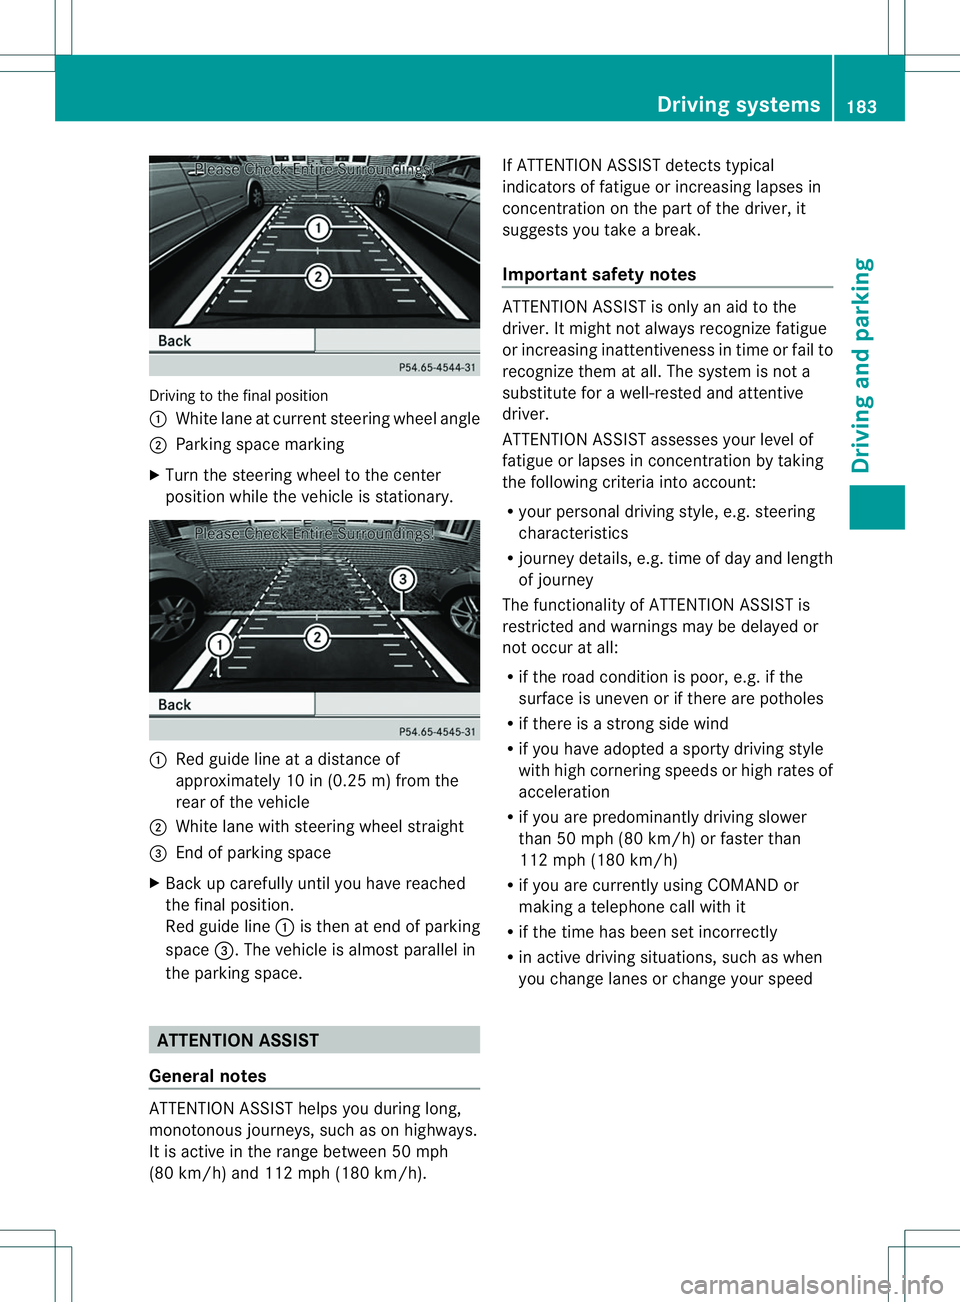
Driving to the fina
lposit ion
001A White lane at current steering whee langle
0010 Parking space marking
X Turn the steering whee ltothe center
positio nwhile the vehicle is stationary. 001A
Red guide line at adistance of
approximately 10 in (0.25 m) from the
rear of the vehicle
0010 White lane with steering wheel straight
0023 End of parking space
X Back up carefully until you have reached
the final position.
Red guide line 001Ais then at end of parking
space 0023.The vehicle is almost parallel in
the parking space. ATTENTION ASSIST
General notes ATTENTION ASSIST helps you during long,
monotonous journeys, such as on highways.
It is active in the range between 50 mph
(80 km/h) and 112 mph (180 km/h). If ATTENTION ASSIST detectst
ypical
indicators of fatigue or increasing lapses in
concentration on the part of the driver, it
suggests you take abreak.
Important safety notes ATTENTION ASSIST is only an aid to the
driver. It might not always recognizef atigue
or increasing inattentiveness in time or fail to
recognizet hem at all. The system is not a
substitute for awell-rested and attentive
driver.
ATTENTION ASSIST assesses your level of
fatigue or lapses in concentration by taking
the following criteria into account:
R your personal driving style, e.g. steering
characteristics
R journey details, e.g. time of day and length
of journey
The functionality of ATTENTION ASSIST is
restricted and warnings may be delayed or
not occur at all:
R if the road condition is poor, e.g. if the
surface is uneven or if there are potholes
R if there is astrongs ide wind
R if you have adopted asporty driving style
with high cornering speeds or high rates of
acceleration
R if you are predominantly driving slower
than 50 mph (80 km/h) or faster than
112 mph (180 km/h)
R if you are currently using COMAND or
making atelephone call with it
R if the time has been set incorrectly
R in active driving situations, such as when
you change lanes or change your speed Driving systems
183Driving and parking Z
Page 258 of 360
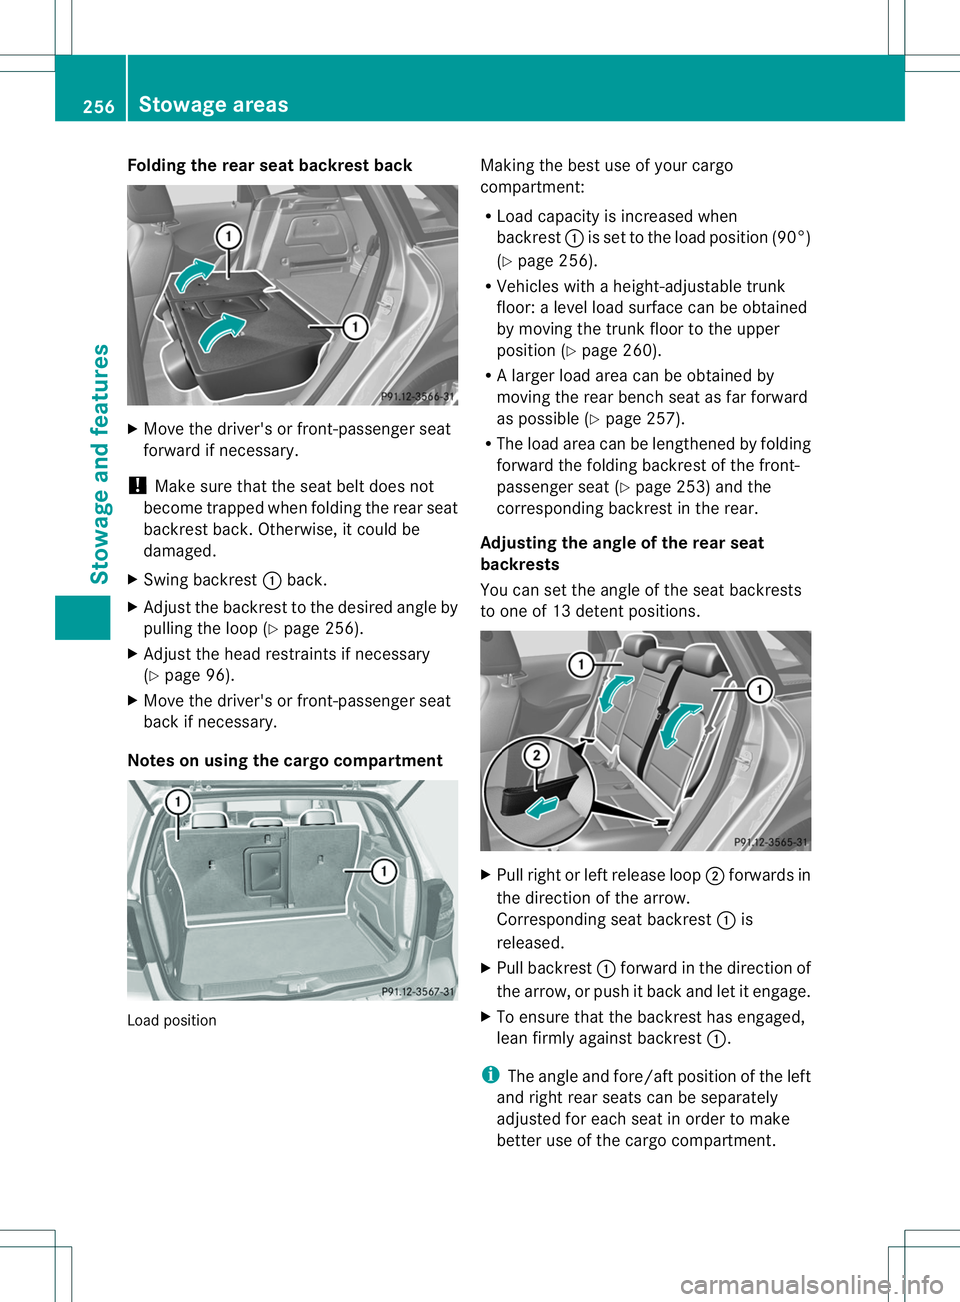
Folding th
erears eat backres tback X
Mov ethe driver' sorfront-pa ssenger seat
forward if necessary.
! Mak esure that th eseat belt does not
become trapped when foldin gthe rear seat
backres tback .Otherwise, it could be
damaged.
X Swing backrest 001Aback.
X Adjust the backrest to the desired angle by
pulling the loop (Y page 256).
X Adjust the head restraints if necessary
(Y page 96).
X Move the driver's or front-passenge rseat
back if necessary.
Notes on using the cargo compartment Load position Making the best use of your cargo
compartment:
R
Load capacity is increased when
backrest 001Ais set to the load position (90°)
(Y page 256).
R Vehicles with aheight-adjustable trunk
floor: alevel load surface can be obtained
by movin gthe trun kfloor to the upper
position (Y page 260).
R Al arge rload area can be obtained by
moving the rear bench seat as far forward
as possible (Y page 257).
R The load area can be lengthened by folding
forward the folding backrest of the front-
passenger seat (Y page 253) and the
corresponding backrest in the rear.
Adjusting the angle of the rear seat
backrests
You can set the angle of the seat backrests
to one of 13 detent positions. X
Pull right or left release loop 0010forwards in
the direction of the arrow.
Corresponding seat backrest 001Ais
released.
X Pull backrest 001Aforward in the direction of
the arrow, or push it back and let it engage.
X To ensure that the backrest has engaged,
lean firmly against backrest 001A.
i The angle and fore/aft position of the left
and right rear seats can be separately
adjusted for each seat in order to make
better use of the cargo compartment. 256
Stowage areasStowage and features
Page 303 of 360
batteries to
aqualified
specialist workshop or a
special collection point for
used batteries.
! Have the battery checked regularly at a
qualified specialist workshop.
Observe the servic eintervals in the
Maintenance Booklet or contact aqualified
specialist workshop for more information.
! You should have all work involving the
battery carried out at aqualified specialist
workshop. In th eexcepti onal cas ethatitis
necessar yfor you to disconnect th ebattery
yourself, mak esure that:
R you switch off th eenginea nd remove the
SmartKey. Chec kthata ll th eindicator
lamps in th einstrumen tcluste rare off.
Otherwise, electronic components, such
as th ealternator, may be damaged.
R you first remove th enegative terminal
clam pand then th epositive terminal
clamp. Never swap th etermi nal clamps.
Otherwise, th evehicle's electronic
system may be damaged.
R on vehicles wit hautomatic transmission,
th et ransmission is locke dinposition P
after disconnecting th ebattery. The
vehicl eissecured against rollin gaway.
You can then no longer mov ethe vehicle.
The battery and th ecover of th epositive
terminal clam pmust be installed securely
durin goperation.
Comply wit hsafet yprecaution sand take
protective measures when handling
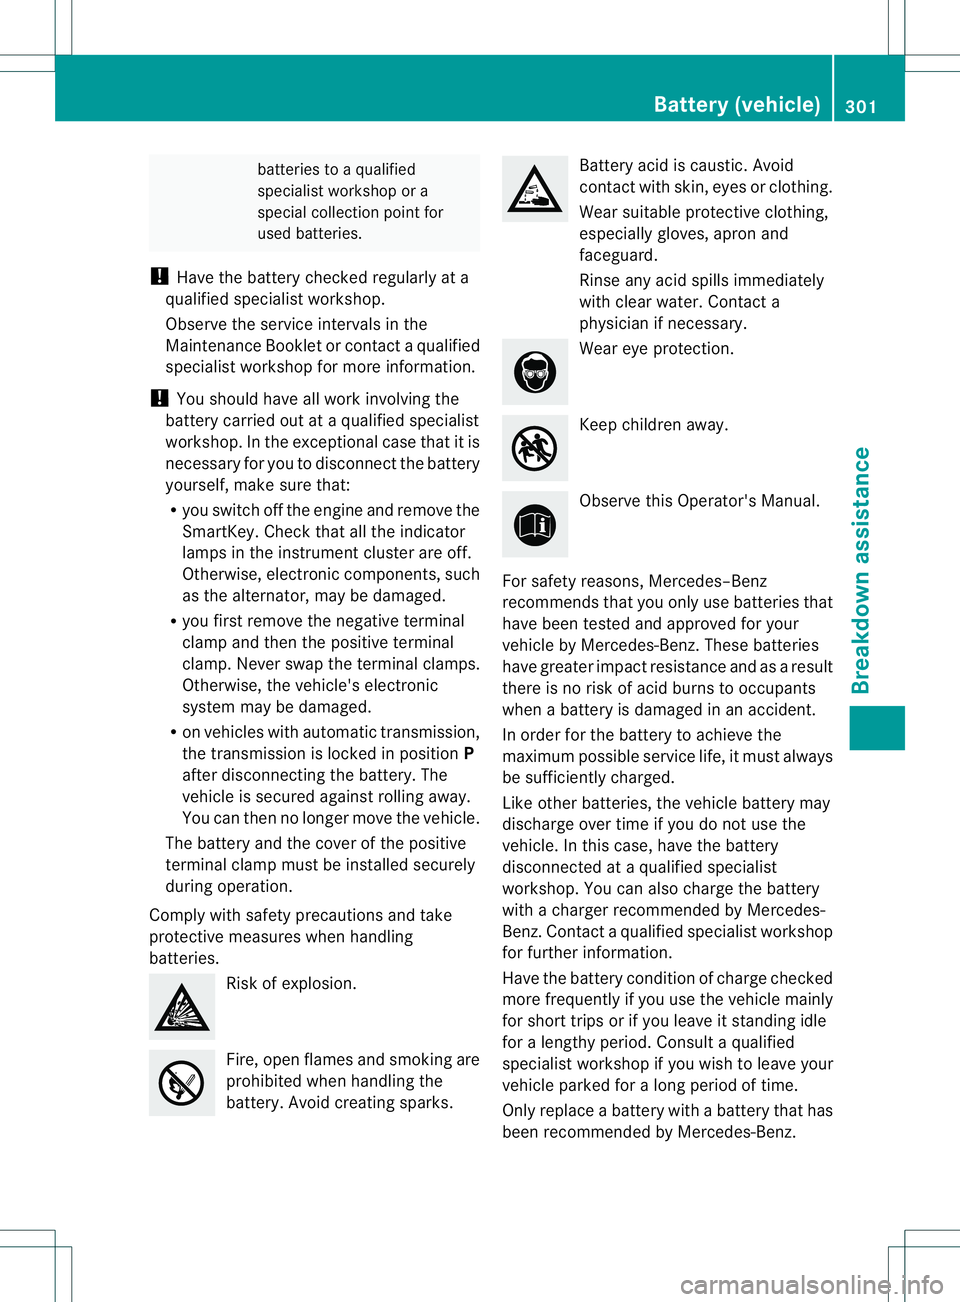
batteries. Risk of explosion.
Fire, open flames and smokin
gare
prohibited when handlin gthe
battery. Avoid creating sparks. Battery acid is caustic. Avoid
contact wit
hskin, eyes or clothing.
Wear suitable protective clothing,
especially gloves, apro nand
faceguard.
Rinse any aci dspillsimmediately
with clear water. Contact a
physician if necessary. Wear ey
eprotection. Kee
pchildren away. Observ
ethisO perator' sManual.
For safety reasons ,Mercedes–Benz
recommends tha tyou only use batteries that
have been tested and approved for your
vehicle by Mercedes-Benz. These batteries
have greater impact resistanc eand as aresult
there is no risk of acid burns to occupants
when abattery is damaged in an accident.
In order for the battery to achieve the
maximum possible service life, it must always
be sufficiently charged.
Like other batteries, the vehicle battery may
discharge over time if you do not use the
vehicle. In this case, have the battery
disconnected at aqualified specialist
workshop. You can also charge the battery
with acharger recommended by Mercedes-
Benz.C ontactaqualified specialist workshop
for further information.
Have the battery condition of charge checked
more frequently if you use the vehicle mainly
for short trips or if you leave it standin gidle
for alengthy period. Consult aqualified
specialist workshop if you wish to leave your
vehicle parked for along period of time.
Only replace abattery with abattery that has
been recommended by Mercedes-Benz. Battery (vehicle)
301Breakdown assistance Z
Page 305 of 360
Jump-starting
For the jump-starting procedure, use only the jump-starting connection point, consisting of a
positive terminal and an earth point, in the engine compartment. G
WARNING
Battery acid is caustic. There is arisk of injury.
Avoid contact with the skin, eyes or clothing. Do not inhale any battery gases. Do not lean over
the battery. Keep children away from batteries. Wash battery acid immediately with water and
seek medical attention. G
WARNING
During charging and jump-starting, explosive gases can escape from the battery. There is arisk
of an explosion.
Particularly avoid fire, open flames, creating sparks and smoking. Ensure there is sufficient
ventilation while charging and jump-starting. Do not lean over abattery. G
WARNING
During the charging process, abattery produces hydrogen gas. If ashort circuit occurs or sparks
are created, the hydrogen gas can ignite. There is arisk of an explosion.
R Make sure that the positive terminal of aconnected battery does not come into contact with
vehicle parts.
R Never place metal objects or tools on abattery.
R It is important that you observe the described order of the battery terminals when connecting
and disconnecting abattery.
R When jump-starting, make sure that the battery poles with identical polarity are connected.
R It is particularly important to observe the described order when connecting and disconnecting
the jumper cables.
R Never connect or disconnectt he battery terminals while the engine is running.G
WARNING
Ad ischarged battery can freeze at temperatures below freezin gpoint .When jump-starting the
vehicle or charging the battery, gases can escape from the battery. There is arisk of an explosion.
Allow the frozen battery to thaw out before charging it or jump-starting.
! Avoid repeated and lengthy startinga ttempts. Otherwise, the catalytic converter could be
damaged by the non-combusted fuel.
If, at low temperatures, the indicator lamps/warning lamps in the instrumentc luster do not
light up, it is highly likely that the discharged battery has frozen .Inthis case you may neither
jump-start the vehicle nor charge the battery. The service life of athawed-out battery may be
shorter. The startingc haracteristics can be impaired, particularly at low temperatures. Have
the thawed-out battery checked at aqualified specialist workshop. Jump-starting
303Breakdown assistance Z
Page 355 of 360
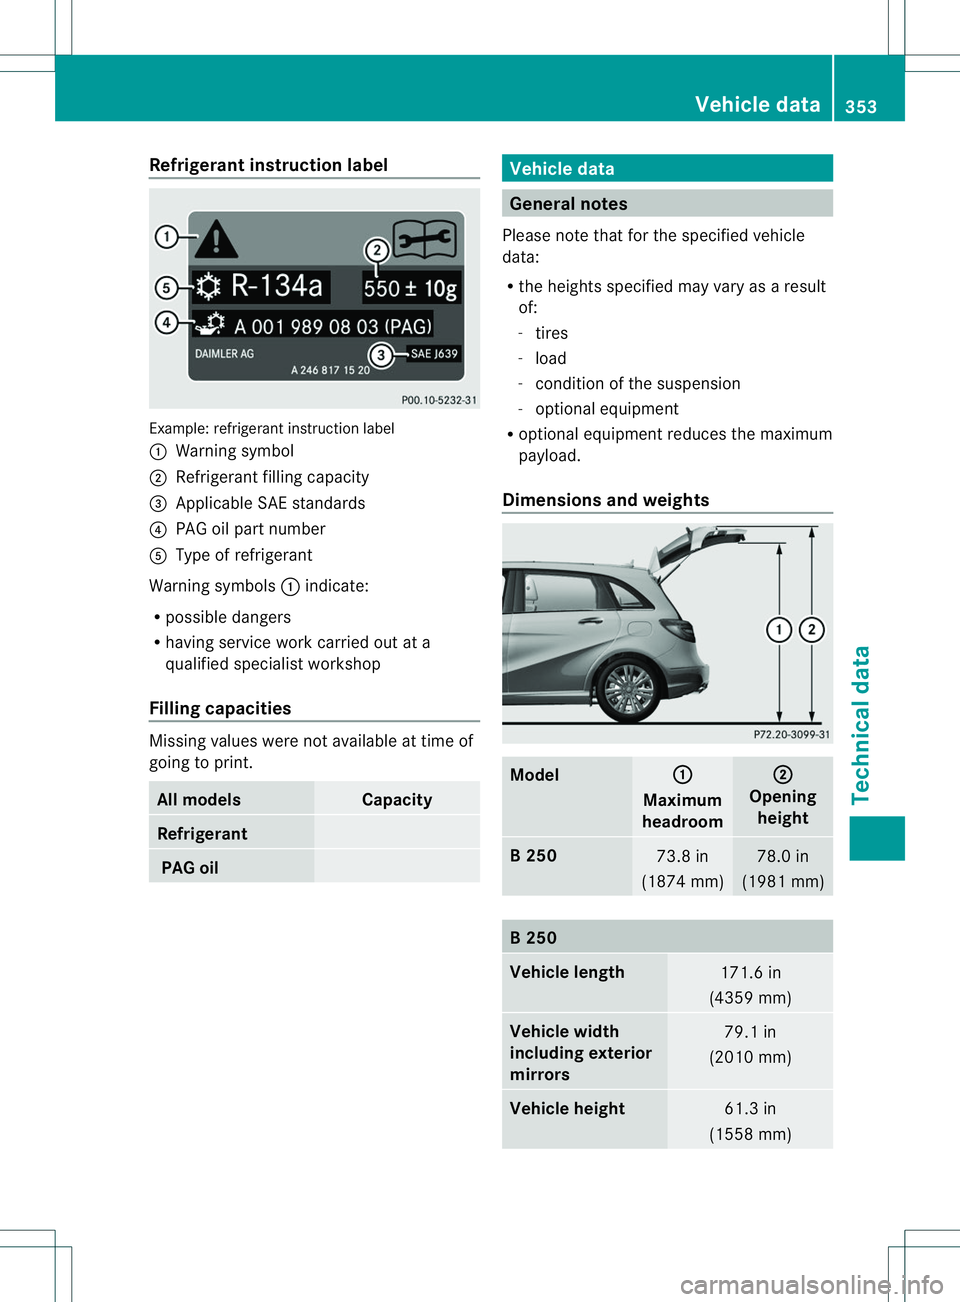
Refrigerant instructio
nlabel Example
:refrigerant instruction label
001A Warning symbol
0010 Refrigerant filling capacity
0023 Applicabl eSAE standards
0021 PAG oi lpartn umber
001E Type of refrigerant
Warning symbols 001Aindicate:
R possible dangers
R having service work carrie doutat a
qualified specialist workshop
Fillin gcapacities Missing value
sweren ot available at time of
going to print. Al
lm odels Capacity
Refrigerant
PA
Go il Vehicle data
Genera
lnotes
Please not ethat for the specified vehicle
data:
R the height sspecified may vary as aresult
of:
- tires
- load
- condition of the suspension
- optional equipment
R optional equipmen treduces the maximum
payload.
Dimensions and weights Model 001A
Maximum
headroom 0010
Opening
height B2
50 73.
8in
(187 4mm) 78.
0in
(198 1mm) B2
50 Vehicle length
171.6 in
(435 9mm) Vehicle width
including exterior
mirrors
79.
1in
(201 0mm) Vehicle height
61.
3in
(155 8mm) Vehicle data
353Technical data Z