2014 MERCEDES-BENZ B-CLASS SPORTS check oil
[x] Cancel search: check oilPage 11 of 360
Hydroplaning
................................. 159
Icy road surfaces ........................... 160
Limited braking efficiency on
salted road s................................... 157
Snow chains .................................. 315
Symmetrical low bea m.................. 104
Wet road surface ........................... 157
DVD audio (on-board computer) ......197
DVD vide o(on-board computer) ......197 E
EASY-VARIO-PLUS system Cargo compartment enlargement ..254
EBD (electronic brake force
distribution)
Display message ............................ 210
Function/notes ................................ 69
ECOd isplay
Function/notes ............................. 156
On-board computer .......................194
ECOs tart/stop function
Automatic engine start ..................140
Automatic engine switch-off ..........139
Deactivating/activating .................140
General information .......................139
Important safety notes ..................139
Introduction ................................... 138
Electronic Stability Program
see ESP ®
(Electroni cStability Program)
Emergenc yrelease
Driver's door .................................... 81
Vehicle ............................................. 81
Emergency spare wheel
General notes ................................ 342
Important safety notes ..................342
Removing ....................................... 343
Technical data ............................... 343
Emergency Tensioning Devices
Activation ......................................... 41
Function .......................................... .55
Safety guideline s............................. 42
Emergency unlocking
Tailgate ............................................ 82
Emissions control
Service and warranty information ....22 Engine
Check Engine warning lamp ........... 245
Display message ............................ 224
ECO start/stop function ................138
Engine numbe r............................... 347
Irregularr unning............................ 142
Jump-starting ................................. 303
Starting problems ..........................142
Starting the engine with the
SmartKey ....................................... 138
Switching off .................................. 153
Tow-starting (vehicle )..................... 308
Engine electronics
Problem (malfunction) ...................142
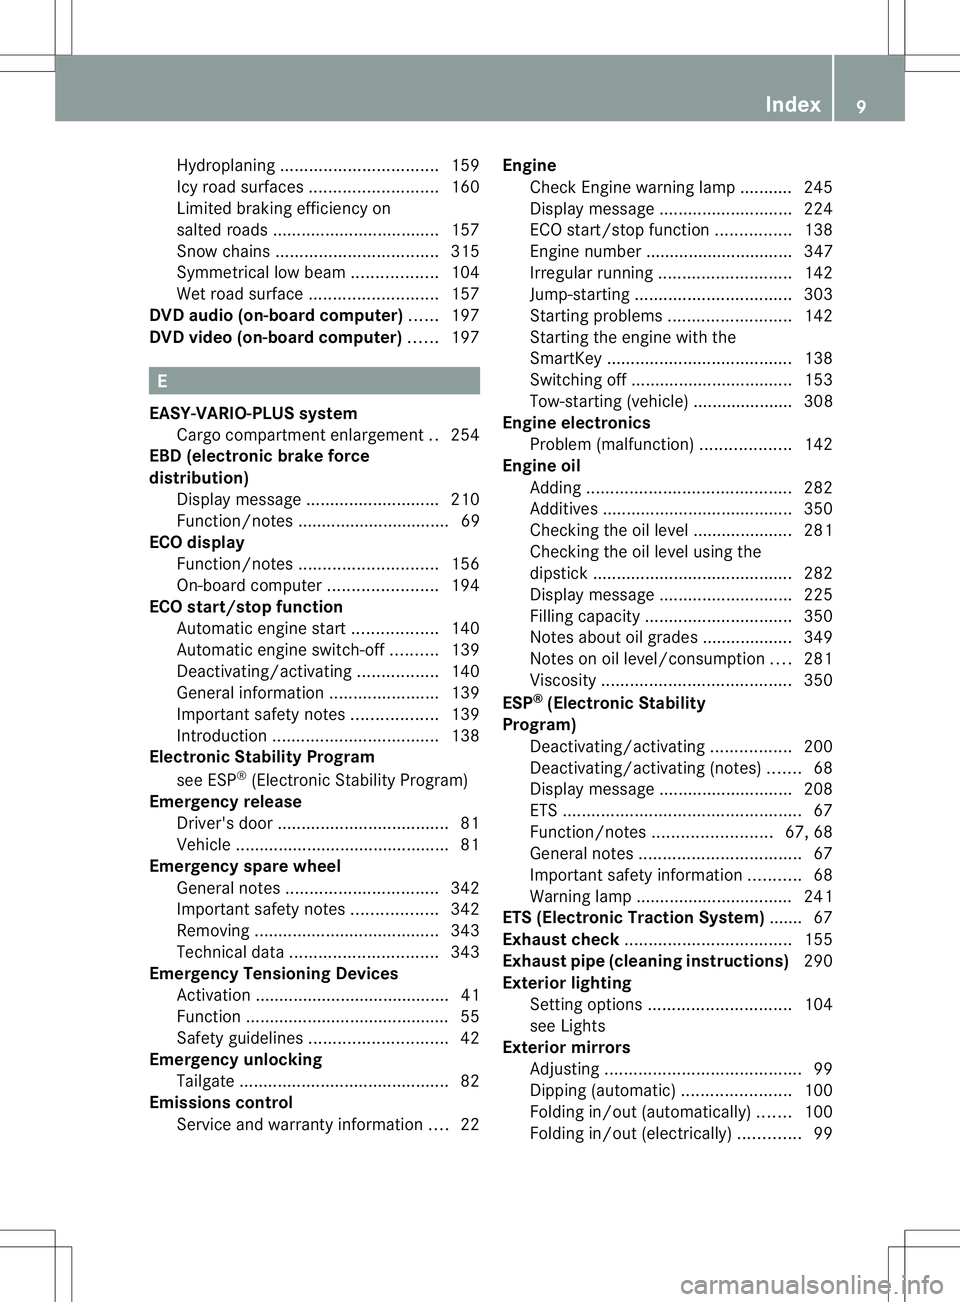
Engine oil
Adding ........................................... 282
Additives ........................................ 350
Checking the oil leve l..................... 281
Checking the oil leve lusing the
dipstick .......................................... 282
Display message ............................ 225
Filling capacity ............................... 350
Notes about oil grades ................... 349
Notes on oil level/consumption ....281
Viscosity ........................................ 350
ESP ®
(Electronic Stability
Program) Deactivating/activating .................200
Deactivating/activating (notes) .......68
Display message ............................ 208
ETS .................................................. 67
Function/notes ......................... 67, 68
General notes .................................. 67
Important safety information ...........68
Warning lamp ................................. 241
ETS (Electronic Traction System) ....... 67
Exhaus tcheck ................................... 155
Exhaus tpipe (cleaning instructions) 290
Exterior lighting Settin goption s.............................. 104
see Lights
Exterior mirrors
Adjusting ......................................... 99
Dipping (automatic) .......................100
Folding in/ou t(automatically) .......100
Folding in/ou t(electrically) .............99 Index
9
Page 152 of 360
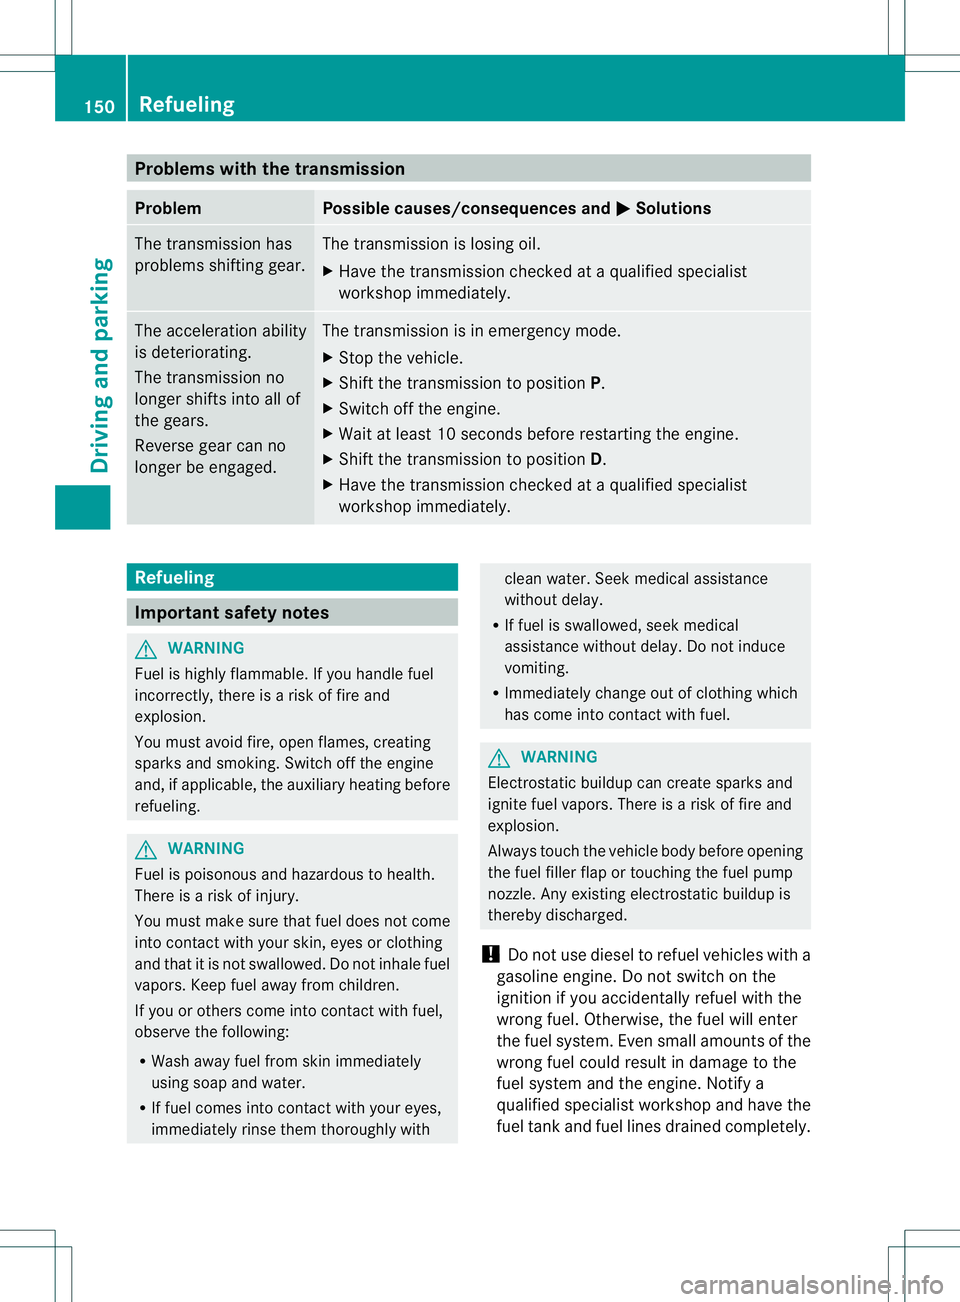
Problems with the transmission
Problem Possible causes/consequences and
000B Solutions
The transmission has
problems shifting gear. The transmission is losing oil.
X
Have the transmission checked at aqualified specialist
workshop immediately. The acceleration ability
is deteriorating.
The transmission no
longer shifts into all of
the gears.
Reverse gear can no
longer be engaged. The transmission is in emergency mode.
X
Stop the vehicle.
X Shift the transmission to position P.
X Switch off the engine.
X Wait at least 10 seconds before restarting the engine.
X Shift the transmission to position D.
X Have the transmission checked at aqualified specialist
workshop immediately. Refueling
Important safety notes
G
WARNING
Fuel is highly flammable. If you handle fuel
incorrectly, there is arisk of fire and
explosion.
You must avoid fire, open flames, creating
sparks and smoking. Switch off the engine
and, if applicable, the auxiliary heating before
refueling. G
WARNING
Fuel is poisonous and hazardous to health.
There is arisk of injury.
You must make sure that fuel does not come
into contact with your skin, eyes or clothing
and that it is not swallowed. Do not inhale fuel
vapors. Keep fuel away from children.
If you or others come into contact with fuel,
observe the following:
R Wash away fuel from skin immediately
using soap and water.
R If fuel comes into contact with your eyes,
immediately rinse them thoroughly with clean water. Seek medical assistance
without delay.
R If fuel is swallowed, seek medical
assistance without delay.Don ot induce
vomiting.
R Immediately change out of clothin gwhich
has come into contact with fuel. G
WARNING
Electrostatic buildu pcan create sparks and
ignite fuel vapors. There is arisk of fire and
explosion.
Always touch the vehicle body before opening
the fuel filler flap or touching the fuel pump
nozzle. Any existin gelectrostatic buildu pis
thereby discharged.
! Do not use diesel to refuel vehicles with a
gasoline engine. Do not switch on the
ignition if you accidentally refuel with the
wrong fuel. Otherwise, the fuel will enter
the fuel system. Even small amounts of the
wrong fuel could result in damage to the
fuel system and the engine. Notify a
qualified specialist workshop and have the
fuel tank and fuel lines drained completely. 150
RefuelingDriving and parking
Page 227 of 360
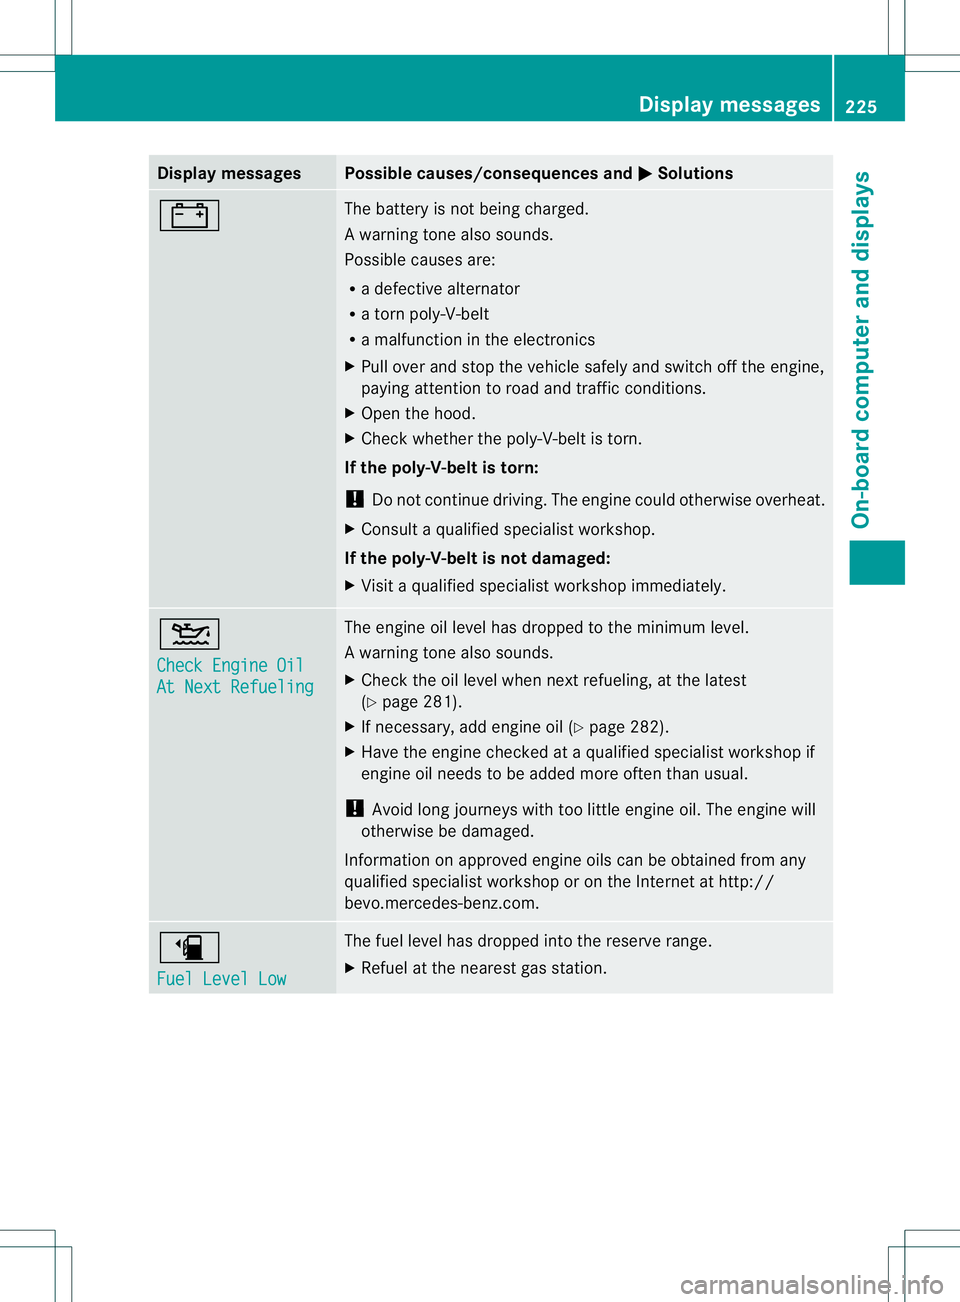
Display messages Possible causes/consequences and
000B Solutions
0012 The battery is no
tbeing charged.
Aw arning tone also sounds.
Possible causes are:
R ad efective alternator
R at ornp oly-V-belt
R am alfunctio nintheelectronics
X Pull ove rand stop the vehicl esafelya nd switch off the engine,
paying attentio ntoroada nd traffic conditions.
X Ope nthe hood.
X Check whether the poly-V-belt is torn.
If the poly-V-belt is torn:
! Do not continue driving. The engine could otherwise overheat.
X Consult aqualified specialist workshop.
If the poly-V-belt is not damaged:
X Visit aqualified specialist workshop immediately. 0008
Check Engine Oil
At Next Refueling The engine oil level has dropped to the minimum level.
Aw
arning tone also sounds.
X Chec kthe oil level when next refueling, at the latest
(Y page 281).
X If necessary, add engine oil (Y page 282).
X Have the engine checked at aqualified specialist workshop if
engine oil needs to be added more often than usual.
! Avoid long journeys with too little engine oil. The engine will
otherwise be damaged.
Information on approved engine oils can be obtained from any
qualified specialist workshop or on the Internet at http://
bevo.mercedes-benz.com. 0007
Fuel Level Low The fuel level has dropped into the reserve range.
X
Refuel at the nearest gas station. Display messages
225On-board computer and displays Z
Page 274 of 360
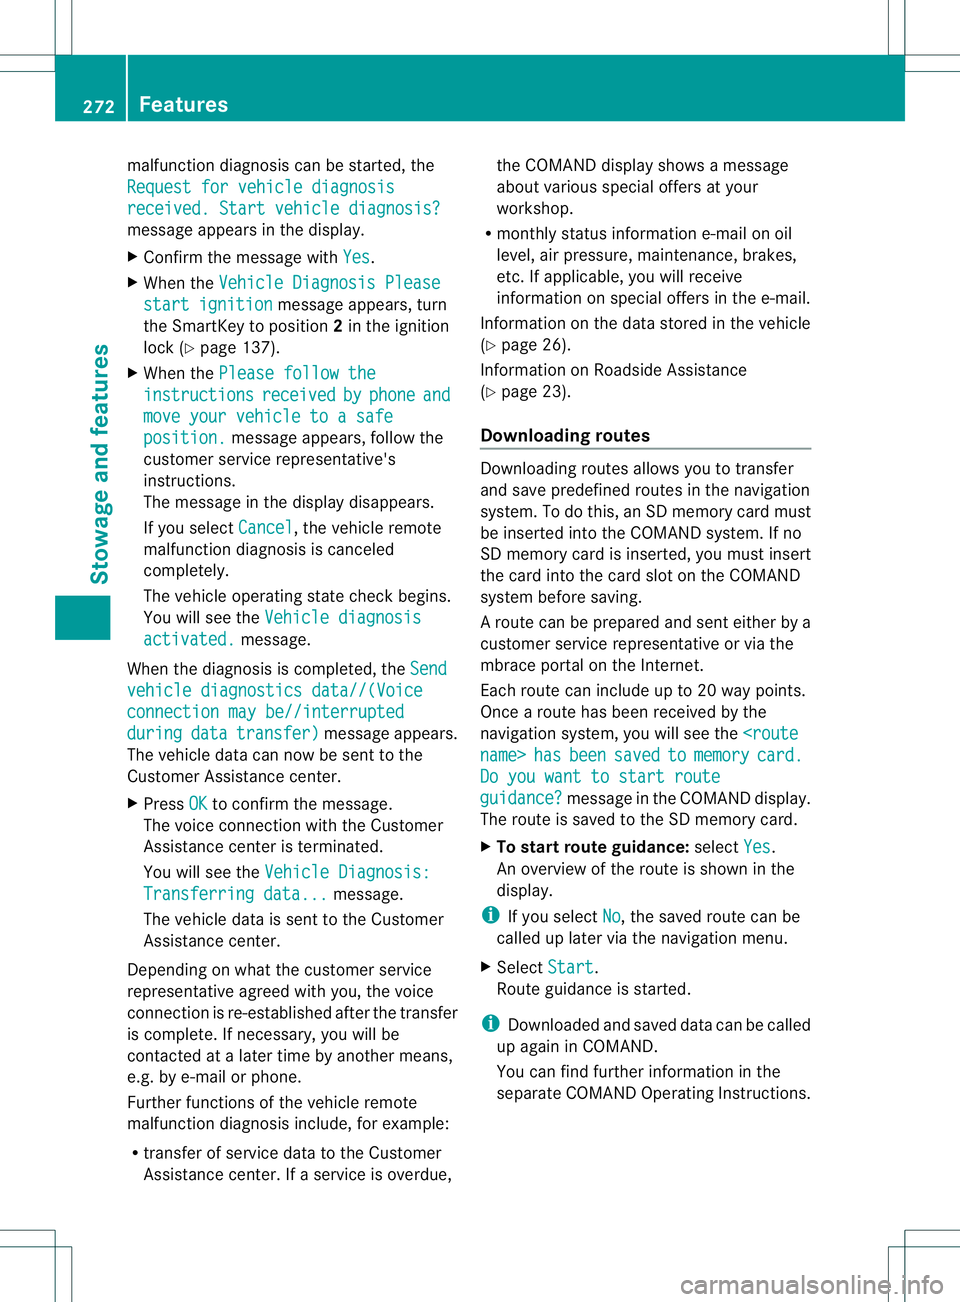
malfunction diagnosis can be started, the
Request for vehicle diagnosis received
.Start vehicle diagnosis? message appears in the display.
X
Confirm the message with Yes .
X When the Vehicle Diagnosi sPlease start ignition message appears, turn
the SmartKey to position 2in the ignition
lock (Y page137).
X When the Please follow the instructions received by phone and
move your vehicle to
asafe position. message appears, follow the
customer service representative's
instructions.
The message in the display disappears.
If you select Cancel ,t
he vehicl eremote
malfunction diagnosis is canceled
completely.
The vehicl eoperating state check begins.
You wills ee theVehicle diagnosis activated. message.
When the diagnosis is completed, the Sendvehicle diagnostics data//(Voice
connection may be//interrupted
during data transfer) message appears.
The vehicl edata can now be sent to the
Customer Assistance center.
X Press OK to confirm the message.
The voice connection with the Customer
Assistance center is terminated.
You wills ee theVehicle Diagnosis: Transferring data... message.
The vehicl edata is sent to the Customer
Assistance center.
Depending on whatt he customer service
representative agreed with you, the voice
connection is re-established after the transfer
is complete. If necessary, you will be
contacted at alater time by another means,
e.g. by e-mail or phone.
Further functions of the vehicle remote
malfunction diagnosis include, for example:
R transfer of service data to the Customer
Assistancec enter. Ifaservice is overdue, the COMAND display shows
amessage
about various special offer satyour
workshop.
R monthly status information e-mail on oil
level, air pressure, maintenance, brakes,
etc.Ifa pplicable, you will receive
information on special offer sinthe e-mail.
Information on the data stored in the vehicle
(Y page 26).
Information on Roadside Assistance
(Y page 23).
Downloading routes Downloading routes allows you to transfer
and save predefined routes in the navigation
system. To do this, an SD memor
ycard must
be inserted int othe COMAND system. If no
SD memor ycard is inserted, you must insert
the card int othe card slot on the COMAND
system before saving.
Ar oute can be prepared and sent either by a
customer service representative or via the
mbrace portal on the Internet.
Each route can include up to 20 way points.
Once aroute has been received by the
navigation system, you will see the
Do you want to start route
guidance? message in the COMAND display.
The route is saved to the SD memory card.
X To startr outeguidance: selectYes .
An overview of the route is shown in the
display.
i If you select No ,t
he saved route can be
called up later via the navigation menu.
X Select Start .
Route guidance is started.
i Downloaded and saved data can be called
up again in COMAND.
You can find further information in the
separate COMAND Operating Instructions. 272
FeaturesStowage and features
Page 283 of 360
could otherwise damag
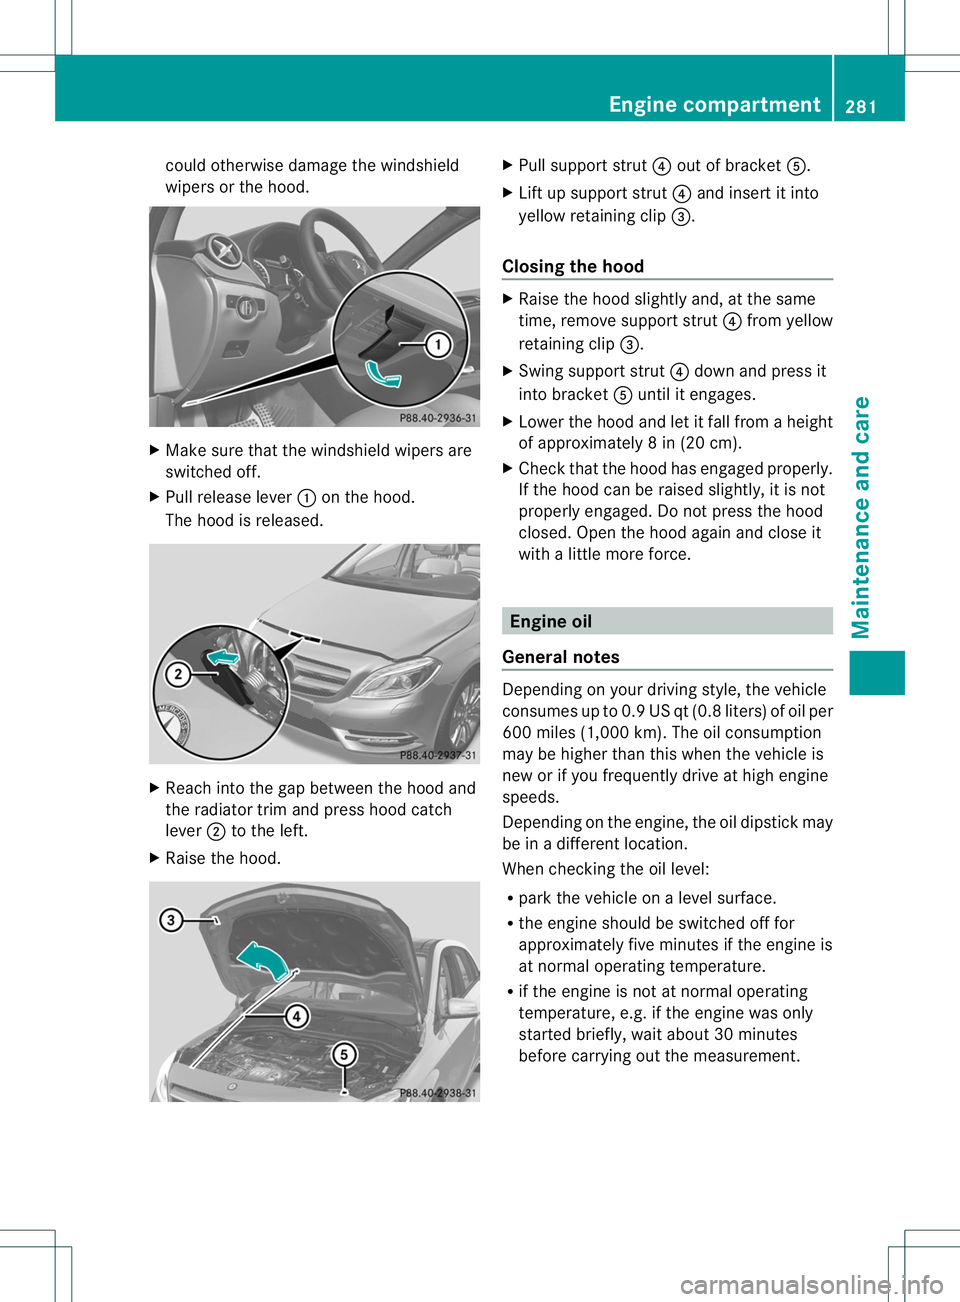
ethe windshield
wiper sorthe hood. X
Make sure that the windshield wiper sare
switched off.
X Pull release lever 001Aon the hood.
The hoo disreleased. X
Reach into the ga pbetween the hoo dand
the radiator trim and press hoo dcatch
lever 0010to the left.
X Raise the hood. X
Pull support strut 0021outofb racket 001E.
X Lift up support strut 0021and insert it into
yellow retaining clip 0023.
Closin gthe hood X
Raise the hoo dslightl yand,att he same
time ,remove support strut 0021from yellow
retaining clip 0023.
X Swing support strut 0021dow nand press it
into bracket 001Eunti lite ngages.
X Lower the hoo dand le titfall from aheight
of approximately 8in(20 cm).
X Chec kthat the hood has engaged properly.
If the hood can be raised slightly, it is not
properly engaged. Do not press the hood
closed. Open the hood again and close it
with alittle more force. Engine oil
General notes Depending on your driving style, the vehicle
consumes up to 0.9 US qt (0.8 liters) of oil per
600 miles (1,000 km). The oil consumption
may be higher than this when the vehicle is
new or if you frequently drive at high engine
speeds.
Depending on the engine, the oil dipstick may
be in
adifferent location.
When checking the oil level:
R park the vehicle on alevel surface.
R the engine should be switched off for
approximately five minutes if the engine is
at normal operating temperature.
R if the engine is not at normal operating
temperature, e.g. if the engine was only
started briefly, wait about 30 minutes
before carrying out the measurement. Engine compartment
281Maintenance and care Z
Page 284 of 360
Checking th
eoil level usin gthe oil
dipstick G
WARNING
Certain components in th eengine
compartment, suc hasthe engine, radiator
and parts of the exh austsystem, can become
very hot. Working in the engine compartment
poses arisk of injury.
Where possible, let the engine cool down and
touch only the components described in the
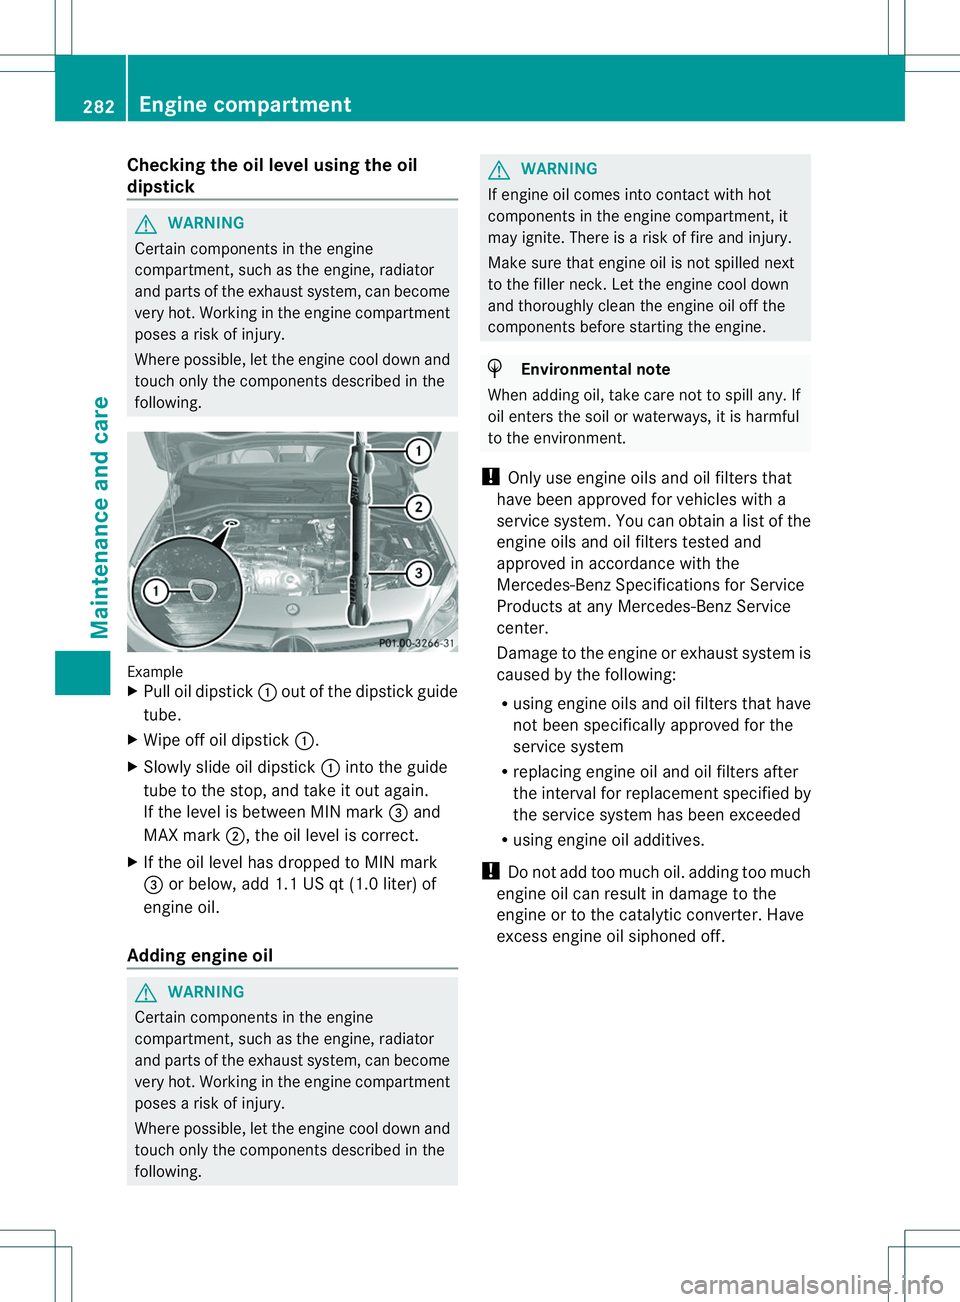
following. Example
X
Pull oil dipstick 001Aout of the dipstick guide
tube.
X Wipe off oil dipstick 001A.
X Slowly slide oil dipstick 001Ainto the guide
tube to the stop, and take it out again.
If the level is between MIN mark 0023and
MAX mark 0010,the oil level is correct.
X If the oil level has dropped to MIN mark
0023 or below, add 1.1 US qt (1.0 liter) of
engine oil.
Adding engine oil G
WARNING
Certain components in the engine
compartment, such as the engine, radiator
and parts of the exhaust system, can become
very hot. Working in the engine compartment
poses arisk of injury.
Where possible, let the engine cool down and
touch only the components described in the
following. G
WARNING
If engine oil comes into contact with hot
components in the engine compartment, it
may ignite. There is arisk of fire and injury.
Make sure that engine oil is not spilled next
to the filler neck.L et the engine cool down
and thoroughly clean the engine oil off the
components before starting the engine. H
Environmental note
When adding oil, take care not to spill any. If
oil enterst he soil or waterways, it is harmful
to the environment.
! Only use engine oils and oil filters that
have been approved for vehicles with a
service system. You can obtain alist of the
engine oils and oil filters tested and
approved in accordanc ewith the
Mercedes-Benz Specifications for Service
Products at any Mercedes-Benz Service
center.
Damage to the engine or exhaust system is
caused by the following:
R using engine oils and oil filters that have
not been specifically approved for the
service system
R replacing engine oil and oil filters after
the interval for replacement specified by
the service system has been exceeded
R using engine oil additives.
! Do not add too much oil. adding too much
engine oil can result in damage to the
engine or to the catalytic converter. Have
excess engine oil siphoned off. 282
Engine compartmentMaintenance and care
Page 285 of 360
Example: engine oi
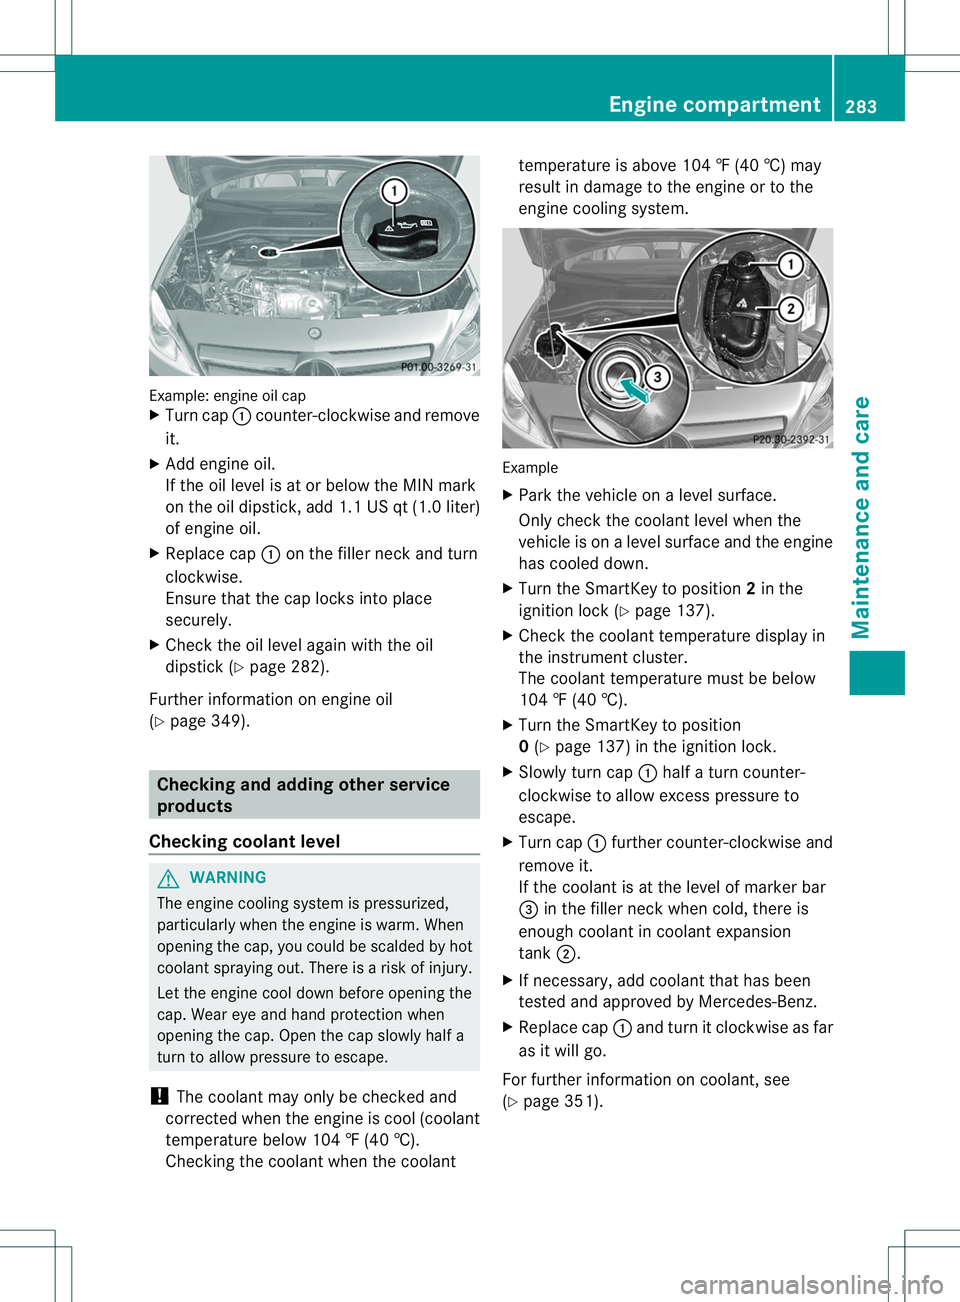
lcap
X Turn cap 001Acounter-clockwis eand remove
it.
X Add engine oil.
If the oi llev el is at or belo wthe MIN mark
on the oi ldipstick, ad d1.1 US qt (1.0 liter)
of engine oil.
X Replace cap 001Aon the fille rneck and turn
clockwise.
Ensure tha tthe cap locks into place
securely.
X Check the oi llev el agai nwith the oil
dipstick (Y page 282).
Further information on engine oil
(Y page 349). Checking and adding other service
products
Checking coolant level G
WARNING
The engine cooling system is pressurized,
particularly when the engine is warm. When
opening the cap, you could be scalde dbyhot
coolan tspraying out. There is arisk of injury.
Let the engin ecool down before openin gthe
cap. Wear eye and hand protection when
openin gthe cap. Open the cap slowly half a
turn to allow pressure to escape.
! The coolant may only be checked and
corrected when the engin eiscool (coolant
temperature below 104 ‡(40 †).
Checking the coolant when the coolant temperature is above 104
‡(40 †) may
result in damage to the engine or to the
engine cooling system. Example
X
Park the vehicle on alevel surface.
Only check the coolant level when the
vehicle is on alevel surface and the engine
has cooled down.
X Turn the SmartKey to position 2in the
ignition lock (Y page 137).
X Check the coolant temperature displayin
the instrument cluster.
The coolant temperature must be below
104 ‡(40 †).
X Turn the SmartKey to position
0(Y page 137) in the ignition lock.
X Slowly turn cap 001Ahalf aturn counter-
clockwise to allow excess pressure to
escape.
X Turn cap 001Afurther counter-clockwise and
remove it.
If the coolant is at the level of marker bar
0023 in the filler neck when cold, there is
enough coolant in coolant expansion
tank 0010.
X If necessary, add coolant that has been
tested and approved by Mercedes-Benz.
X Replace cap 001Aand turn it clockwise as far
as it will go.
For further information on coolant, see
(Y page 351). Engine compartment
283Maintenance and care Z
Page 287 of 360
Hiding
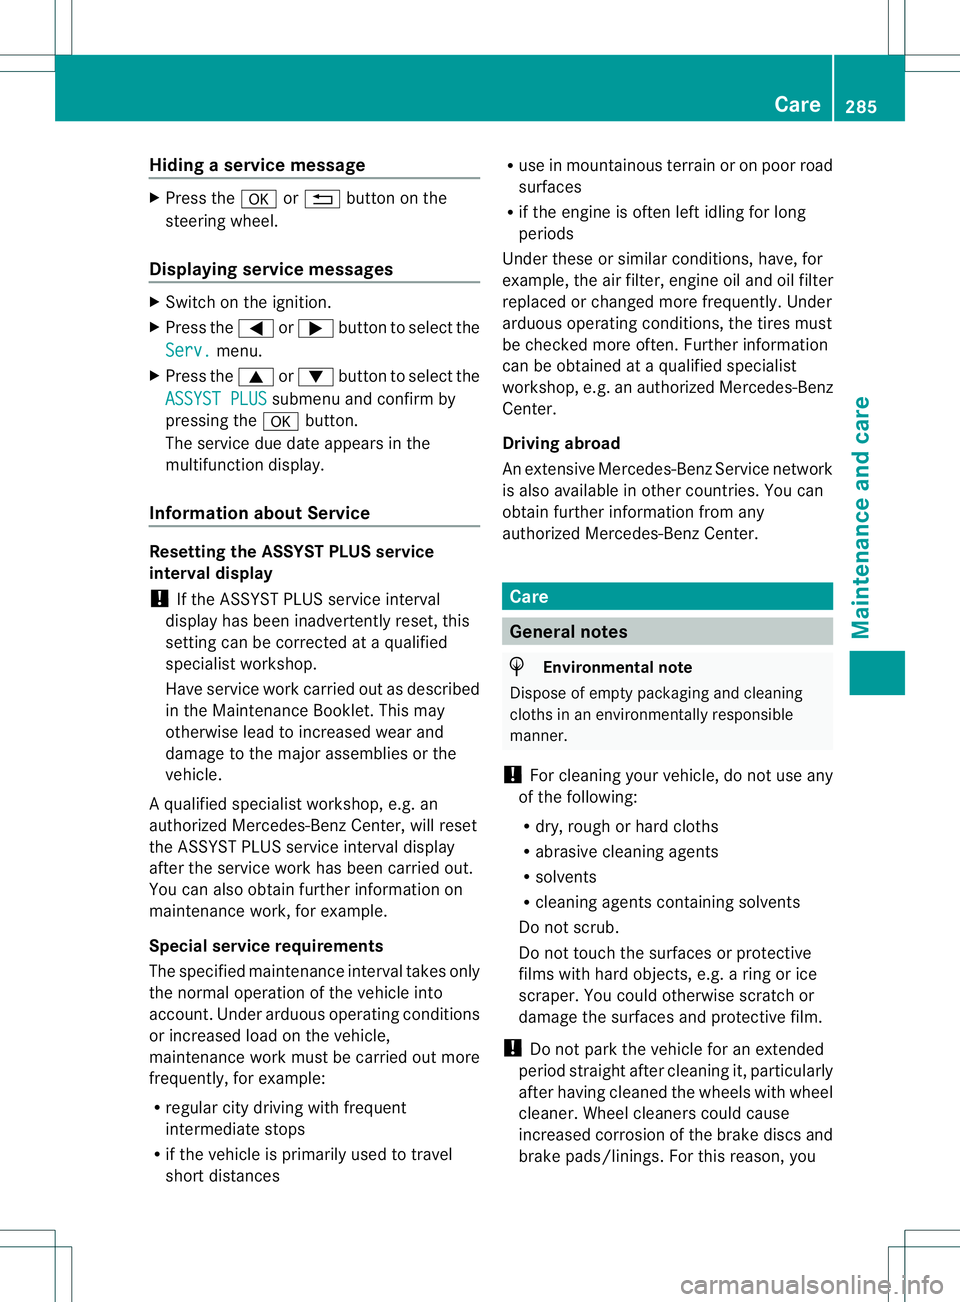
aservice message X
Pres sthe 000C or0002 button on the
steerin gwheel.
Displaying service messages X
Switch on th eignition.
X Pres sthe 000A or0004 button to selec tthe
Serv. menu.
X Press the 0006or0005 button to select the
ASSYST PLUS submenu and confirm by
pressing the 000Cbutton.
The service due date appears in the
multifunction display.
Information about Service Resetting the ASSYST PLUS service
interval display
!
If the ASSYST PLUS service interval
displayh as been inadvertently reset, this
settingc an be corrected at aqualified
specialist workshop.
Have service work carried out as described
in the MaintenanceB ooklet. This may
otherwise lead to increased wear and
damage to the major assemblies or the
vehicle.
Aq ualified specialist workshop, e.g. an
authorize dMercedes-Ben zCenter, will reset
the ASSYST PLUS servic einterval display
after the servic ework has been carried out.
You can also obtain further information on
maintenanc ework, for example.
Special service requirements
The specified maintenanc einterval takes only
the normal operation of the vehicle into
account. Under arduous operatin gconditions
or increased load on the vehicle,
maintenanc ework must be carried out more
frequently, for example:
R regular city driving with frequent
intermediate stops
R if the vehicle is primarily used to travel
short distances R
use in mountainous terrain or on poor road
surfaces
R if the engin eisoften left idling for long
periods
Under these or similar conditions ,have, for
example, the air filter, engin eoil and oil filter
replaced or changed more frequently. Under
arduous operatin gconditions ,the tires must
be checked more often .Further information
can be obtained at aqualified specialist
workshop, e.g. an authorized Mercedes-Benz
Center.
Driving abroad
An extensive Mercedes-BenzS ervice network
is also available in other countries. You can
obtain further information from any
authorized Mercedes-BenzC enter. Care
General notes
H
Environmental note
Dispose of empty packagin gand cleaning
cloth sinane nvironmentally responsible
manner.
! For cleanin gyour vehicle, do not use any
of the following:
R dry, rough or hard cloths
R abrasive cleanin gagents
R solvents
R cleanin gagents containin gsolvents
Do not scrub.
Do not touch the surfaces or protective
films with hard objects, e.g. aring or ice
scraper. You could otherwise scratch or
damage the surfaces and protective film.
! Do not park the vehicle for an extended
period straight after cleanin git, particularly
after having cleaned the wheels with wheel
cleaner. Wheel cleaners could cause
increased corrosion of the brake discs and
brake pads/linings. For this reason, you Care
285Maintenance and care Z